| Audience | Marketers, creative teams |
| Prerequisites |
|
Ads are the core creative output in Ad Studio. Create ads using five different starting points, iterate with AI or a built-in visual editor, and launch finished creatives to your connected ad platforms.
Overview
The Ads section is where you create, manage, and review all ad creatives. The agent generates each ad based on your inputs — a brief, a product, an existing ad, a competitor reference, or a trend description — combined with your brand guidelines and asset library.
You can iterate on any generated ad using the agent chat (natural language prompts) or the built-in visual editor (direct layer manipulation). Once you're satisfied, launch the creative to your connected ad platform.
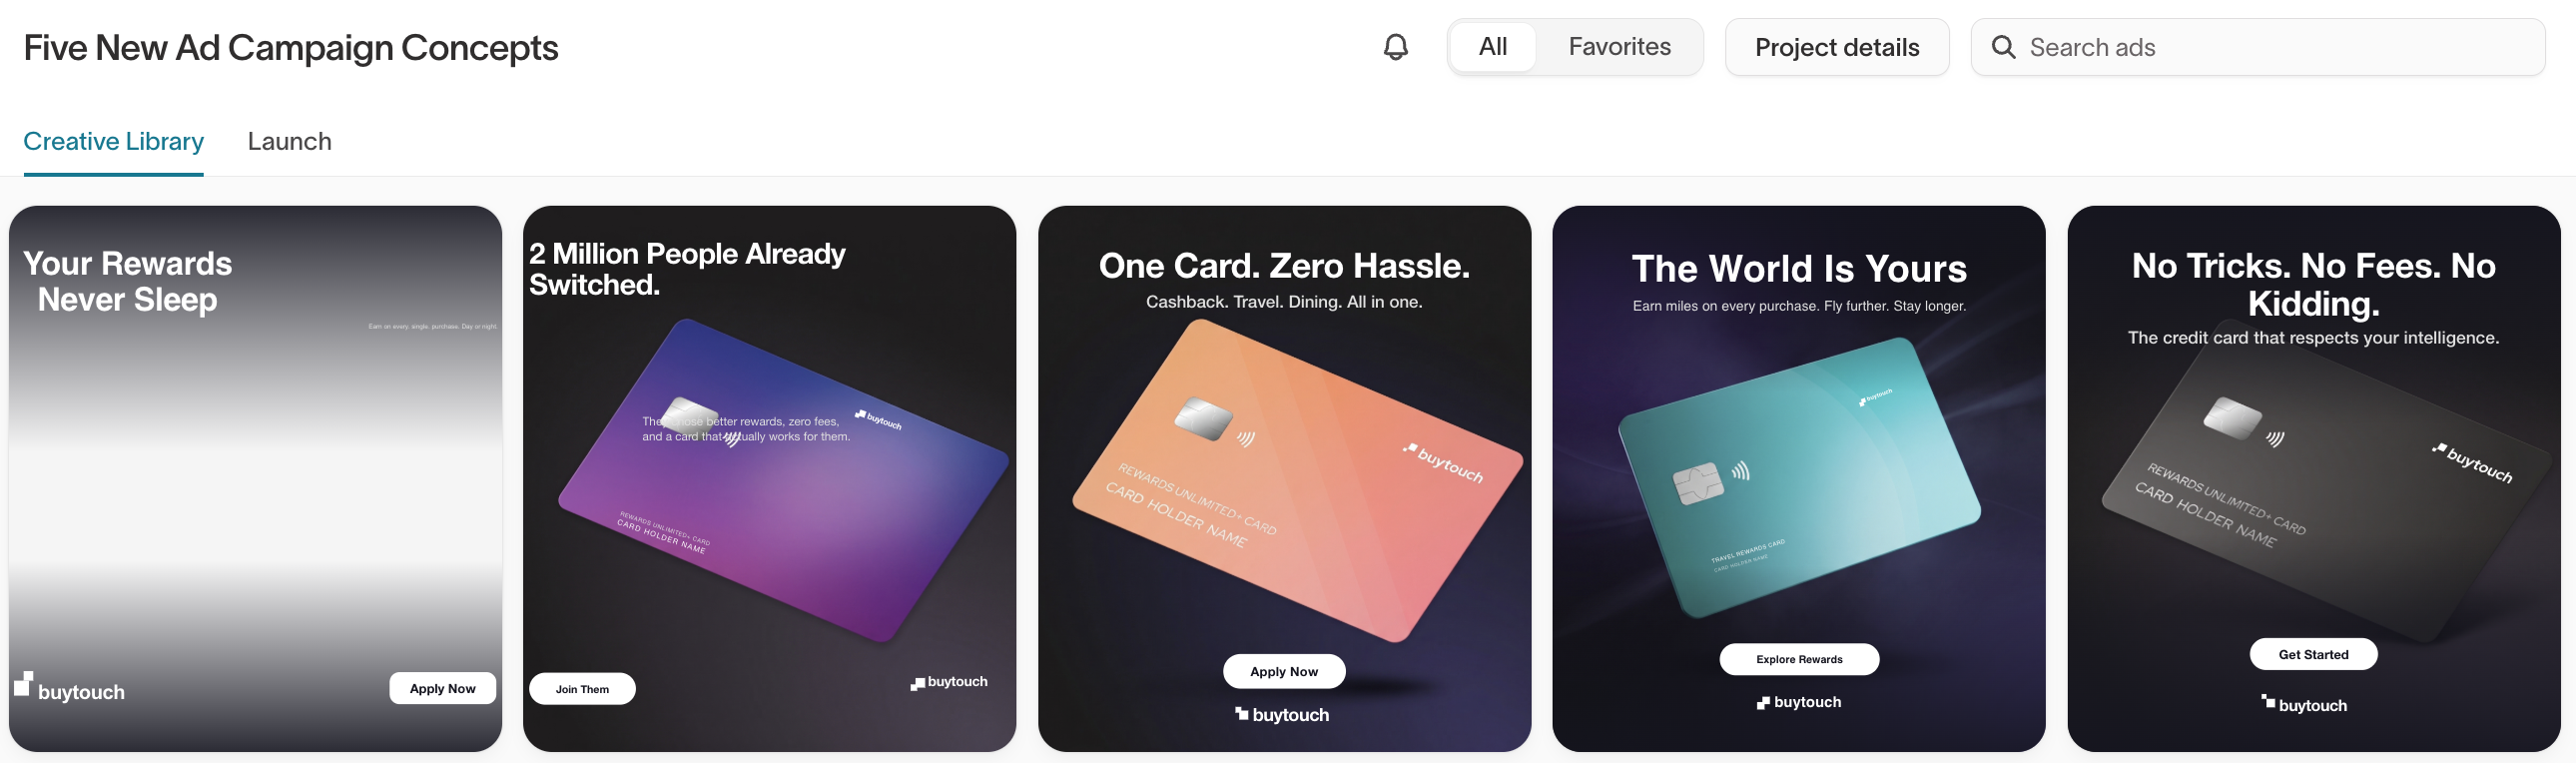
Projects
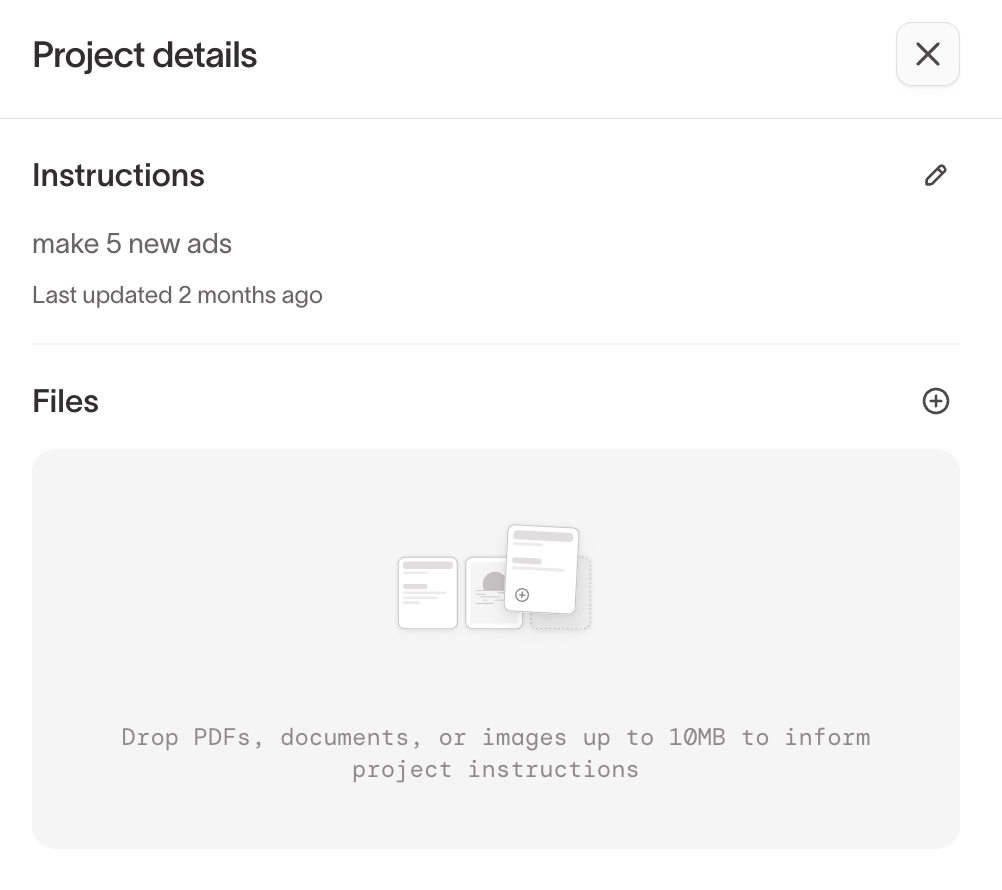
Projects are the organizational container for ads. Each project has a Creative Library tab (your generated ads) and a Launch tab (the launch pipeline). Select Project details to view or edit the project's instructions and upload reference files — PDFs, documents, or images up to 10MB — that inform the agent's creative direction for that project.
Create an ad
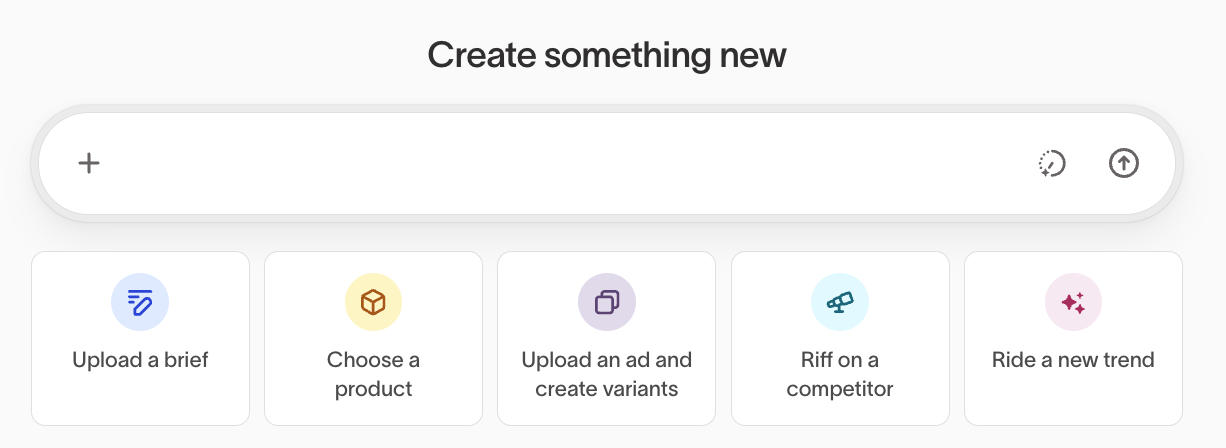
To start creating, describe what you want in the text input — for example, "Generate ten ad concepts that showcase this product, vary the hook, benefit, emphasis, tone, and visual treatment so we can test what resonates." The agent uses your prompt to generate creatives based on your brand guidelines and asset library.
You can also select one of the five structured creation modes below for a more guided starting point.
Upload a brief
Use this mode when you have a campaign description, creative idea, or brief and want the agent to generate ad creatives from scratch. This is the most open-ended starting point and the most common way to create ads.
To create an ad from a brief:
- Go to Ad Studio → Ads and select Create ad.
- Select Upload a brief.
- Describe your campaign — include your target audience, key message, desired tone, and any must-include elements.
- Optionally specify constraints like platform, format, or number of variants.
- Review the generated creatives.
Include your target audience, key differentiators, and desired emotional tone in the brief. Specific inputs produce more relevant creatives on the first pass.
Choose a product
Use this mode when you want to create product-focused ads. The agent pulls product images, descriptions, pricing, and other attributes from your product catalog to generate accurate, product-focused creatives.
To create a product ad:
- Go to Ad Studio → Ads and select Create ad.
- Select Choose a product.
- Browse or search your product catalog and select one or more products.
- The agent generates product-focused creatives using catalog data and your brand guidelines.
- Review the generated creatives.
This mode requires a configured product catalog. See Product catalog for setup instructions.
Upload an ad and create variants
Use this mode when you have an existing ad — yours or a reference — that you want to iterate on. The agent generates variations with different copy, imagery, formats, or CTAs while maintaining the core creative direction.
To create variants:
- Go to Ad Studio → Ads and select Create ad.
- Select Upload an ad and create variants.
- Upload an existing ad or select one from your library.
- Specify what to vary — copy, imagery, format, CTA, or a combination.
- Review the generated variants.
This mode is well-suited for A/B testing and creative refresh cycles. Start with your top-performing ad and generate variants to test against it.
Riff on a competitor
Use this mode when you've seen a competitor ad you want to respond to with your own on-brand version. The agent uses the competitor ad as inspiration while applying your brand context and guidelines — it won't copy the competitor's creative.
To riff on a competitor:
- Go to Ad Studio → Ads and select Create ad.
- Select Riff on a competitor.
- Upload or describe the competitor ad.
- The agent generates your brand's version using your brand guidelines and assets.
- Review the generated creatives.
You can also use the Competitors tab in Insights to browse competitor ads and create responses directly from there.
Ride a new trend
Use this mode when there's a cultural moment, trending topic, or timely event you want to tie your brand to. Speed matters for trends — this mode is designed for quick-turn creative.
To ride a trend:
- Go to Ad Studio → Ads and select Create ad.
- Select Ride a new trend.
- Describe the trend or cultural moment.
- The agent generates creatives that connect the trend to your brand while following your brand guidelines.
- Review the generated creatives.
Iterate with the agent chat
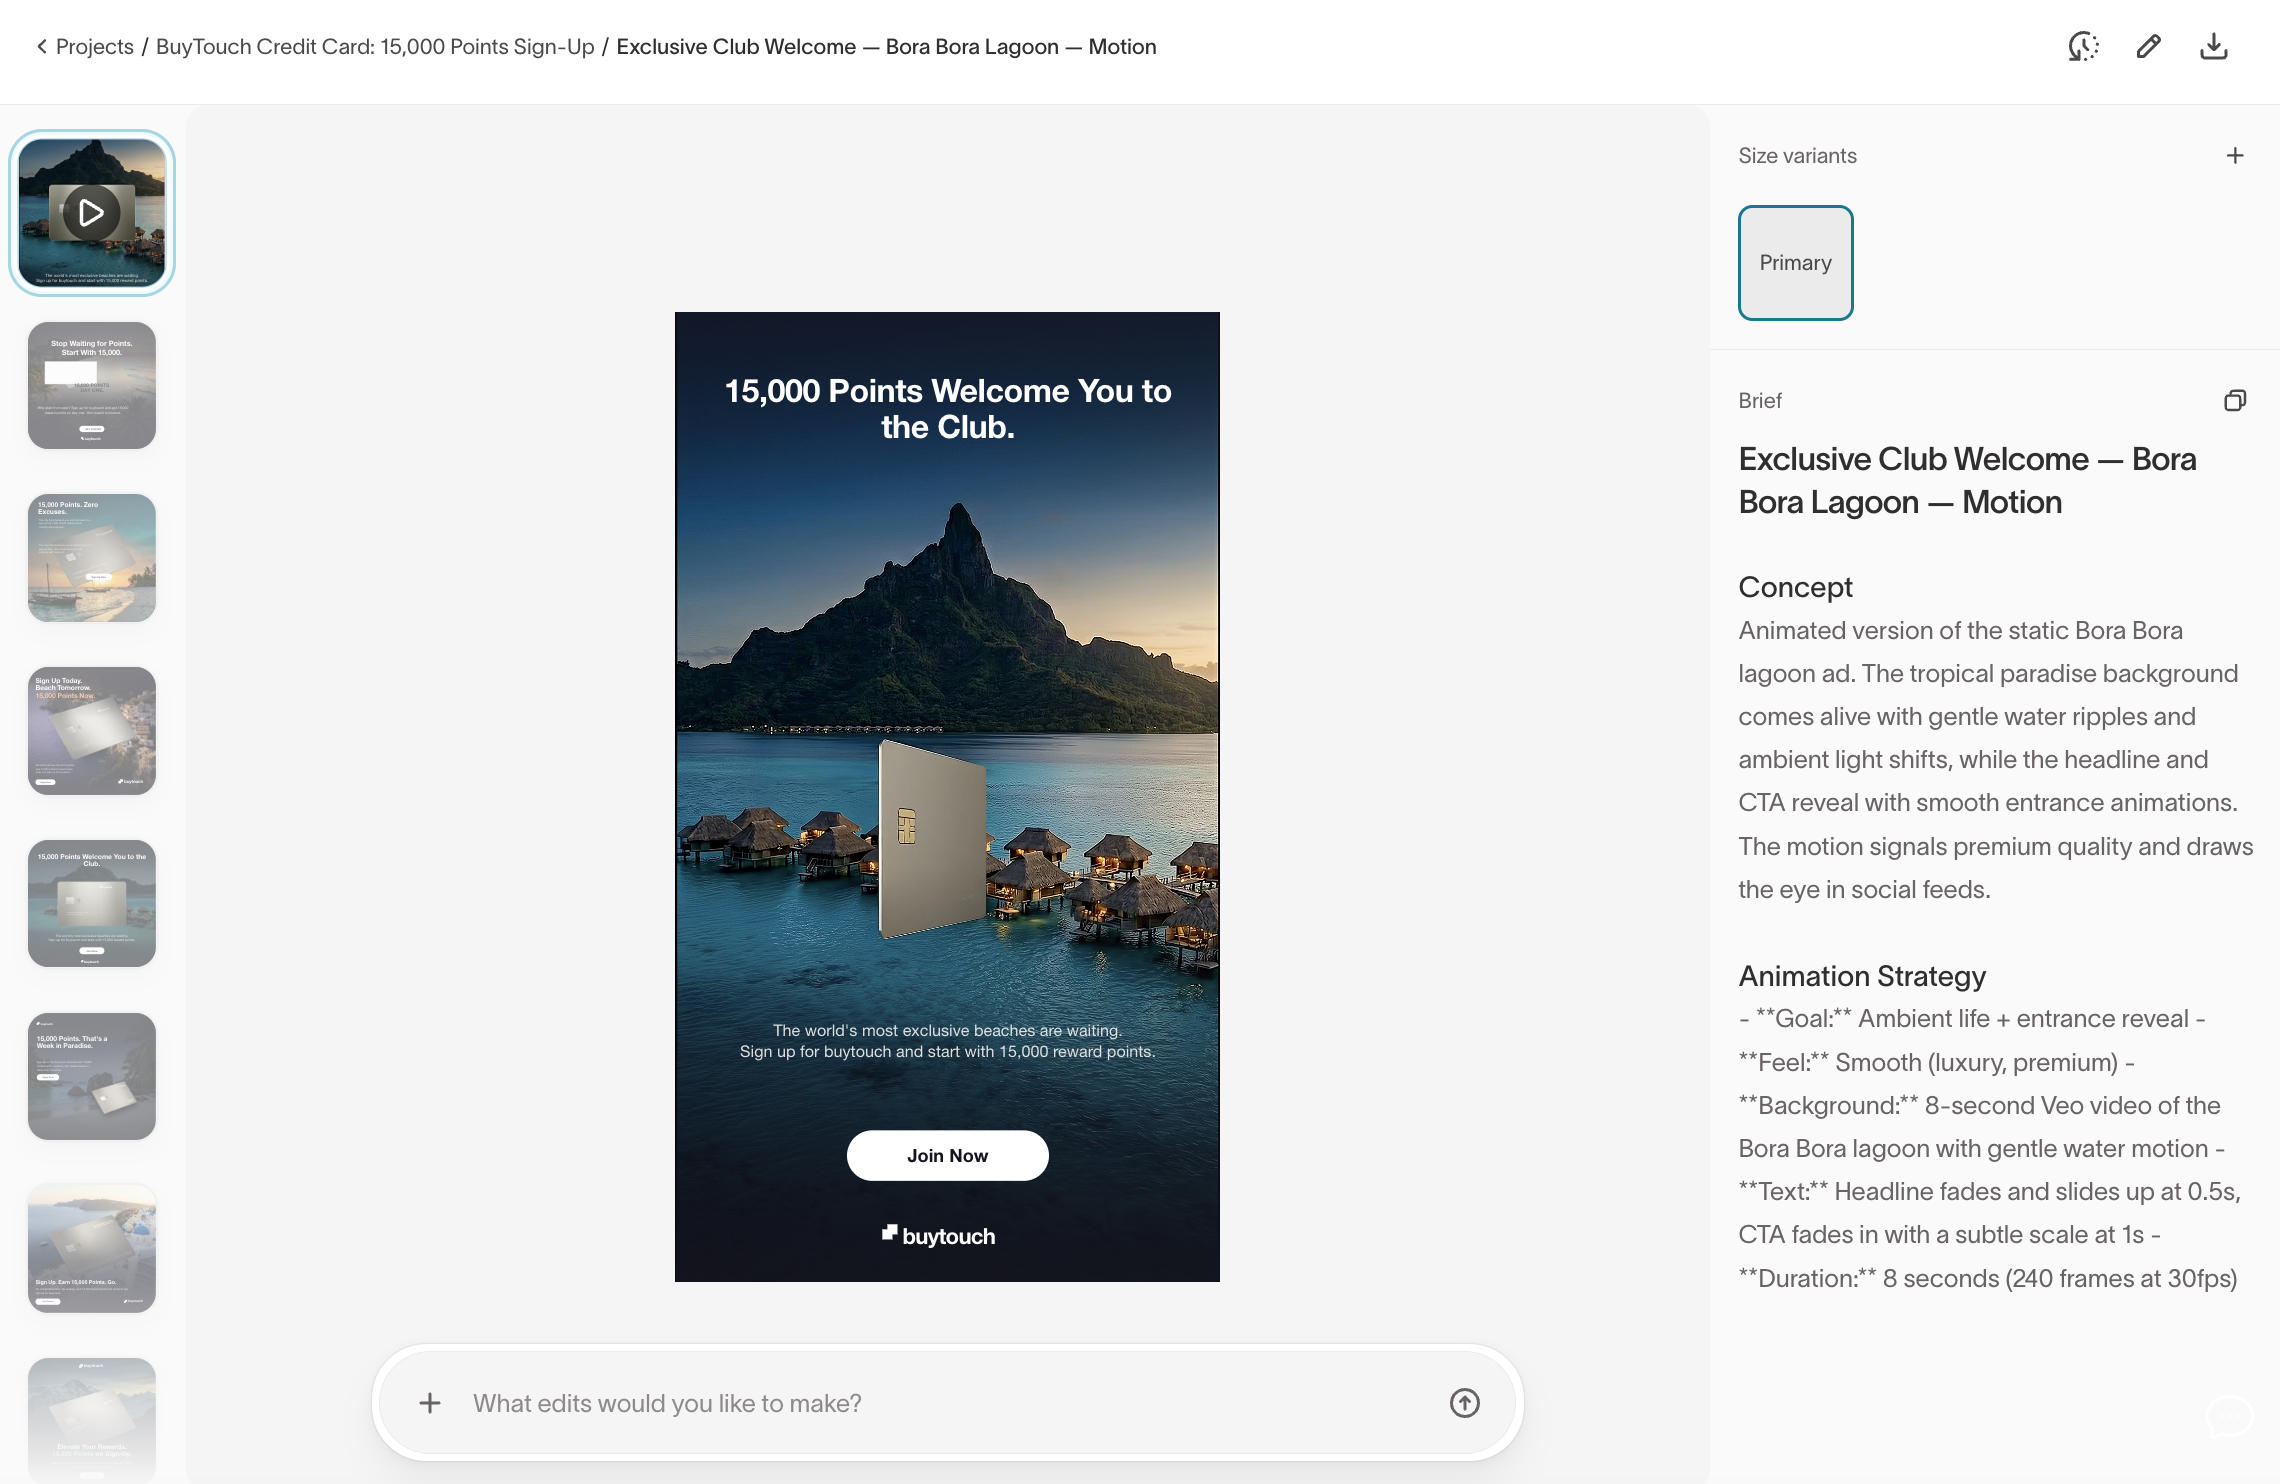
Once the agent generates creatives, you land in the ad editing workspace. The creative preview and variant thumbnails appear on the left. The brief, concept description, and agent chat appear on the right. Use the chat to refine the creative in natural language — you can ask for changes to copy, imagery, layout, tone, format, or anything else.
Example prompts:
- "Make the headline more aspirational and lighten the color palette."
- "Swap the product image for the blue variant."
- "Add a sense of urgency to the CTA."
- "Can you try a version with a lifestyle image instead of a product shot?"
- "Resize this for Instagram Stories."
The agent explains what it changed and why, so you can evaluate each iteration in context.
Style, brand, and agent controls
The chat input includes controls for Concept, Brand, Style, and Agent. Select a style to anchor the agent's visual direction to a defined look and feel — palette, layout, subjects, and mood. The style options are filtered to the selected brand profile, so changing the brand profile resets the style selection. You can also select No style to let the agent choose freely based on the brief and brand guidelines.
Select an Agent to run your prompt through a custom agent — a pre-packaged prompt designed for recurring workflows like creative fatigue monitoring or competitor analysis. If you don't select one, the agent uses your overall brand context.
Edit with the visual editor
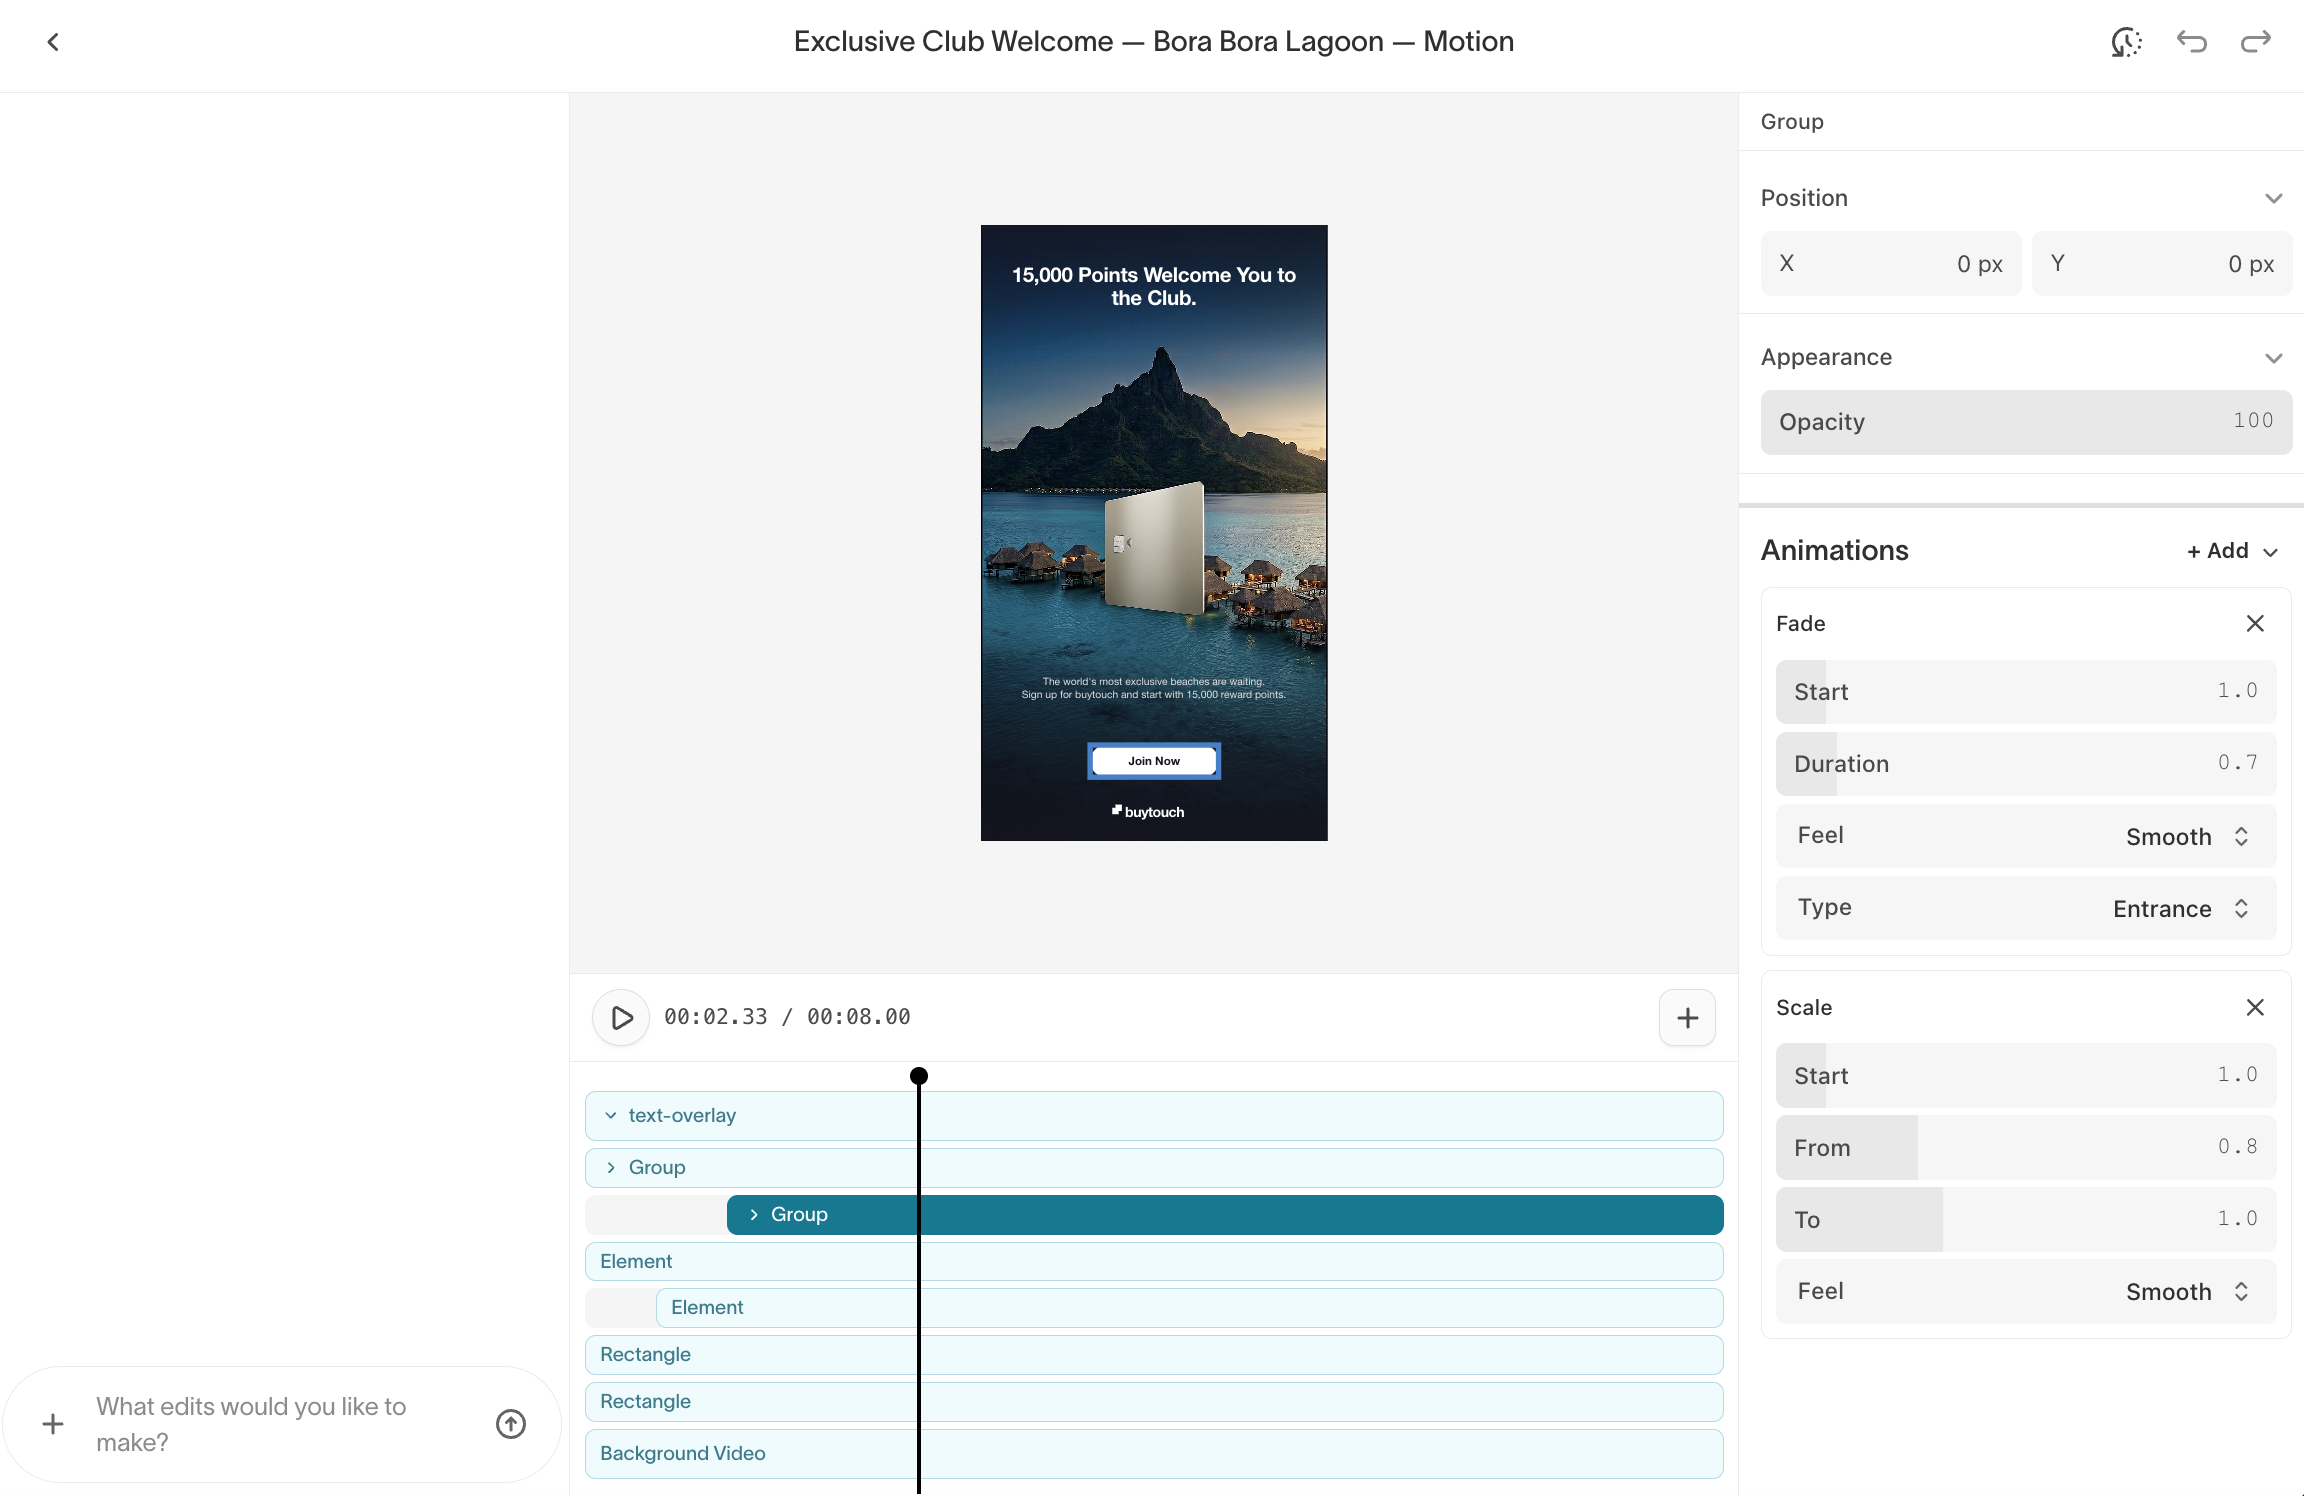
For direct manipulation, switch to the visual editor. Every ad creative is constructed as a layered composition — headline text, CTA button, imagery, background — and you can edit each layer independently. Drag and drop elements on the canvas to reposition them, or use the property panels on the right for precise control.
The visual editor provides:
- Drag and drop — Move any element on the canvas by dragging it. Reorder layers by dragging them in the layers panel.
- Layers panel — View, select, and reorder the layers in your ad composition. Each element (headline, CTA, product image, background) is a separate layer. Layers are displayed in a tree structure below the creative preview.
- Position and appearance — Set precise X/Y coordinates for any layer. Control opacity through the Appearance panel.
- Animations — Add entrance animations (fade, scale) to individual layers with controls for start time, duration, feel, and type. A timeline scrubber at the bottom lets you preview animations frame by frame.
- Direct text editing — Edit text content directly within the layer.
You can switch between the agent chat and the visual editor at any time — edits made in one are reflected in the other.
Ad toolbar
![]()
The toolbar at the top of the ad editing workspace provides quick access to common actions:
| Icon | Action |
|---|---|
 | Export to Figma — Send the creative to Figma for further refinement |
 | Version history — Browse previous versions and iterations of the ad |
 | Launch — Queue the ad for launch to a connected ad platform |
 | Animate — Preview or generate animated versions of the ad |
 | Edit — Open the visual editor for direct layer manipulation |
 | Download — Download the ad creative as an image file |
Generate size variants
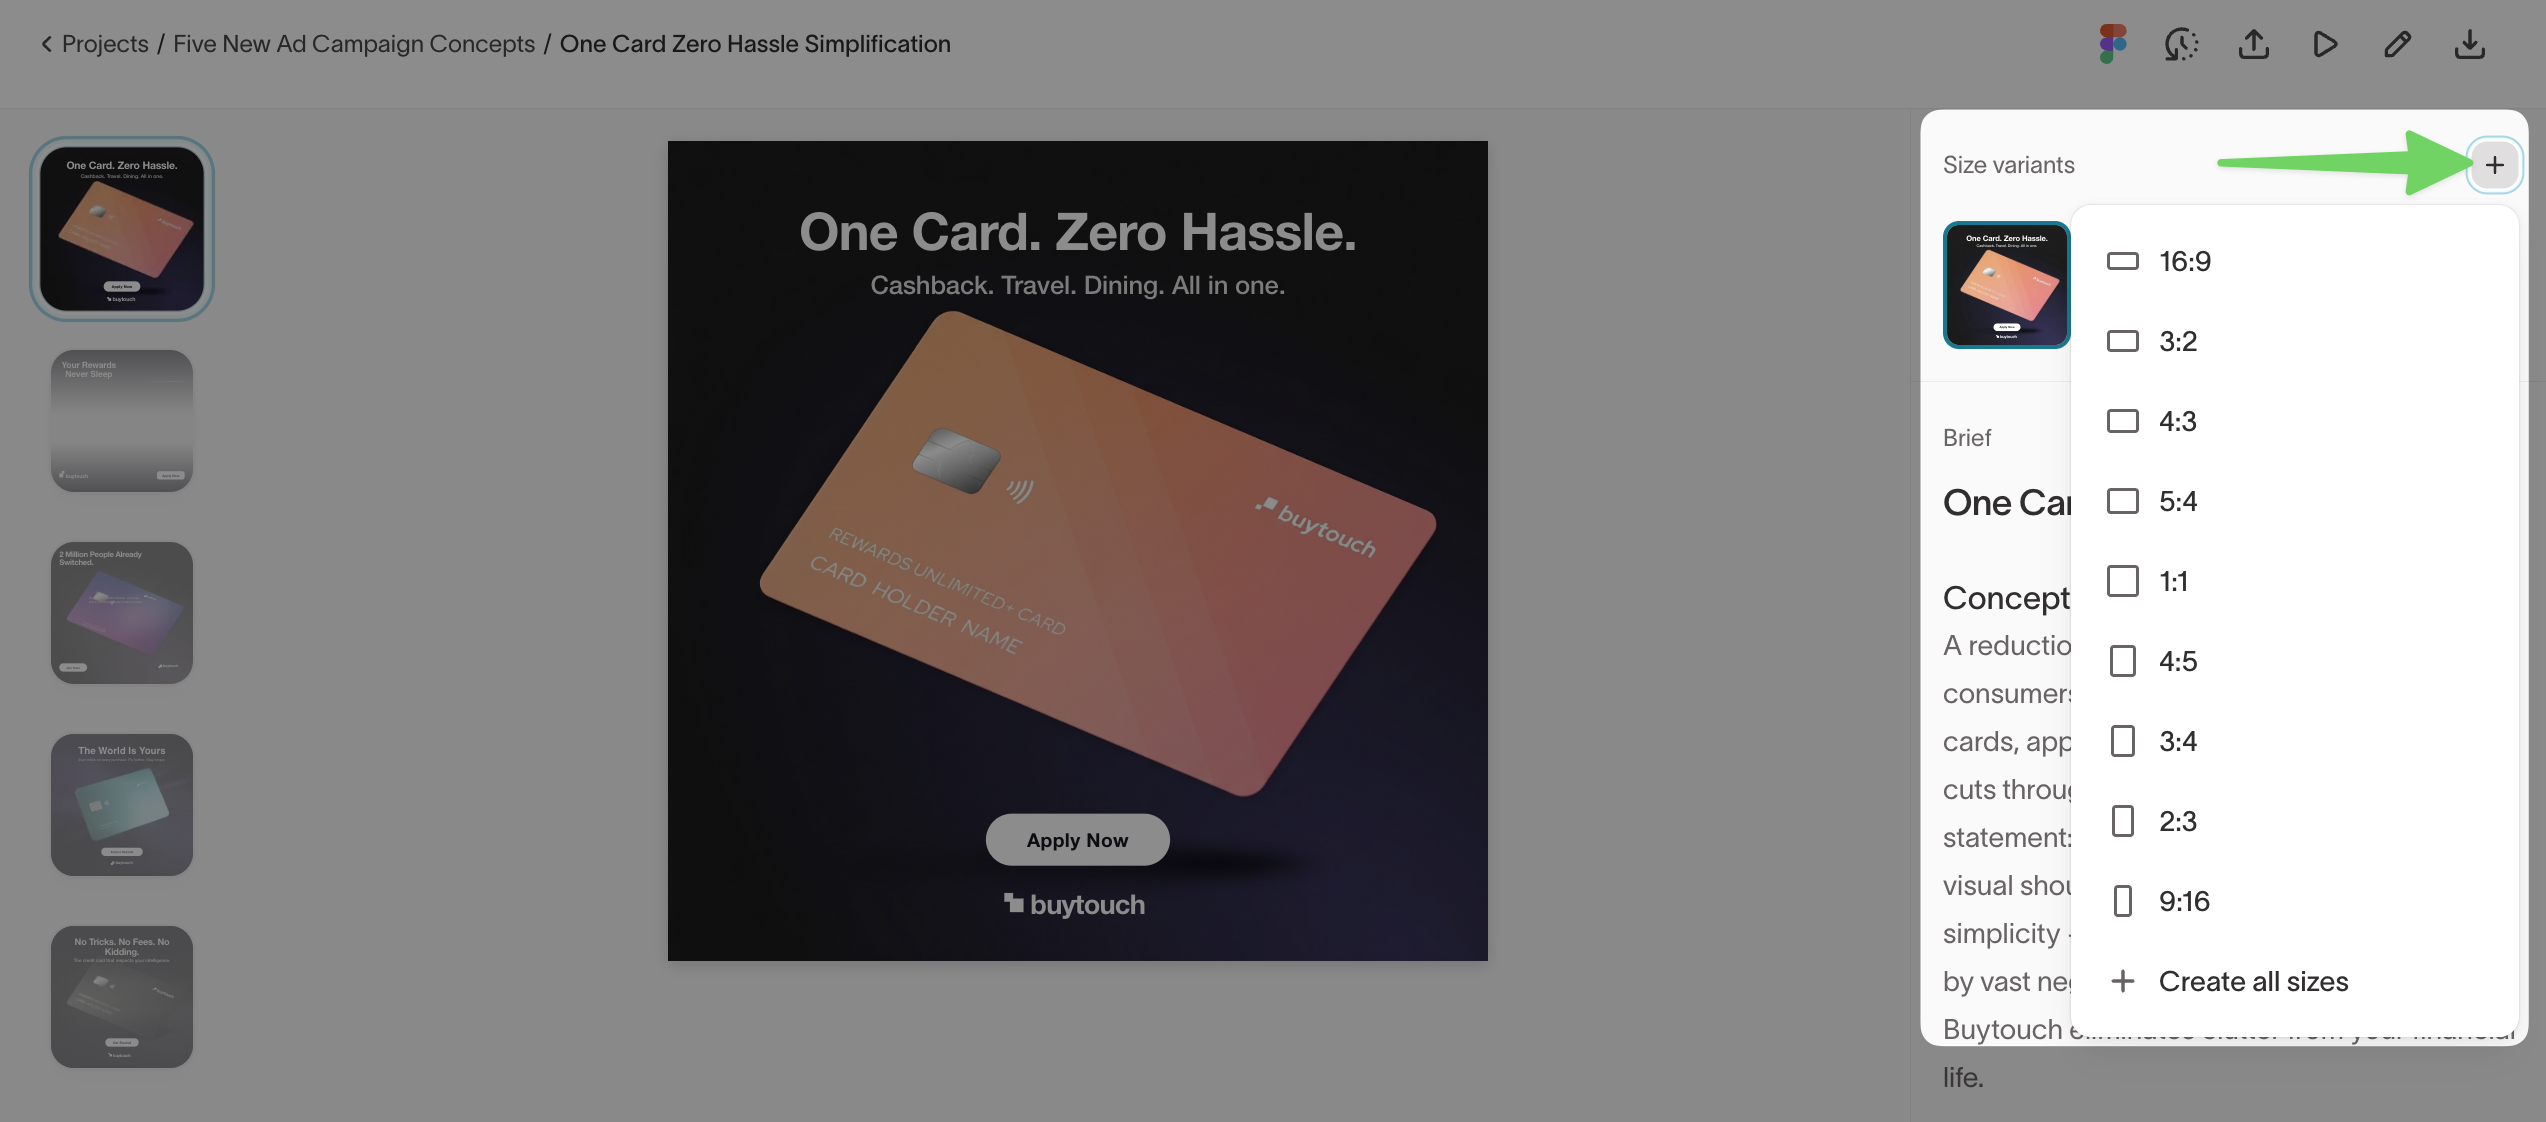
After creating an ad, generate size variants for different placements and platforms. Select the + button in the Size variants panel to choose from available aspect ratios — 16:9, 3:2, 4:3, 5:4, 1:1, 4:5, 3:4, 2:3, and 9:16 — or select Create all sizes to generate every format at once.
Size variant thumbnails appear alongside the primary creative so you can review all versions at once.
Create video ads
Ad Studio supports motion ads — animated text, product reveals, cinematic transitions — and short-form UGC-style video. You can create video ads in two ways:
Animate an existing static ad
Select one or more static ads in your project and prompt the agent to animate them. The agent animates text, imagery, and layout elements while preserving the creative direction.
Example prompts:
- "Animate these ads, make them cinematic."
- "Turn this into a motion ad with moving text and a product reveal."
Create new video ads from scratch
Prompt the agent to generate motion video ads directly from a brief, just like you would for static ads.
Example prompt: "Create 5 new motion video ads based on these concepts."
Supported video aspect ratios
Video ads support the following aspect ratios: 1:1, 9:16, 16:9, 4:3, 3:4, and 21:9. You can request additional sizes through the agent chat.
Make sure your ad accounts are synced in Context Hub → Connections. The agent pulls synced video ads from your connected platforms as visual and thematic inspiration when generating new video ads. Synced ads appear automatically under Assets in the Synced tab.
Review and iterate
Ad Studio never launches an ad without your input. After the agent generates creatives, review them and continue iterating — via the agent chat, the visual editor, or both — until the creative meets your standards. When you're ready, move the ad to the Launch tab to queue it for your ad platform.
Launch to an ad platform
Once you approve creatives, launch them to your connected ad platform.
Queue ads for launch

Open the Launch tab within your project to manage the launch pipeline. The Queued section shows ads waiting to be launched with their platform, status, and date. The Launched section shows ads that have been successfully launched.
To queue an ad, select the launch icon in the toolbar. To launch multiple ads at once, select them in the queue and select Launch selected.
Select a campaign
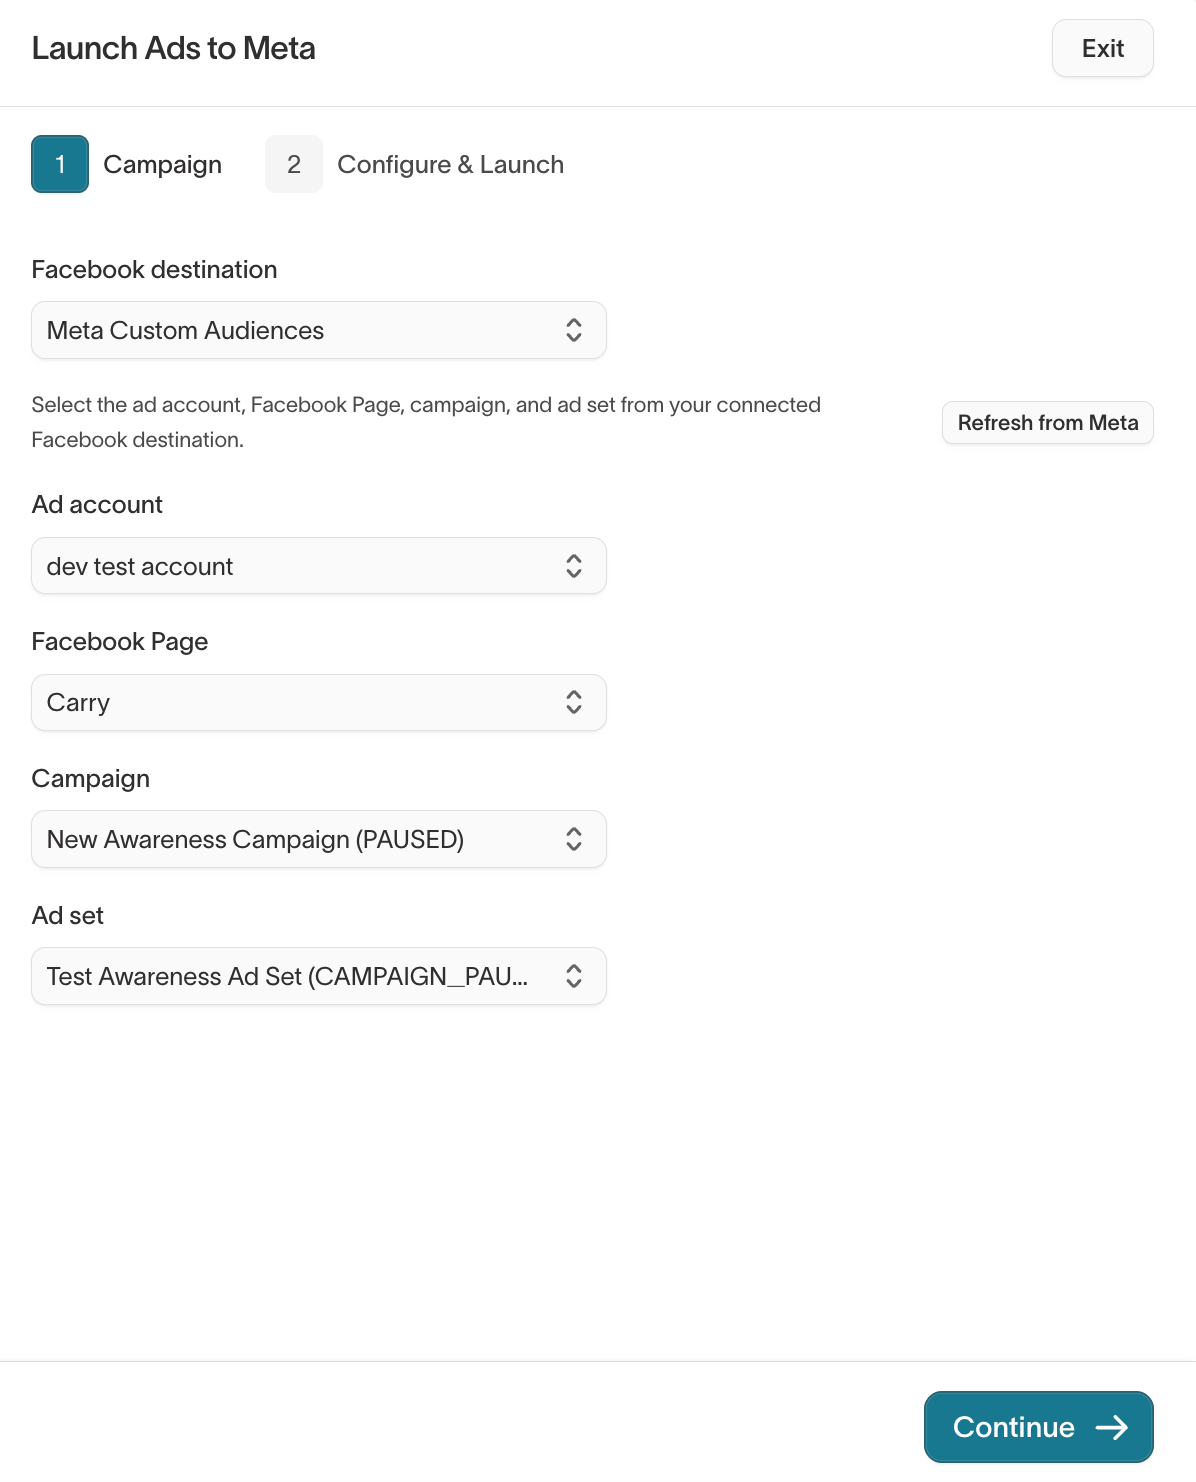
When you launch an ad, the first step is selecting where it goes. Choose the destination platform, ad account, page, campaign, and ad set. Use Refresh from Meta (or the equivalent for your platform) to pull the latest campaign structure.
- Select the destination ad platform.
- Select the ad account, page, campaign, and ad set.
- Select Continue.
Configure and launch
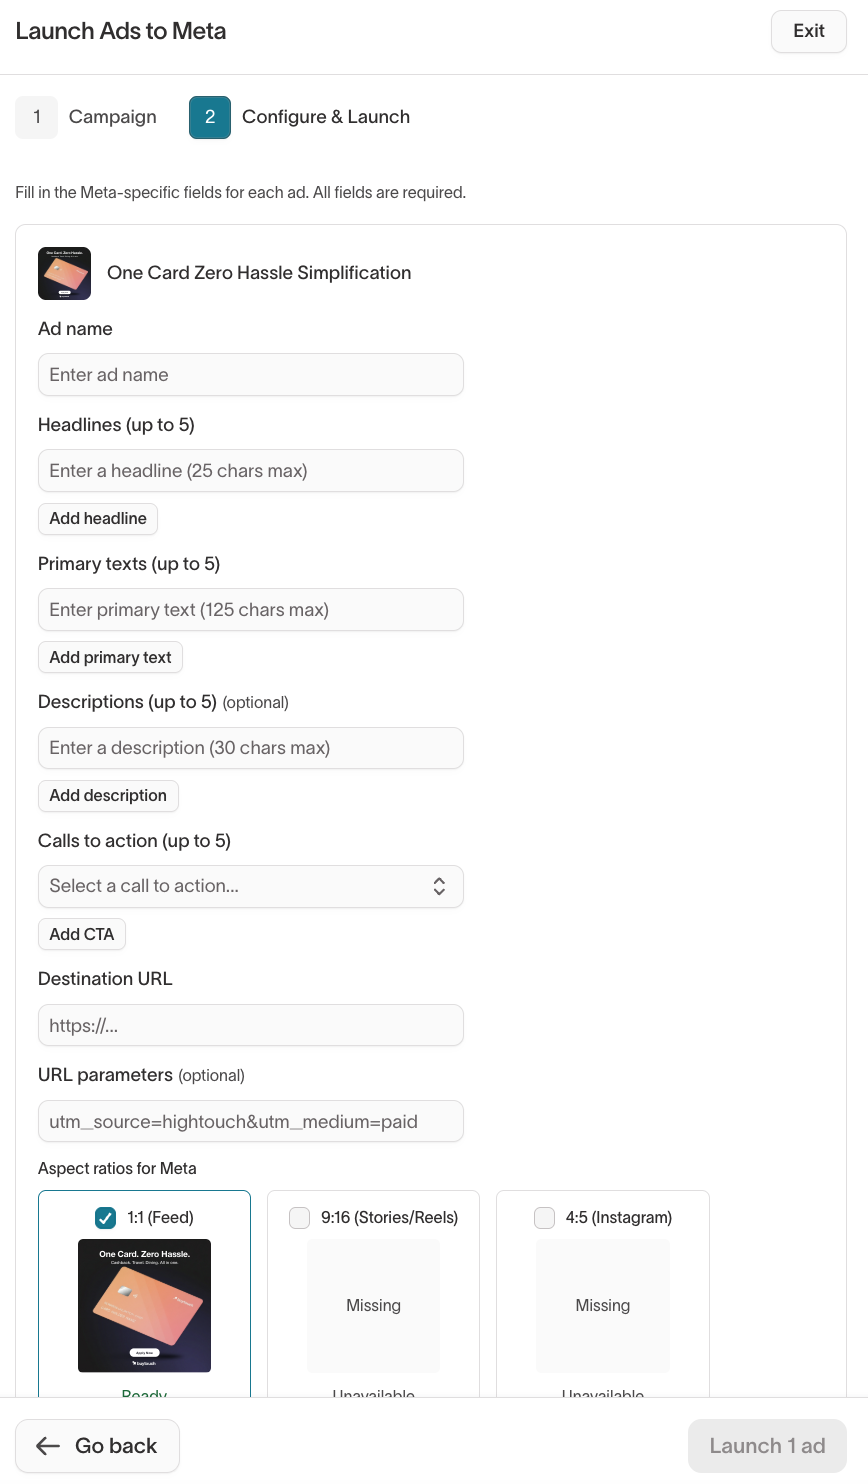
Fill in the platform-specific fields for each ad — ad name, headlines, primary texts, calls to action, destination URL, and the aspect ratios you want to launch. Required fields and character limits vary by platform.
Select Launch 1 ad (or the equivalent for your selection) to launch the creative to your ad platform.
The ad enters your ad platform as a new creative asset. You manage campaign targeting, budget, and scheduling in the ad platform itself — Ad Studio handles the creative production.
Export to Figma
To hand off a creative to your design team, select the Figma icon in the toolbar. The ad exports as an editable Figma file so designers can polish layouts or approve final assets in their existing workflow.
Tips and best practices
Structure your prompts
Specific prompts produce better results on the first pass. Include as many of the following as relevant:
- Goal — What business outcome are you driving? (e.g., app downloads, brand awareness)
- Audience — Which persona, funnel stage, or segment?
- Offer — What product, SKU, or value prop is being promoted?
- Inputs — What files, URLs, reports, or reference ads should the agent use?
- Creative direction — What formats or styles should it explore? (e.g., lifestyle imagery, illustration, text-heavy)
- Output spec — How many concepts and assets? How different should they be?
- Constraints — What brand rules or asset restrictions must it follow?
You don't need all seven elements in every prompt. For quick iterations, a sentence or two is fine. Use the full structure when starting a new project or when the first batch missed the mark.
Common mistakes
- Prompting before setup is complete. Brand context, reference assets, and ad platform connections all improve output quality. Set them up first.
- Asking for "good ads" without specifics. Include a goal, audience, and offer at minimum.
- Forgetting output shape. Specify how many concepts and variants you want — otherwise the agent decides.
- Comparing unlike formats. When reviewing performance or asking for analysis, compare static to static and video to video.
Static ad tips
- Upload reference images when starting a new project — they give the agent a visual target and improve brand consistency.
- Attach source materials like campaign briefs, landing page URLs, or past performance reports to ground the agent's creative direction.
- Use descriptive style words ("premium," "editorial," "bold flat illustration") to steer visual output.
- Tell the agent to ask clarifying questions before generating — this often produces better first-pass results.
Video ad tips
- Synced ads from your connected platforms are automatically available under Assets. The agent uses them as visual inspiration when generating new video ads.
- Supported video aspect ratios are 1:1, 9:16, 16:9, 4:3, 3:4, and 21:9.
- You can animate existing static ads or create new motion ads from scratch. See Create video ads for details.