
Amazon EventBridge is a serverless, fully managed, and scalable event bus that enables integrations between AWS services, Software as a services (SaaS), and your applications.
Overview
Hightouch integrates directly with Amazon EventBridge to support high-throughput, distributed, or asynchronous workloads, letting you build a custom connector to your internal systems.
This destination was designed to be as flexible as possible. You can publish into different buses, have custom sources attributes and detail types for each message trigger allowing you to enrich your events.
Getting started
Connect to your AWS account
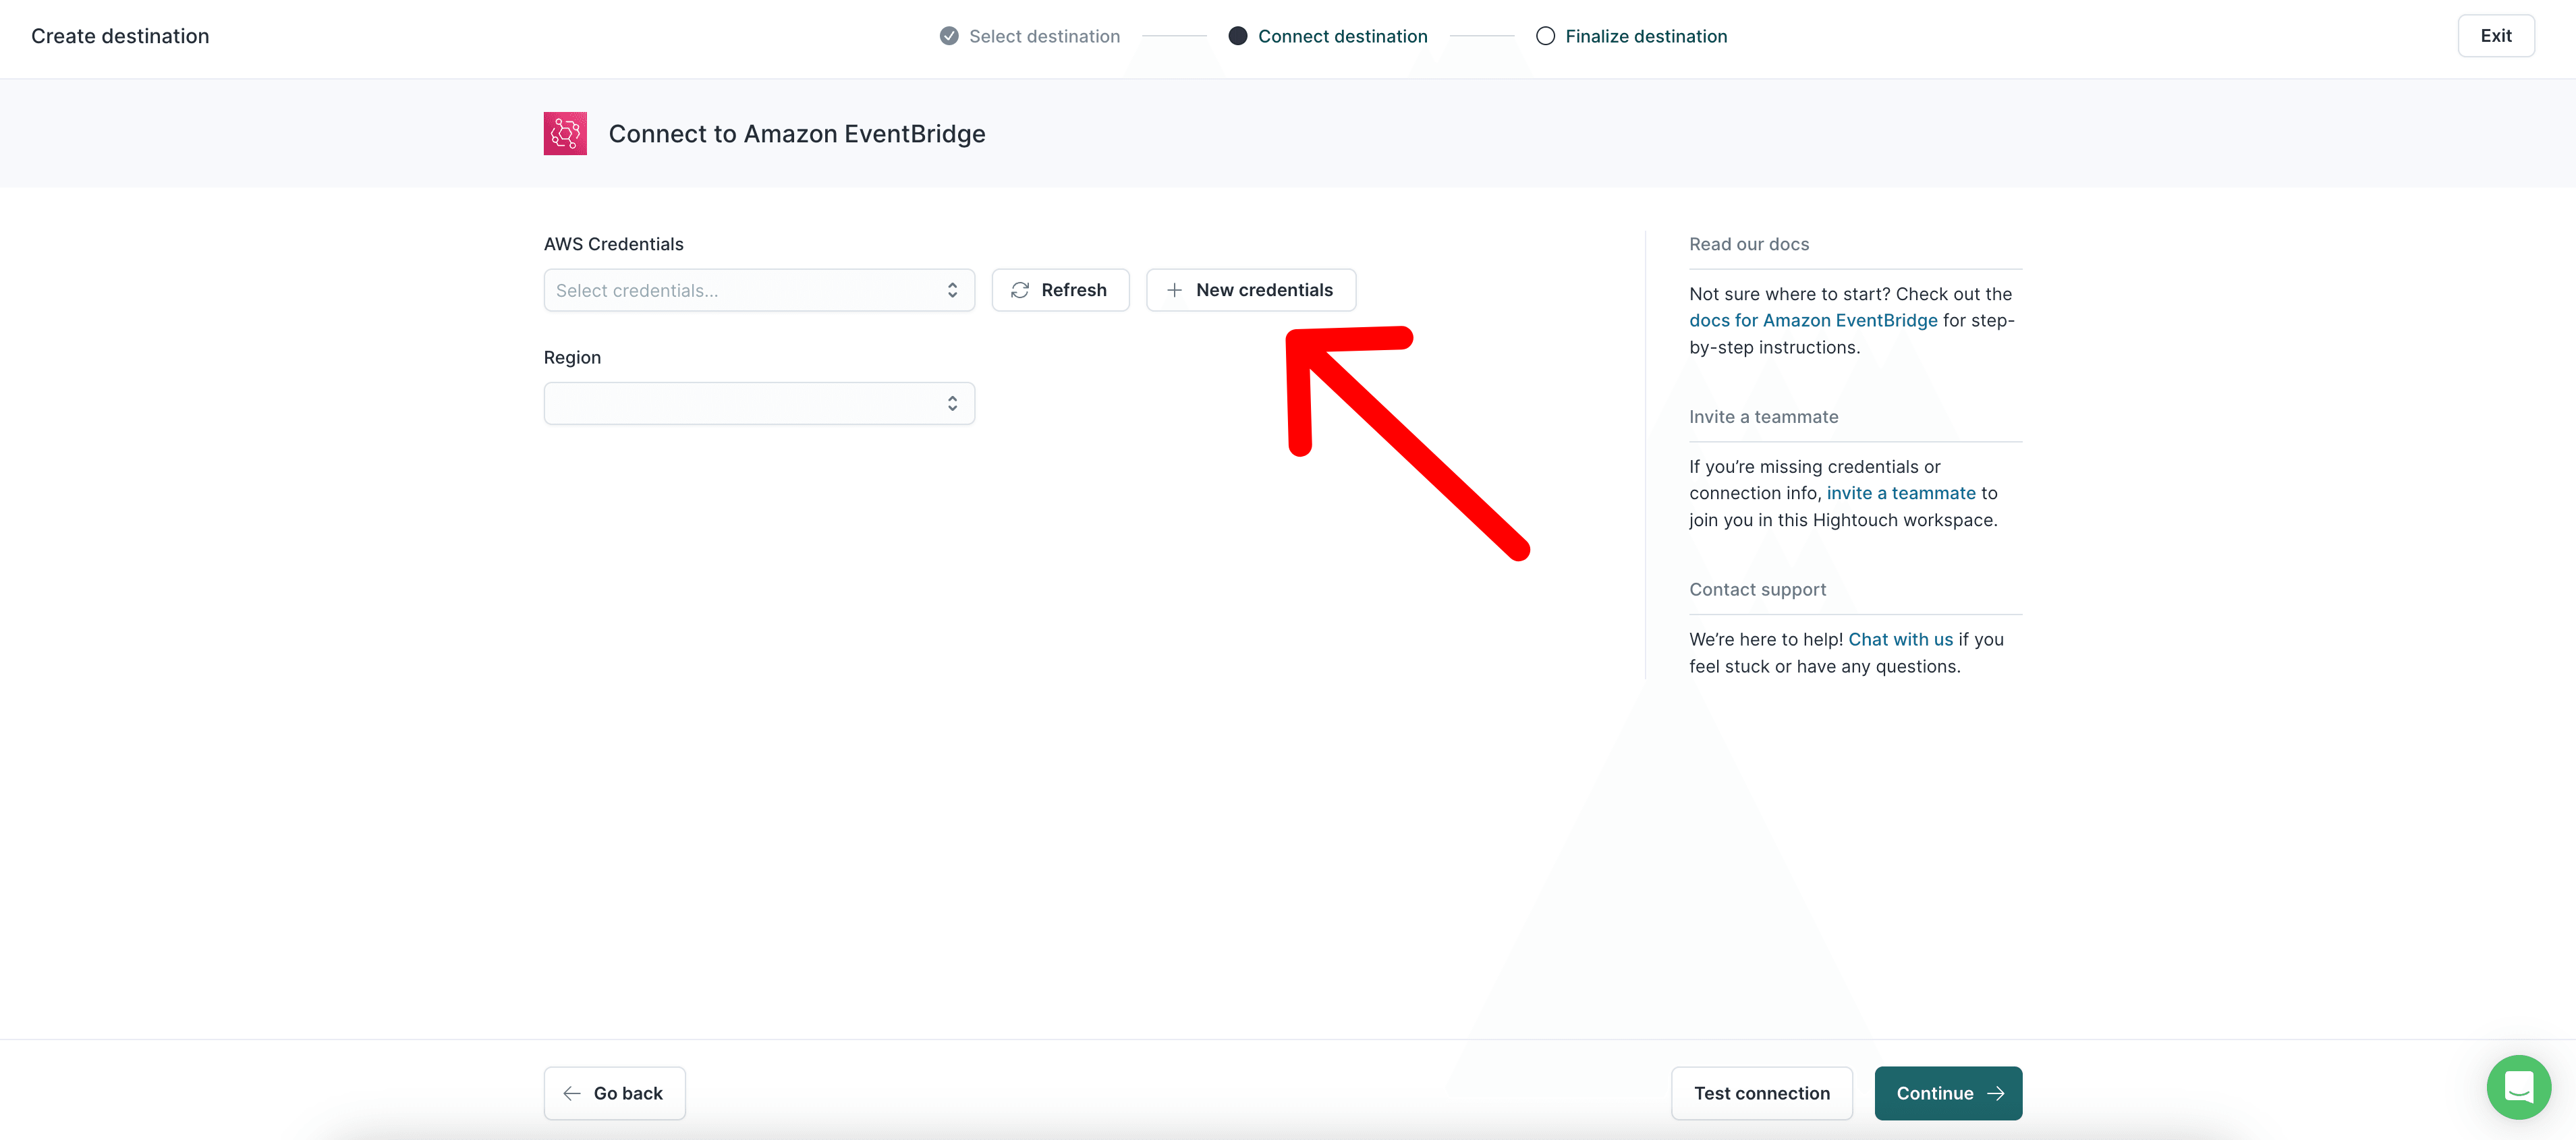
When setting up the Amazon EventBridge destination for the first time, you need to enter your AWS Credentials to give Hightouch access to your AWS account. Hightouch needs permission to send events to Amazon EventBridge on your behalf.
Hightouch believes in the principle of least privilege. We ask for no more permissions than necessary. For the Amazon EventBridge destination, Hightouch requires events:PutEvents and events:ListEventBuses.
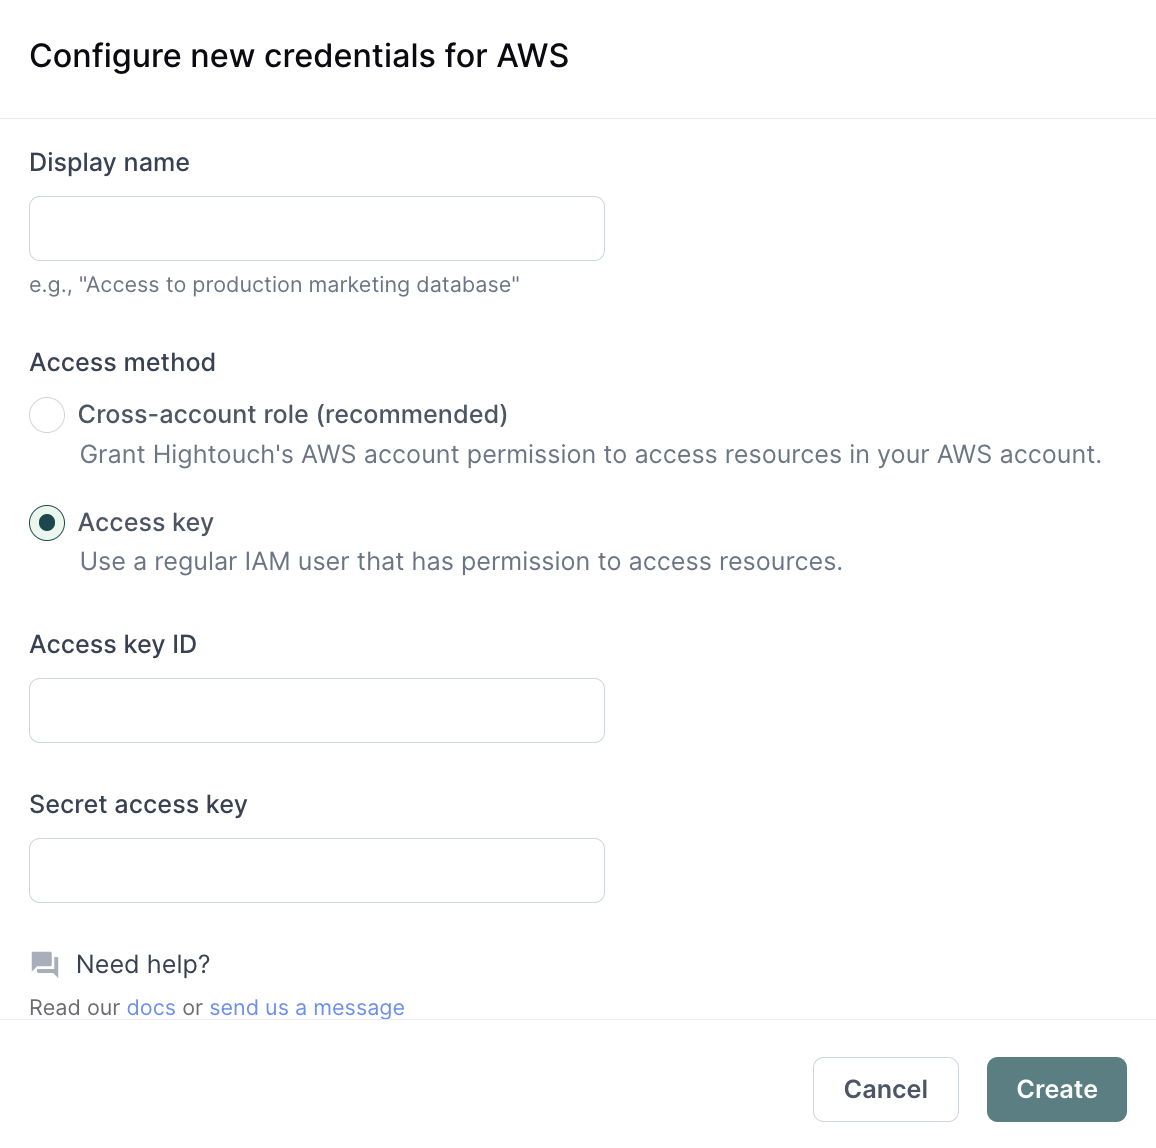
When configuring your credentials in Hightouch, you have two options:
- Setting up a cross-account role (recommended)
- Providing an access key
Set up cross-account role
Cross-account roles are the most secure method for granting Hightouch access to Amazon EventBridge in your AWS account.
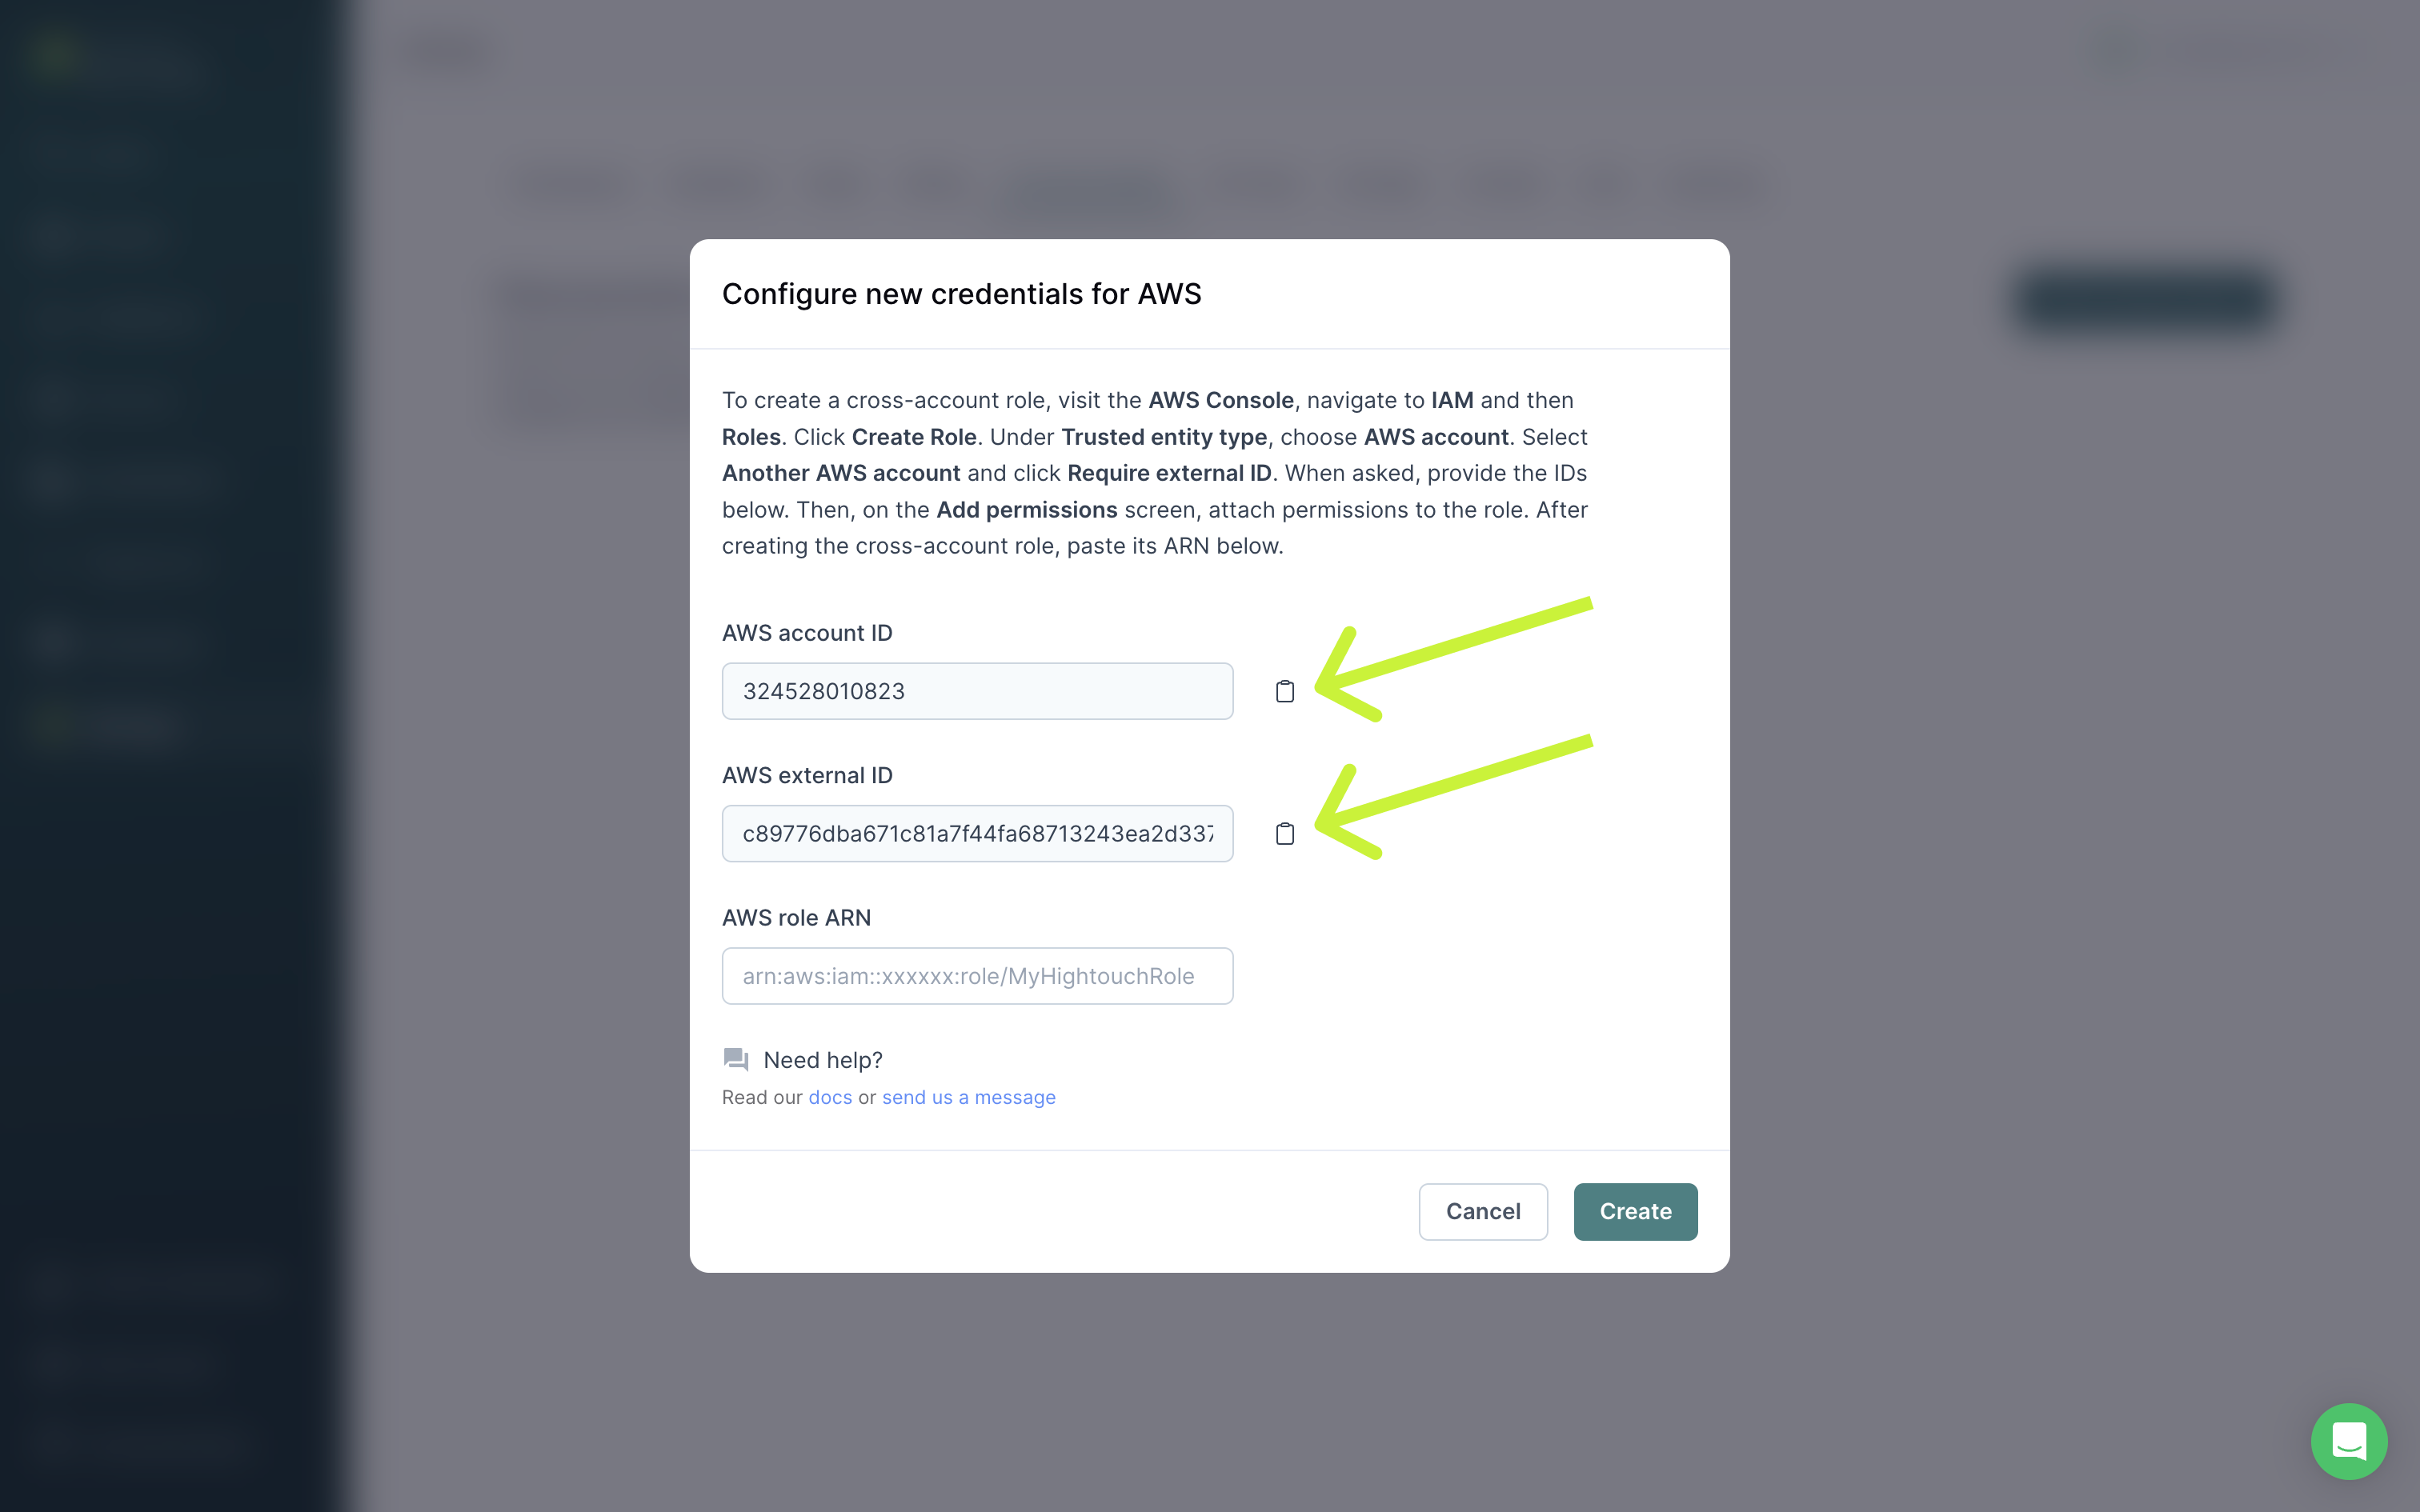
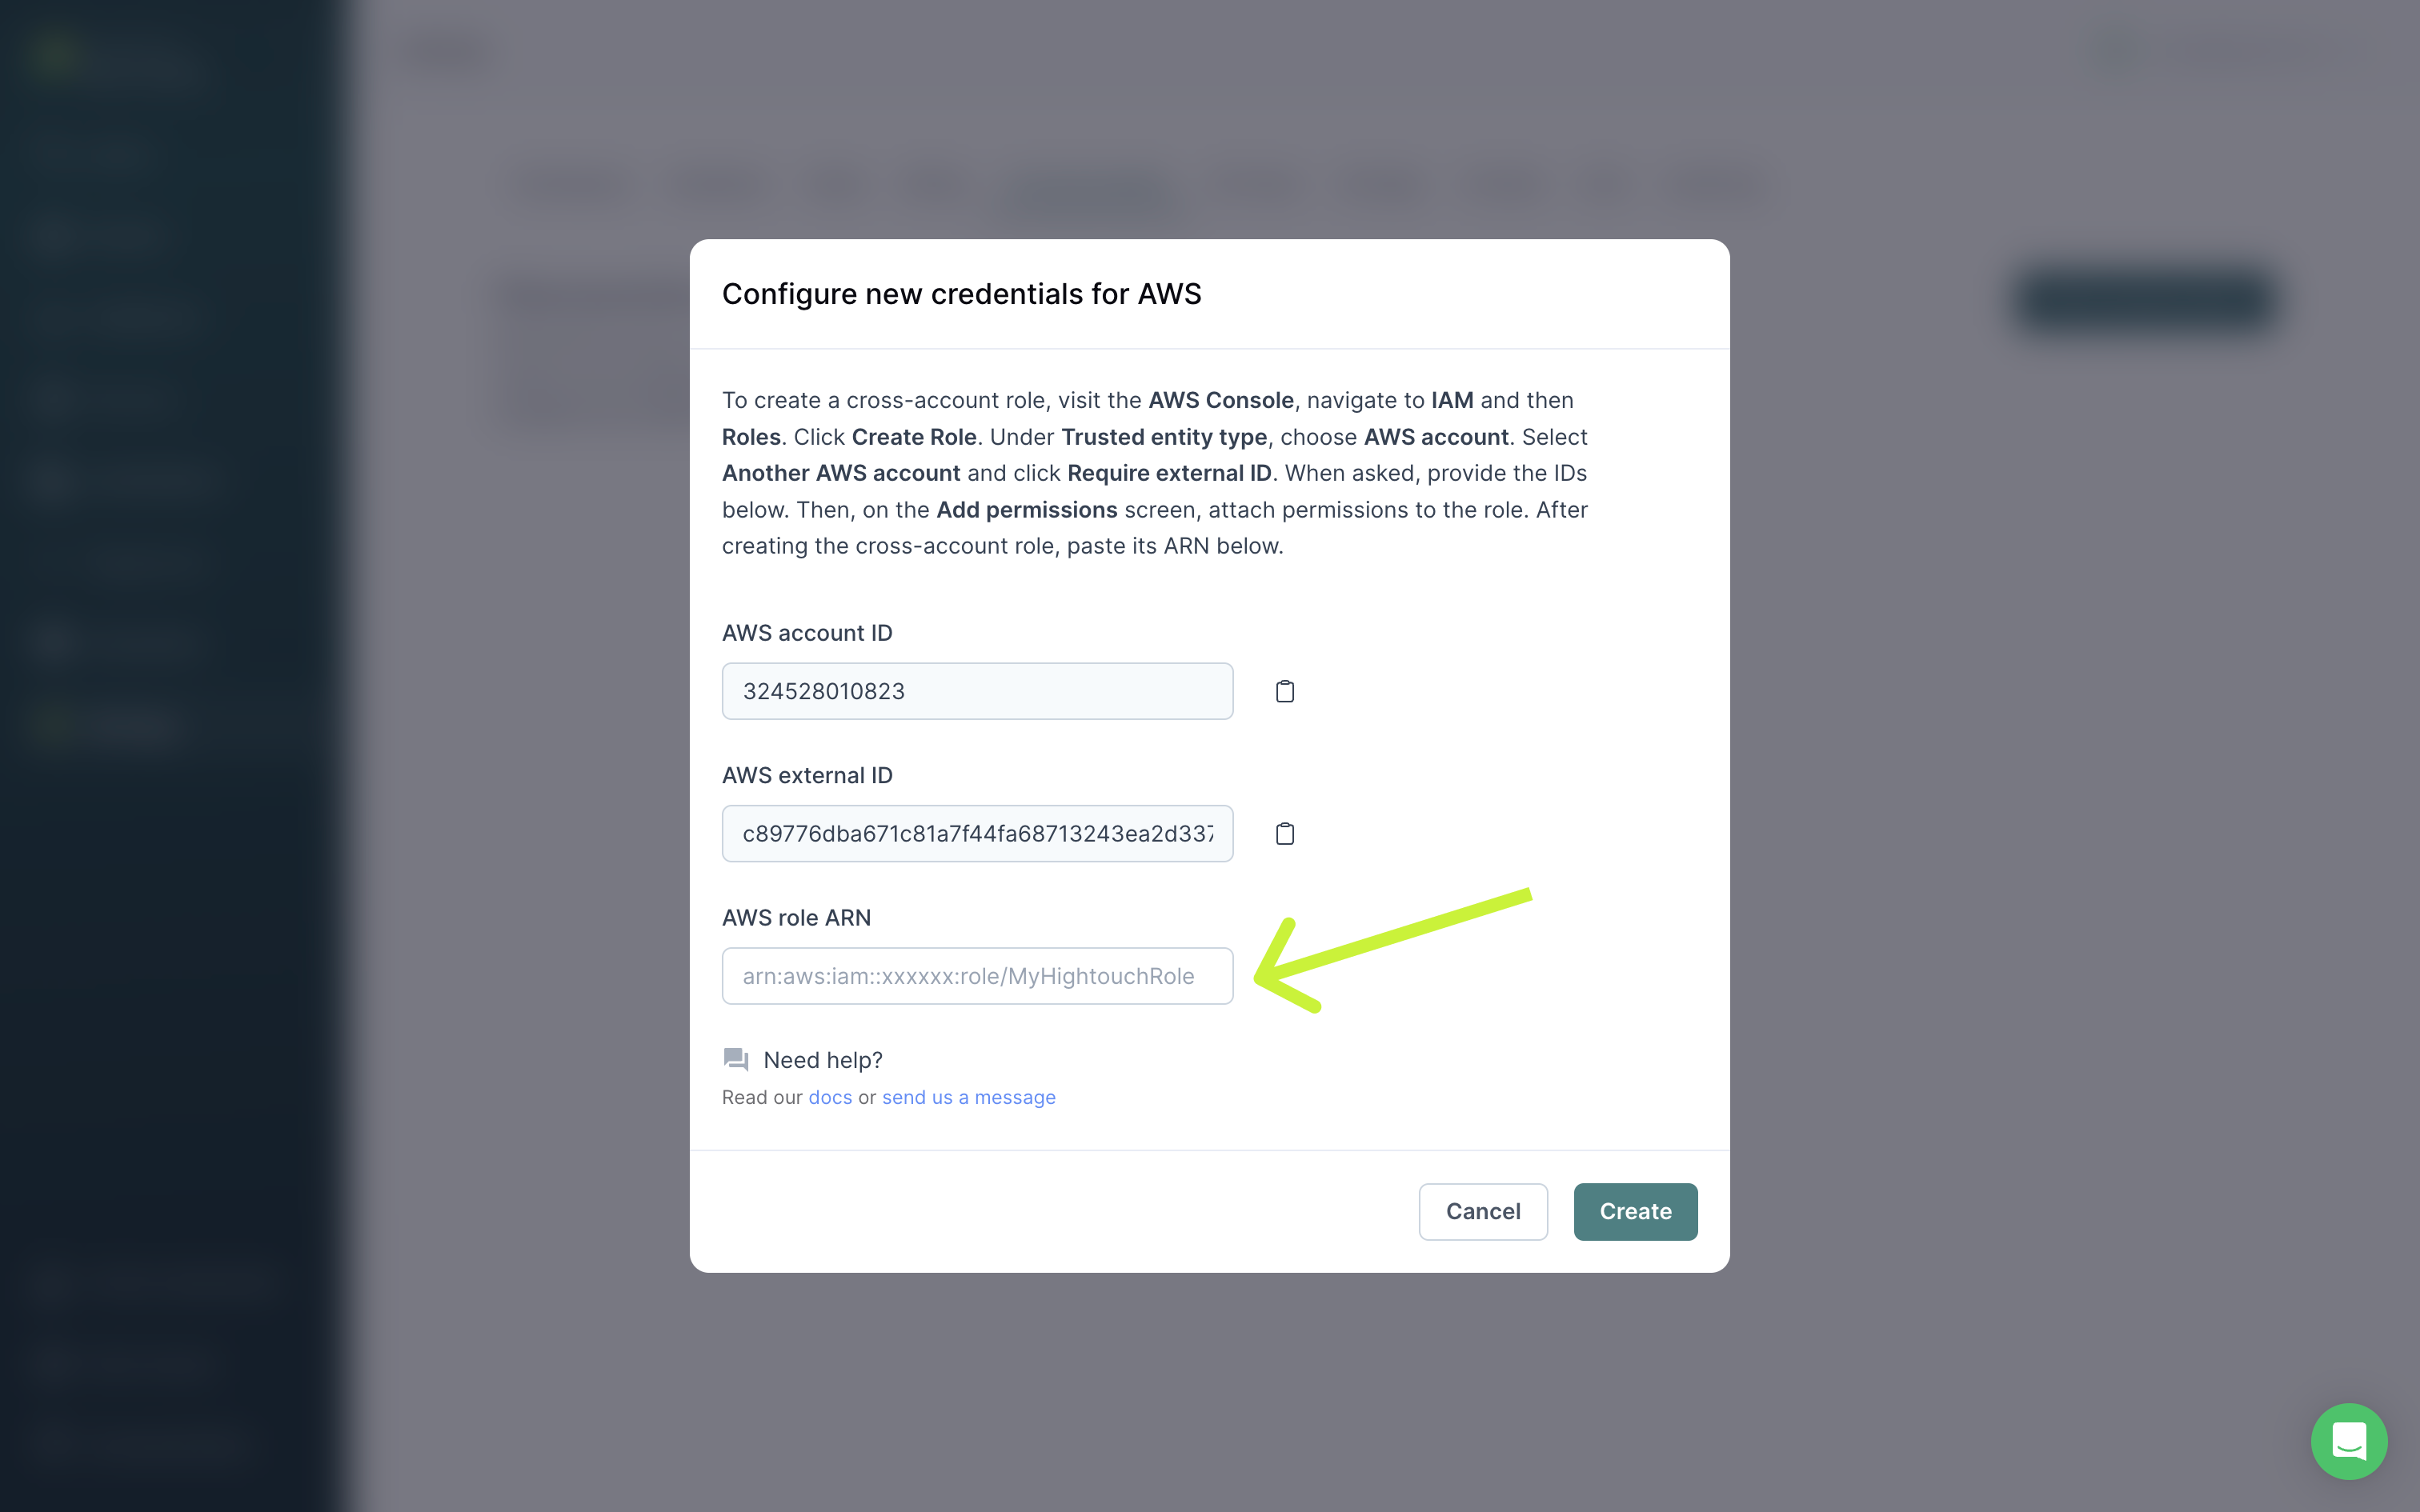
You need the Account ID and External ID in the Hightouch UI to set up a cross-account role.
- In the AWS Console, navigate to IAM → Roles.
- Click Create Role.
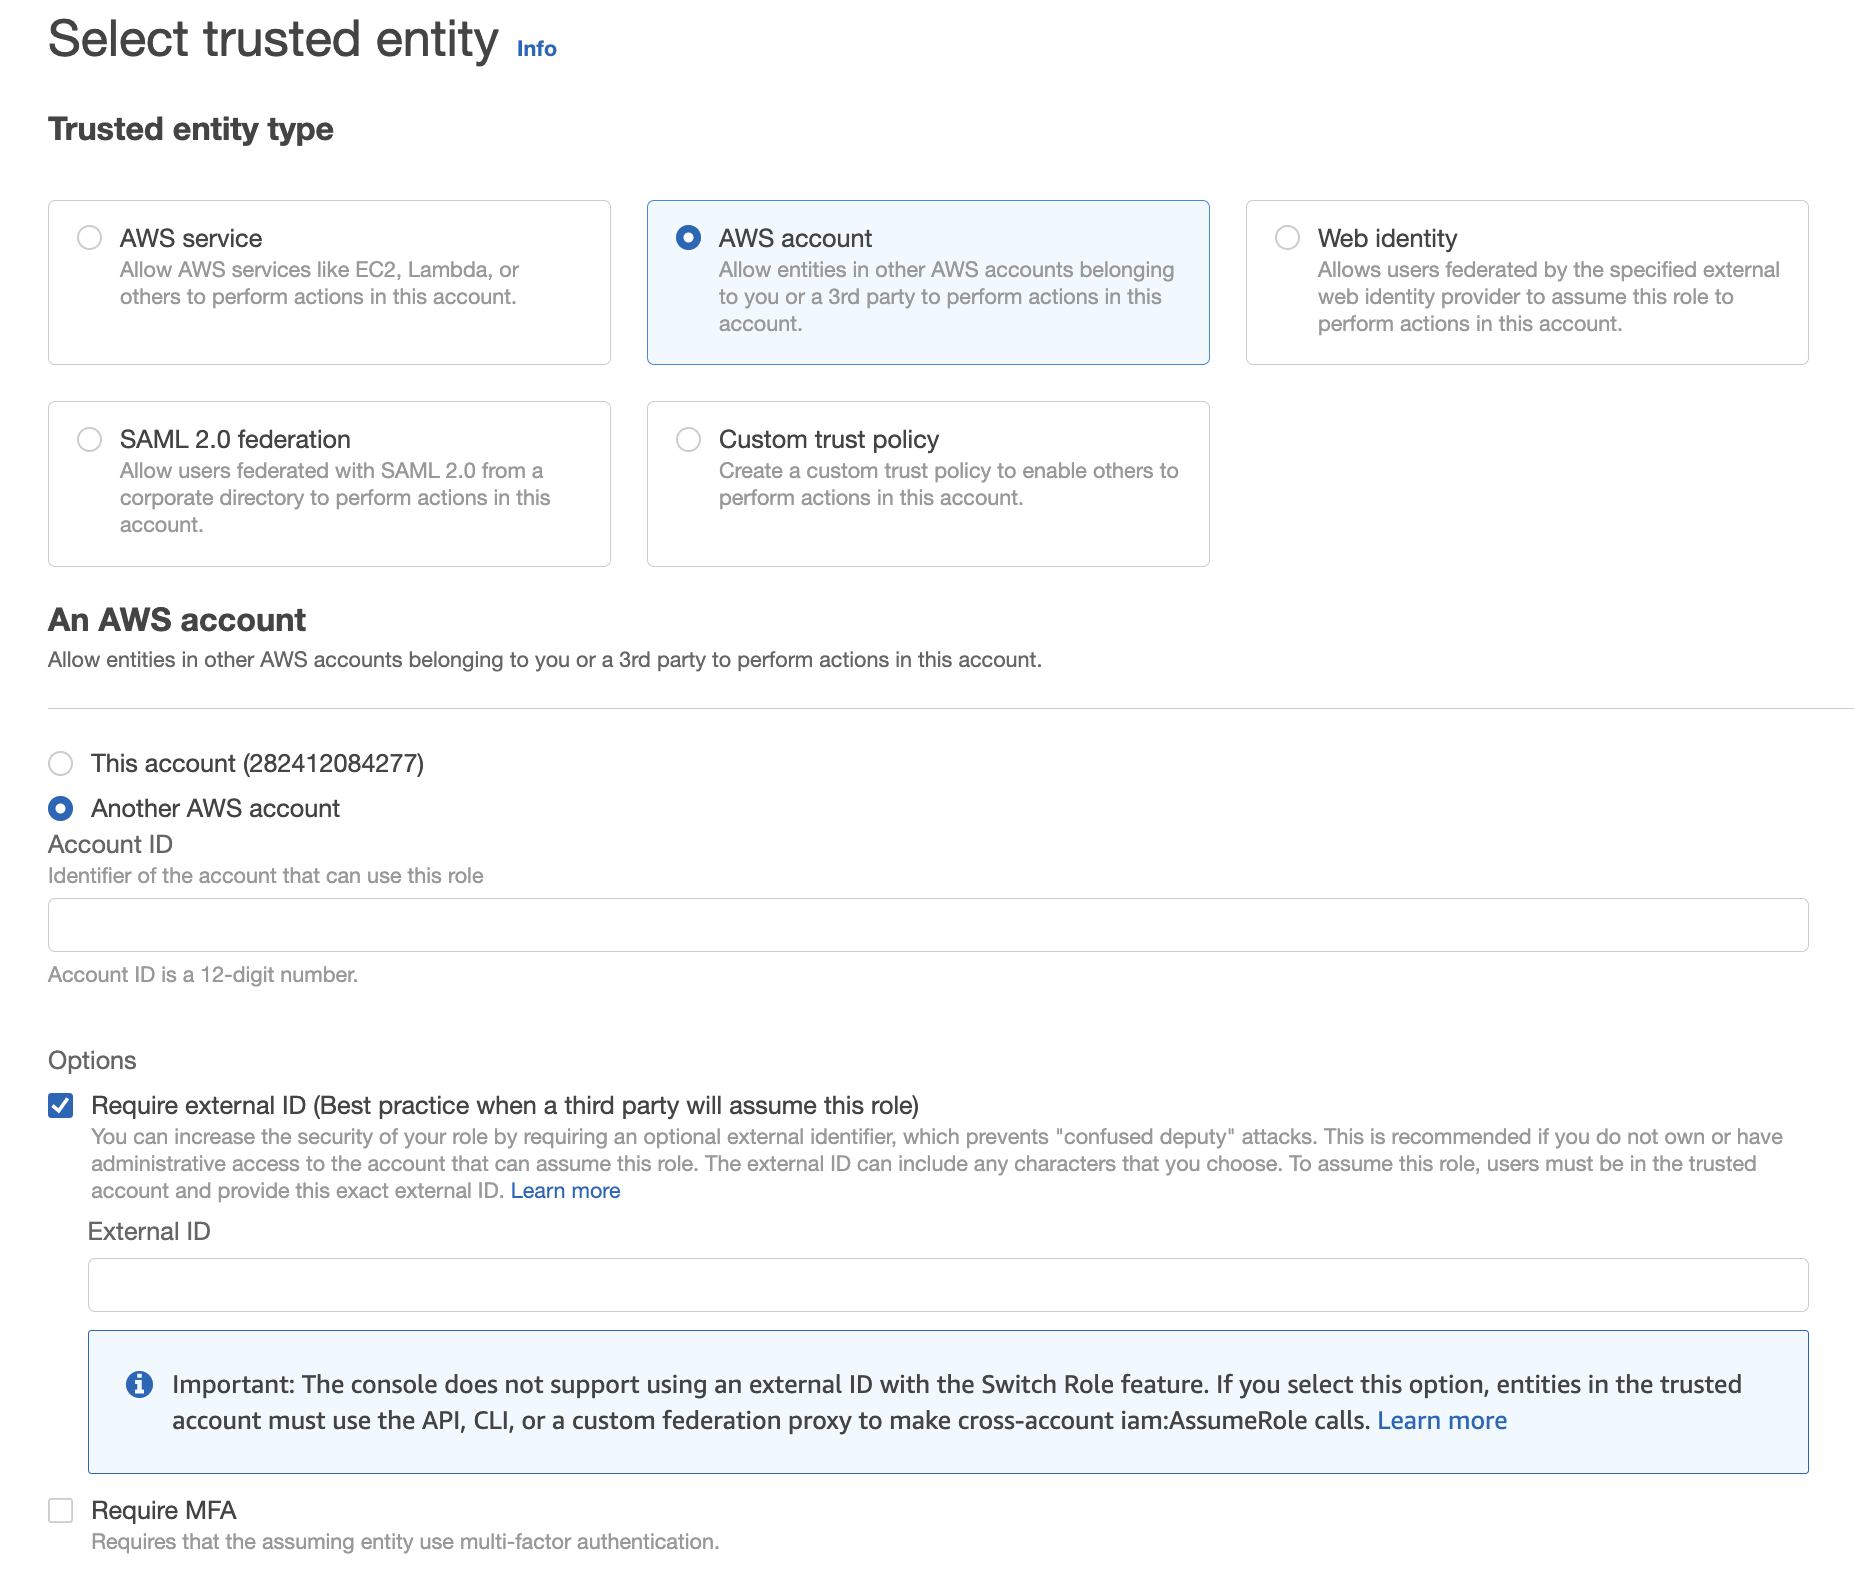
- Under Trusted entity type, choose AWS account.
- Select Another AWS account and also click Require external ID.
- Copy/paste the Account ID from Hightouch into the Account ID field in AWS.
- Copy/paste the External ID from Hightouch into the External ID field in AWS.
- On the Add permissions screen, proceed to attach permissions to the role using any policy that includes at least
events:PutEventsandevents:ListEventBuses.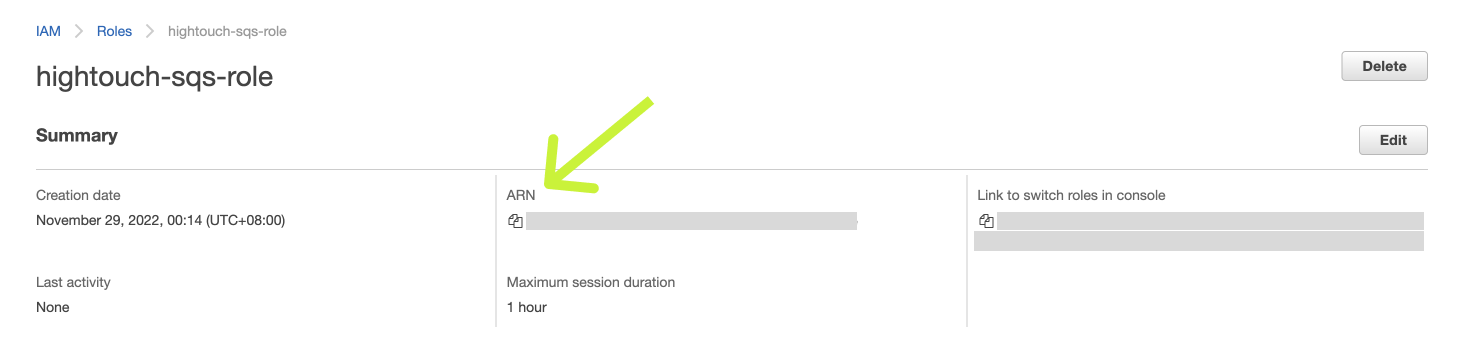
- Copy/paste the Role ARN from AWS into Hightouch. Click Create to finish setting up your cross-account role.
Provide access key
If you don't want to create a cross-account role, you can create a regular IAM user and share a Access Key ID and Secret Access Key with Hightouch.
Be sure to attach the user to a permission policy that include events:PutEvents and events:ListEventBuses for the specific resource you want to use via a Hightouch sync.
An example policy looks like this:
{
"Version": "2012-10-17",
"Statement": [
{
"Effect": "Allow",
"Action": "events:PutEvents",
"Resource": ["YOUR_EVENTBRIDGE_BUS_ARN_1", "YOUR_EVENTBRIDGE_BUS_ARN_2", "YOUR_EVENTBRIDGE_BUS_ARN_3"]
},
{
"Effect": "Allow",
"Action": "events:ListEventBuses",
"Resource": "*"
}
]
}
Select your AWS region
In this step, you specify which region has the resources you want to sync to.
Syncing data
Once you've authenticated your AWS account in Hightouch and selected an AWS Region, you've completed setup for an Amazon EventBridge destination in your Hightouch workspace. The next step is to configure a sync that send events whenever rows are added, changed, or removed in your model.
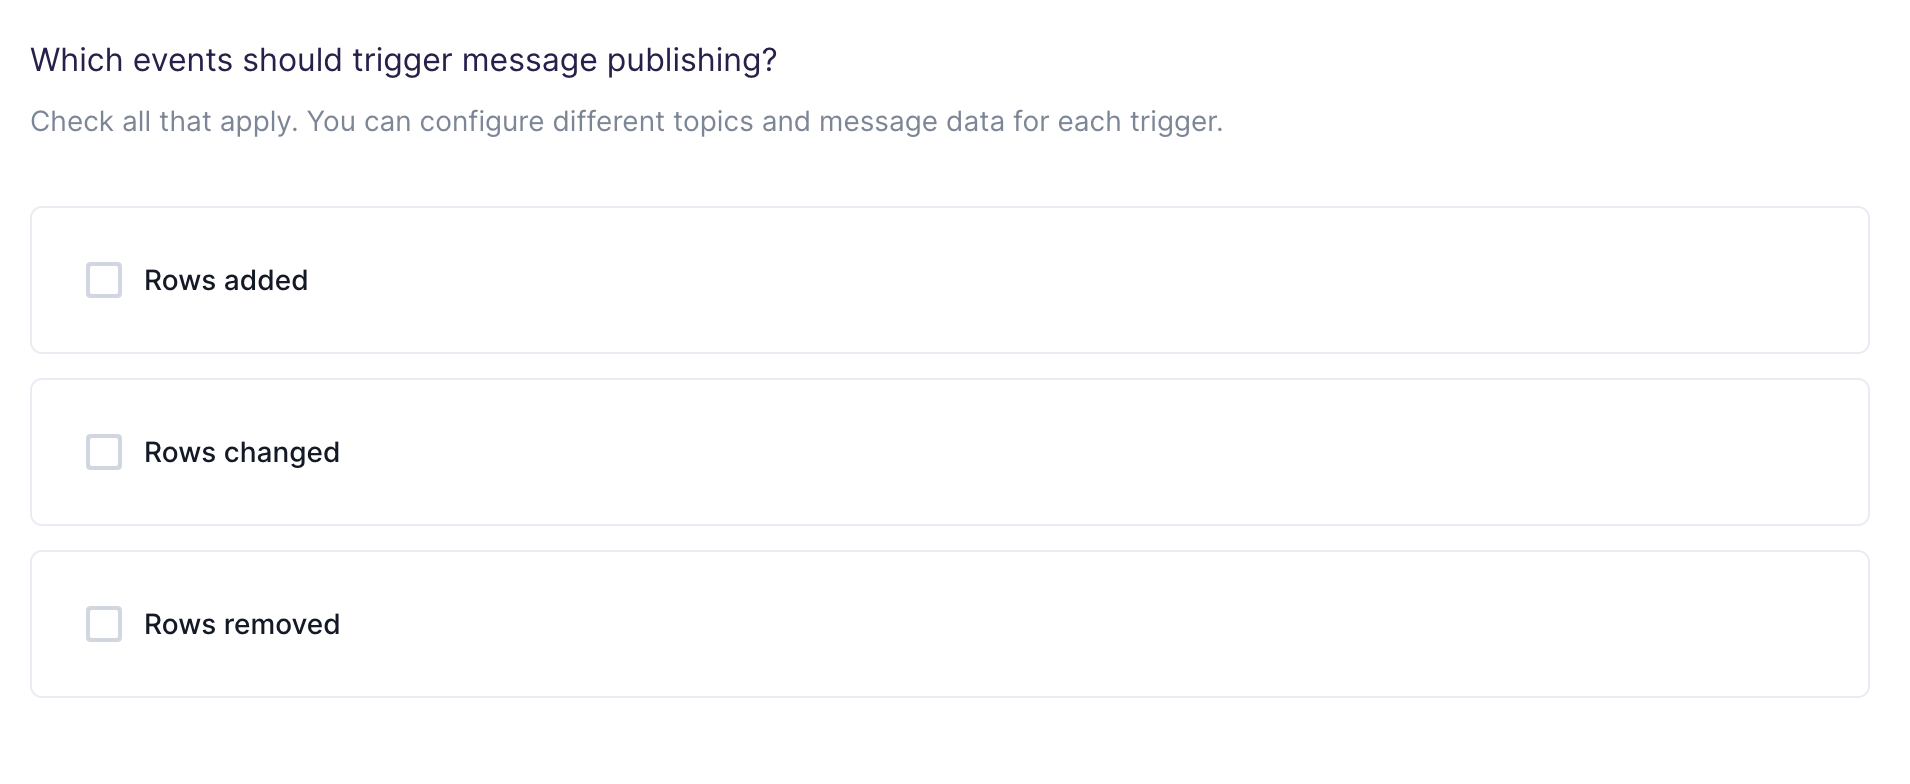
Configure your events trigger
Hightouch monitors your data model for added, changed, and removed rows. In this step, you specify which of these events should trigger message publishing.
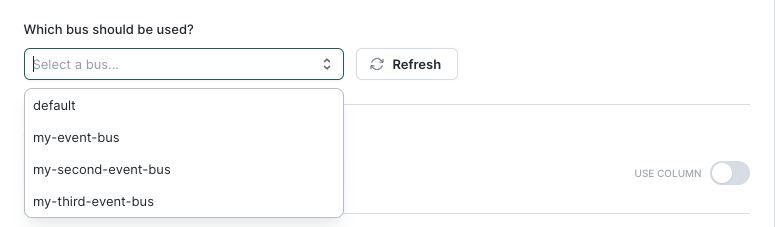
Choose your event bus
In this step, you choose to send the events to a specific event bus. Hightouch allows you to sync to existing buses in your AWS EventBridge.
Customize your source and detail type attributes
In this step, you tell Hightouch what value to put for the source and detail-type attribute in EventBridge for the event. More information can be found here on what these fields mean can be found in the AWS docs.
Use JSON editor
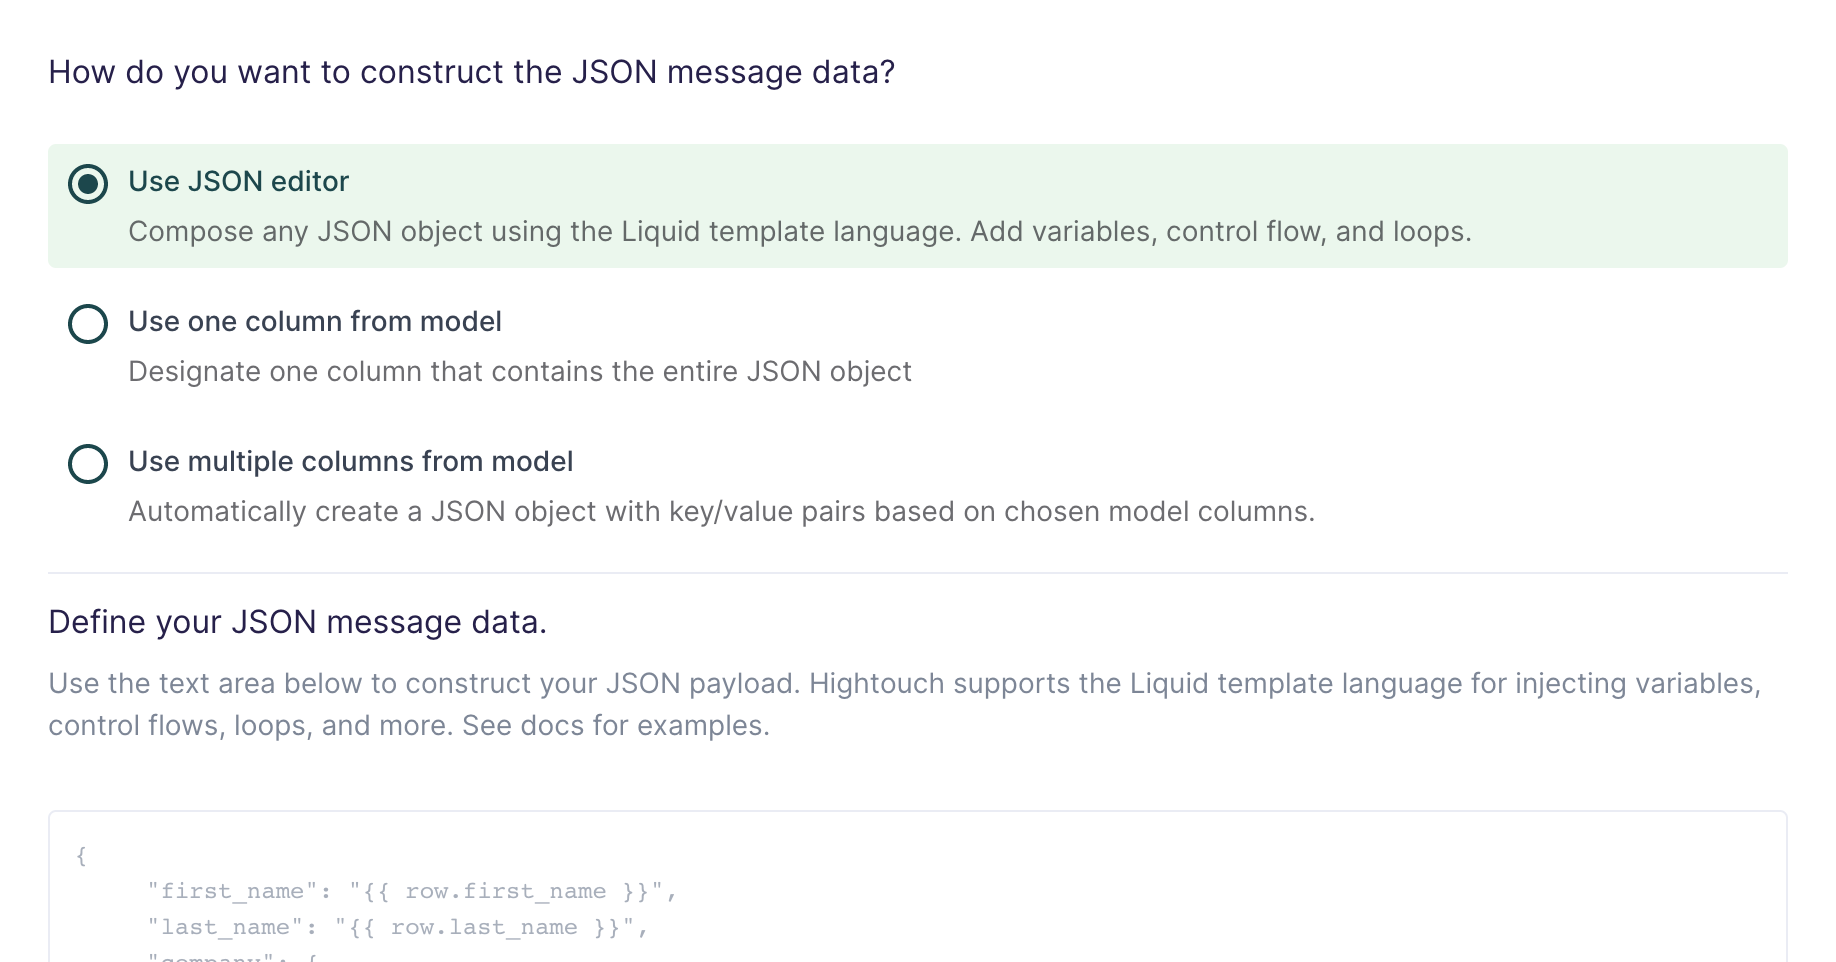
With the JSON editor, you can compose any JSON object using the Liquid template language. This is particularly useful for complex message data bodies containing nested objects and arrays, which can sometimes be difficult to model entirely in SQL.
Suppose your data model looks like this:
| full_name | age | email_address | phone_number |
|---|---|---|---|
| John Doe | 30 | john@example.com | +14158675309 |
And you want your message data like this:
{
  "name": "John Doe",
  "age": 30,
  "contact_info": [
    {
      "type": "email",
      "value": "john@example.com"
    },
    {
      "type": "phone",
      "value": "+14158675309"
    }
  ]
}
Your Liquid template should look like this:
{
  "name": "{{row.full_name}}",
  "age": {{row.age}},
  "contact_info": [
    {
      "type": "email",
      "value": "{{row.email_address}}"
    },
    {
      "type": "phone",
      "value": "{{row.phone_number}}"
    }
  ]
}
This makes it so you can reference any column using the syntax {{row.column_name}}. You can also use advanced Liquid features to incorporate control flow and loops into your dynamic message data.
When injecting strings into your JSON request body, be sure to surround the Liquid tag in double quotes.
Use one column from model
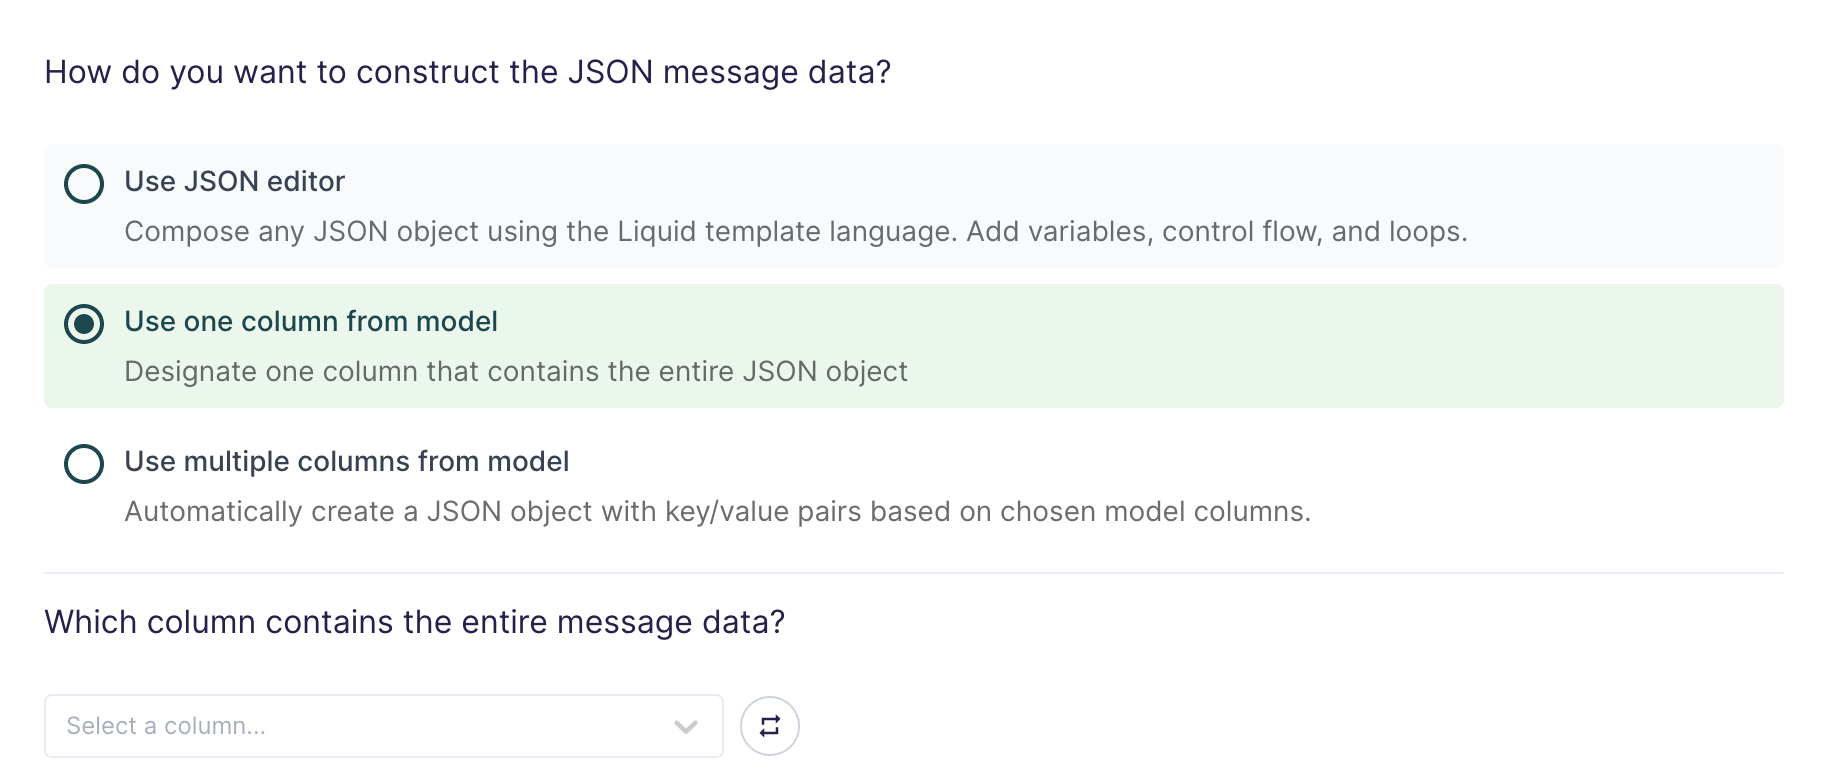
If you're already storing JSON data in your source, or if you have the ability to construct a JSON object using SQL, you can select one column in your model that already contains the full message data.
This setting is commonly used when syncing web events that have already been collected and stored as JSON objects in your database.
Use multiple columns from model
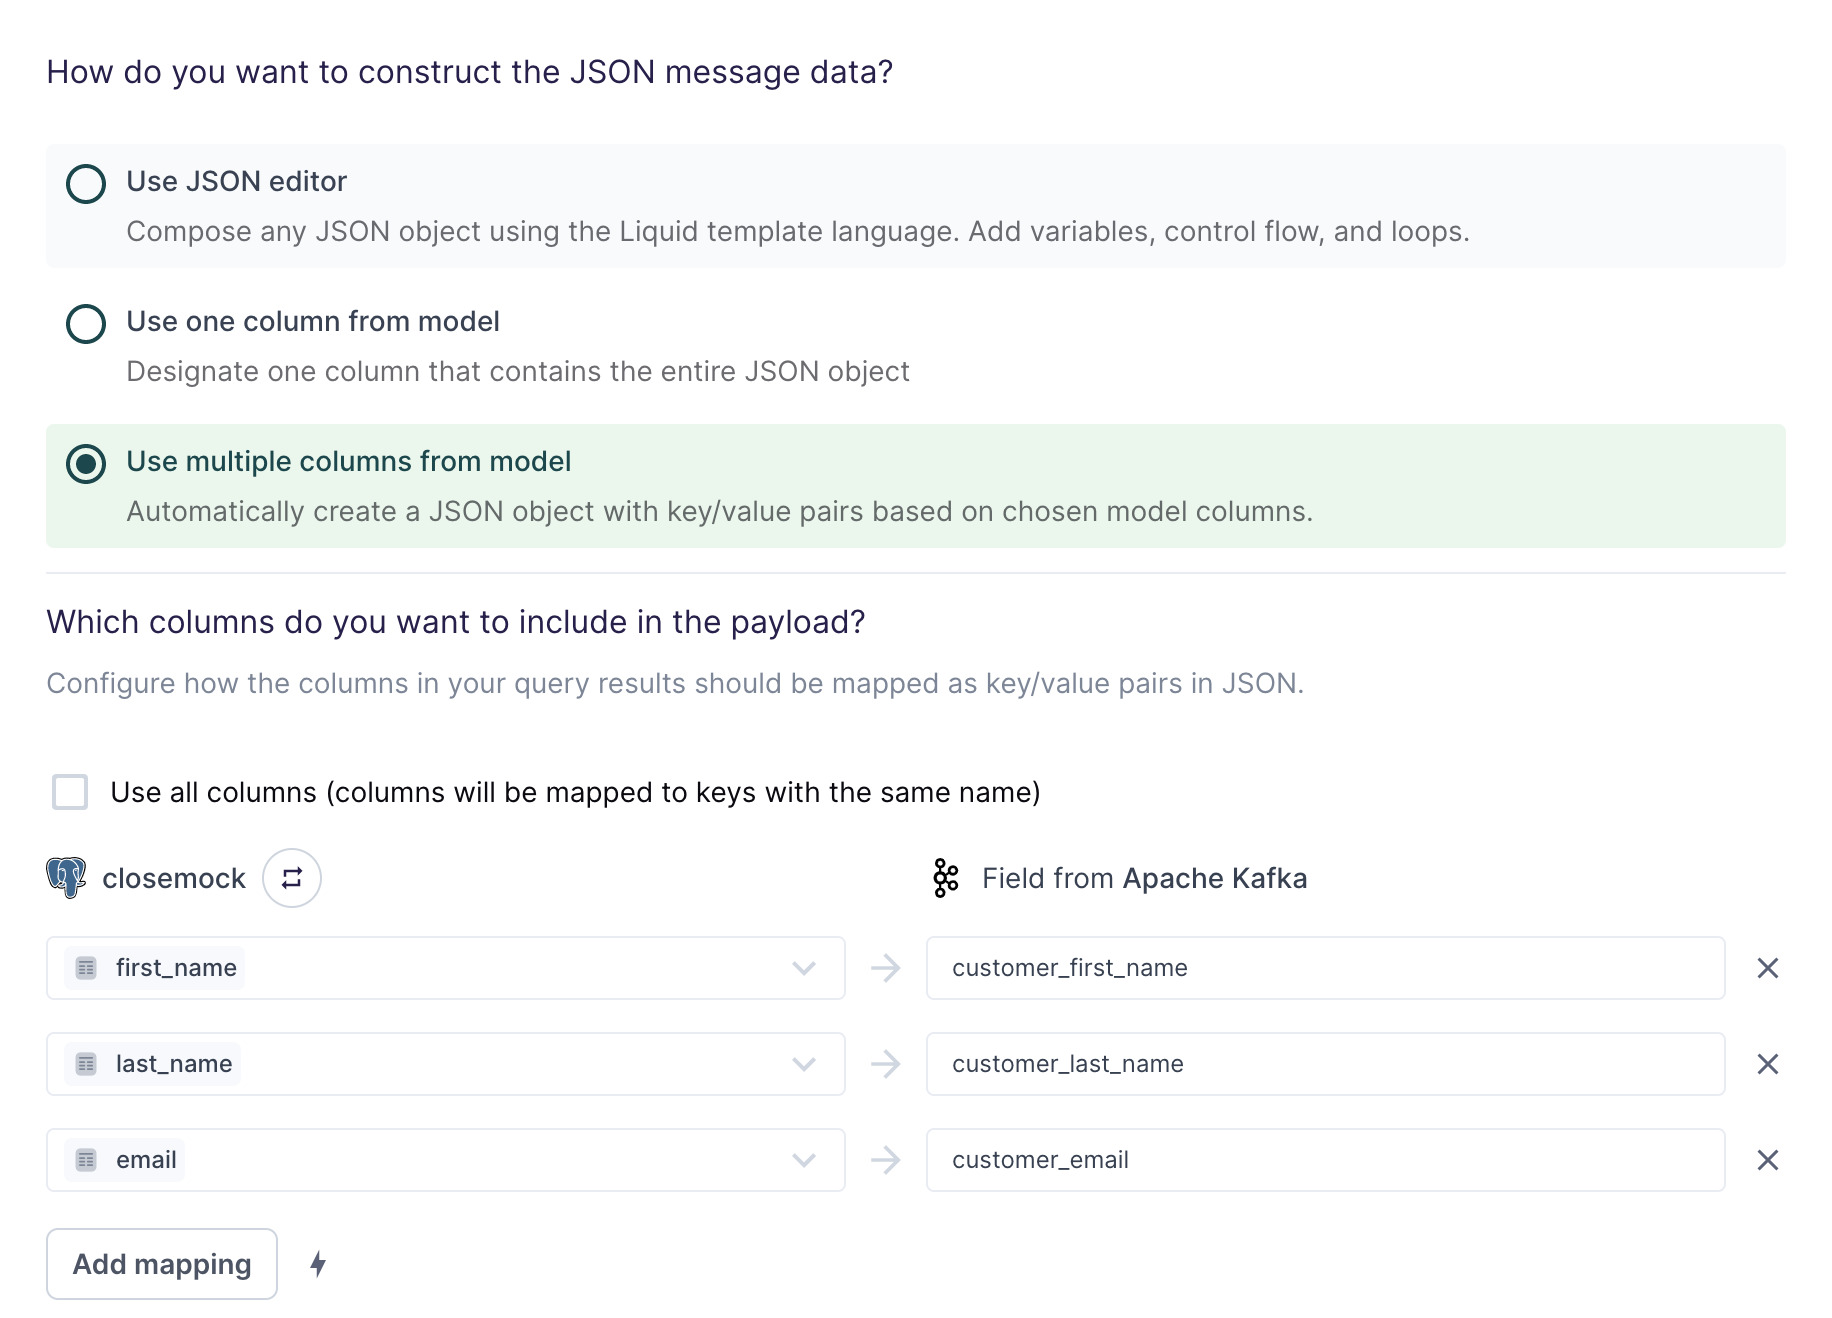
For the simplest use cases, Hightouch can construct a JSON object with key/value pairs based on multiple columns in your model.
Suppose your model looks like this:
| first_name | last_name | |
|---|---|---|
alice.doe@example.com | Alice | Doe |
bob.doe@example.com | Bob | Doe |
carol.doe@example.com | Carol | Doe |
The field mapping in the preceding screenshot would generate the following message data for the first row:
{
  "customer_first_name": "Alice",
  "customer_last_name": "Doe",
  "customer_email": "alice.doe@example.com"
}
You can use the field mapper to rename fields. For example, first_name can
be mapped to customer_first_name.
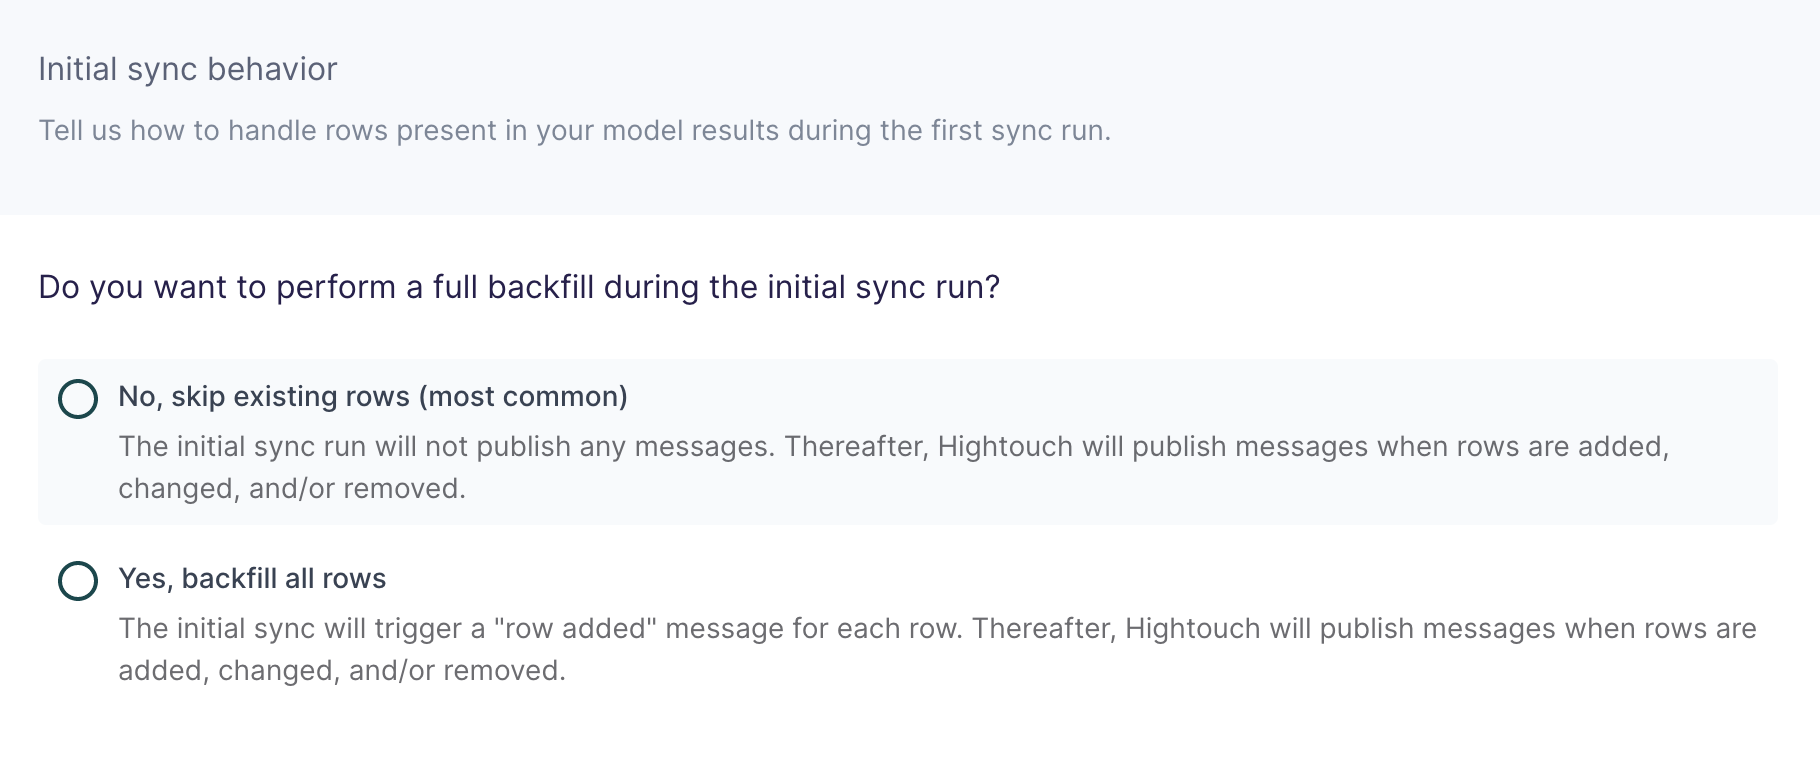
Configure initial sync behavior
In this step, you tell Hightouch how to handle rows present in your model results during the first sync run.
Certain workflows may require performing a backfill of all rows during the initial sync. For other use cases, you might only want to send messages in response to future data changes.
Tips and troubleshooting
Common errors
To date, our customers haven't experienced any errors while using this destination. If you run into any issues, please don't hesitate to . We're here to help.
Live debugger
Hightouch provides complete visibility into the API calls made during each of your sync runs. We recommend reading our article on debugging tips and tricks to learn more.
Sync alerts
Hightouch can alert you of sync issues via Slack, PagerDuty, SMS, or email. For details, please visit our article on alerting.