| Audience | Marketers |
| Prerequisites | Completed schema setup by your data team |
Audiences define the group of users or accounts you want to target in your campaigns. You can build one visually with filters or describe the audience you want to the Agent — either way, you review the logic, preview the results, and activate the audience from the same workflow.
What you'll learn
After reading this article, you’ll know how to:
- Create a new audience in Customer Studio
- Apply filters to define and refine audience membership
- Preview and validate audience results
- Limit and control audience size
- Analyze and reuse audiences
- Sync audiences to destinations
Overview
The audience builder is where you define who qualifies for an audience using your warehouse data. You add filters, preview the results, refine the logic, and save the audience for use in syncs and journeys.
You can:
- Build an audience visually using properties, events, relationships, traits, audiences, and journey participation
- Use the Agent to describe the segment you want in natural language and refine its draft in the same builder
- Preview and validate the audience before saving
- Analyze, reuse, and sync the audience after it's created
Both paths converge in the same builder: you preview, validate, and save before syncing. Use the Agent when you're not sure which fields or events to use, or when you want help refining an existing audience.
Once created, audiences can be:
Audiences are built from models configured by your data team. These models define the source data you’ll use to segment users, accounts, or other entities.
Audience types (batch vs real-time)
Hightouch supports both batch and real-time audience evaluation.
| Type | Description | Example use |
|---|---|---|
| Batch | Evaluated on a schedule or manually refreshed. | Weekly “High-LTV Customers” campaign |
| Real-time | Evaluated continuously as new events arrive. | “Users who searched flights in the last 10 minutes” |
Use batch audiences when you need stable segments that update on a predictable cadence, such as lifecycle or nurture campaigns.
Use real-time audiences when you want to respond instantly to user behavior like triggering an ad, notification, or personalization within seconds of an event.
Create and refine audiences (core workflow)
You can build an audience two ways: configure filters yourself in the visual builder, or describe the audience to the Agent and refine its draft. The steps below cover the visual builder. For the Agent workflow, see Build audiences with AI.
For questions that reach beyond a single audience — like deciding which segment to target next — use the standalone Agents workspace instead.
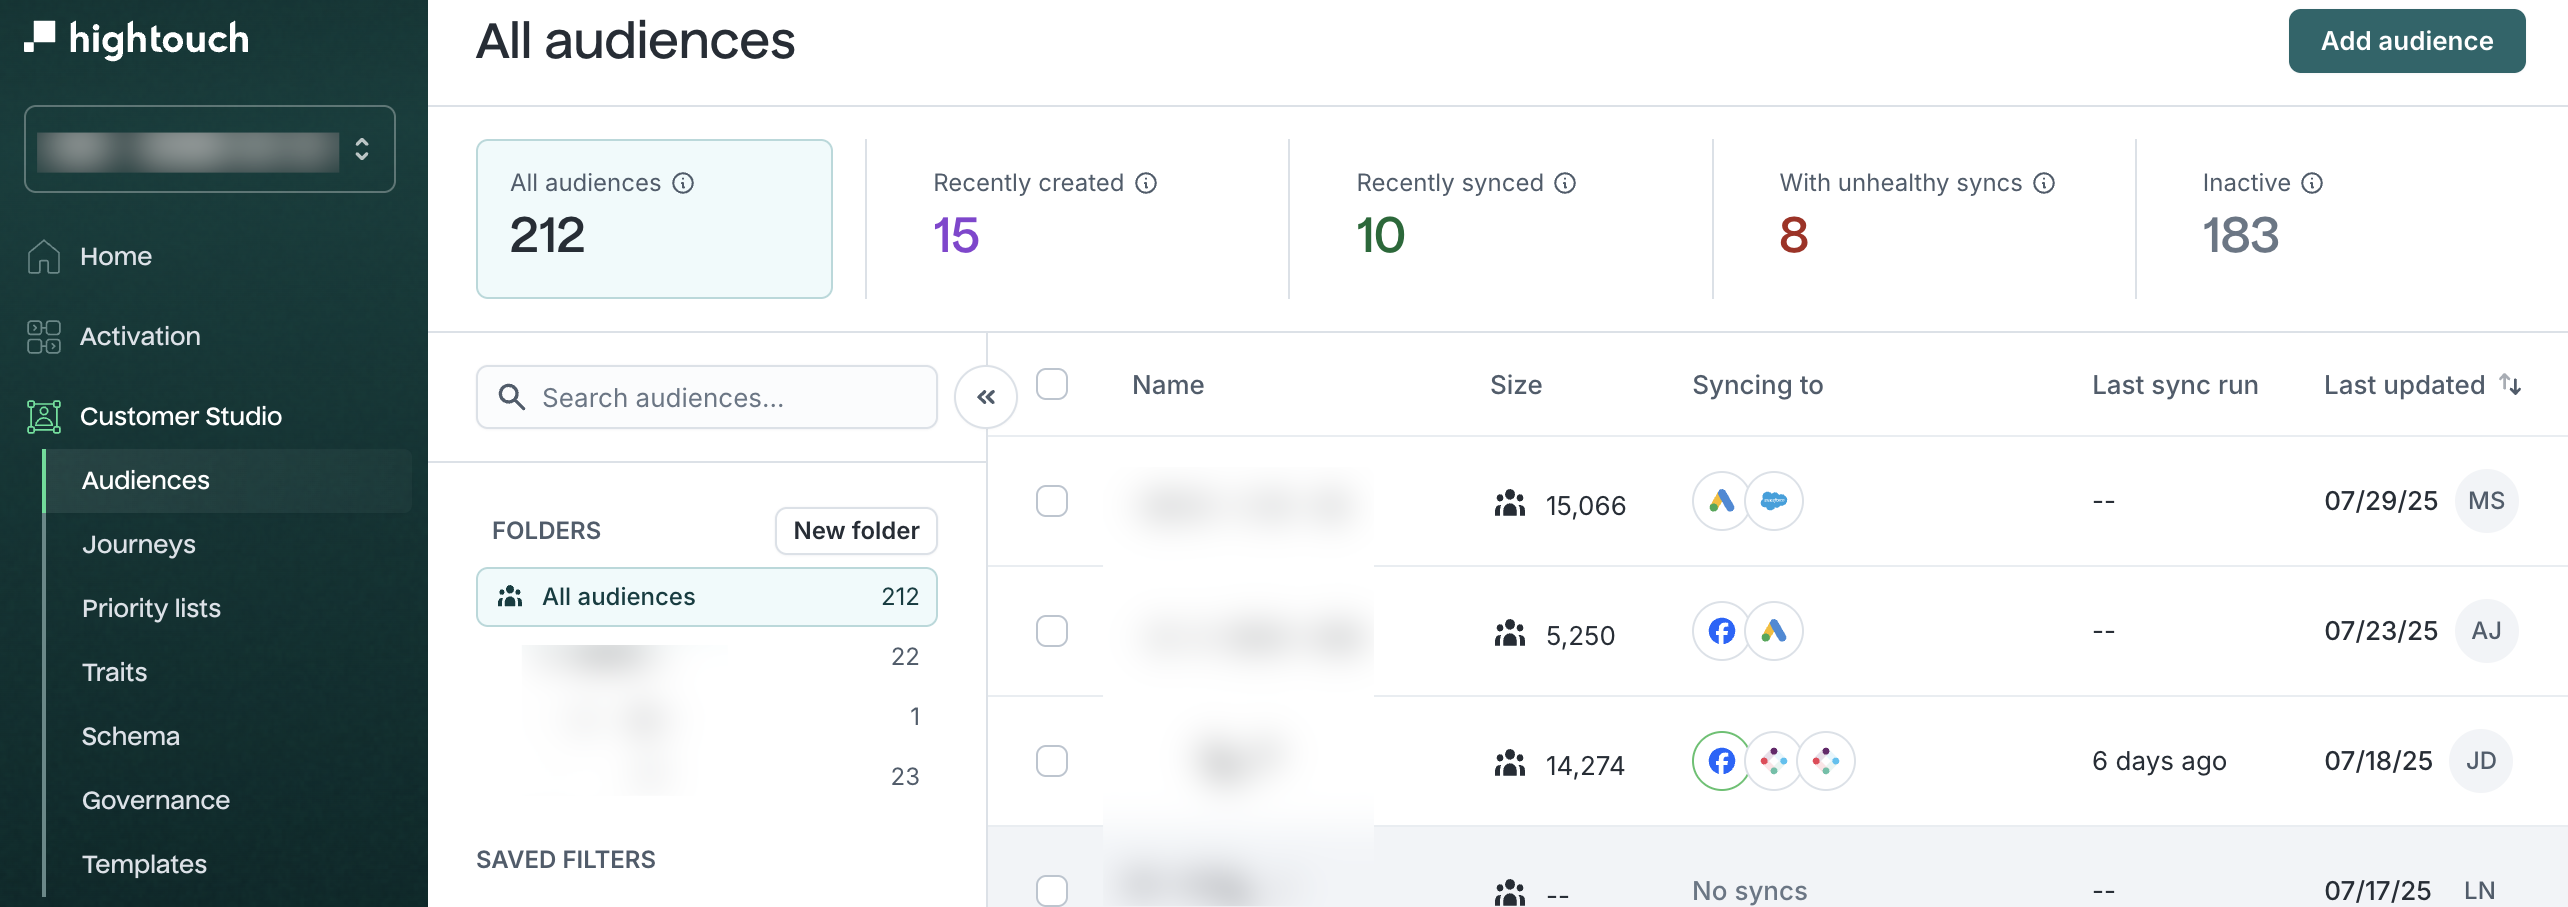
Step 1: Create a new audience
- Go to Customer Studio → Audiences.
- Click
Add audience.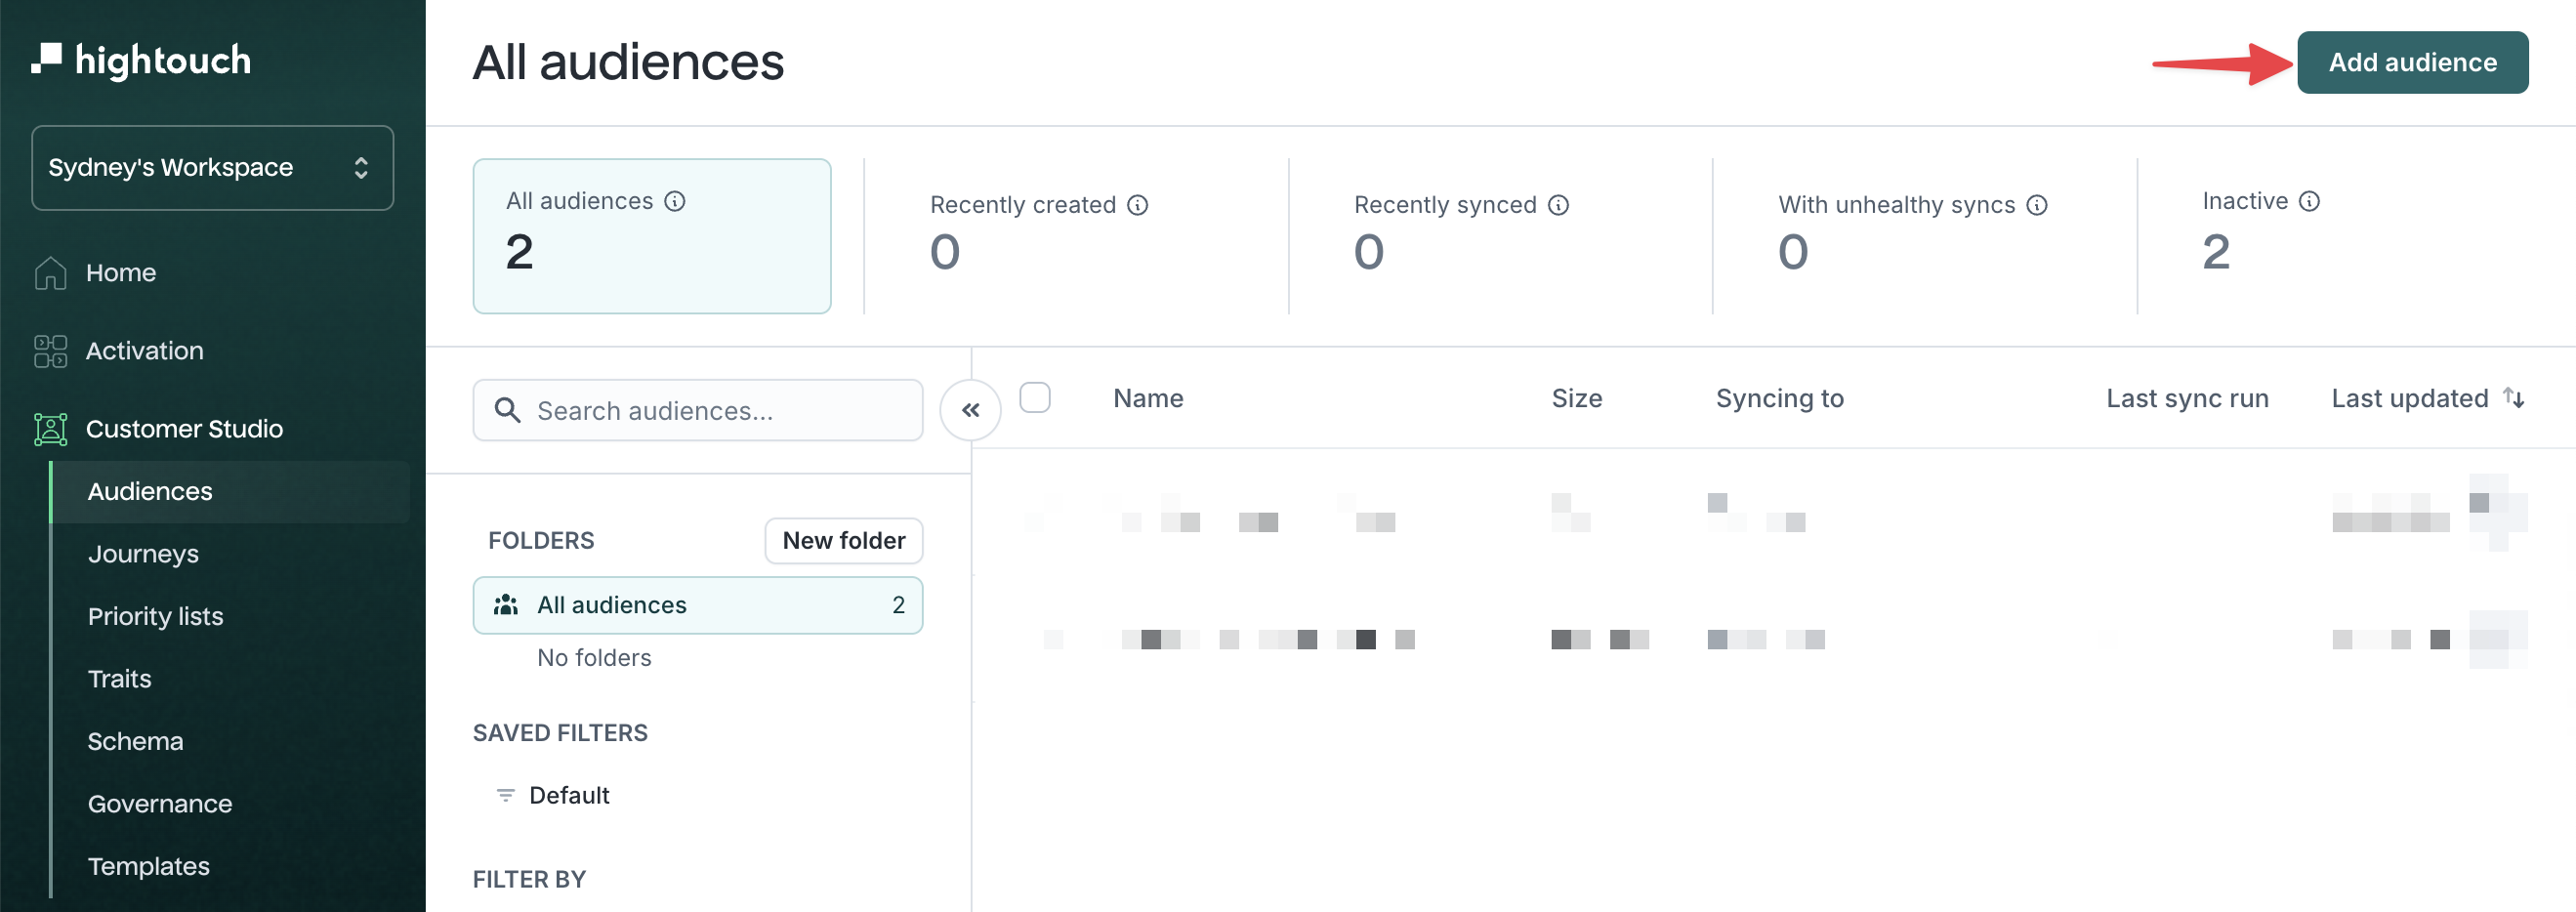
- Select a Parent Model to segment (for example,
Users,Accounts, orDevices).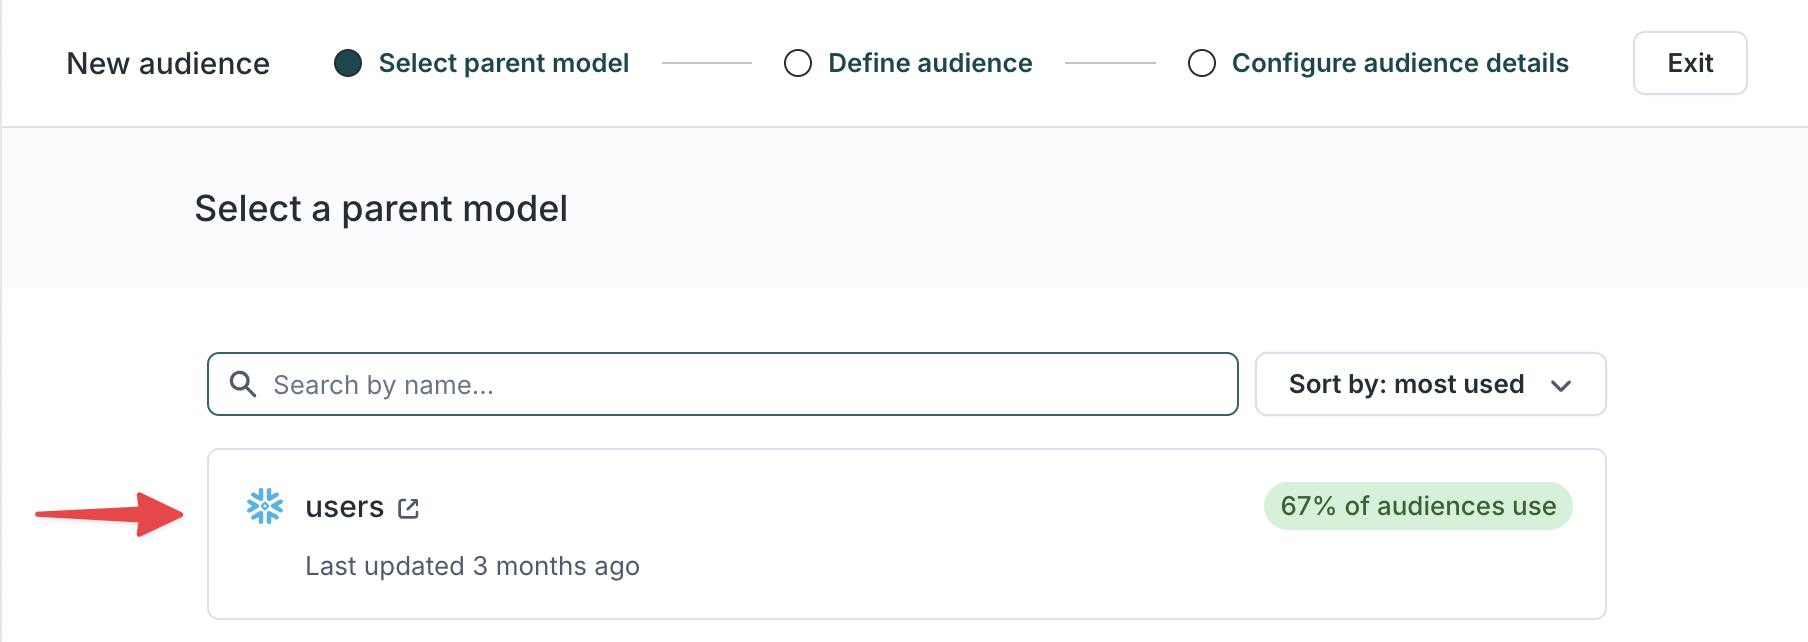
- Name your audience (for example, High-Value Customers) and add an optional description.
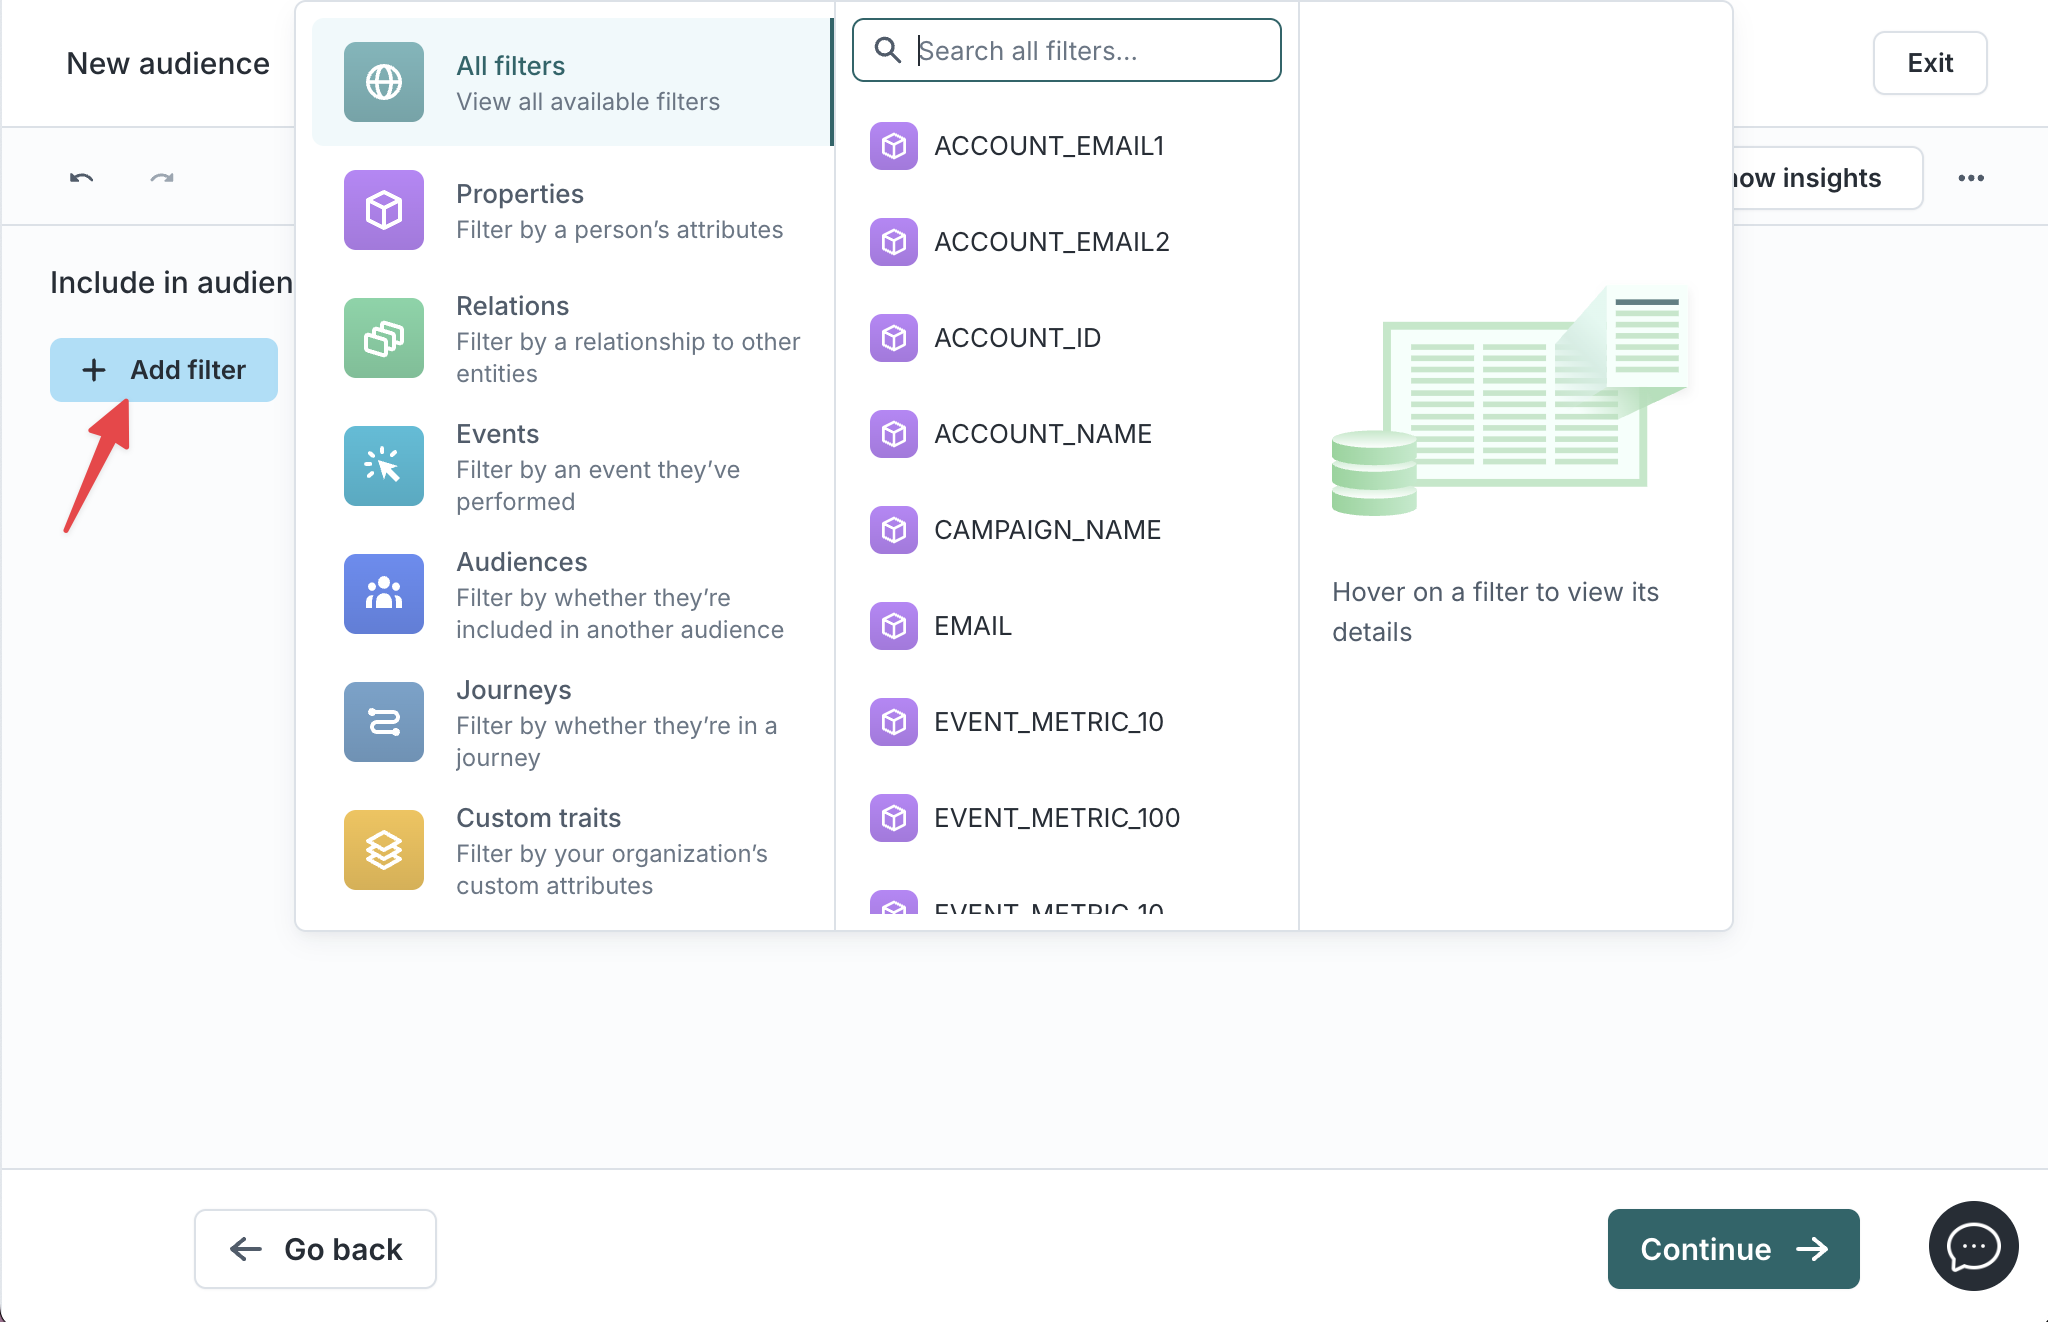
Step 2: Apply filters
Start from an audience template, configure filters from scratch, or ask the Agent to draft the audience for you and refine its output in the builder.
| Filter type | Use it to filter by… | Example filters |
|---|---|---|
| Properties | Columns on the parent model | email contains "@gmail.com" |
| Relations | Linked records (purchases, accounts) | has Purchase where amount > 100 |
| Events | Actions users performed | Product Viewed within last 30 days |
| Audiences | Membership in another audience | is in VIP Members |
| Journeys | Participation in a journey | currently in Abandoned Cart Journey |
| Traits | Custom or computed fields | customer_score > 80 |
If you find yourself recreating the same logic across multiple audiences, convert that logic into a reusable trait. Traits help maintain consistent segmentation.
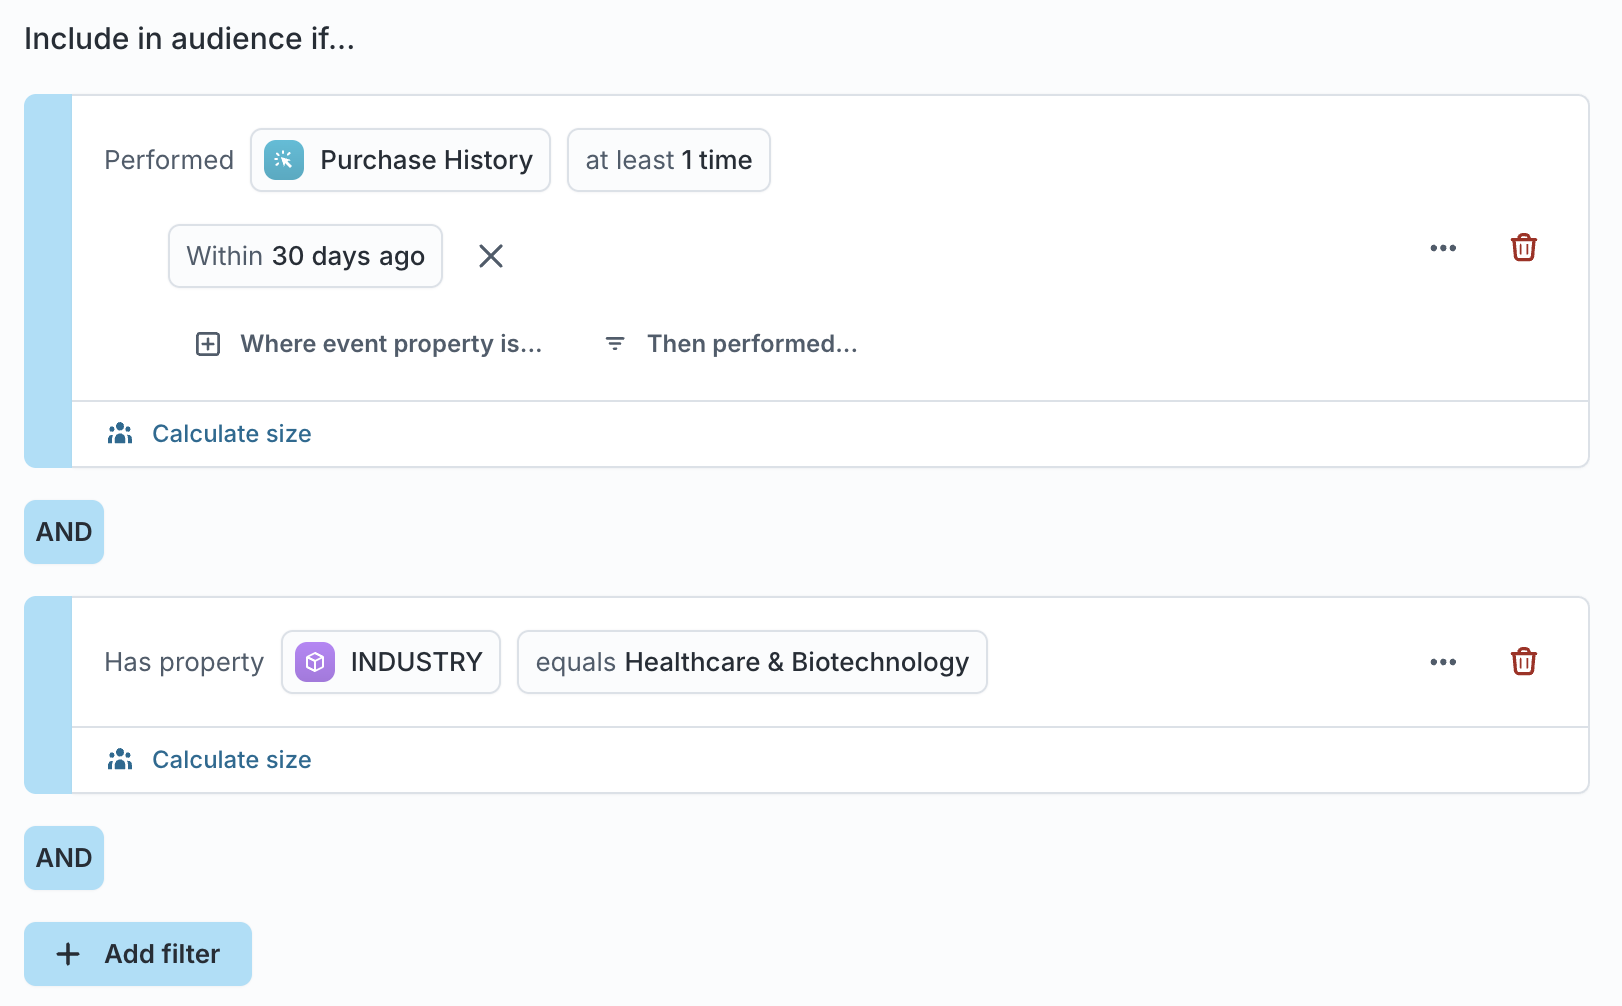
Combine filters with AND/OR logic
Use AND, OR, and nested condition groups to express complex logic.
Example:
Include users who made a purchase or added to cart, and belong to the Gold tier.
| Group | Condition |
|---|---|
| (A) | has Purchase where amount > 100 OR added to cart within last 7 days |
| (B) | loyalty_tier equals "Gold" |
| Audience logic | (A) AND (B) |
Nested condition groups in related model filters
When filtering on related models, you can nest AND/OR condition groups inside the related model filter itself. This lets you express logic like "has a purchase where (amount > 100 AND category = 'Electronics') OR (amount > 50 AND category = 'Accessories')."
To add a nested group, open the ... menu on a related model filter and select Add "OR" group to create a nested condition group within the filter block.
Unexpectedly small results often indicate a one-to-many relationship mismatch or overlapping event time windows. Check your schema relationships and event time filters.
Step 3: Preview and validate your audience
After defining filters, preview your audience to confirm that your logic returns the expected members. This step matters whether you built the audience visually or with the Agent. Either way, confirm the audience matches your intent before activation.
- Click
Calculate sizeto estimate audience size. - Click the member count (for example,
110 members) to preview sample records.
- Ask the Agent to summarize the audience, explain which conditions are excluding members, or suggest changes.
Use Sampling to test filters and preview large datasets without querying your entire warehouse.
Limit audience size
Limit audience size to focus on your highest-value members, sample randomly, or run controlled experiments on an audience subset.
-
Click the
Limit audience sizeicon. -
Choose a limiting method:
- Top or Bottom — select the top or bottom N members sorted by a column (for example,
purchase_amountorlast_purchase_date). - Random — select a random sample of the specified size. Random sampling does not require a sort column and returns a different set of members on each evaluation.
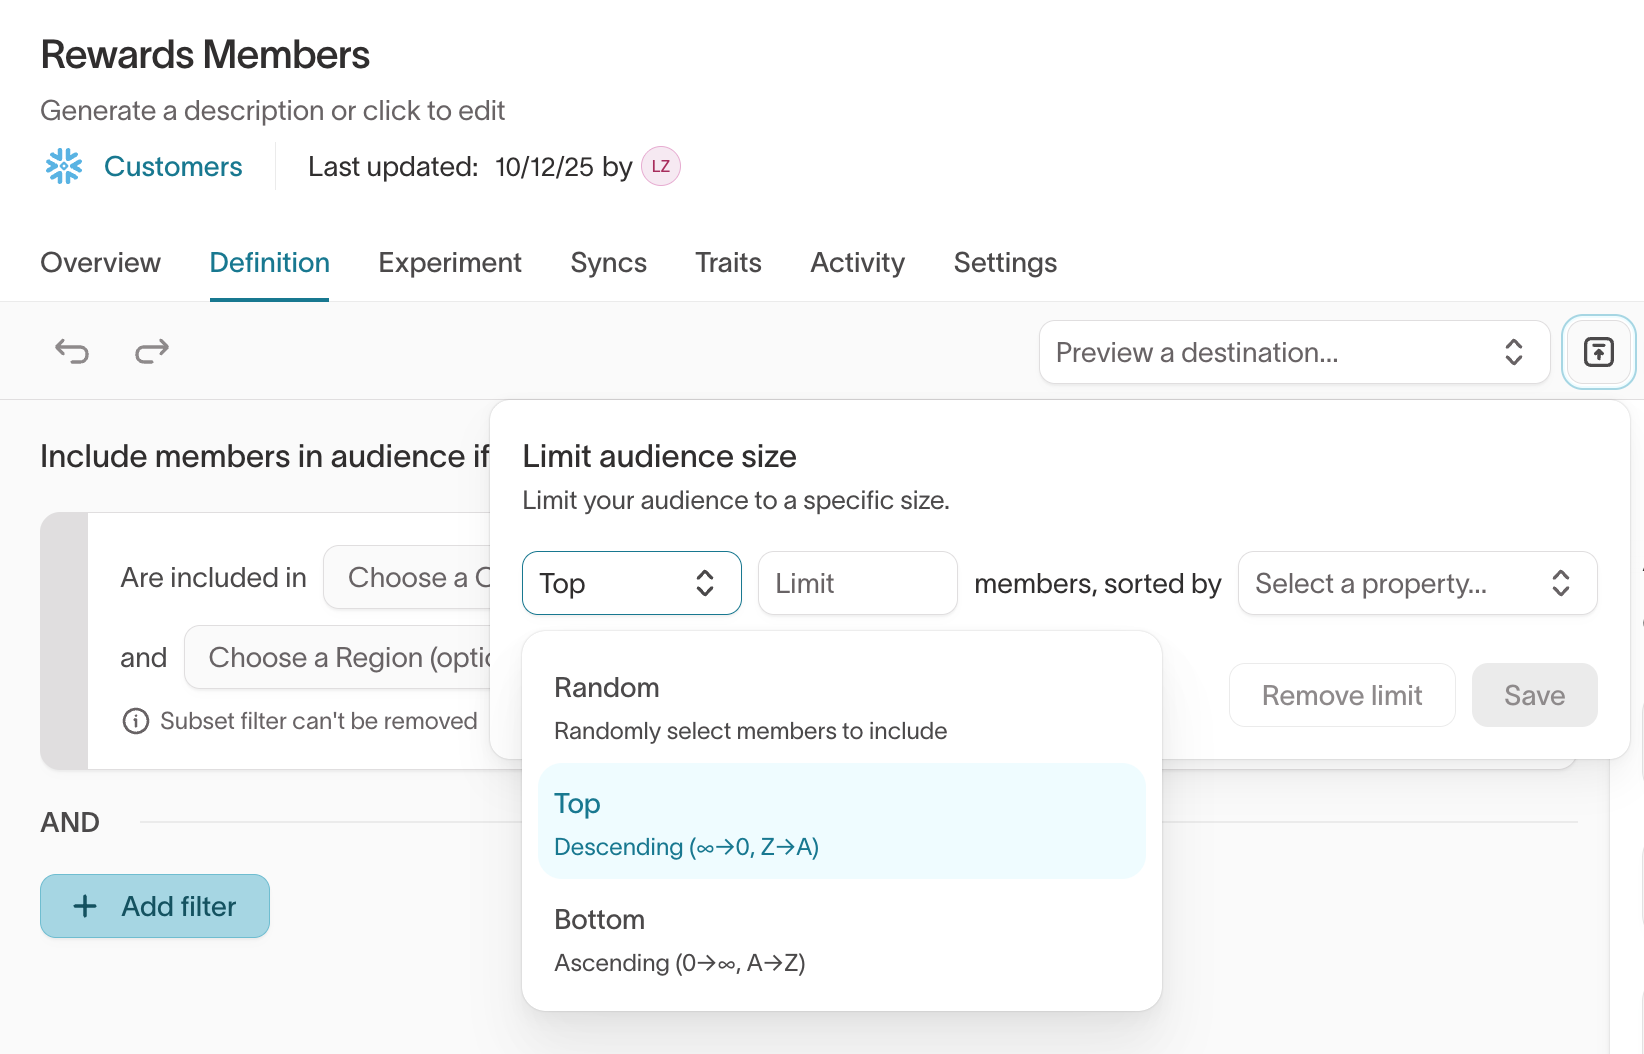
- Top or Bottom — select the top or bottom N members sorted by a column (for example,
You can also limit by percentile (for example, top 25th percentile of spend). The percentile option appears only for numeric columns without value suggestions enabled.
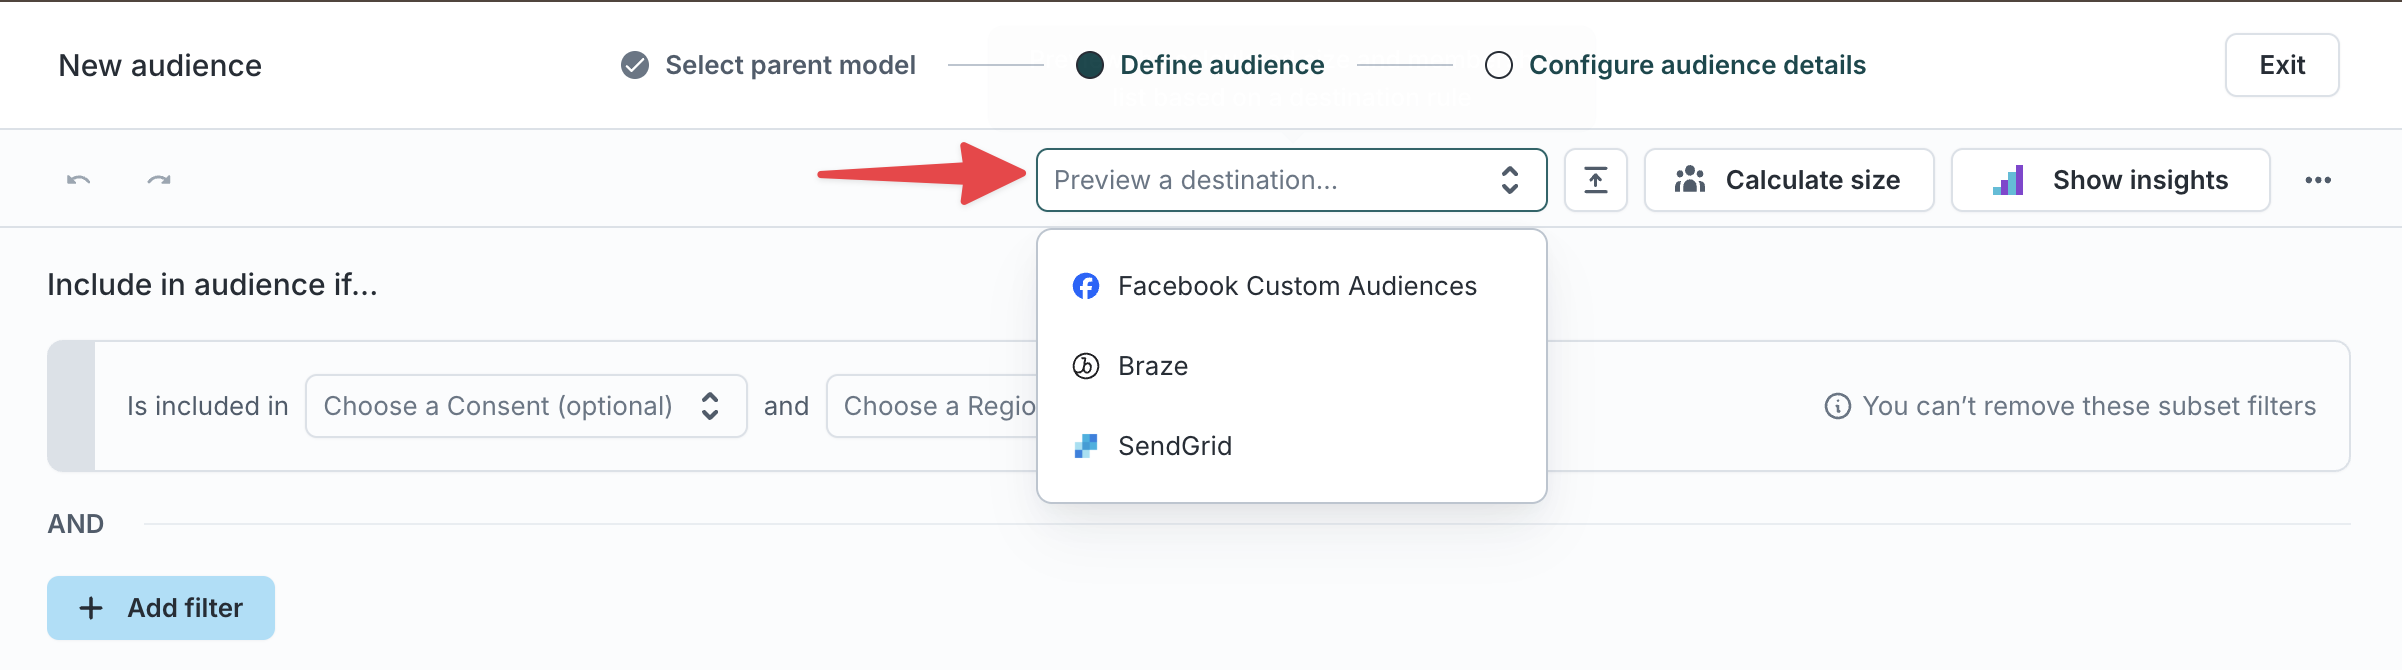
Preview with destination rules
If your workspace uses destination rules, you can select a destination to preview how the audience will sync before saving.
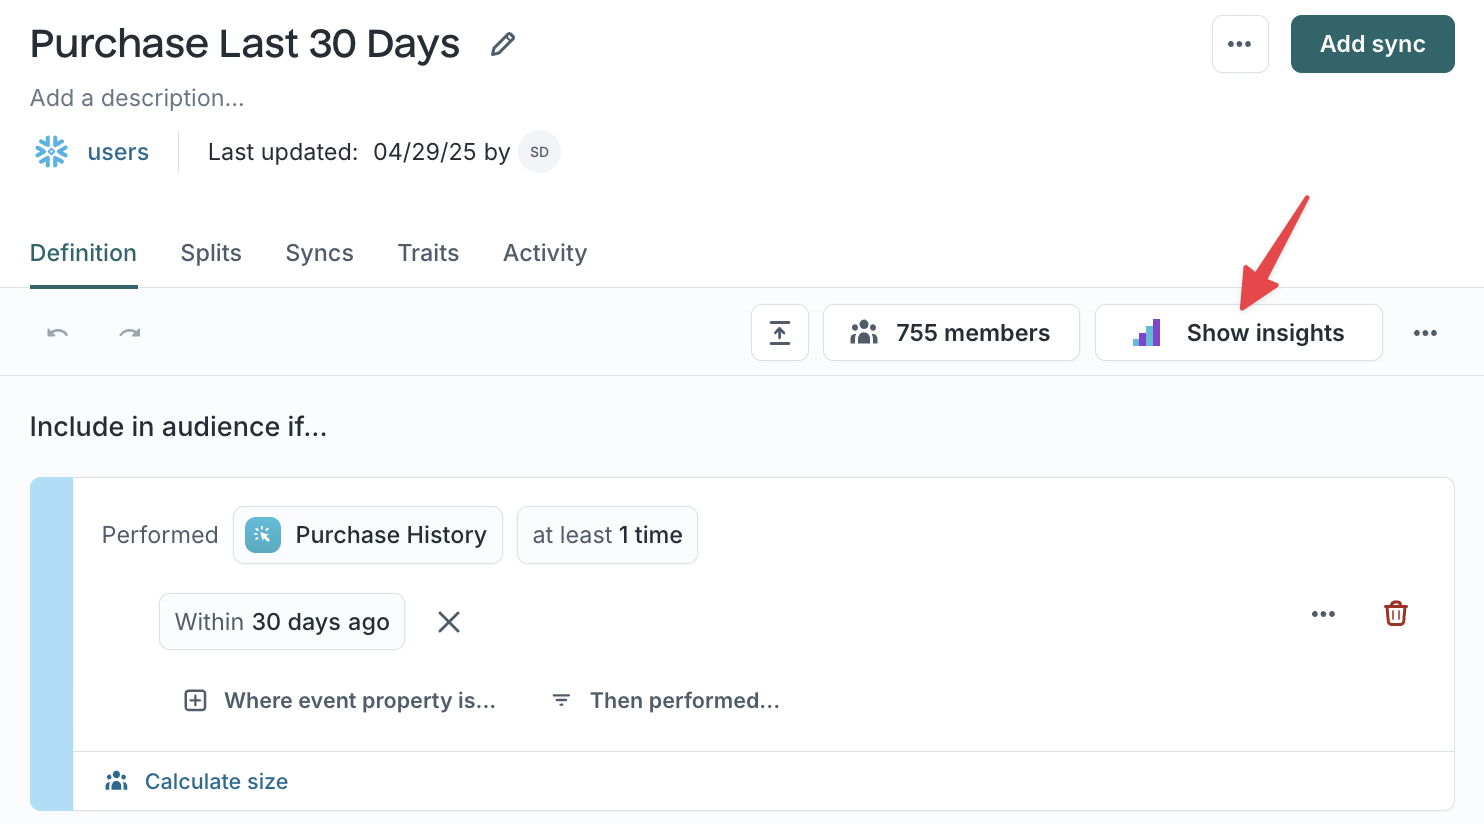
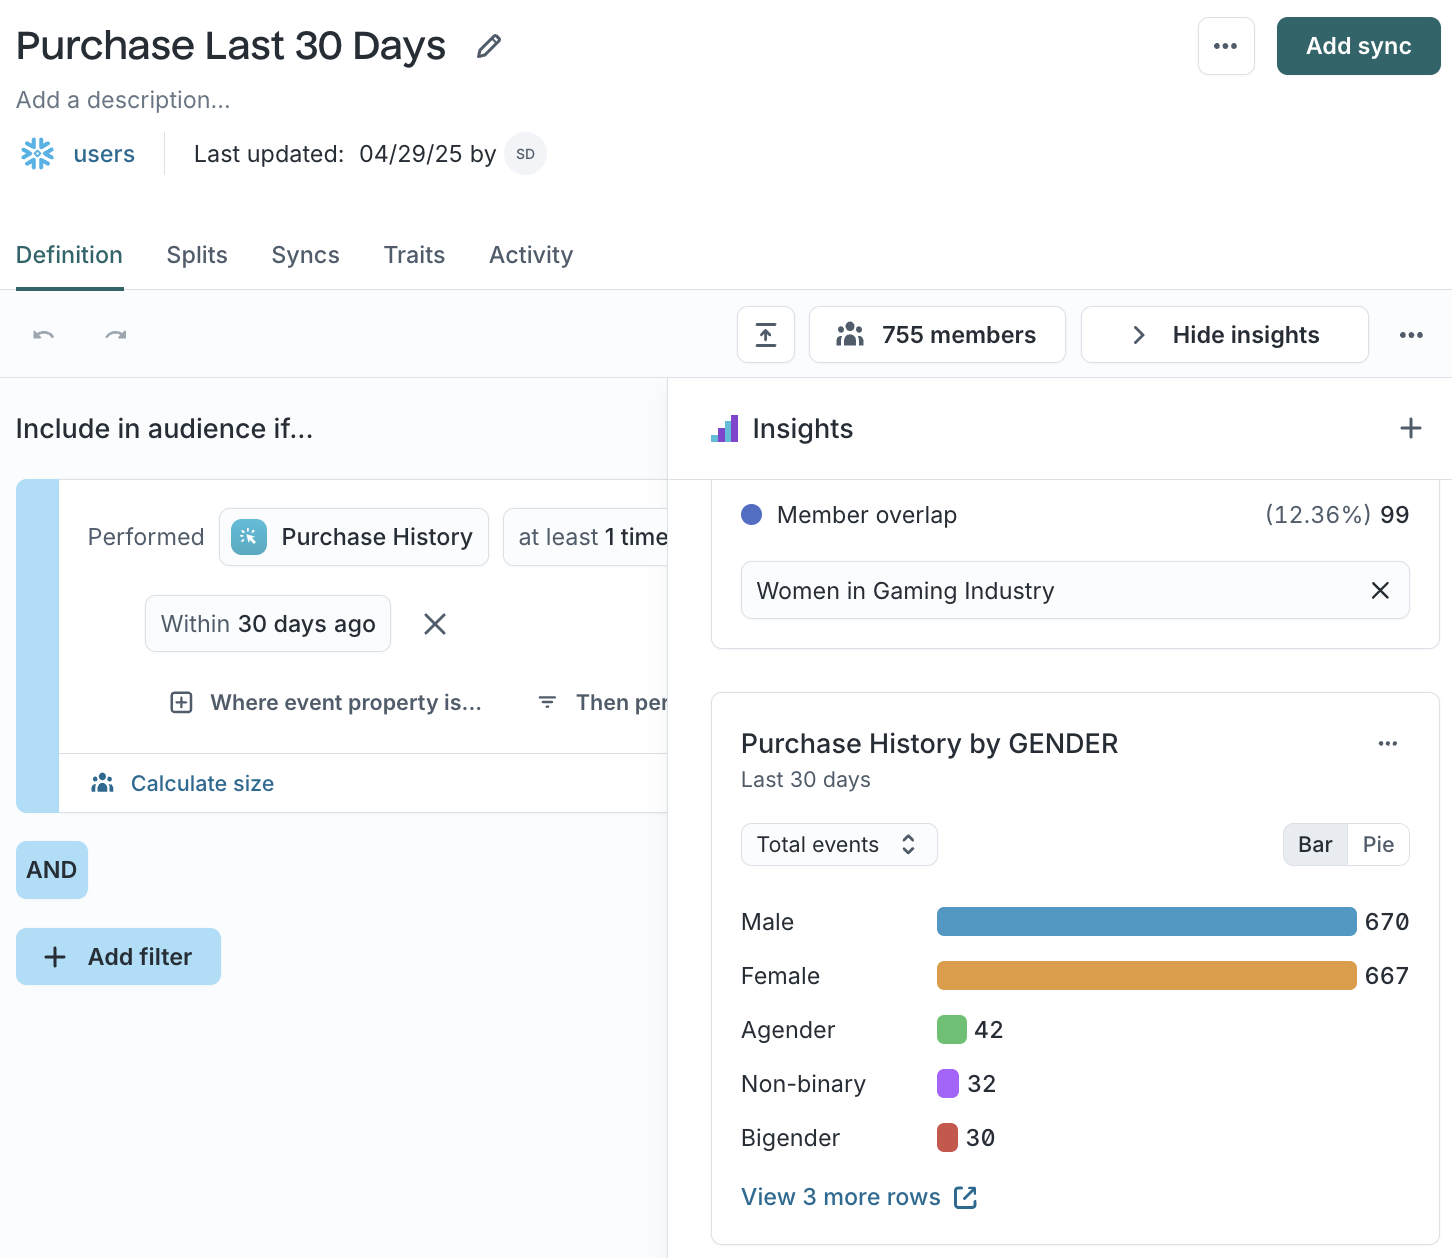
Step 4: Analyze your audience
Use Insights to analyze composition and overlap.
- Click
Show Insightsto open the panel.- Overlap compares shared members with another audience.
- Breakdown displays distribution by trait, geography, or behavior.
You can also ask the Agent to explain the audience, identify which conditions are excluding members, or suggest tweaks based on what Insights surfaces.
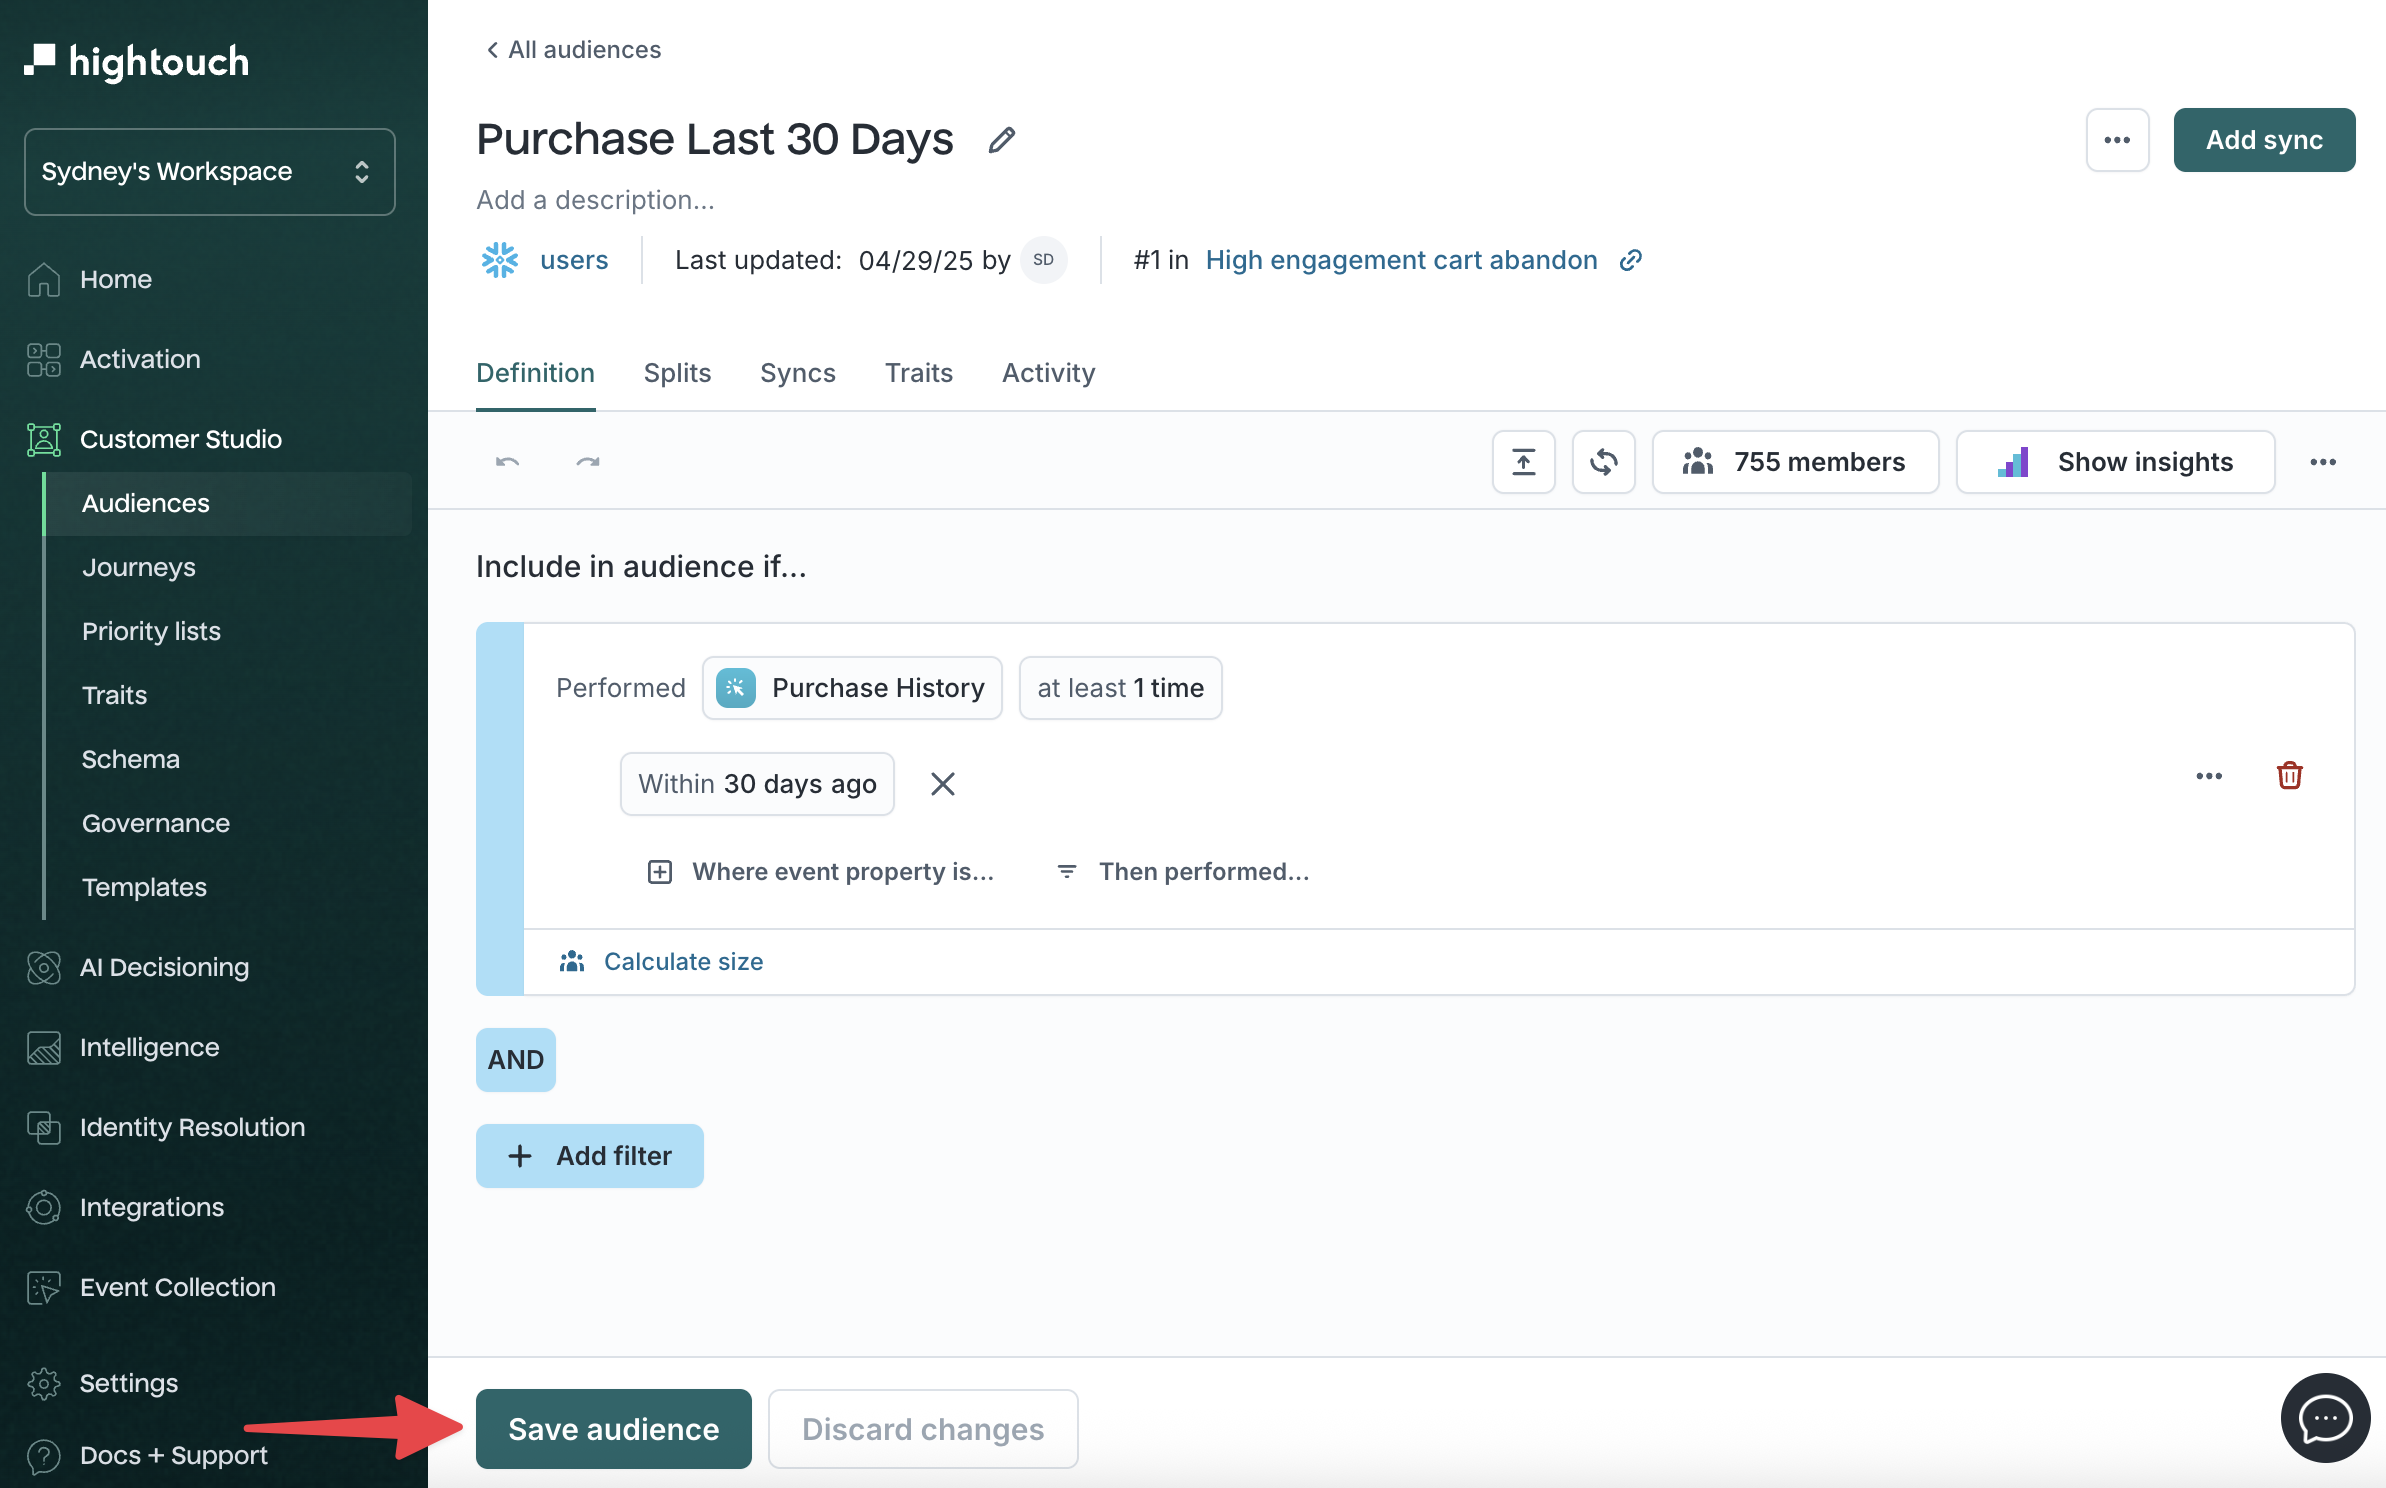
Step 5: Save and reuse audiences
Click Save audience to finalize your setup.
Reuse audiences with templates
To create repeatable logic, apply an audience template directly in the builder. Templates let you standardize approved audience definitions for faster setup.
Clone audiences
To duplicate an existing audience, open the overflow menu and click Clone.
You can modify filters, rename the copy, and choose which syncs to duplicate.
Step 6: Sync to destinations
After saving, activate your audience by syncing to tools such as CRMs, ESPs, or ad platforms.
Learn more in Sync audiences.
Run a test sync to a sandbox destination before enabling production syncs. This helps validate column mappings and audience behavior without affecting live campaigns.
Advanced filtering and configuration
Use these optional tools to create more sophisticated or large-scale audiences.
Filter using related / event models
If your data includes relationships (for example, Users → Orders), you can build filters across connected models. This lets you target users based on behaviors or attributes in other tables.
Example
"Target users who placed an order worth more than $100."
If related models or expected fields are missing, your data team may need to adjust schema relationships or merge columns.
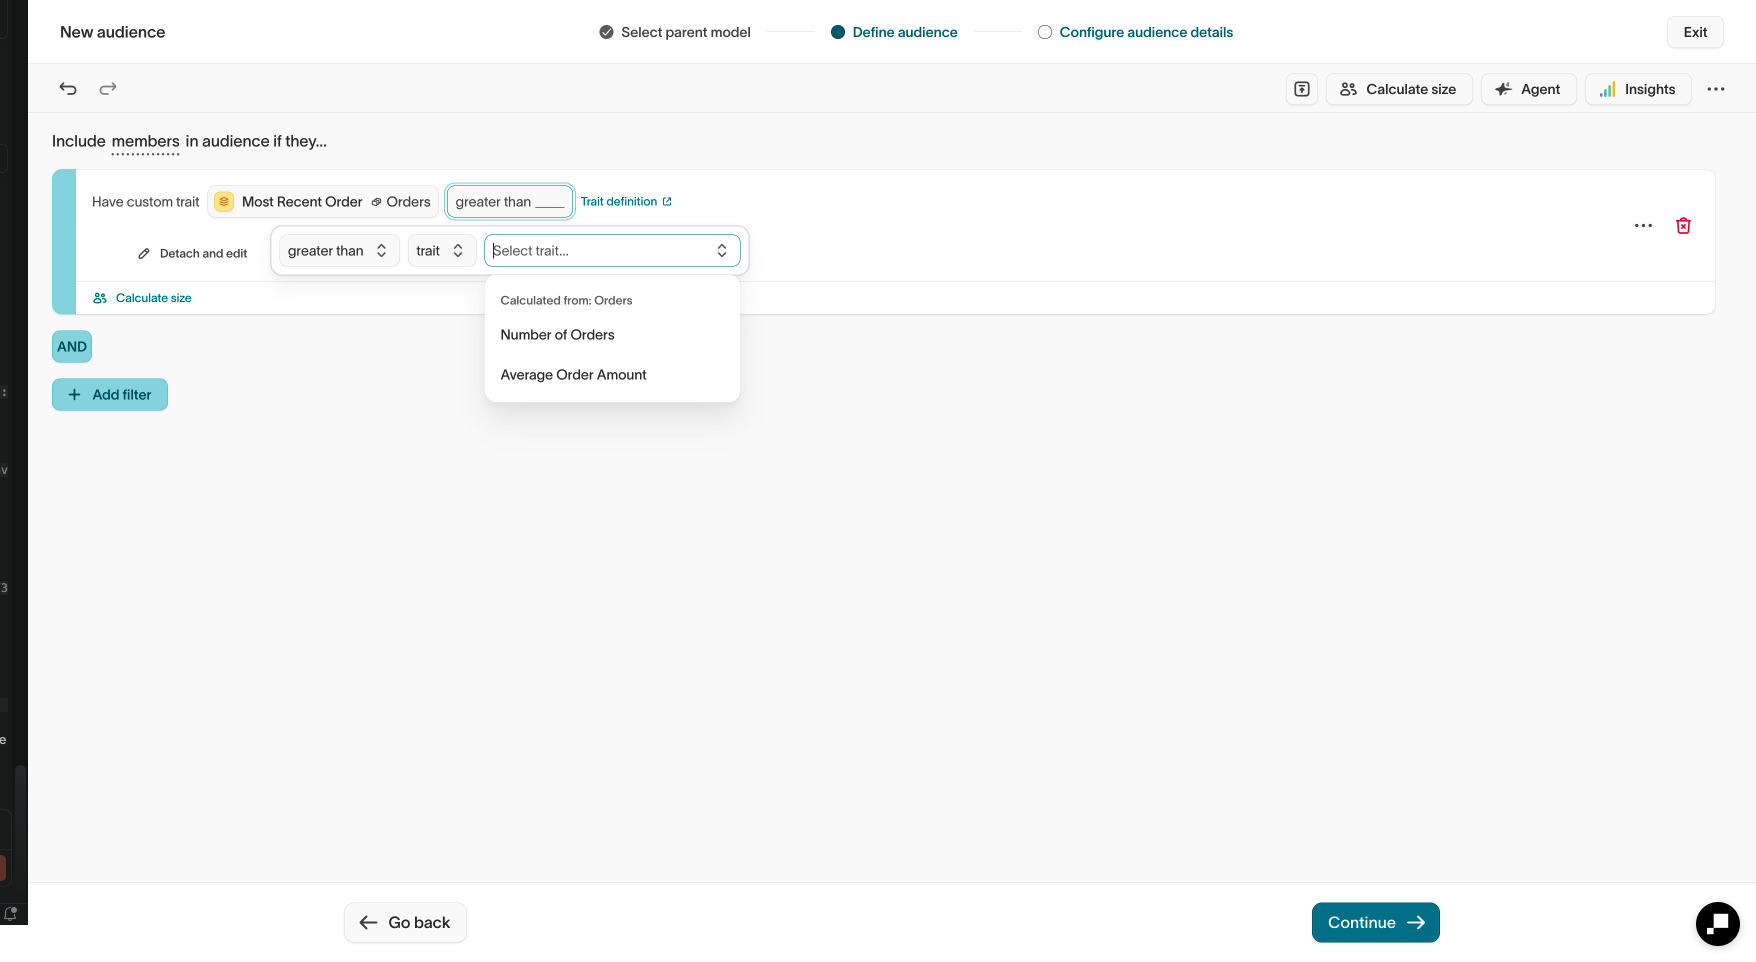
Compare traits and columns in filters
Trait comparison lets you filter audiences by comparing two column or trait values against each other, rather than comparing a column against a static value. This is useful when the threshold for inclusion depends on per-user data rather than a fixed number.
For example, you can build a filter like lifetime_value > avg_order_value to find users whose lifetime value exceeds their average order — without hardcoding a dollar amount.
When adding a filter condition, you can select a column or trait as the comparison value instead of entering a static value. Choose the second column or trait to compare against, and the filter evaluates each user's row individually.

Filter using nested related / event models
Overview
Nested filtering lets you filter audiences using data across multiple 1:many relationships (e.g. User → Purchases → Items). This allows you to express logic like:
"Target users who have a purchase in the past 30 days where that purchase includes an item in the 'Skincare' category."
You can traverse up to three levels of related or event models to capture richer, real-world relationships.
When to use it
Use nested filtering when you need to build conditions on data that is in a downstream event or related model. Nested filtering is especially useful when you want to combine conditions within sub-models with conditions on the current model.
Example
Schema: User → Purchases → Items
Goal: Find users who have made a purchase in the last 30 days that included a 'Toy' item.
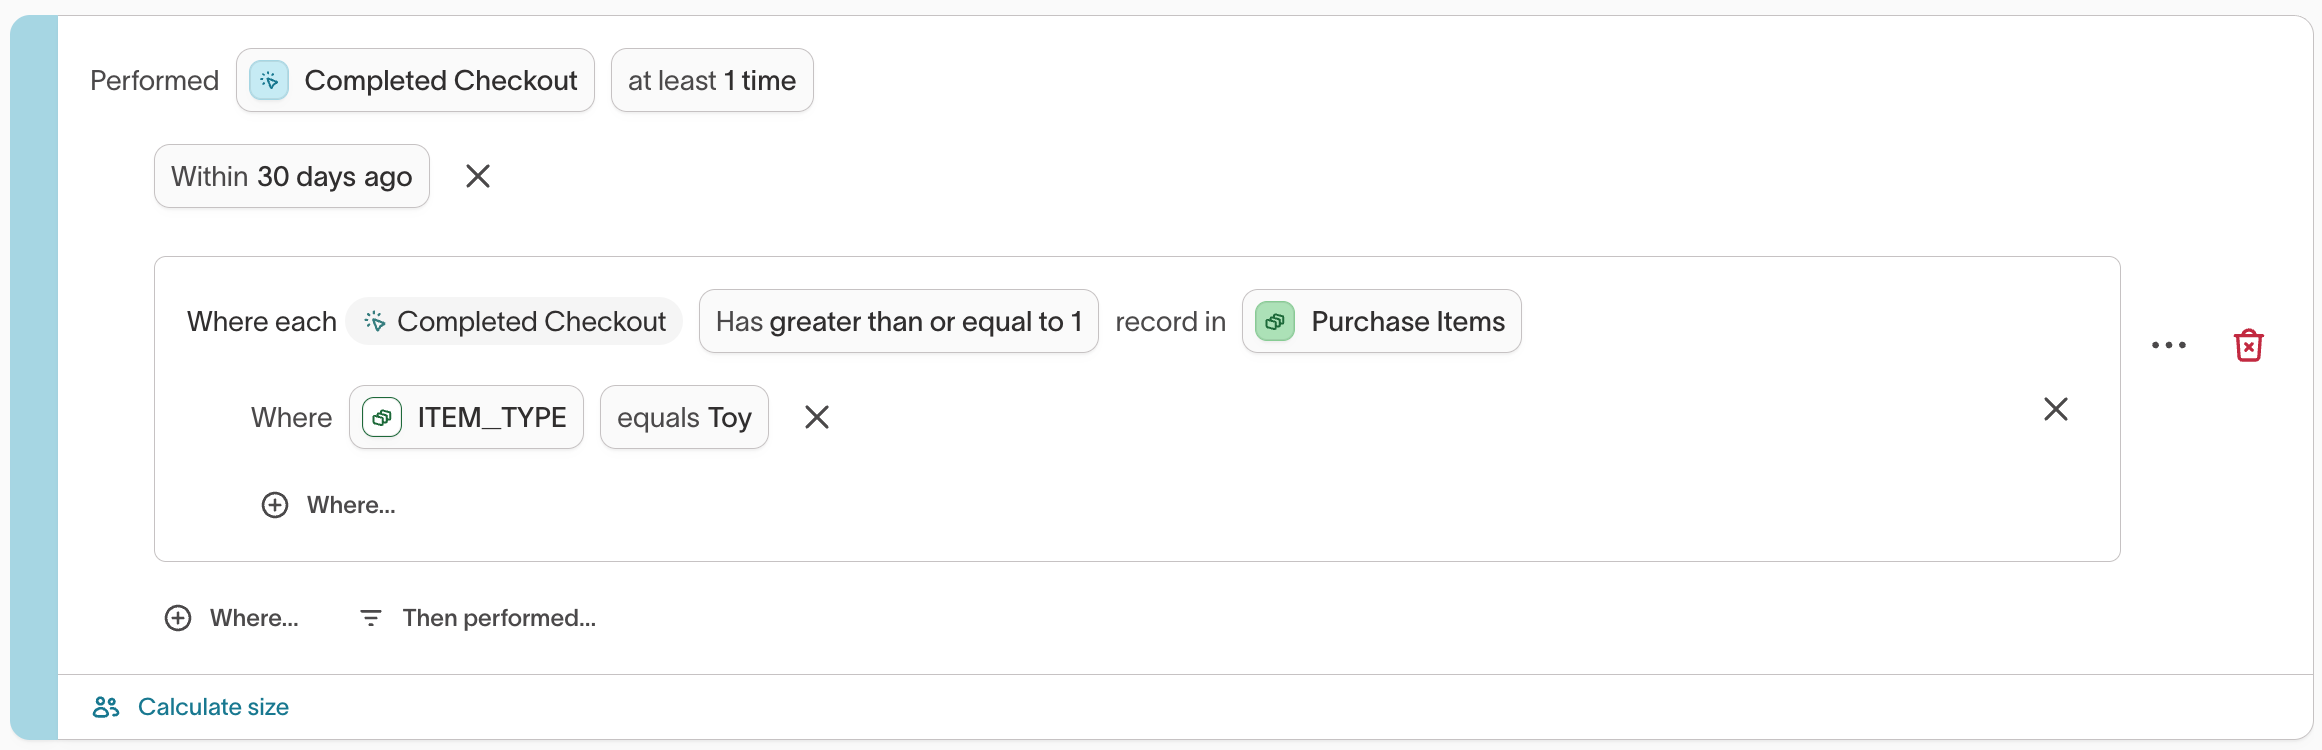
How it works
Each nested block evaluates conditions within its own level.
- The outer block (
Has ≥1 CompletedCheckout) evaluates purchases belonging to the user. - The inner block (
PurchaseItems include item\_type \= 'Toy') evaluates items belonging to each purchase.
In this example, a user qualifies if at least one purchase matches the nested condition. You can also use "Number of" filters at both levels (e.g., "≥3 purchases where for each such purchase, ≥2 items match").
This is different from universal logic (e.g., finding users where all purchases included a 'Toy'). Universal logic queries can be performed via traits.
Limitations
- Only supports traversal up to three levels deep from the parent model.
Nested filtering is an advanced feature intended for users needing to access multiple levels of models. Contact your Customer Success team to enable nested filtering for your workspace.
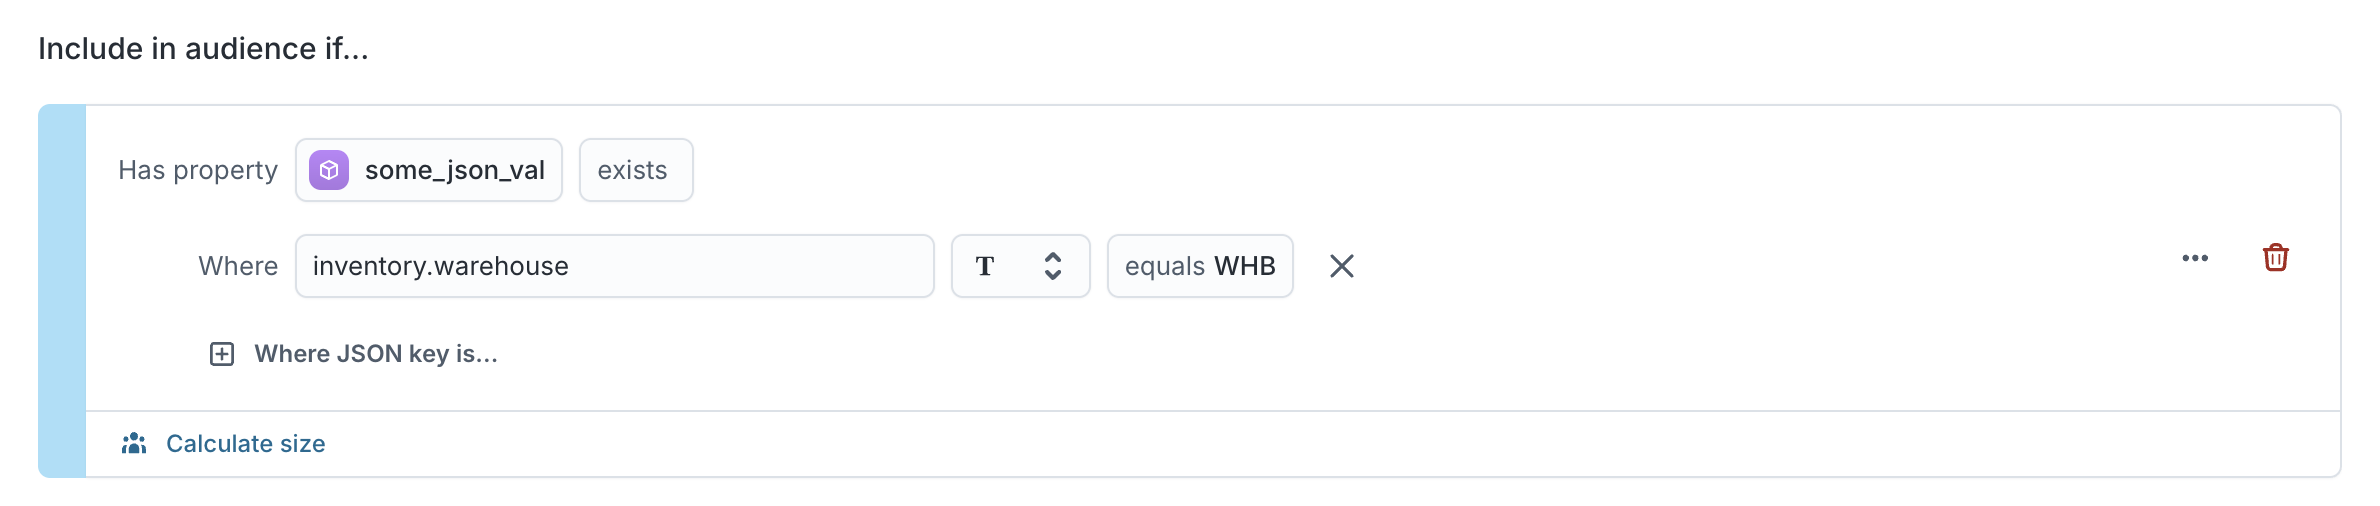
Filter nested JSON data
Some columns contain nested JSON objects or arrays (type unknown JSON).
You can filter inside these structures using dot-path notation to access specific fields.
For example:
booking.product.geo.cityfilters by a nested property inside an object.booking.0filters by the first item in an array.
This is useful when event data or object payloads store multiple attributes within a single column. JSON filtering is supported on parent, event, and related models.
Example JSON
{"inventory":{"on_order":50,"stock":750,"warehouse":"WHB"}, "dimensions":[9, 8, 7]}
{"inventory":{"on_order":10,"stock":120,"warehouse":"WHA"}, "dimensions":[5, 4, 3]}
If the column is on a parent model:
If the column is on an event model:
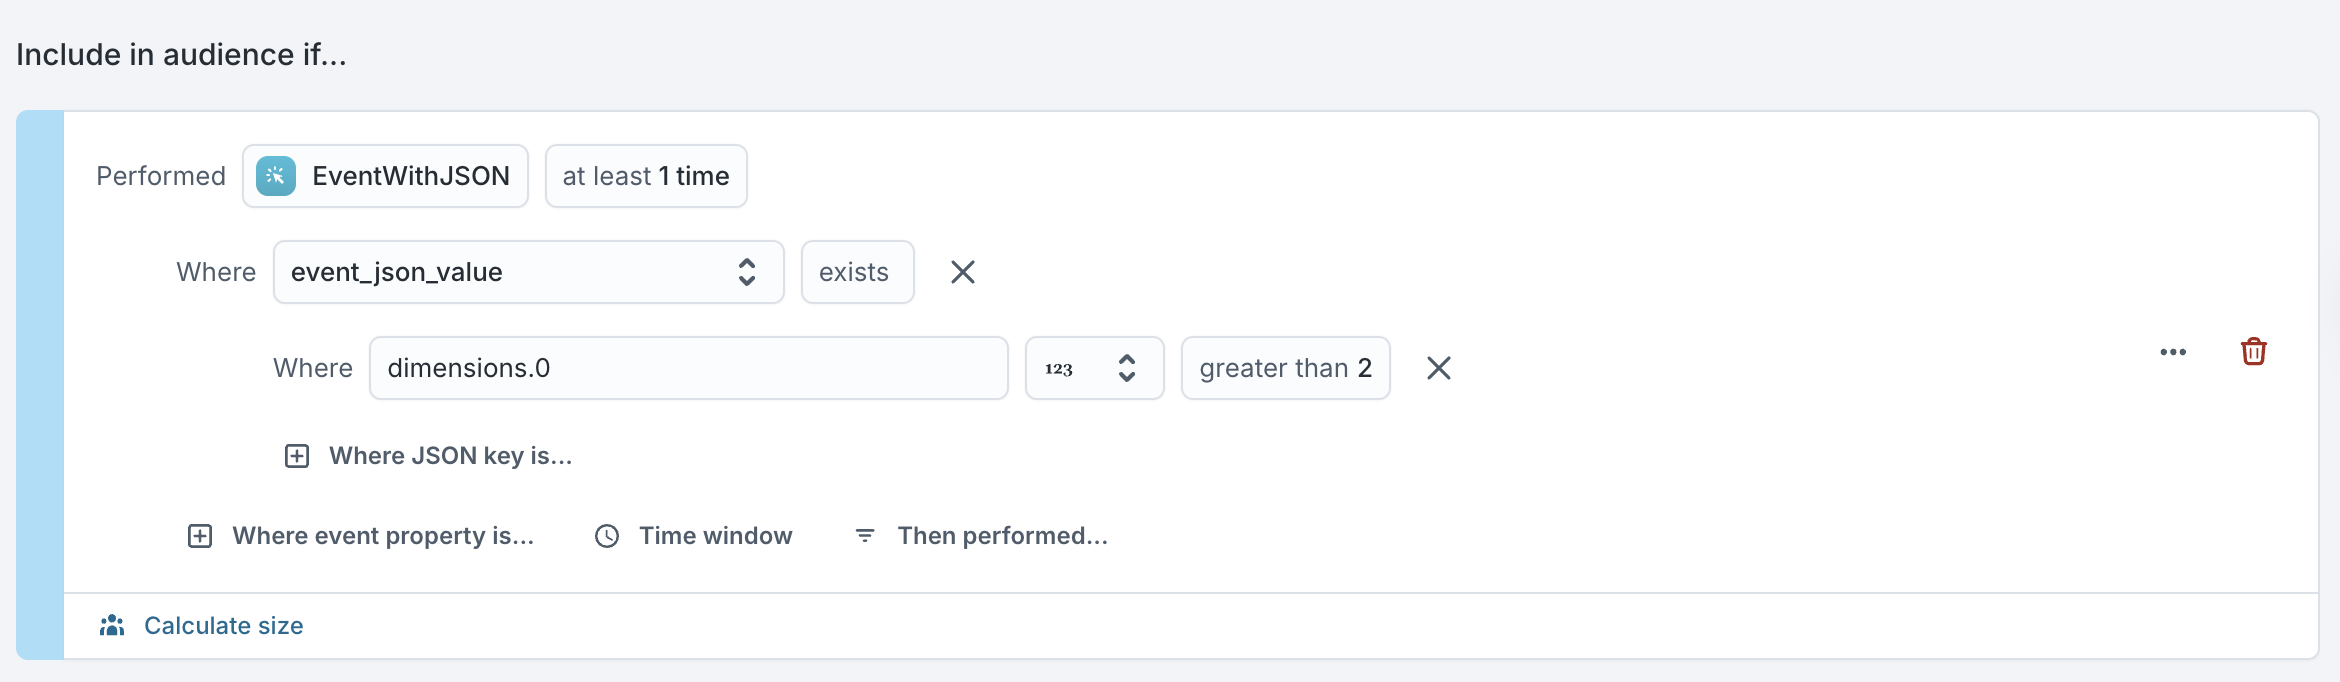
How to filter
Use dot-path notation to specify the exact field you want to filter on. Hightouch supports both object and array traversal for nested JSON fields.
By default, JSON columns are treated as type unknown with the exists operator. You can manually set the data type—string, number, or boolean—to unlock the operators that make sense for that field.
All standard operators supported in the audience builder (for example, equals, contains, greater than, exists) are available, but only if they’re compatible with the selected type.
Preview
Depending on your dataset size and how recent your events are (if filtering event data), you may use the member preview to confirm that your JSON paths and filters return the expected results.
JSON filtering is an advanced feature intended for users who understand their data structure. If you’re unsure which JSON fields to target, ask your data team for help or contact your Customer Success team to enable JSON column filtering for your workspace.
Drag and drop values
For certain textual and numerical operators, you can upload a list of values directly into your filter using drag and drop instead of entering them manually.
This feature saves time when working with long lists, such as customer IDs, organization IDs, or email addresses, so you don’t have to copy and paste each value.
You can drag and drop .txt or .csv files containing comma-separated values (CSV) directly into the filter’s value field.
Example use case
- You have a CSV file with hundreds of organization IDs.
- Instead of entering each ID manually, drag and drop the file into the input box of a property filter.
- Hightouch automatically uploads and parses the list of values for you.

Supported operators
| Data type | Supported operators |
|---|---|
| Textual | contains · does not contain · equals · does not equal |
| Numerical | equals · does not equal |
Operator reference
Each filter condition in the audience builder uses a set of comparison operators to determine whether records meet your criteria.
The available operators depend on the data type (text, number, Boolean, or timestamp).
Use this table to confirm which operators are available for each data type.
| Data type | Supported operators |
|---|---|
| Textual | equals · does not equal · contains · does not contain · starts with · ends with · exists · does not exist |
| Numerical | equals · does not equal · greater than · less than · greater than or equal to · less than or equal to · exists · does not exist |
| Boolean | equals · does not equal · exists · does not exist |
| Timestamp | equals · before · after · within · not within · between · anniversary · exists · does not exist |
The anniversary operator checks whether a date falls on an anniversary of the current day—useful for birthdays, renewals, or membership milestones.
Textual operators
When filtering on textual data (for example, product brand, location, or email domain), you can use:
- equals
- does not equal
- contains
- does not contain
- starts with
- ends with
- exists
- does not exist
Behavior details
The contains operator performs a fuzzy match—it translates to the SQL
LIKE operator with the value wrapped in % %. The equals operator looks
for an exact match (also using LIKE, but without surrounding wildcards).
Numerical operators
When filtering on numerical data (for example, price, score, or lifetime value), you can use:
- equals
- does not equal
- greater than
- less than
- greater than or equal to
- less than or equal to
- exists
- does not exist
You can use the drag and drop feature with the following operators: equals and does not equal.
When using greater than, less than, greater than or equal to, or less than or equal to, you can enter:
- an absolute numerical value (for example,
purchase_amount > 100), or - a percentile (for example, “top 50th percentile of lifetime value”).

To use the percentile option, make sure the column has value suggestions turned off in the schema configuration.
Percentile filtering is helpful when audience size, rather than a fixed number, is your targeting driver (for example, “top 10% of users by spend”).
Timestamp operators
When filtering on timestamps (for example, purchase date or last activity), you can use:
- equals
- before
- after
- within
- not within
- between
- anniversary
- exists
- does not exist
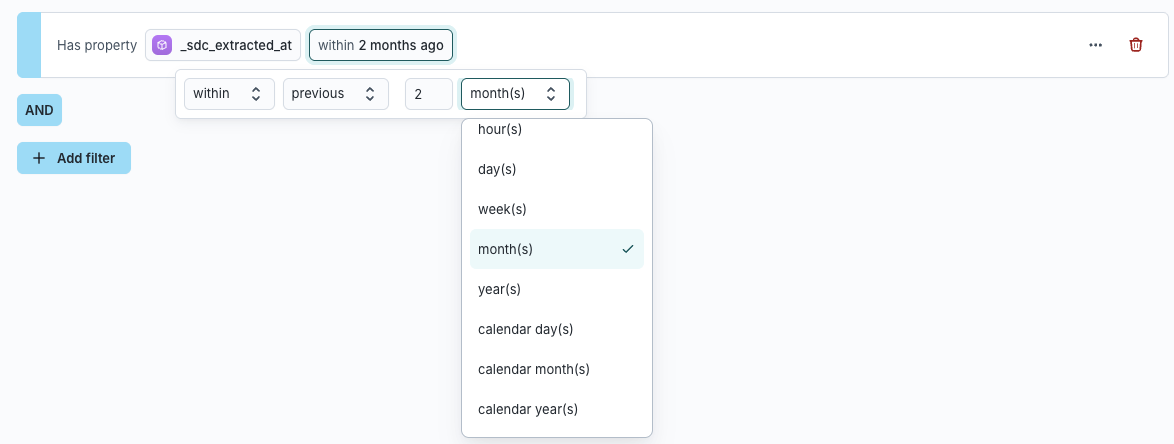
You can choose between rolling or calendar time periods for relative filters.
Examples:
- To find users active in the last 60 days → use “within previous 2 months” (rolling window).
- To find users active during a specific range → use “within previous 2 calendar months.” If today is June 3, this filters for dates between April 1 and May 31.
If a column contains timezone data, that timezone is used when calculating date and time values. If not, Hightouch uses the warehouse’s default timezone for both stored values and current time calculations.
Operators vary by data type. If you don’t see an operator available for a
specific column, check the column’s configured data type in your schema
setup. For example, string types
support text-based filters, while number types unlock percentile and
inequality operators.
Configure null-value behavior
When building filters, you may encounter null data (for example, missing country values).
Admins can control how nulls behave for “not” operators in Workspace Settings.
Options:
- Treat null values like any other value (default):
Country does not equal USA→ includesCountry = null - Use special behavior for null values:
Country does not equal USA→ excludesCountry = null

Experimentation and governance
Split audiences for experiments
Divide an audience into random or rule-based groups for testing.
| Split type | Description |
|---|---|
| A/B Split | Divide members randomly between two syncs. |
| Multi-branch Split | Route members to multiple destinations. |
Each profile is assigned once, based on its primary key.
Changing split percentages can reassign users—use a snapshot to preserve consistency.
How audiences stay up to date
Audiences update automatically as your source data changes so campaigns always reach the right people.
| Behavior | Description |
|---|---|
| Automatic updates | New data or events trigger re-evaluation. |
| Manual refresh | Trigger a full recalculation from the overflow menu. |
| Snapshots | Freeze membership at a point in time to measure lift or maintain fixed test groups. |
Segment by households or accounts
In some workspaces, audience data is organized around more than one entity type, such as: People, Households, or Accounts. When you enable schema labeling, the audience builder automatically reflects these relationships.
This allows you to create audiences that consider shared characteristics or behaviors across related entities, rather than limiting segmentation to individuals.
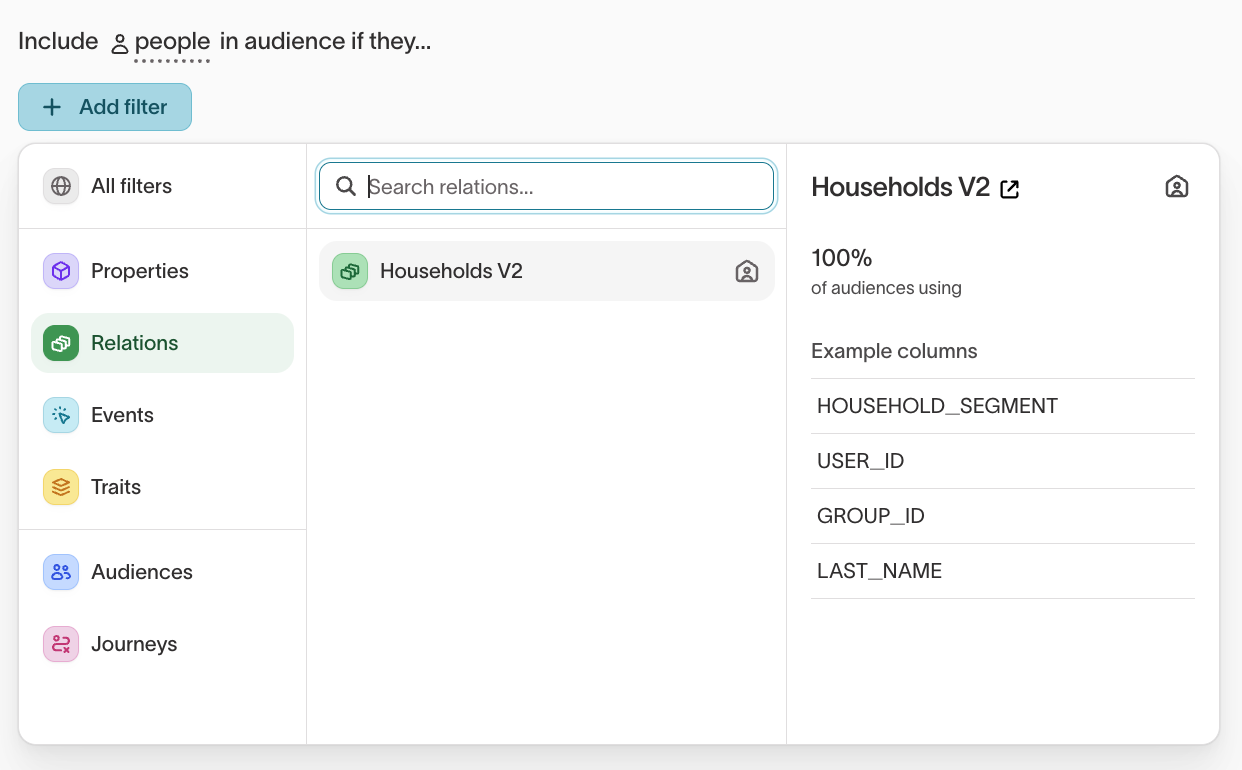
With schema labels applied, filters adjust automatically so you can build audiences using data from connected entities. For instance, you can define a People audience that includes or excludes members based on traits of their associated Household or Account.
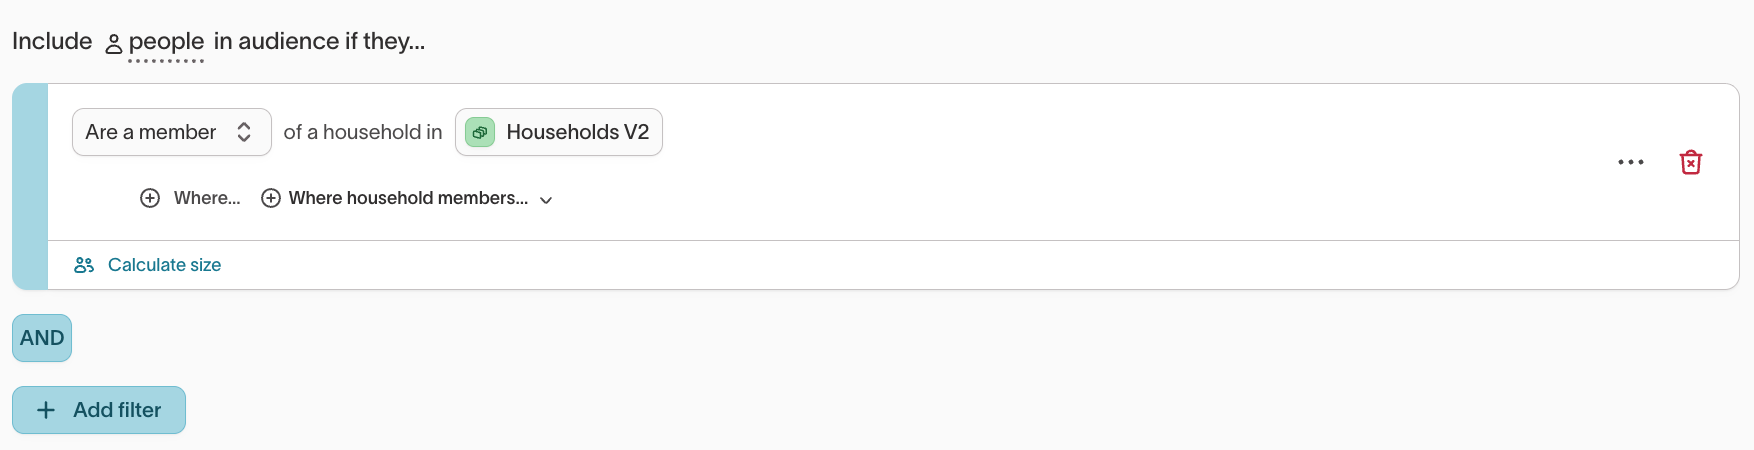
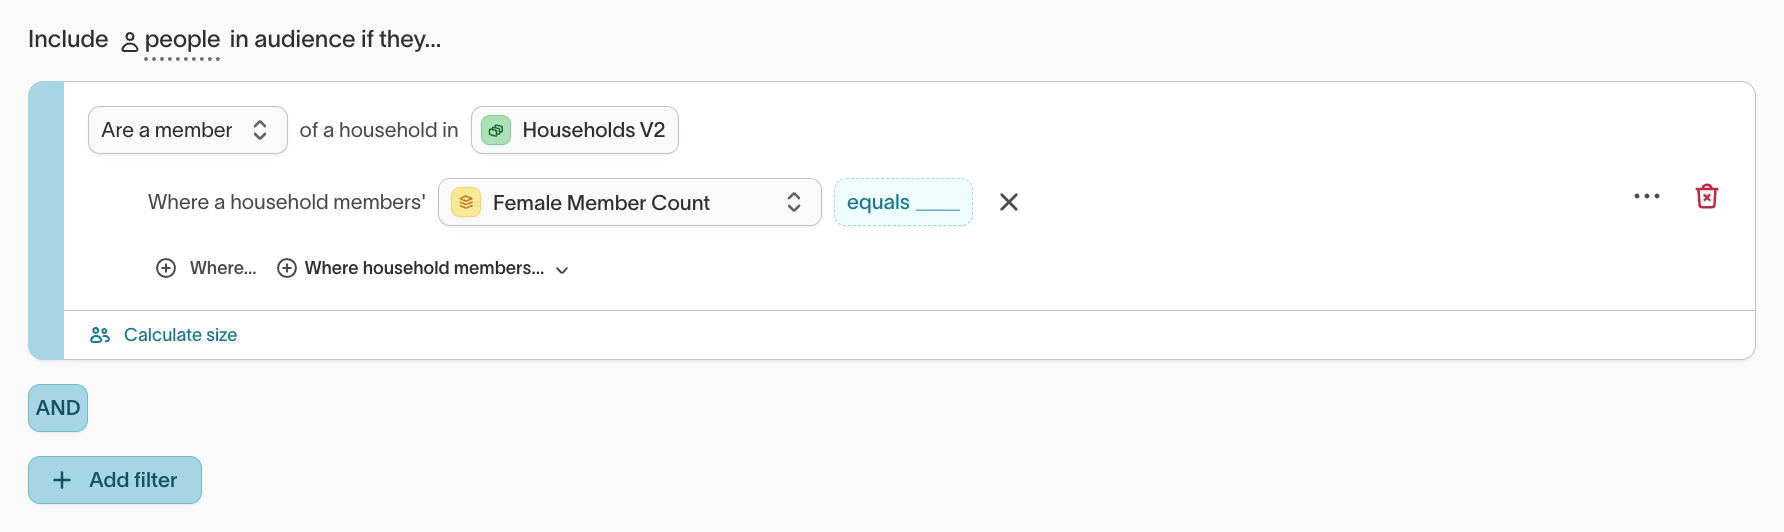
Examples:
-
Household segmentation: Include people in households that meet a shared condition (for example, at least one member identifies as female or holds an active subscription).
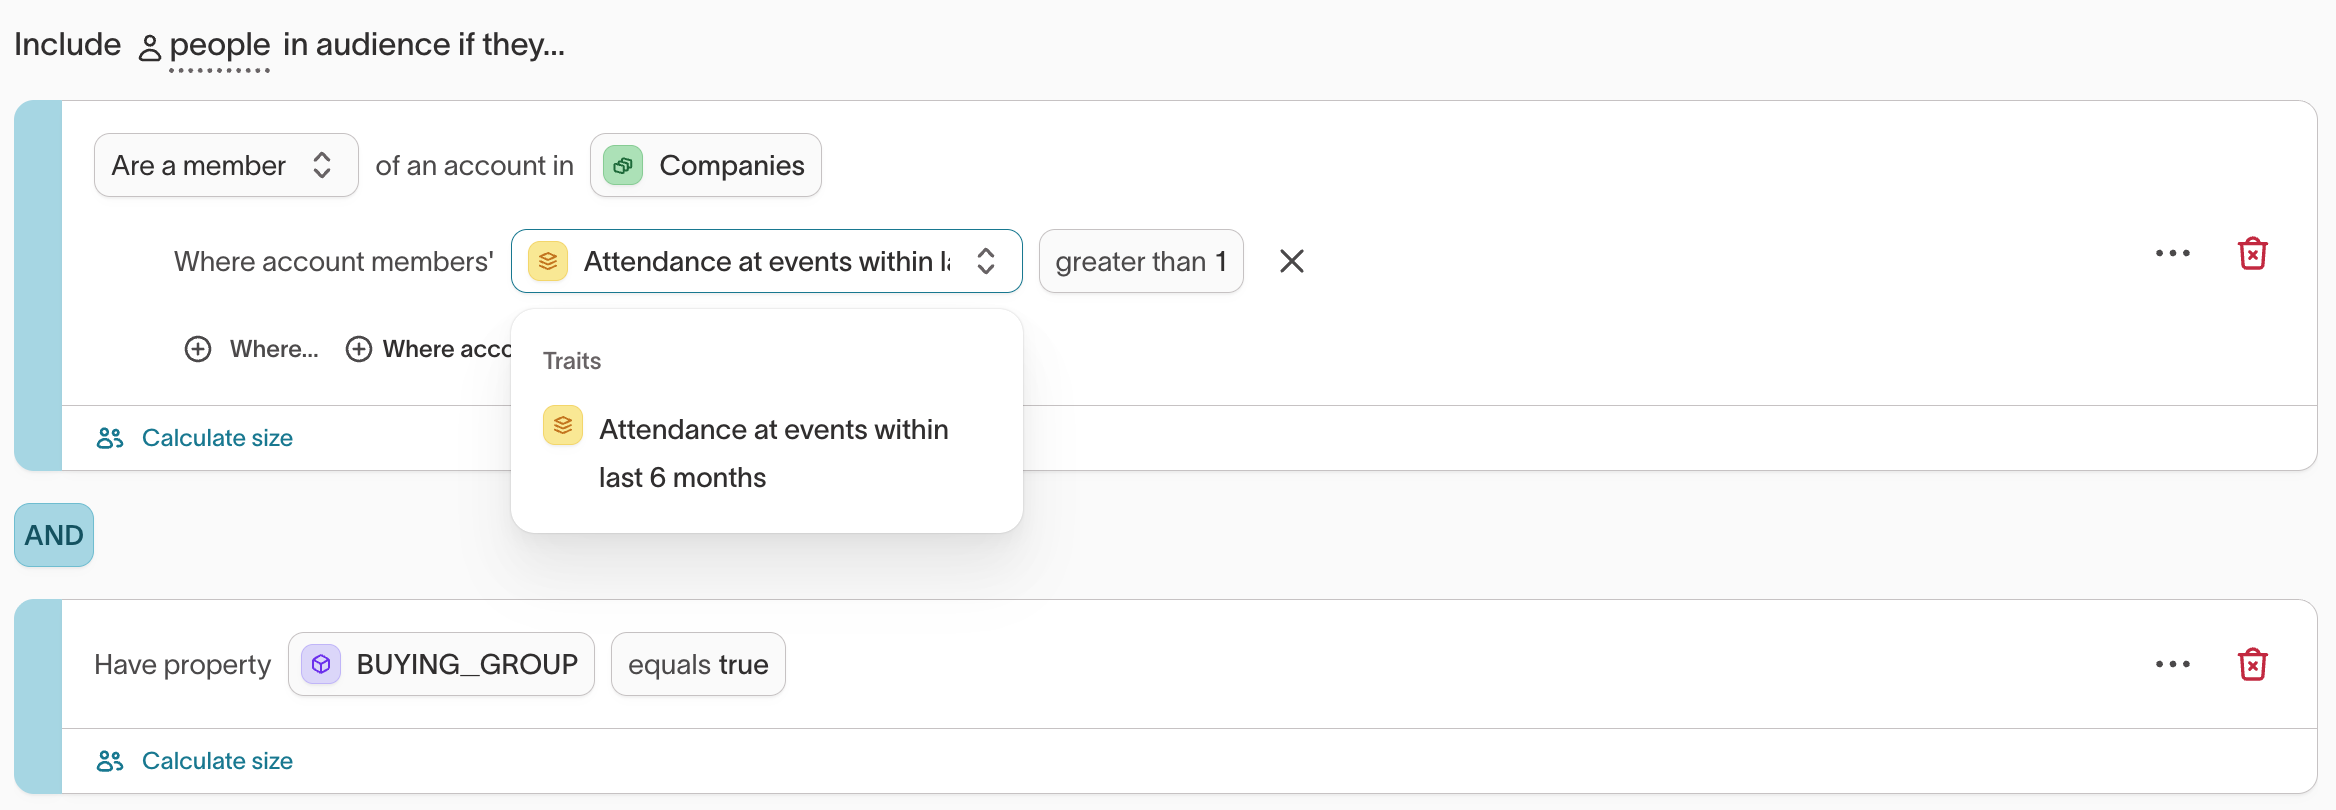
-
Account segmentation: Include people whose associated account shows recent activity or engagement (for example, a recent purchase or contract renewal).
Schema labeling enables you to build audiences using both individual and group-level data. This supports coordinated targeting and measurement when multiple related entities—like people within households or employees within accounts—affect campaign outcomes.
Example use cases
Abandoned checkout retargeting
Goal: Retarget users who started checkout but didn’t complete.
Filters
- Event:
Checkout startedwithin last 24 hours - Event:
Order completednot performed in same window - Trait:
LTV > 200 - Property:
Email is not null
Sync to
- Meta Custom Audiences
- Klaviyo List
Combine this audience with a subset or destination rule to exclude opt-outs.
Real-time travel personalization
Goal: Personalize offers for users who searched flights or hotels in the last 24 hours.
Filters
- Event:
searchwherecategory = flight OR hotel - Event:
search_timeperformed within 24 hours - Trait:
loyalty_status = Gold
Enable real-time evaluation, split 80/20 for testing, and sync to ad platforms. Learn more in Same-session audiences.
Best practices
| Goal | Recommendation |
|---|---|
| Start a new audience from a description | Draft with the Agent, then review and refine the suggested logic in the builder. |
| Ensure consistent segmentation | Build complex logic once as reusable traits. |
| Avoid audience drift | Use snapshots to lock membership for control groups. |
| Simplify experimentation | Keep experiment audiences clearly named (for example, retargeting_a and retargeting_b). |
| Test before activation | Use sampling to preview results on smaller datasets. |
| Iterate on saved audiences | Ask the Agent to explain exclusions or suggest changes when audience size or composition shifts. |
Troubleshooting
| Issue | Likely cause | Resolution |
|---|---|---|
| Audience size changes unexpectedly | Real-time evaluation enabled | Use snapshots to lock membership |
| Filters return no results | Wrong relationship or null handling | Check schema configuration and null settings |
| Members appear in both split groups | Split percentages edited after launch | Avoid editing live splits |
| Cannot assign sync | Missing permissions | Contact your workspace admin |
If you see warehouse SQL errors (for example, unresolved columns, invalid identifiers, or object authorization failures), use Resolve SQL compilation errors.
Common issues and detailed resolutions
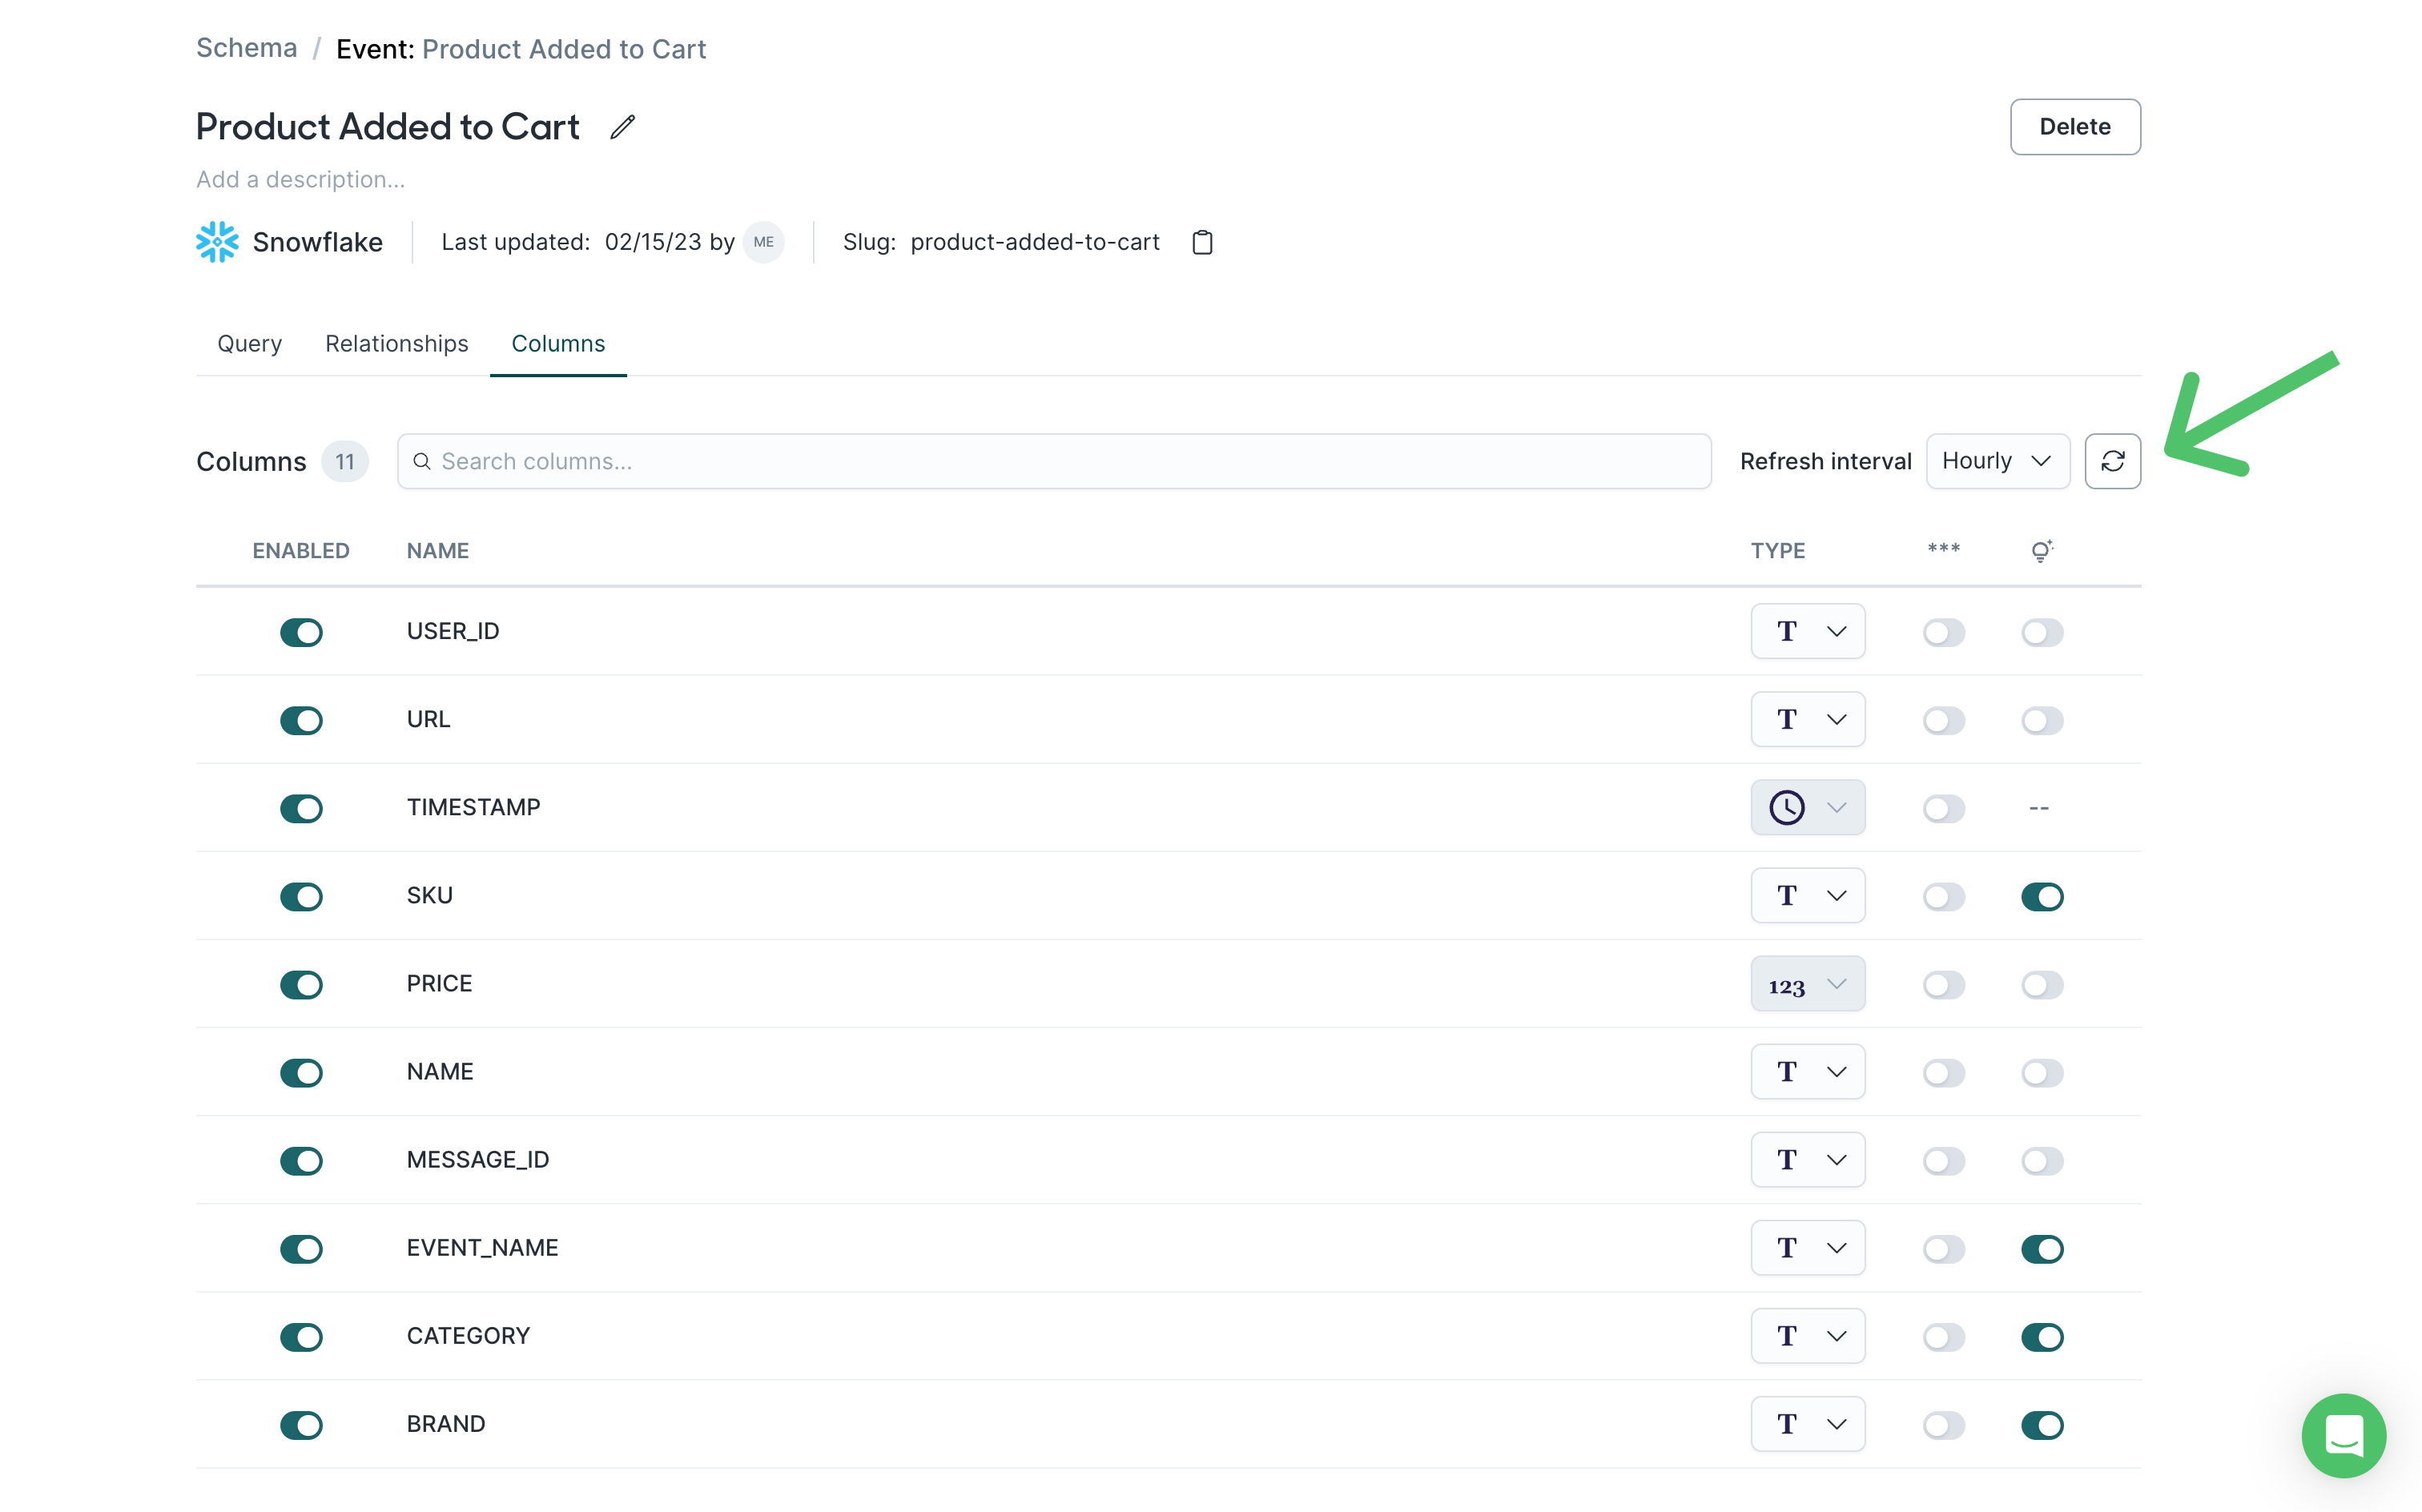
Filter value suggestions not appearing
Cause: Column suggestions are not enabled, or the suggestion cache is stale.
Resolution: Ensure you’ve enabled column suggestions. If suggestions are enabled but missing, refresh them in the filter UI.
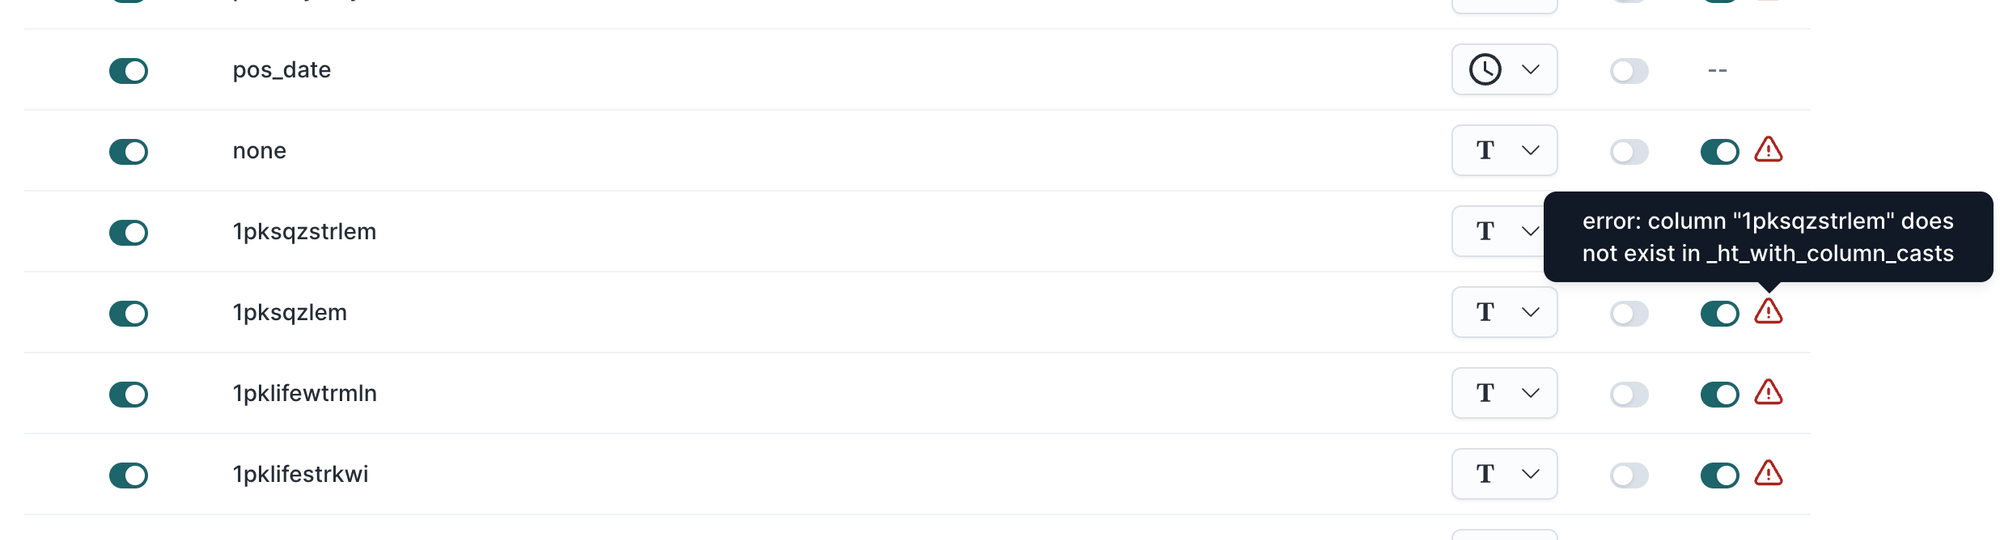
Error: column "…" does not exist in _ht_with_column_casts
Cause: A model column was deleted but is still cached in Hightouch.
Resolution: Preview and re-save the model configuration to refresh cached columns.
Error: [UNRESOLVED_COLUMN.WITH_SUGGESTION] … cannot be resolved
Cause: A filter or audience condition references a column that is not present in the model output (for example, segment_value), often due to a renamed or removed column or stale filter configuration.
Resolution:
- Open the parent model and confirm the referenced column exists in the selected columns.
- Preview and re-save the model to refresh available columns in Customer Studio.
- Update audience filters that reference the missing column, or add the column back to the model.
- Re-run audience preview to confirm the error is gone.
If audience sizes or syncs change unexpectedly, review your schema relationships and sync schedules regularly to ensure alignment.
What’s next?
After creating audiences, you can activate and measure them using these related features: