| Audience | Platform admins |
| Prerequisites |
|
Configure your Hightouch workspace to ensure secure access, clear permissions, and consistent governance across teams.
Setup checklist
1. Learn the building blocks
Before configuring anything, familiarize yourself with how Hightouch is organized: organizations, workspaces, user groups, roles, environments, and Spaces.
Core concepts — organizations, workspaces, user groups, roles, environments, and Spaces
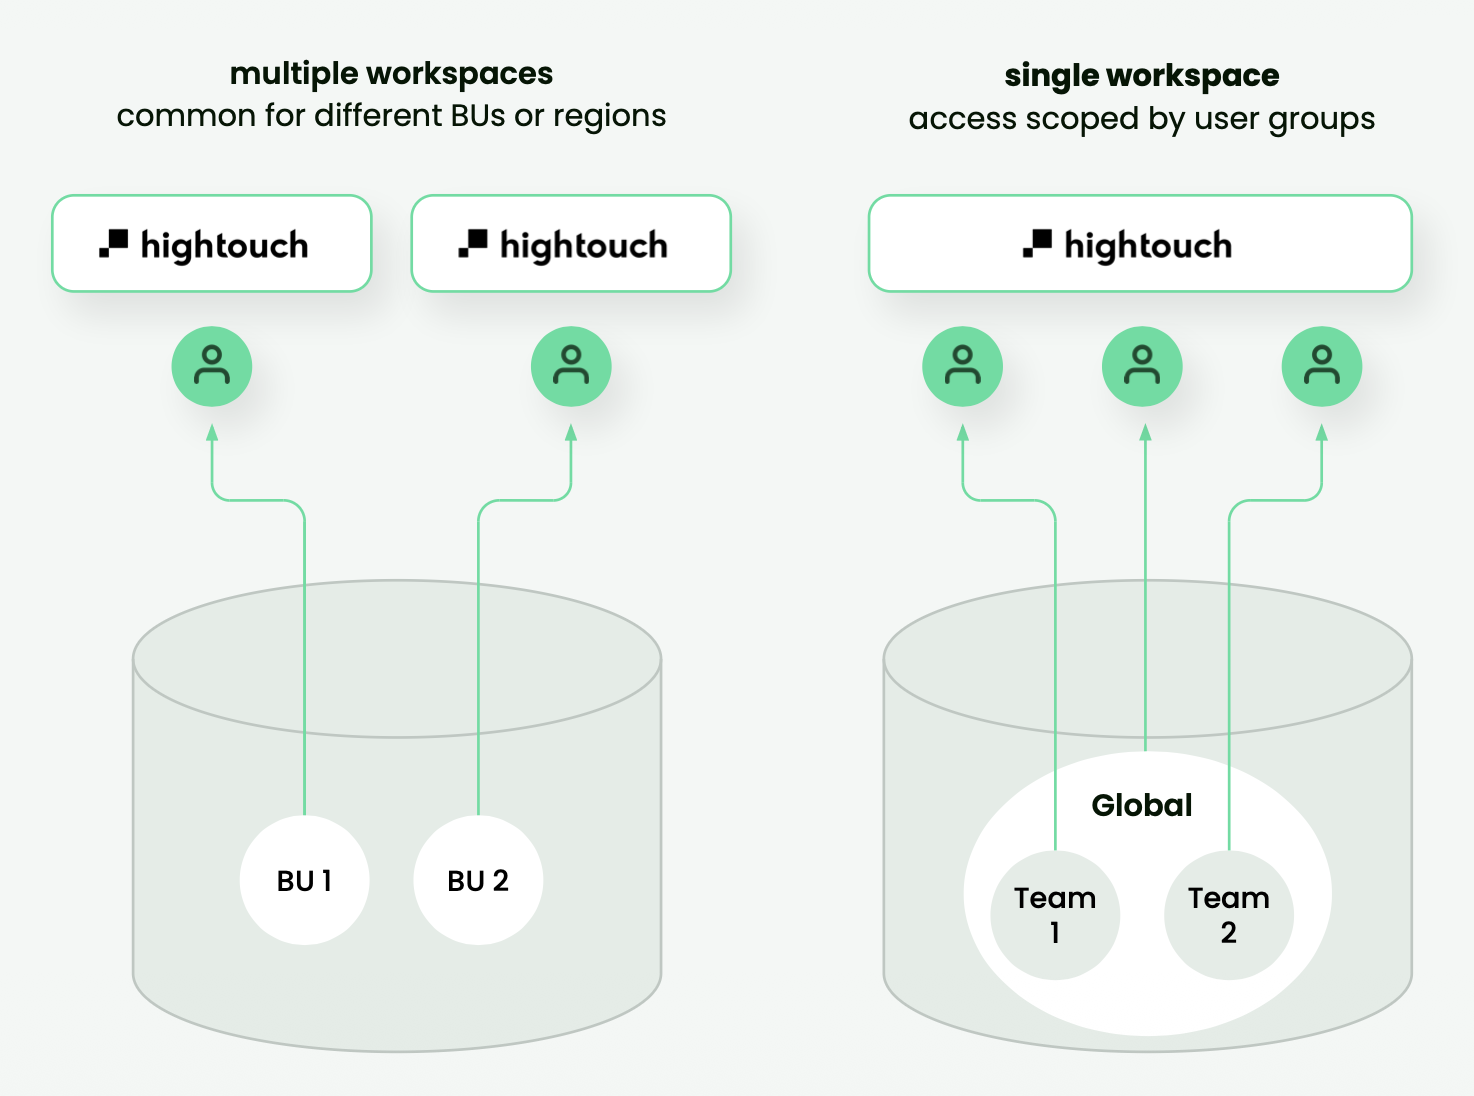
Most teams use a single production workspace with Spaces, permissions, and subsets to separate teams. Use additional workspaces when you need strict data isolation or separate dev and prod environments. See Workspaces for guidance on when to add a workspace.
2. Create your workspace
Set up your organization and first workspace. Choose a region, pick a workspace name and slug, and walk through the onboarding checklist.
Workspaces — create, configure, switch, and delete workspaces
3. Set up access control
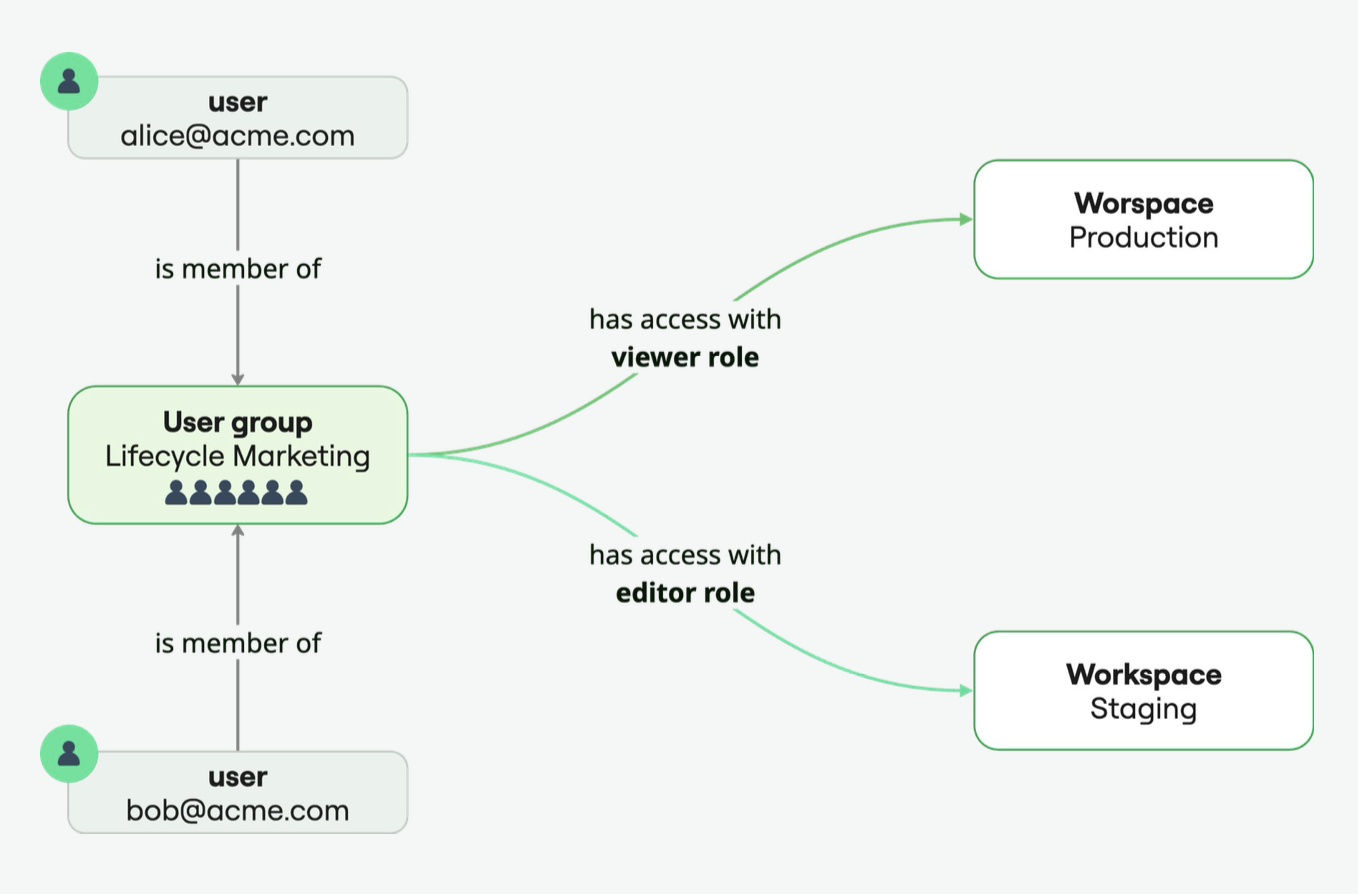
Configure how your team authenticates and what they can access. Set up SSO and SCIM to automate provisioning, map identity provider groups to Hightouch user groups, and assign roles.
SSO setup — connect your identity provider for centralized authentication
Manage users and groups — invite users, assign groups, manage membership
Roles — pre-built and custom permission sets
Transfer org admin access — hand off admin privileges when team members change
Start with pre-built roles during onboarding. Move to custom roles once your org structure or compliance needs require it.
4. Plan your governance
Decide how teams should collaborate within your workspace: who can publish changes, what data they can reach, and what requires approval. Hightouch offers several controls that layer on top of each other.
Governance best practices — when to use each control and how they layer together
Environments — dev/staging/prod promotion within a workspace
Approval flows — require review before changes go live
Spaces — scope resource visibility across teams
Subsets — limit which records marketers can query by region, brand, or compliance boundary
Destination rules — control which records can be sent to specific destinations
Templates — standardize audience and sync setup so marketers start from approved patterns
Audit logs — track all in-app user actions for 90 days
5. Secure your infrastructure
Configure storage, networking, and monitoring to meet your security and compliance requirements.
Security overview — encryption, compliance, and hosting details
Storage — configure self-hosted storage for data-at-rest
Networking — tunnels, PrivateLink, IP allowlisting
Alerting — sync failure notifications via Slack, email, PagerDuty, or Datadog
Sync logs — write sync history to your warehouse
6. Organize resources (optional)
As your workspace grows, use folders, labels, and filters to keep things navigable.
Readiness checklist
Before marketers can start building audiences, the workspace needs to be fully configured. Use this checklist to verify that all setup is complete across teams.
Platform admin responsibilities:
- Workspace created and region selected
- SSO and SCIM configured (if applicable)
- User groups created and roles assigned
- Governance configured: environments, approval flows, Spaces, subsets, destination rules, and templates
- Storage, networking, and alerting configured per security requirements
- Marketers have the right roles and Space access to see the data they need
Confirm with your data team or whoever owns the technical setup:
- At least one source connected with the Lightning sync engine (recommended)
- At least one destination connected
- Schema defined with parent model, related models, events, and traits
In smaller teams, one person may own both platform admin and data team responsibilities. The checklist above is organized by responsibility, not job title.
Next steps
- Data teams: Technical setup — connect sources, configure sync infrastructure, and define schema.
- Marketers: Daily usage — build audiences, run campaigns, and measure results.