Audience: Business users (marketers, lifecycle managers)
Prerequisites: Set up an Agent →
By the end of this article, you’ll understand:
- What a collection is and how it enhances personalization
- When and why to use collections in an AI Decisioning campaign
- How to create and configure a collection in Hightouch
- Where to use collections inside your actions
What is a collection?
A collection is a dynamic list of items — like products, content, or offers — that AID can use to personalize messages. Collections are pulled from catalogs you’ve already synced to Hightouch.
Instead of hardcoding one product into a message, a collection allows AID to select the best-fit item(s) for each user, based on behavior, preferences, or campaign performance.
When to use collections
Use collections when:
- You want to test which items perform best in a message
- You’re sending product recommendations (e.g., top sellers, “just for you”)
- You want dynamic inserts like:
- “Recommended for you” product grids
- Personalized blog/article carousels
- Contextual discounts or promo bundles
You don’t need a collection if your message has fixed content that doesn’t change by user.
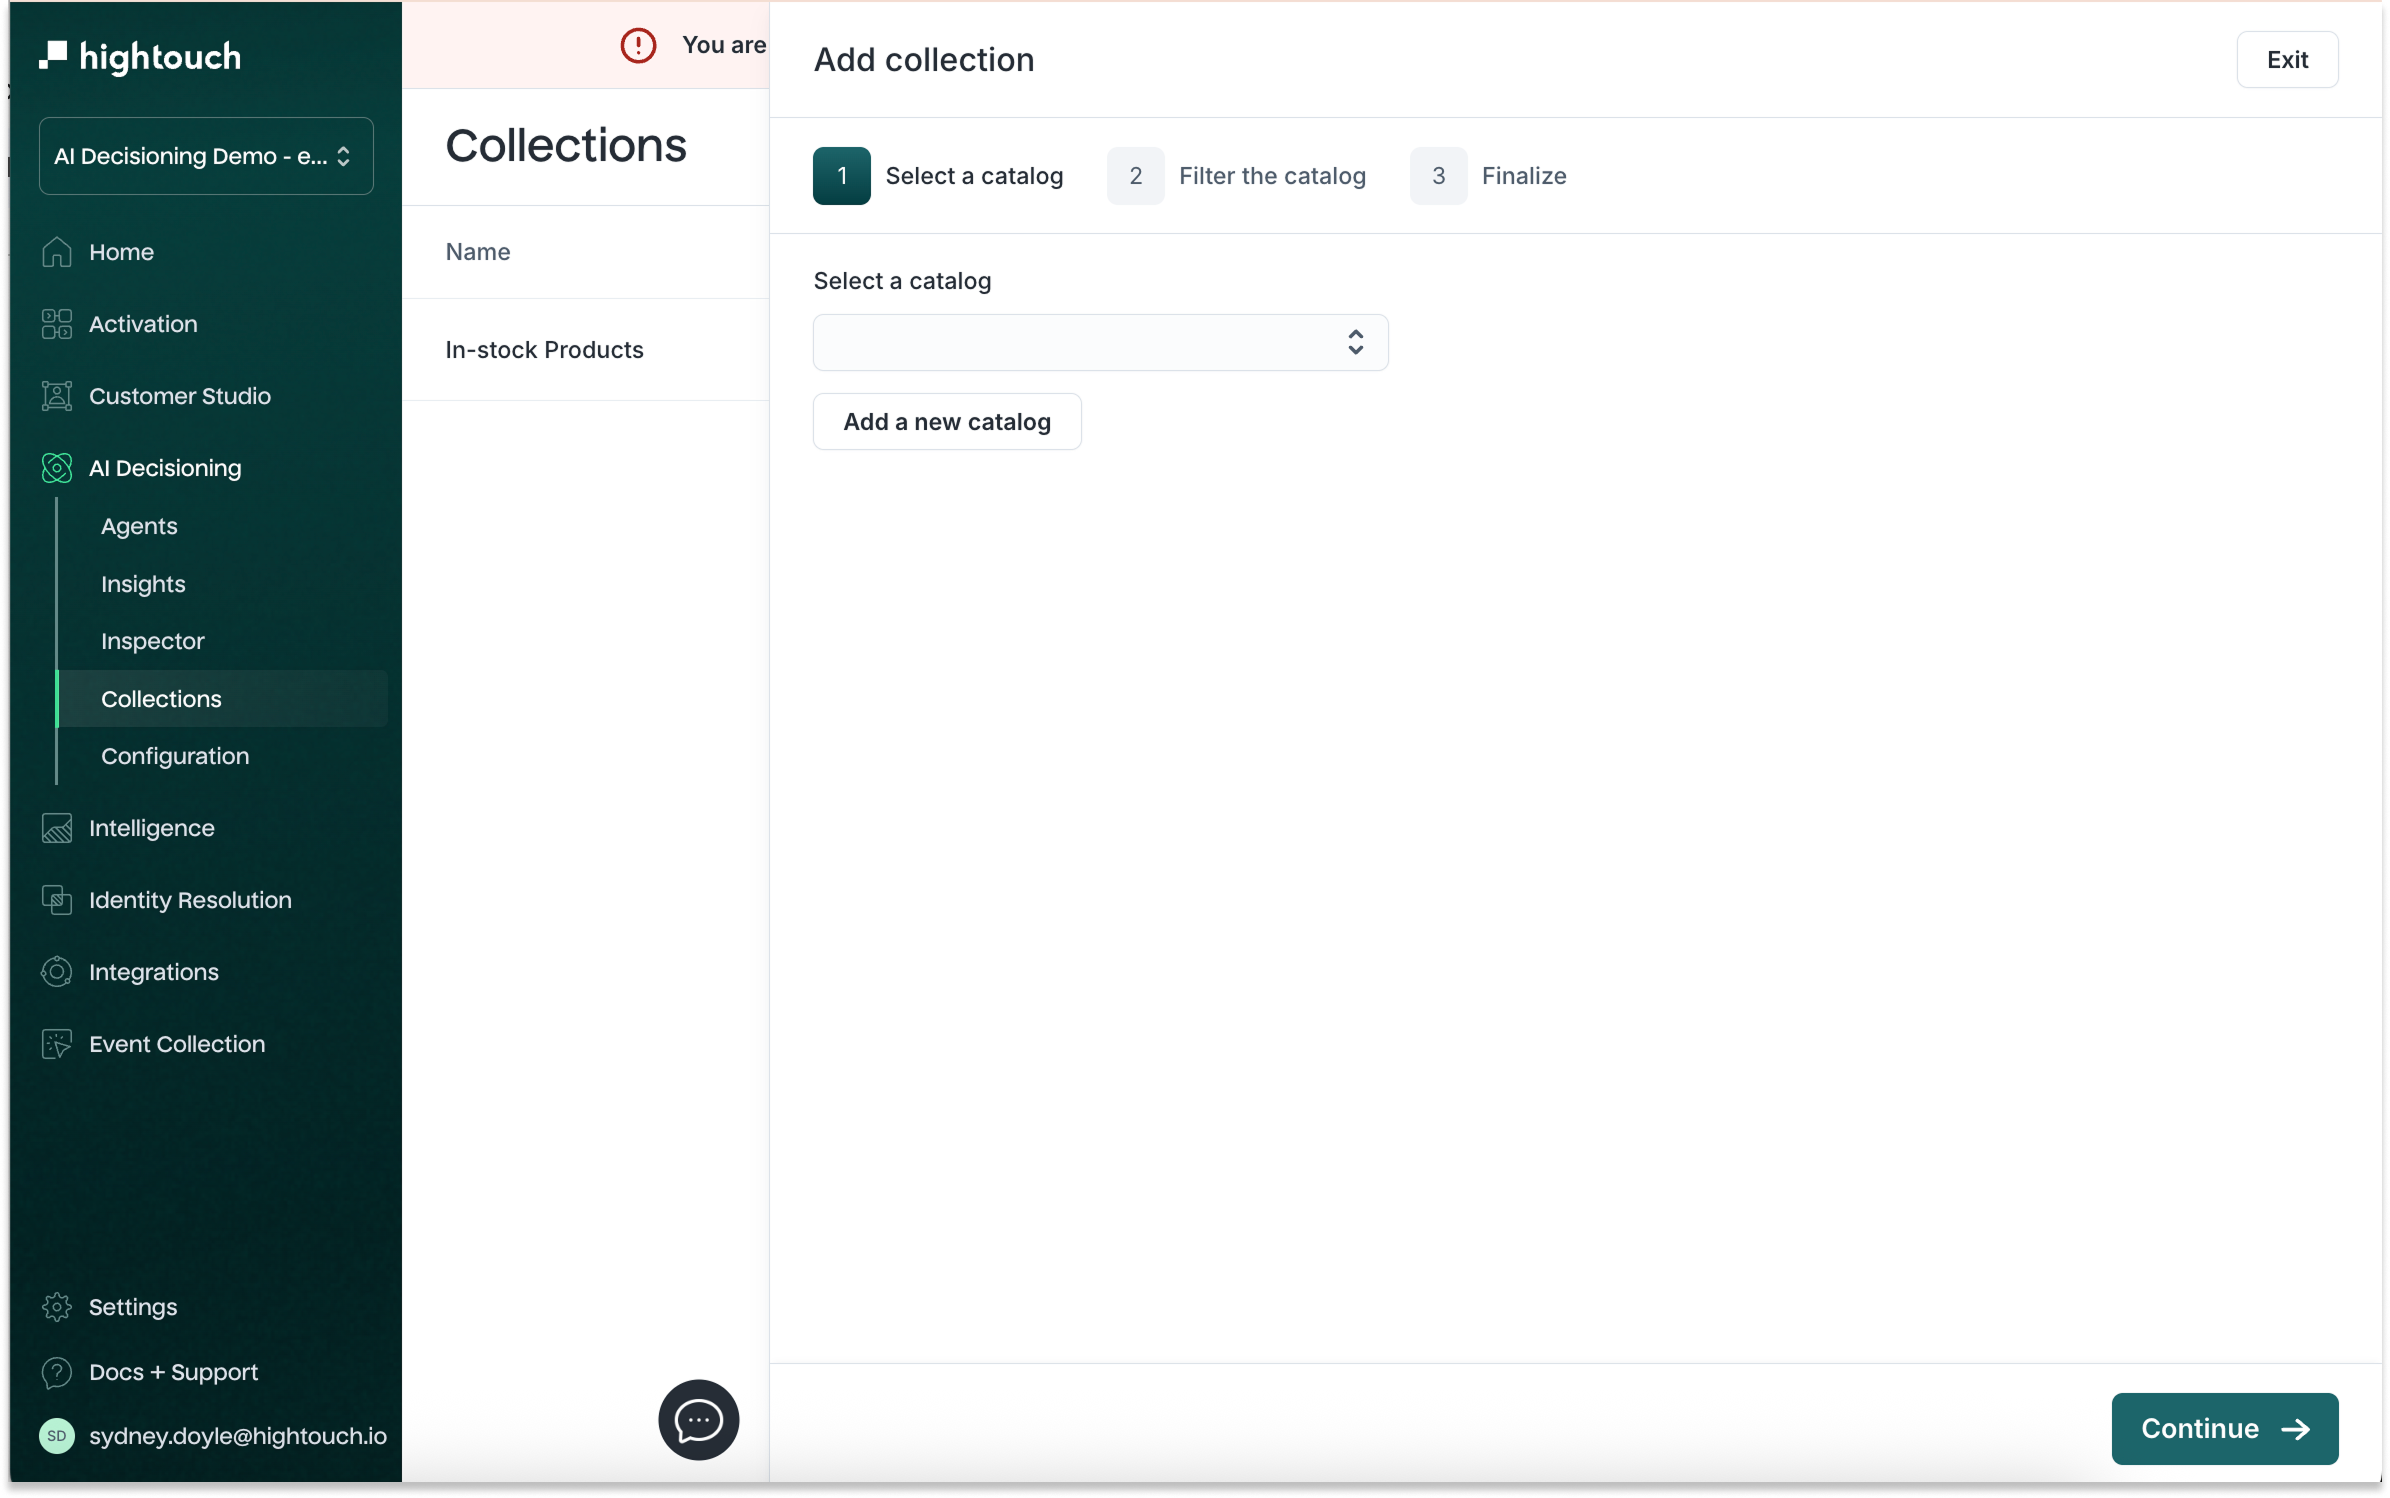
Navigating to Collections
To configure a collection:
- Go to AI Decisioning > Collections
- Click Add collection
- Follow the three-step builder:
- Select a catalog
- Filter the catalog
- Finalize configuration
How to create a collection
Step 1: Select a catalog
Choose a data source that contains the items you want to recommend — for example, your synced Products or Content catalog.
Catalogs are created in Customer Studio. If you haven’t created a catalog yet, navigate to Customer Studio > Schema > Create > Catalog.
Step 2: Filter the catalog
Apply filters to limit which items the AI can select from. Common filters include:
- In-stock only
- Specific category or brand
- Minimum discount threshold
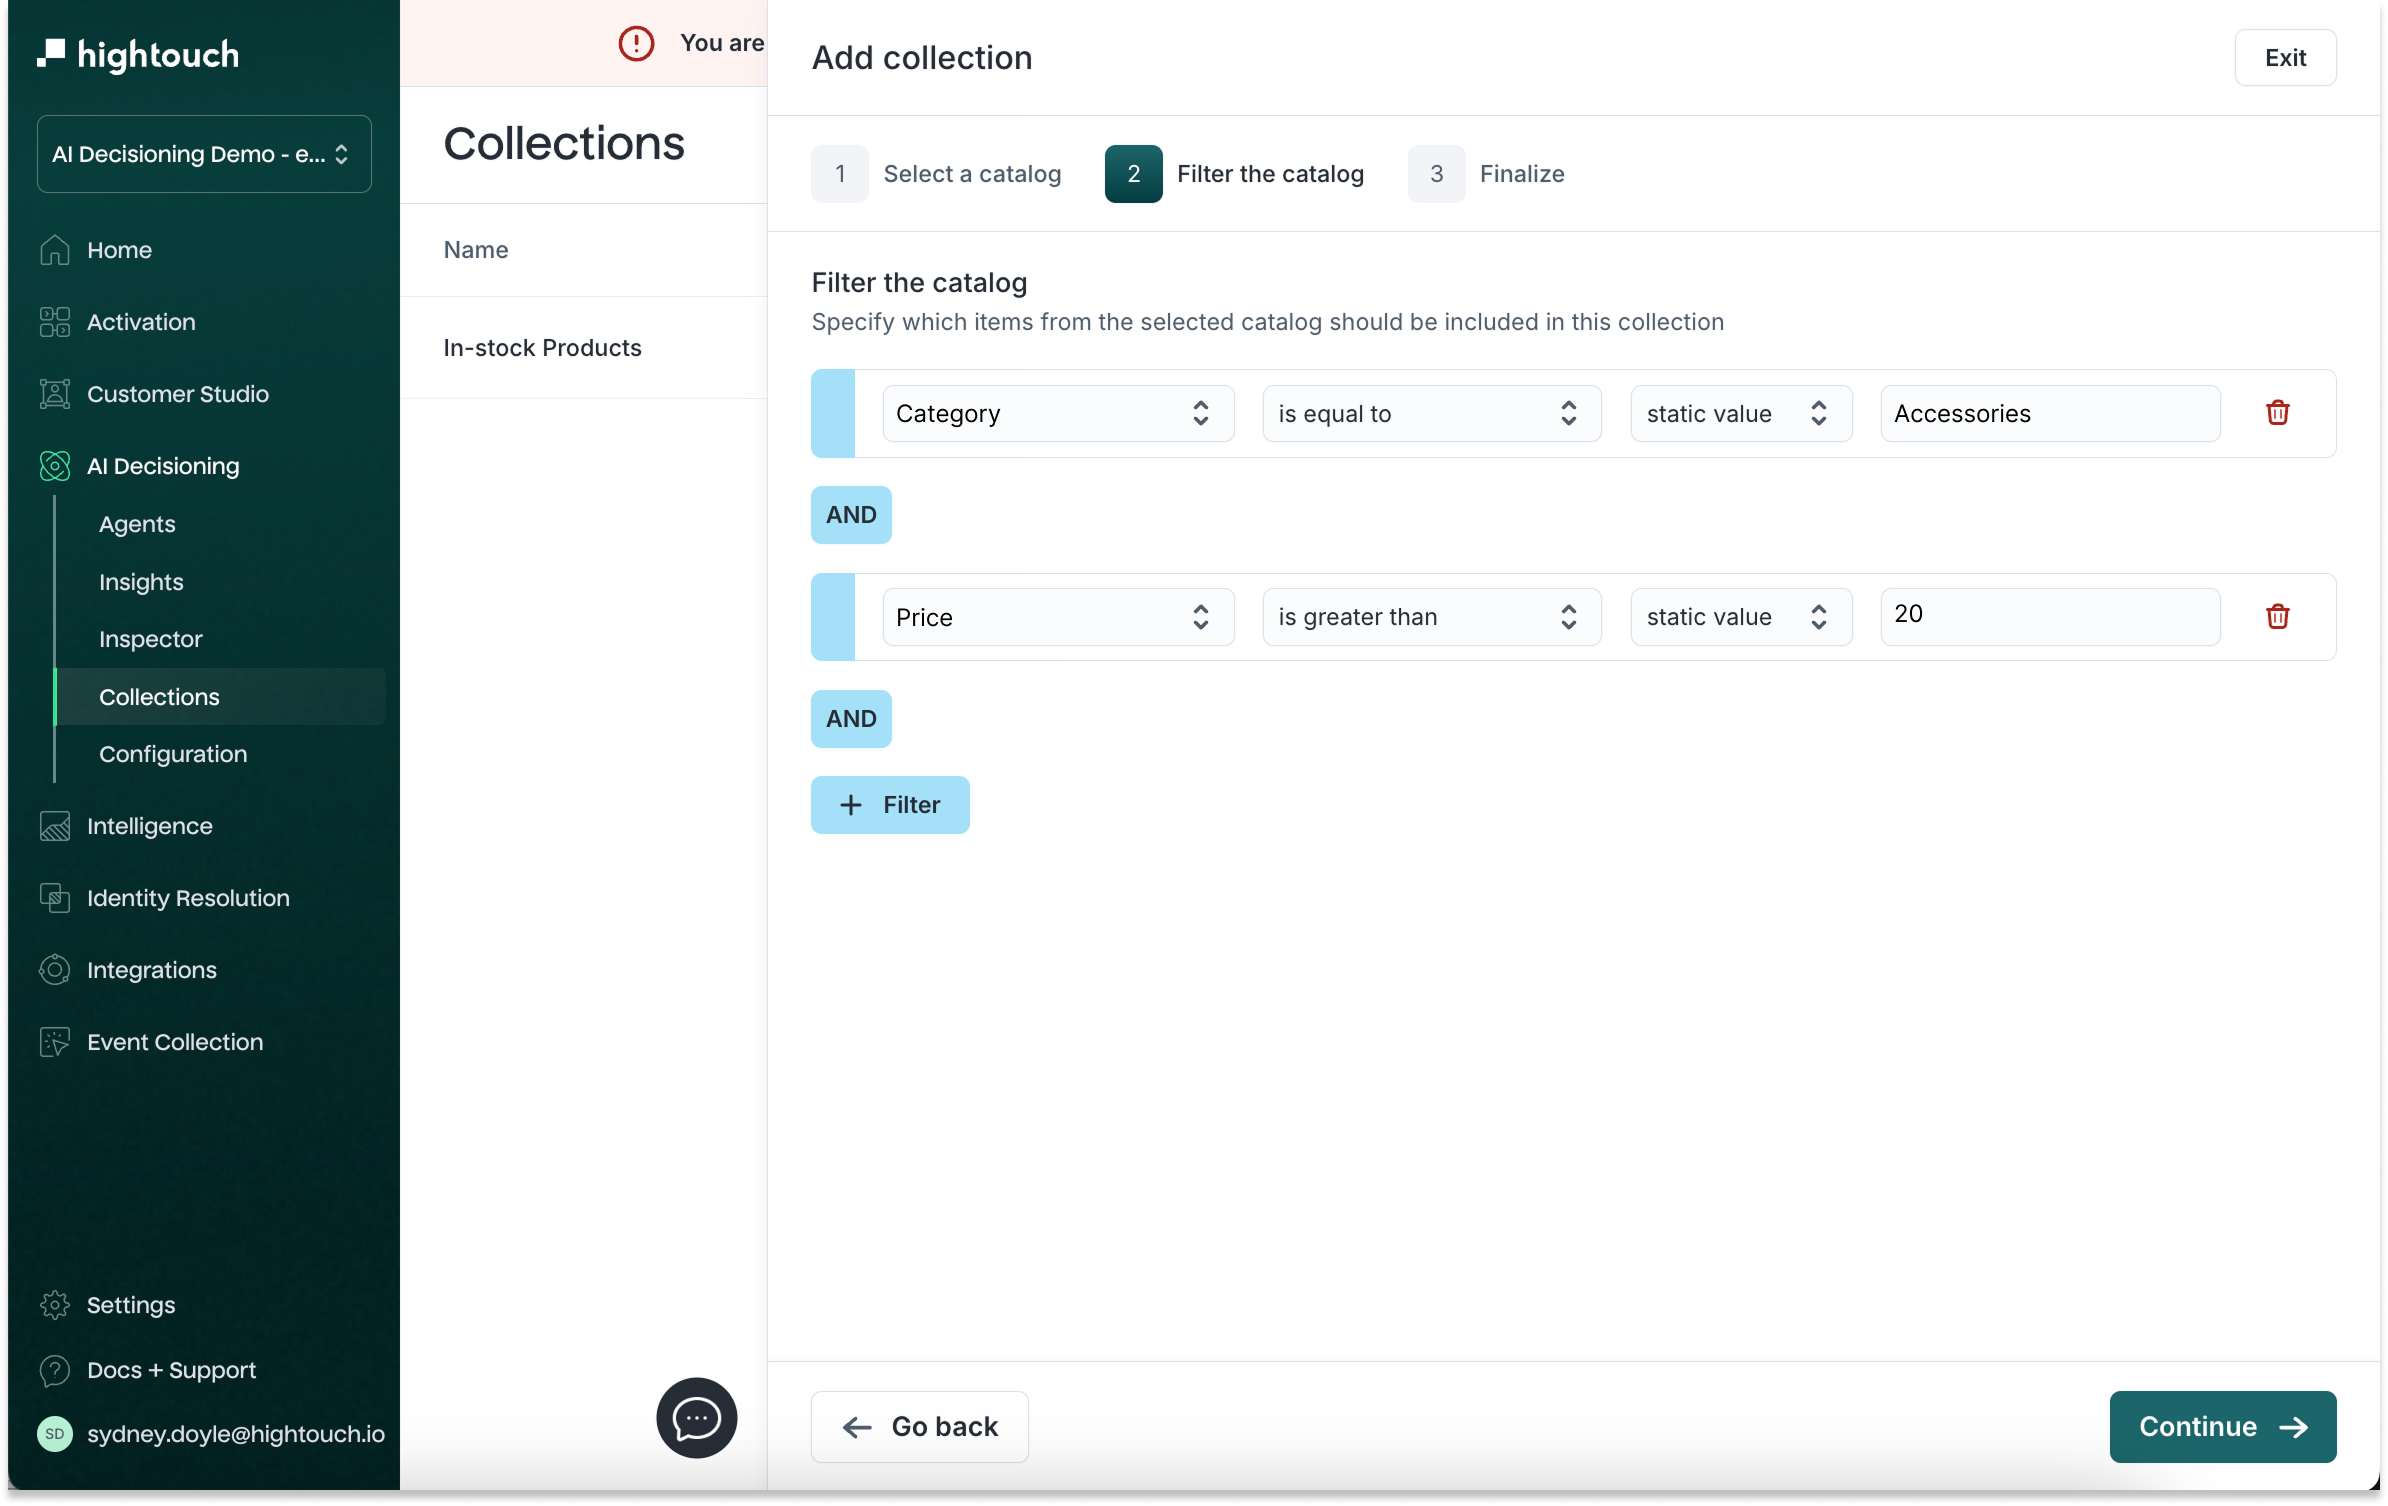
Example: “In-stock spring accessories over $20”
Let’s say you want to create a collection of spring accessories that are currently available and cost more than $20. This could be used in a win-back email or seasonal campaign to re-engage lapsed shoppers with trending items.
You would set up your filters like this:
categoryis equal toAccessoriesseasonis equal toSpringinventory_statusis equal toIn Stockpriceis greater than20
This ensures the AI only recommends:
- Spring-ready accessories
- That are in stock
- And priced above $20
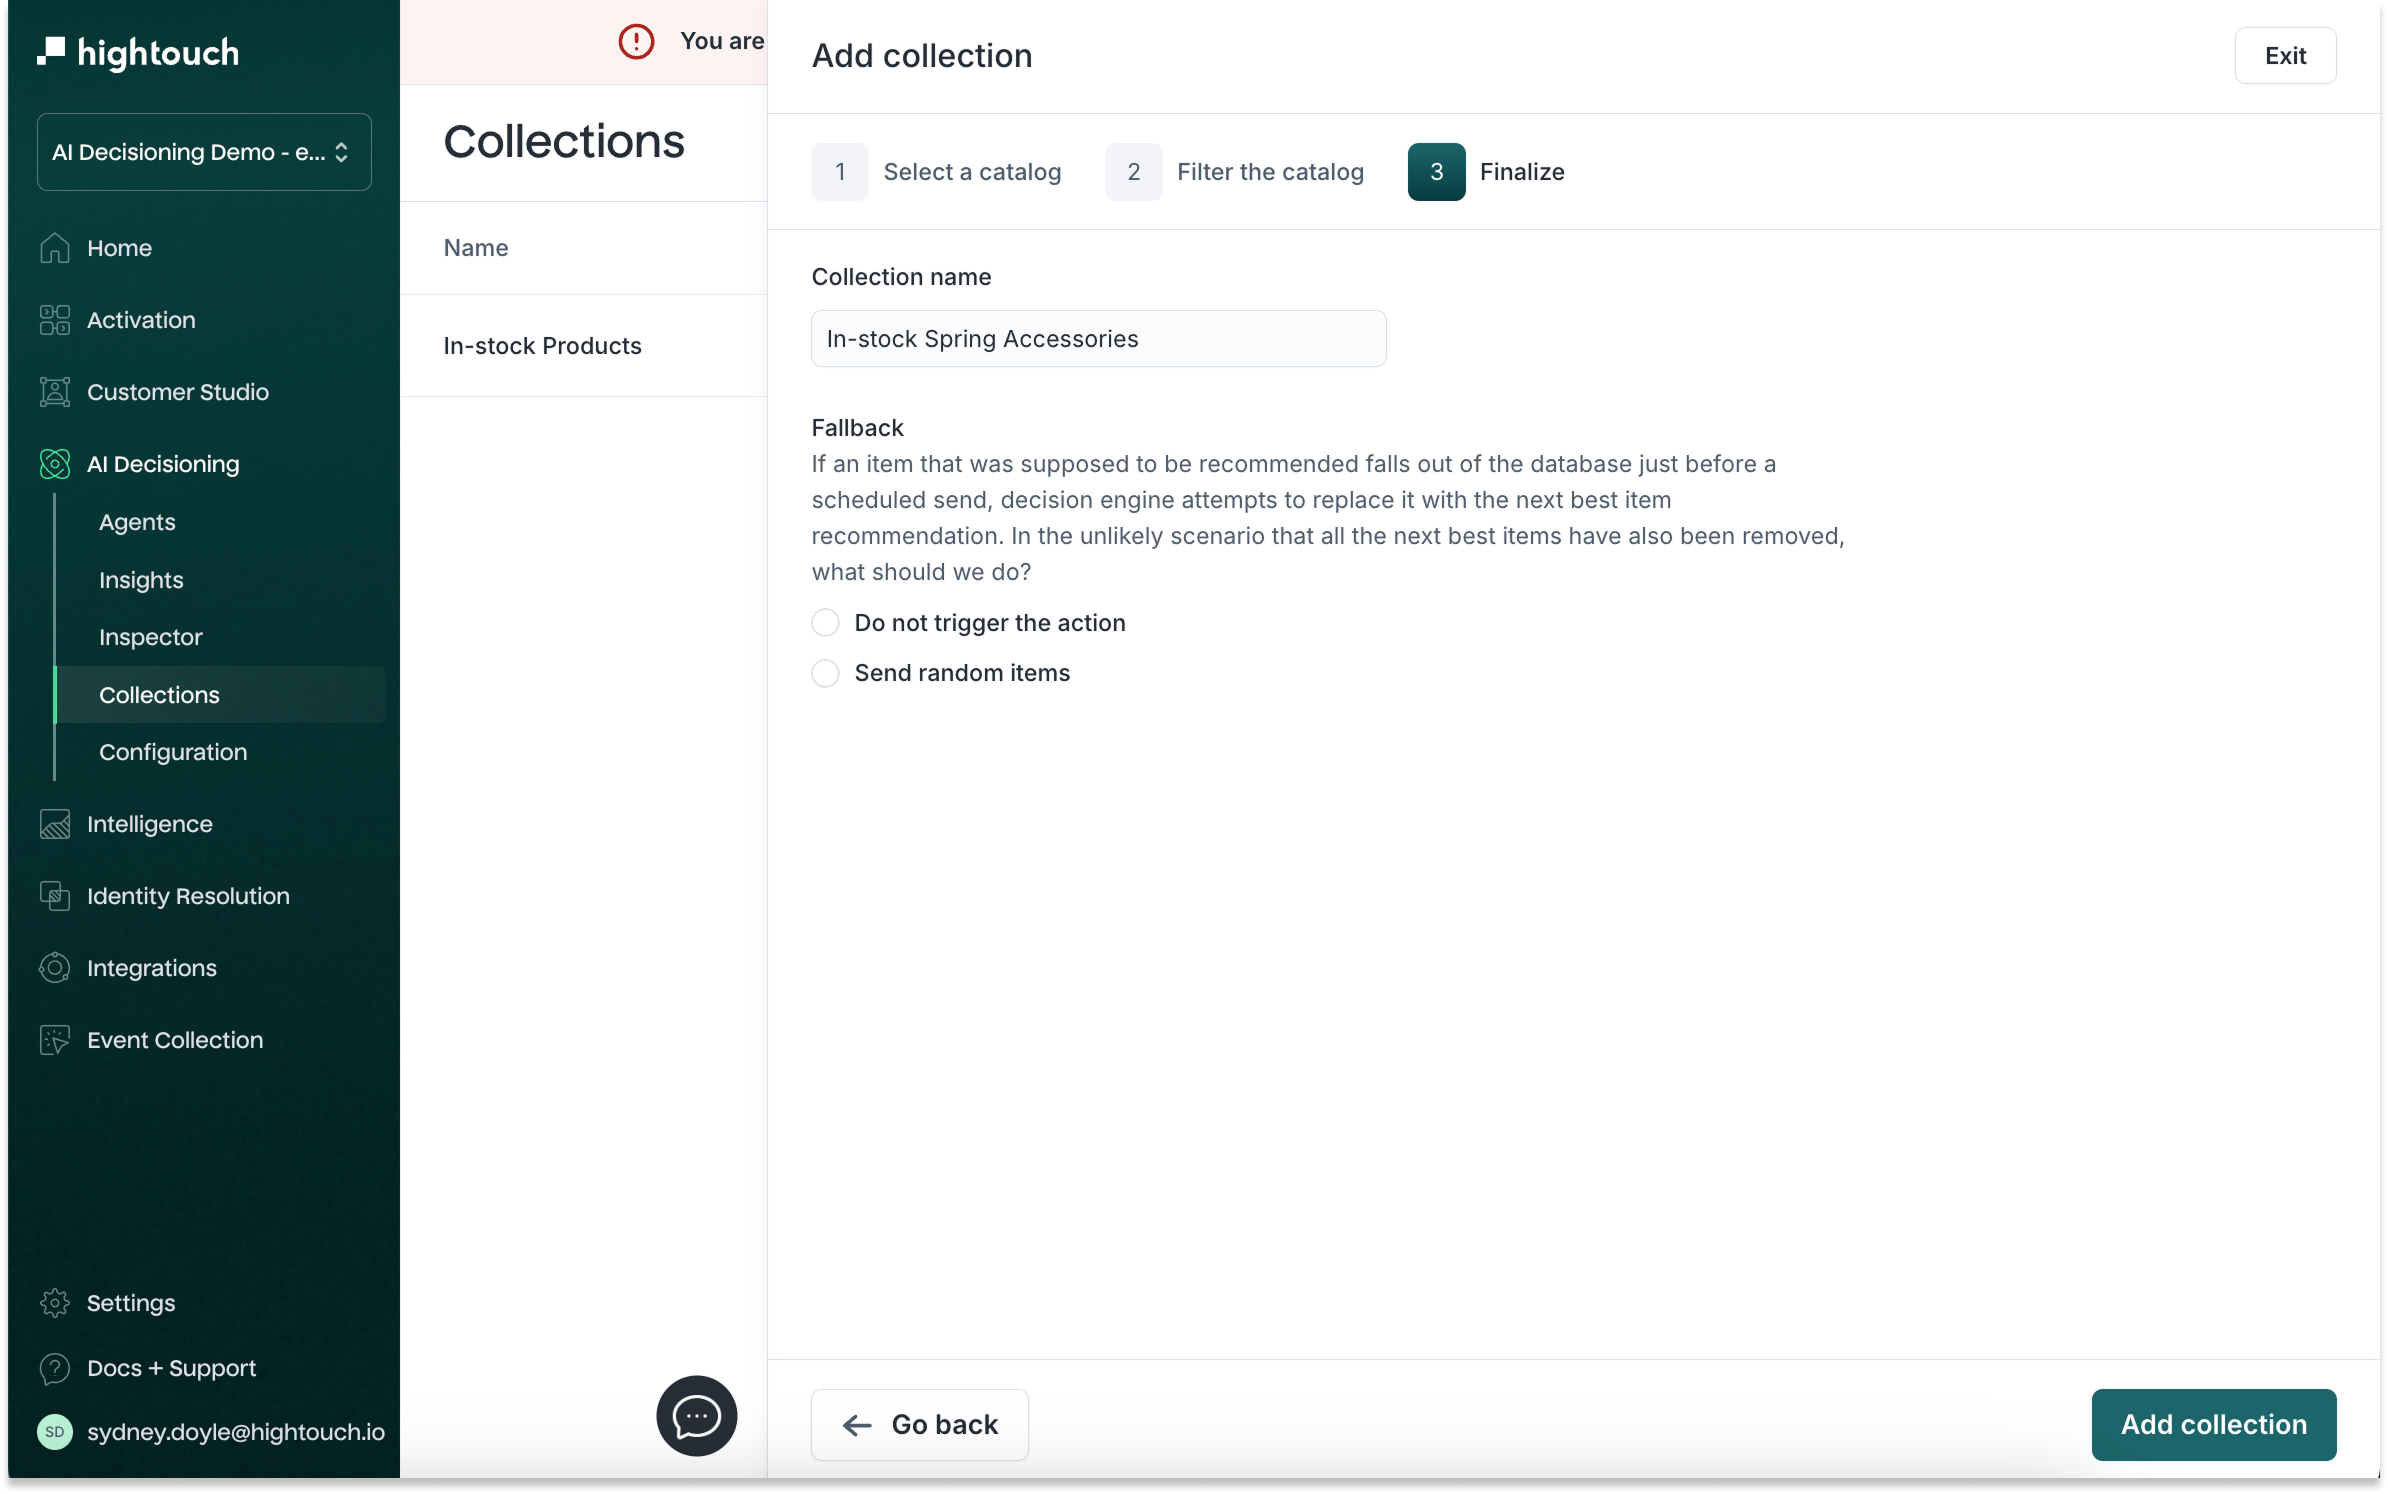
Step 3: Finalize configuration
-
Name your collection.
-
Use clear, descriptive names that reflect what the collection includes and how it’ll be used—like “In-stock Spring Accessories” or “Top Picks for Win-back.” This makes it easy to recognize and reuse collections across campaigns.
-
-
Configure callback behavior.
- Sometimes the ideal item might not be available at the time of send. You can choose:
- Do not trigger the action if the item isn’t available
- Send random items as a fallback
- Sometimes the ideal item might not be available at the time of send. You can choose:
You can return to a collection later and adjust filters or fallback rules.
Eligibility (item-level targeting)
You can click into individual collections to add eligibility filters. Eligibility filters let you control which users are eligible to receive specific items from a collection. This ensures users only see recommendations that are relevant and appropriate for them.
You’ll define logic such as:
fieldis equal tostatic valuefieldis greater than/less than a defined value
Example:
- Only recommend size-specific SKUs to users who’ve bought that size
- Show luxury items only to loyalty-tier Platinum customers
| Goal | Eligibility Filter Setup |
|---|---|
| Show only women’s products | user.gender is equal to female |
| Recommend premium items to high spenders | user.lifetime_value is greater than 500 |
| Target users who’ve viewed sunglasses | user.last_viewed_category is equal to sunglasses |
| Limit discounted items to bargain shoppers | user.segment is equal to Value Seeker |
| Personalize by location | user.region is equal to Midwest |
You can stack multiple filters together using AND conditions, just like shown in the screenshot.
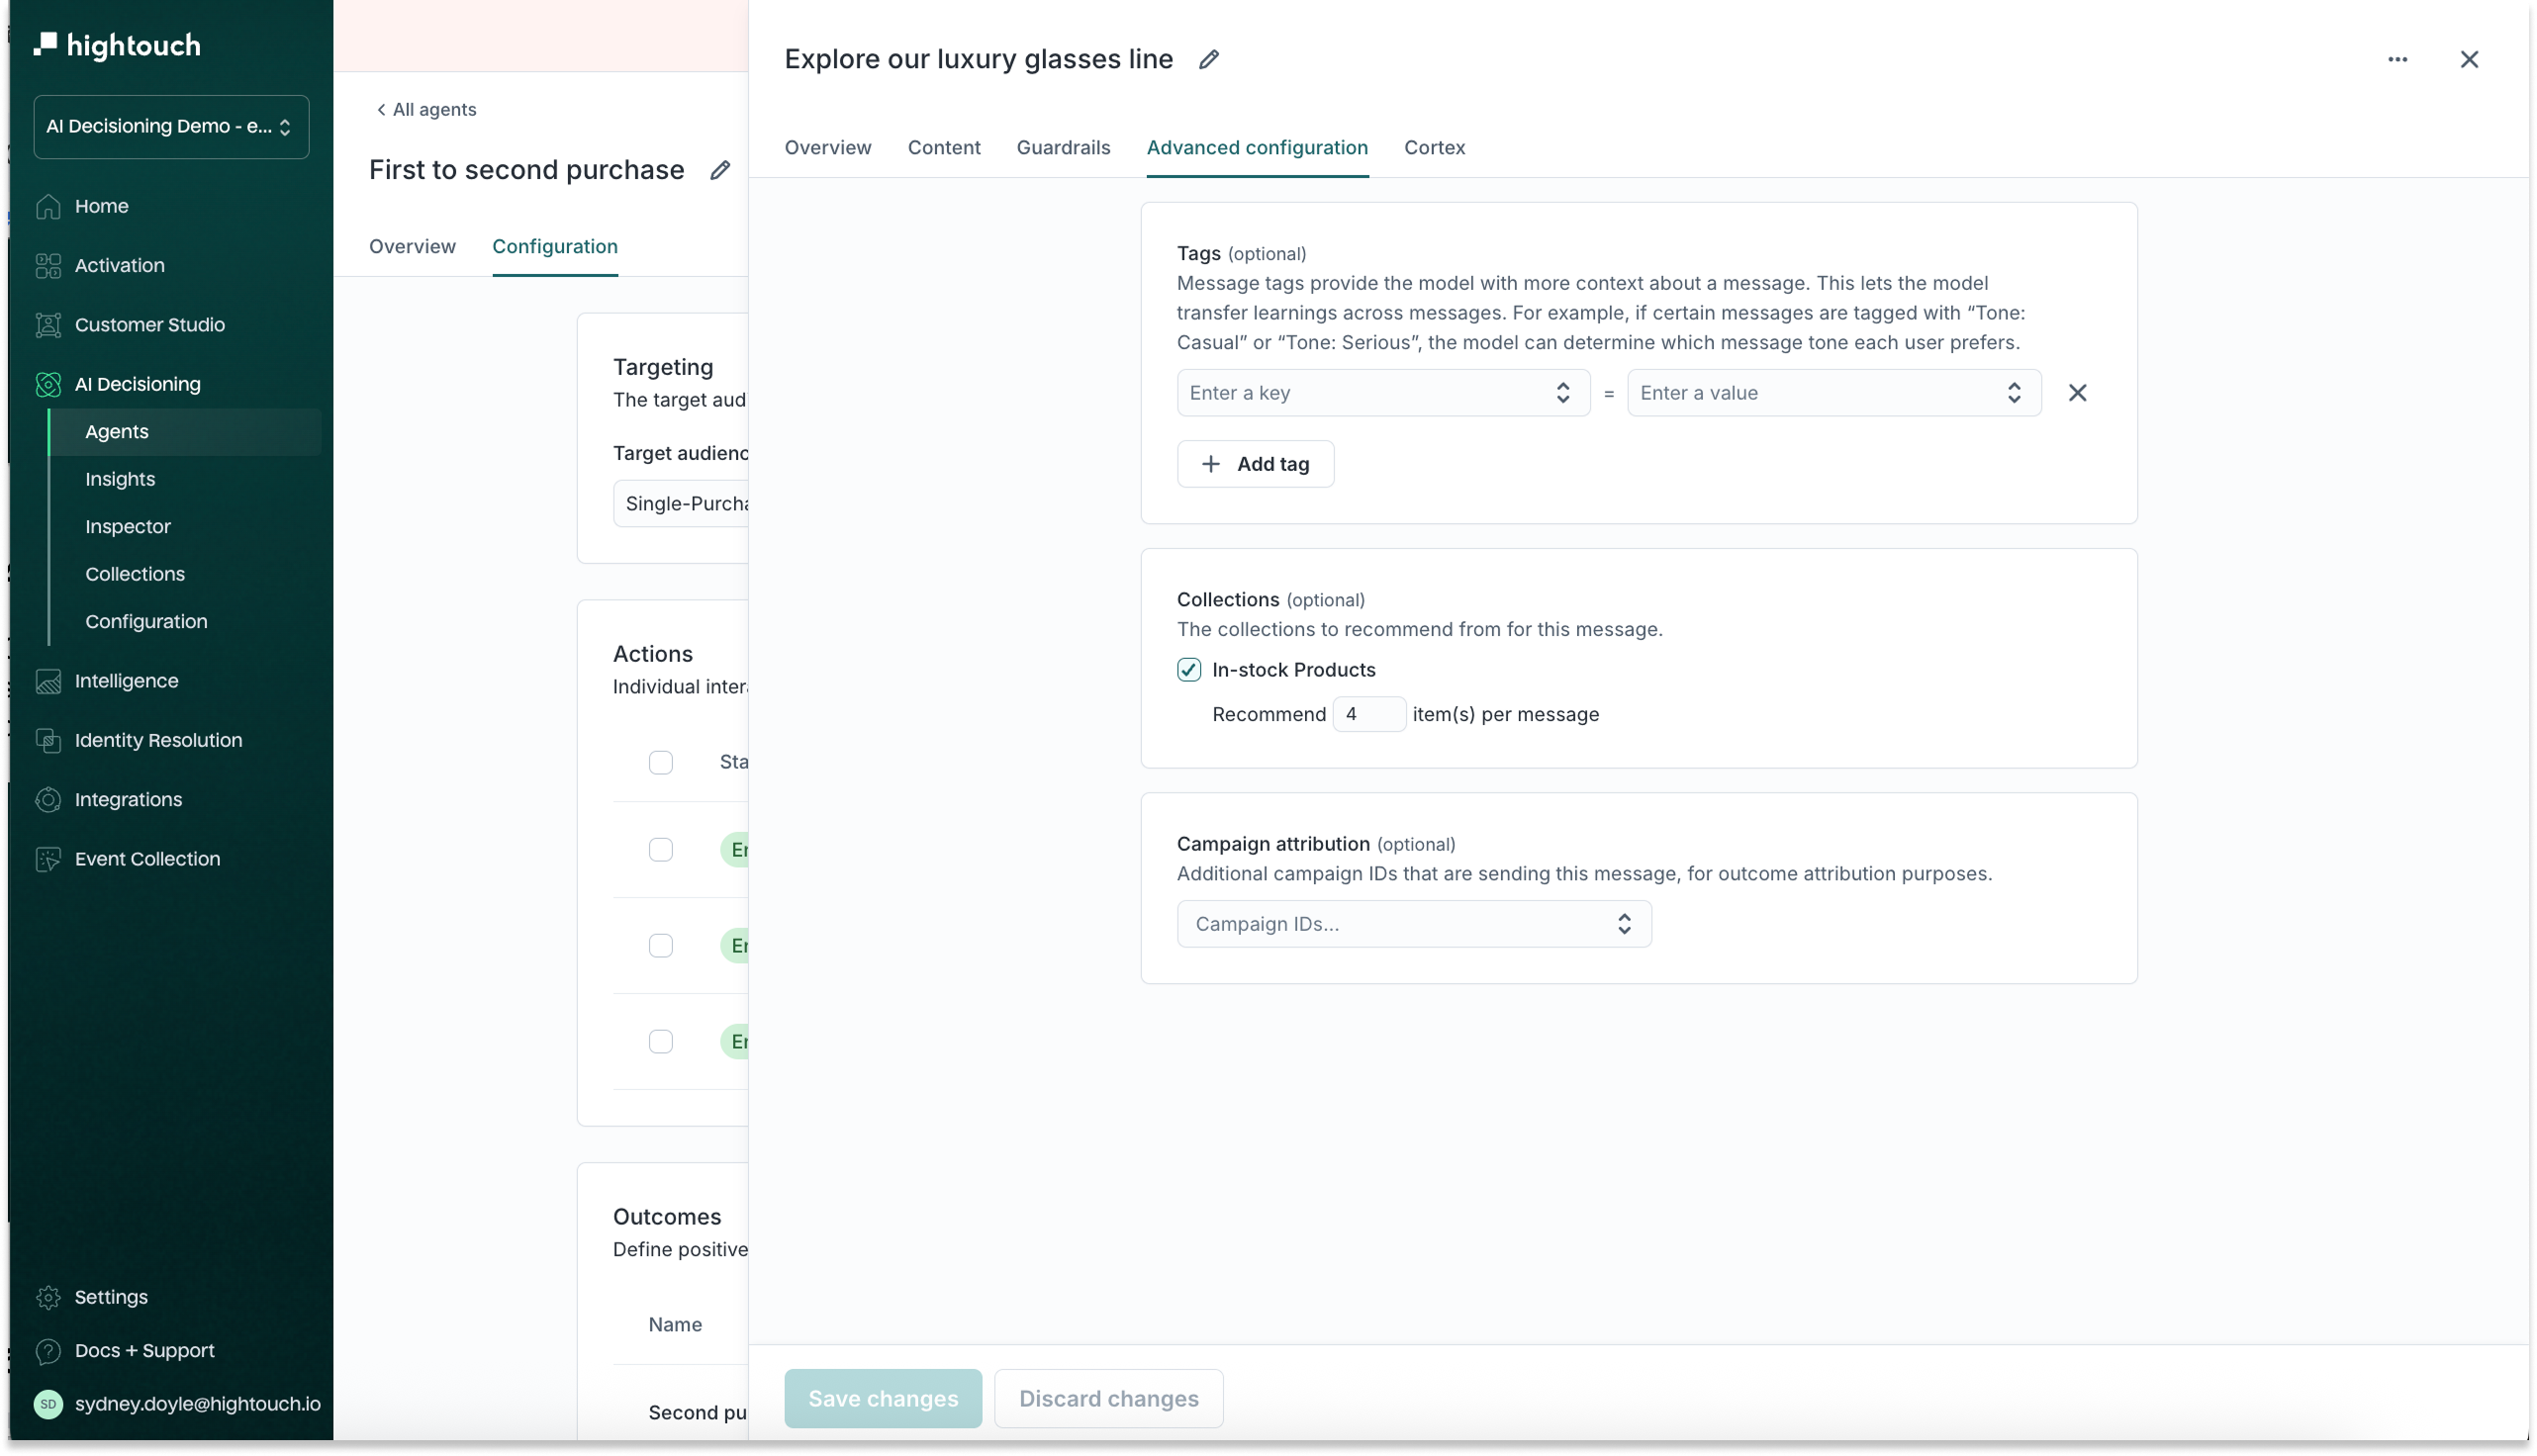
Using collections in actions
Once your collection is created, you can apply it inside an action:
- Go to AI Decisioning > Agents > Select an agent > Configuration > Select an Action
- Navigate to the Advanced Configuration tab
- Select a collection (e.g., “In-stock Products”)
- Define how many items to recommend (e.g., 4 items per message)
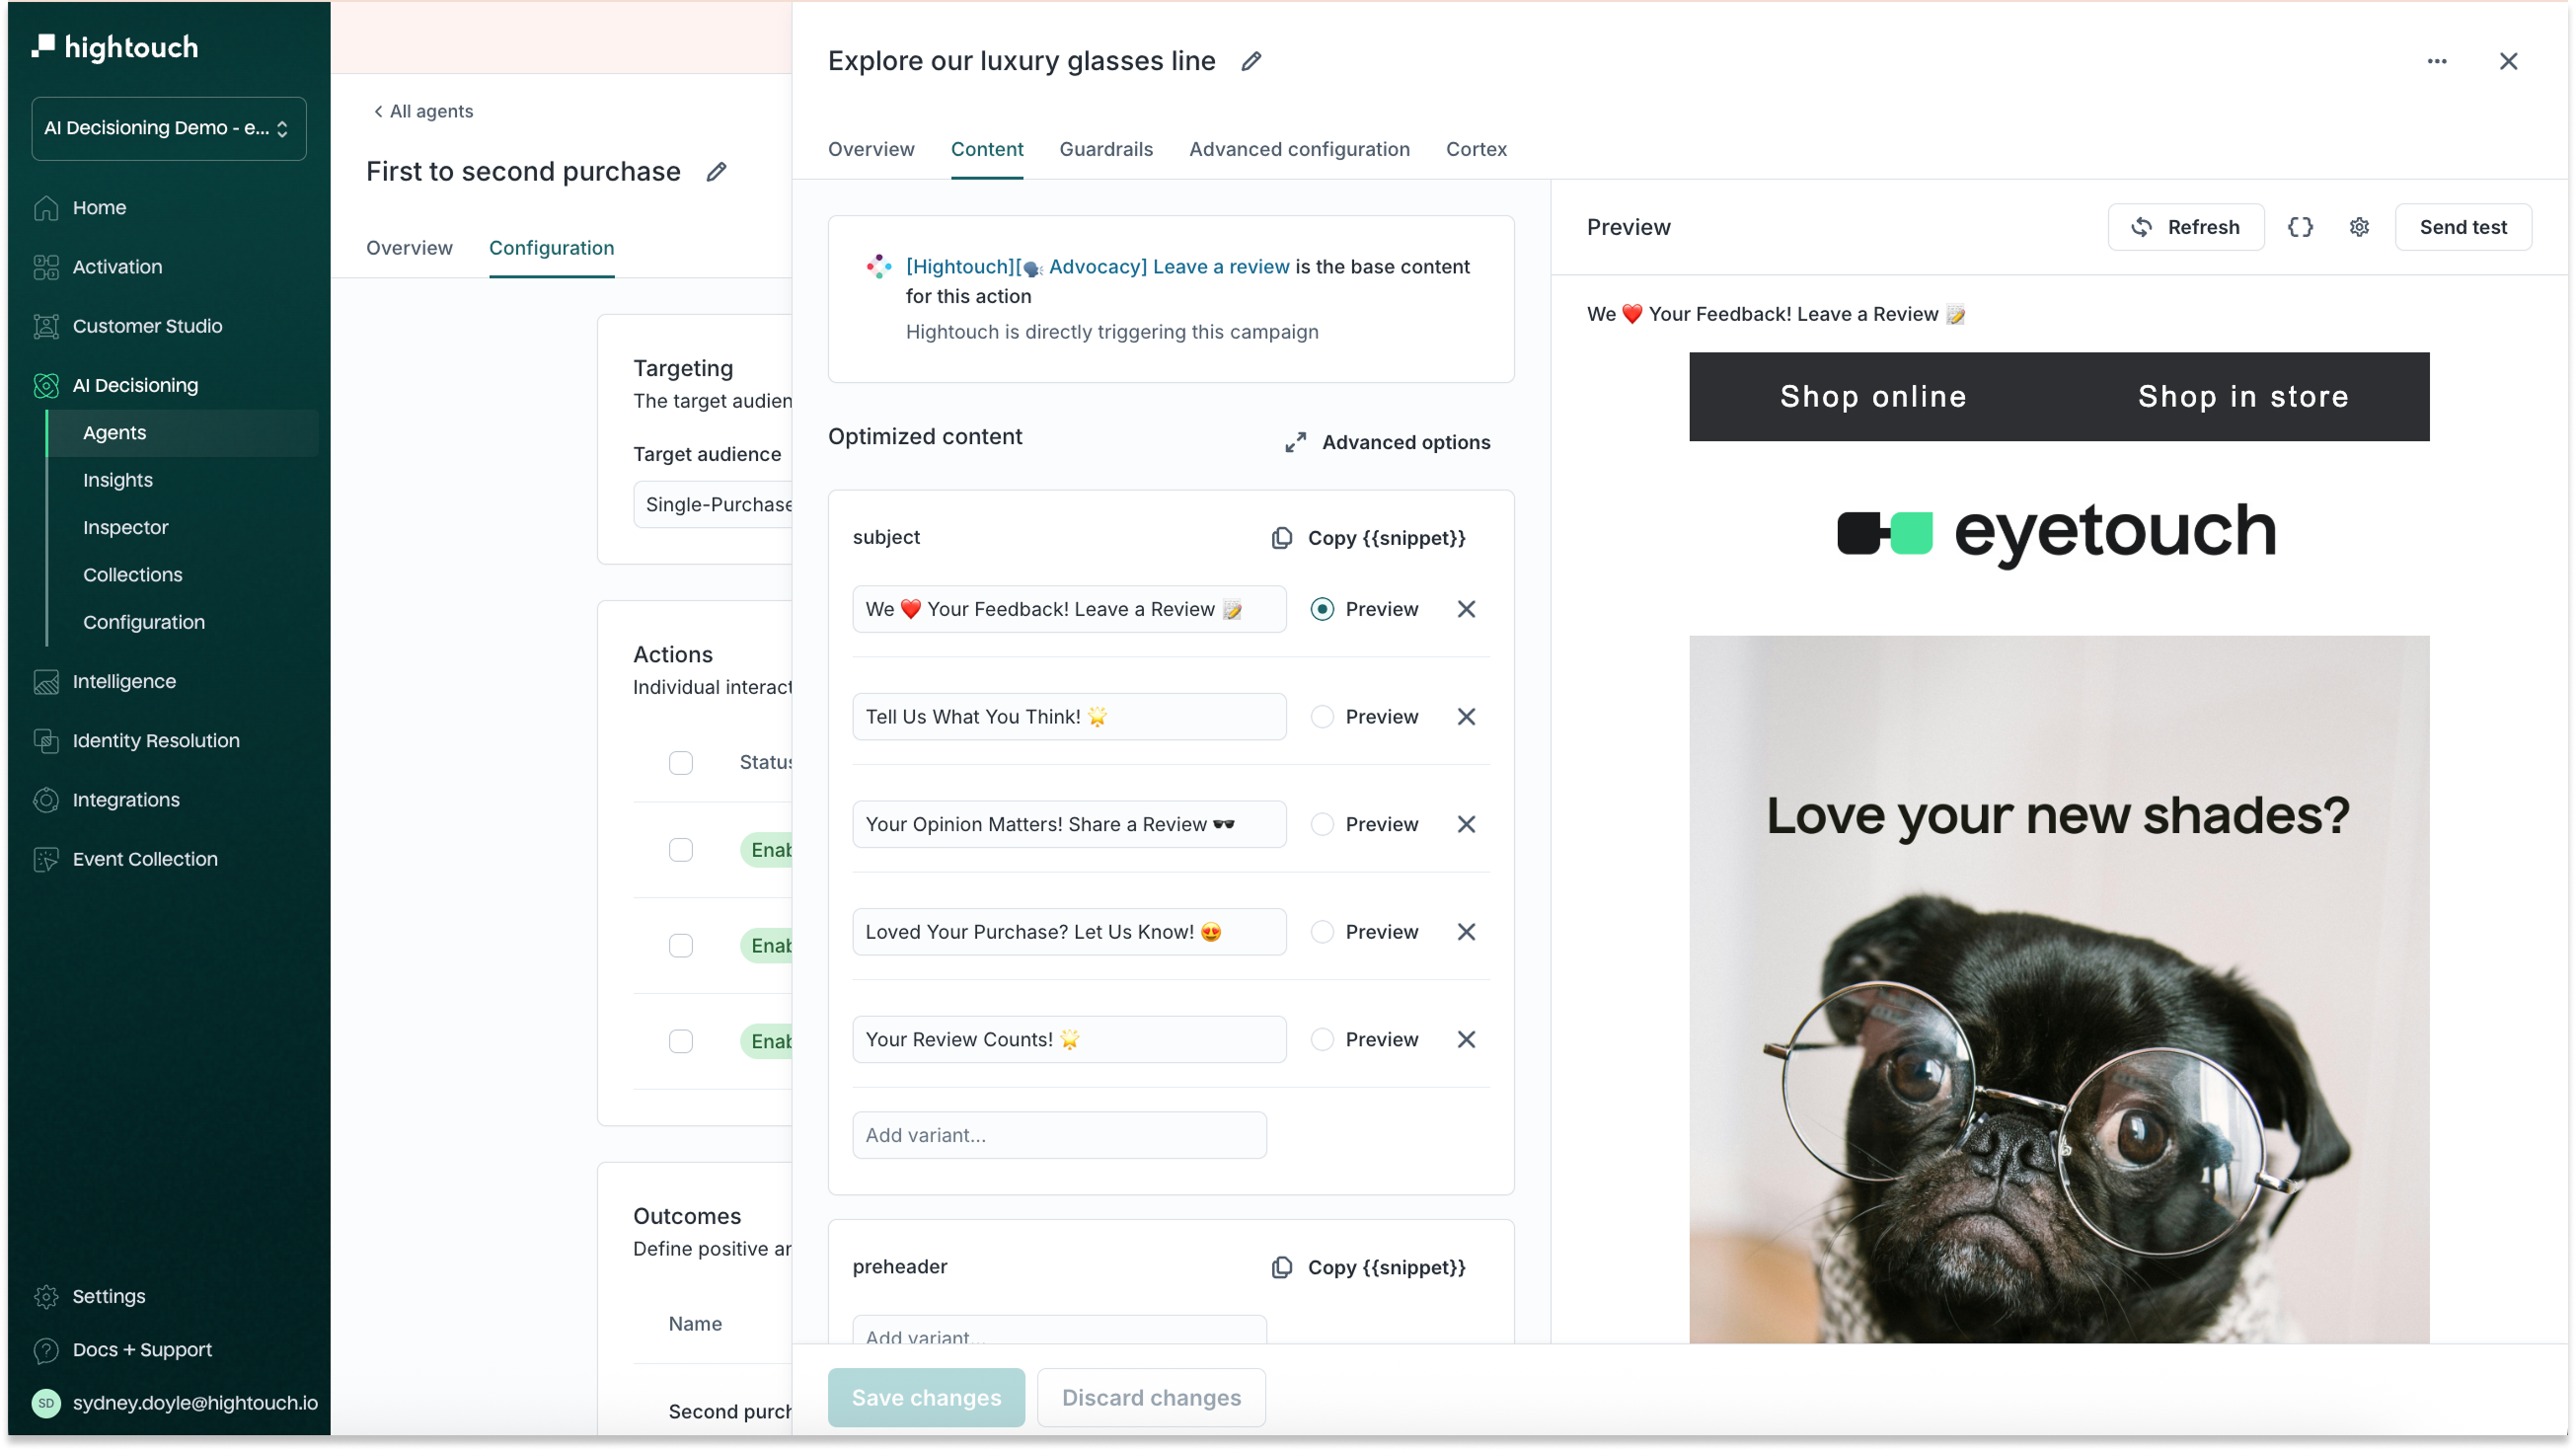
Preview and QA
- Go to AI Decisioning > Agents > Select an agent > Configuration > Select an Action
- Navigate to the Content tab to preview your content:
- Confirm that the correct number of items are inserted
- Test fallback logic
- Ensure templates display well with various item combinations