Go to the Destinations overview page and click the Add destination button. Select Microsoft Dynamics 365 and click Continue. You can then authenticate Hightouch to Microsoft Dynamics 365.
For the Authentication method, select Log in to Microsoft Dynamics 365 and log into your Microsoft Dynamics 365 account. Once successful, you will be redirected back to Hightouch to enter a descriptive name for your destination and complete setup.
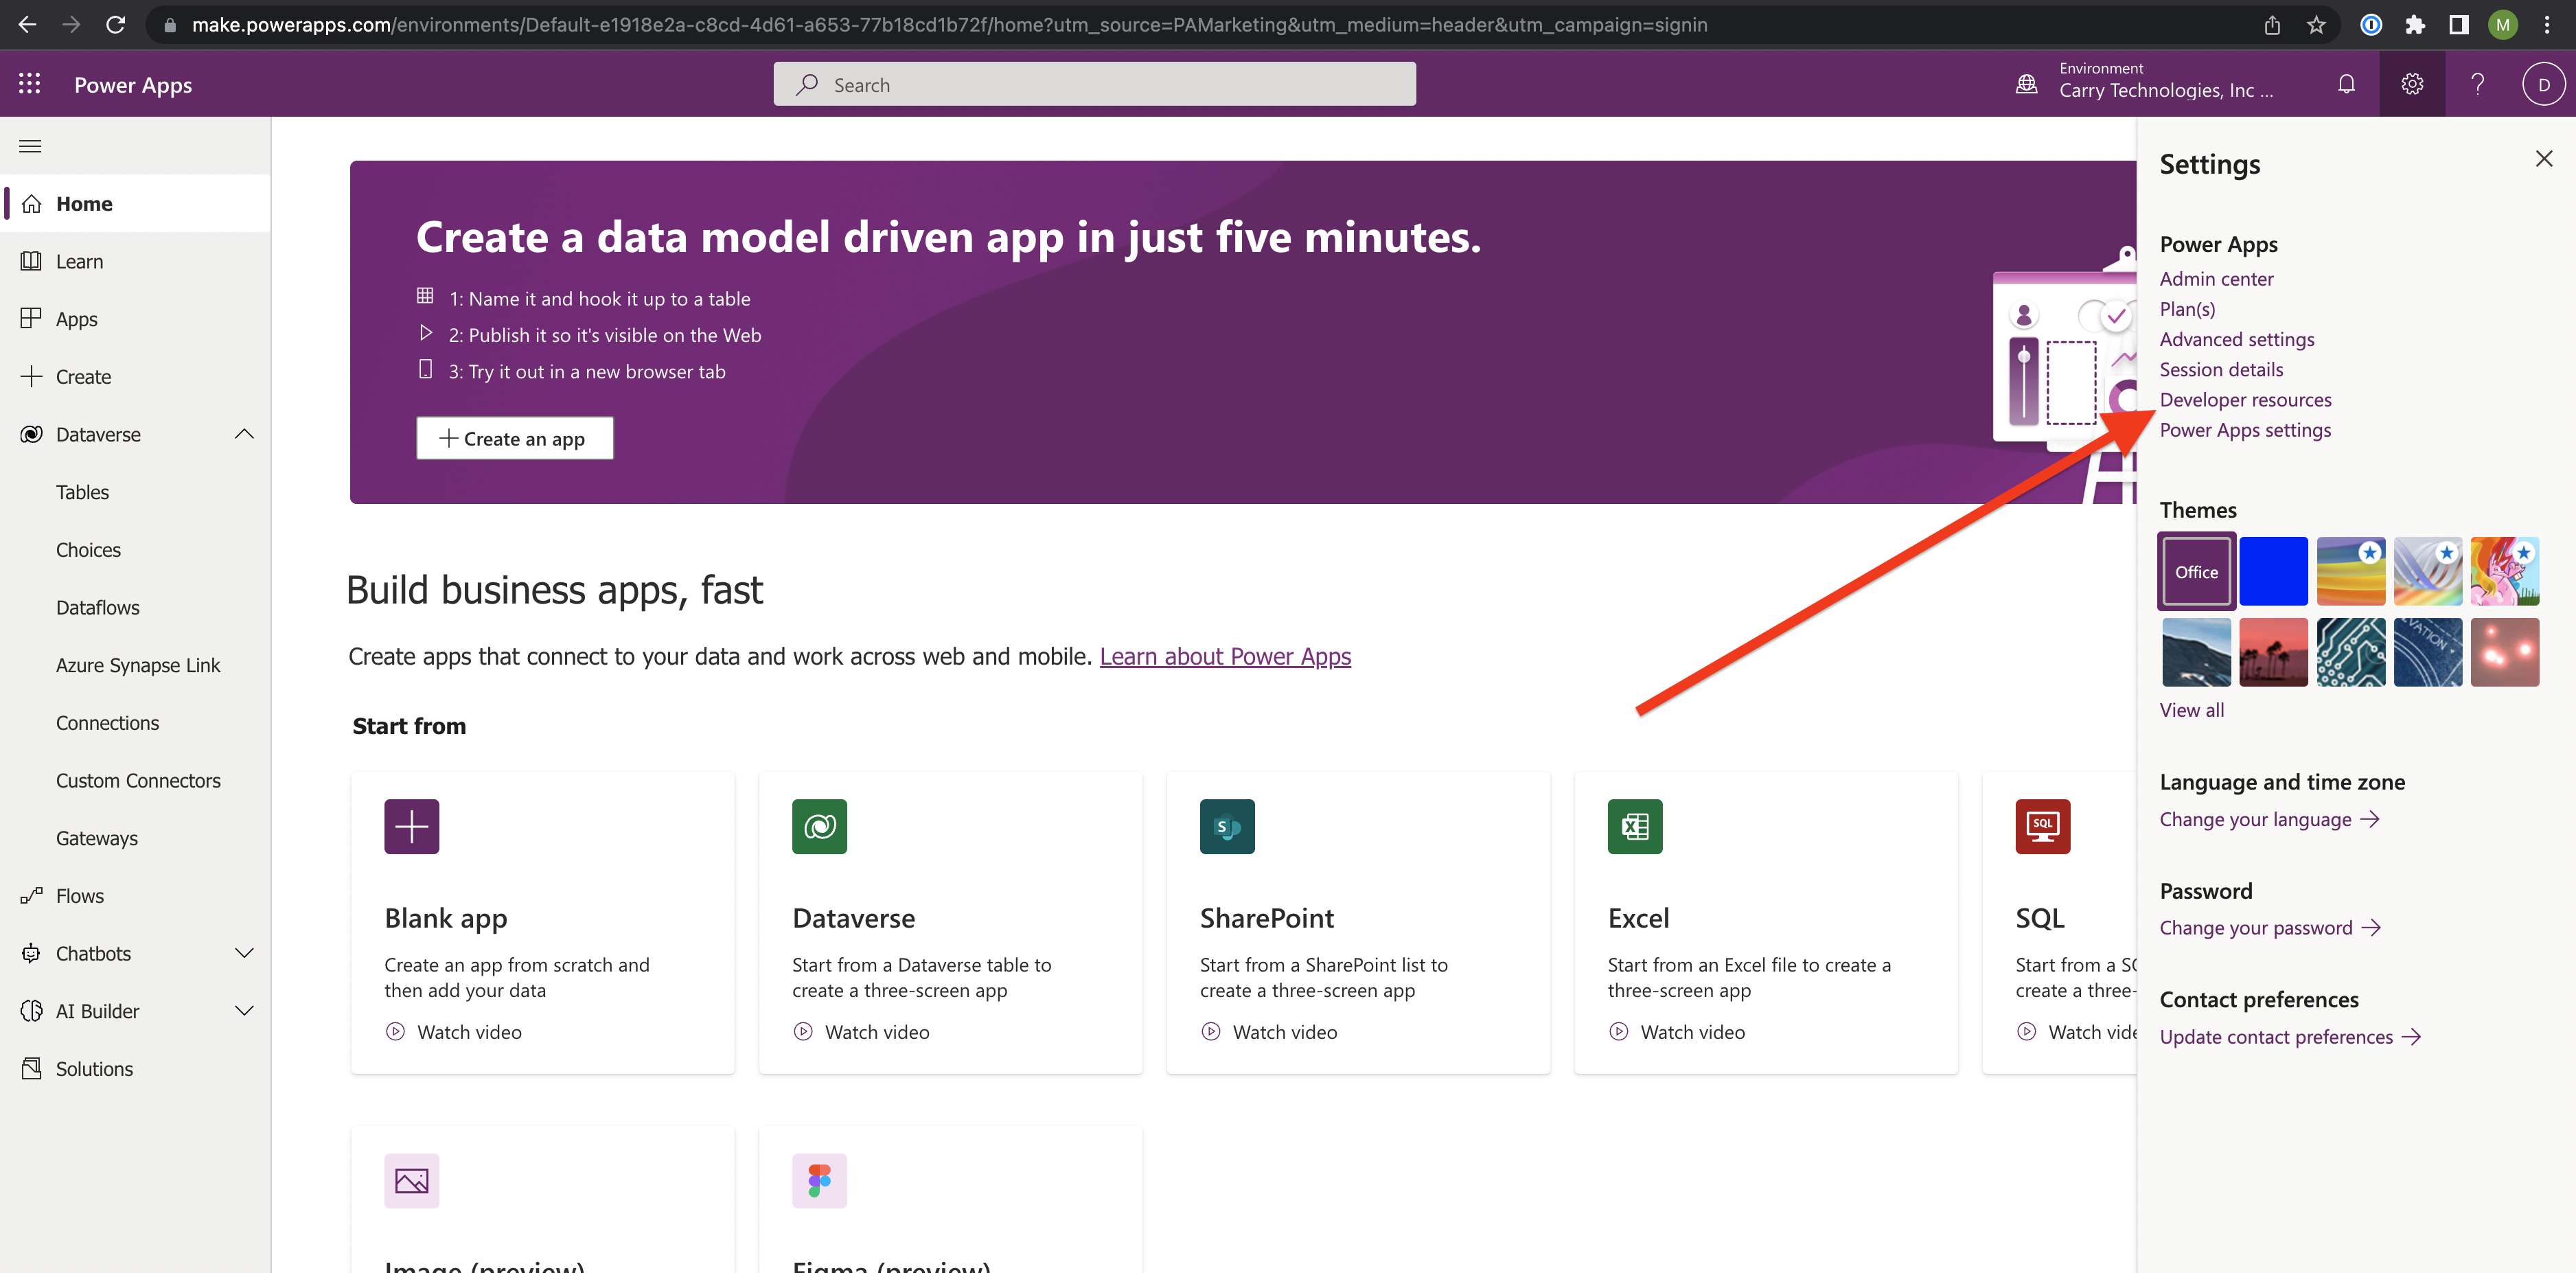
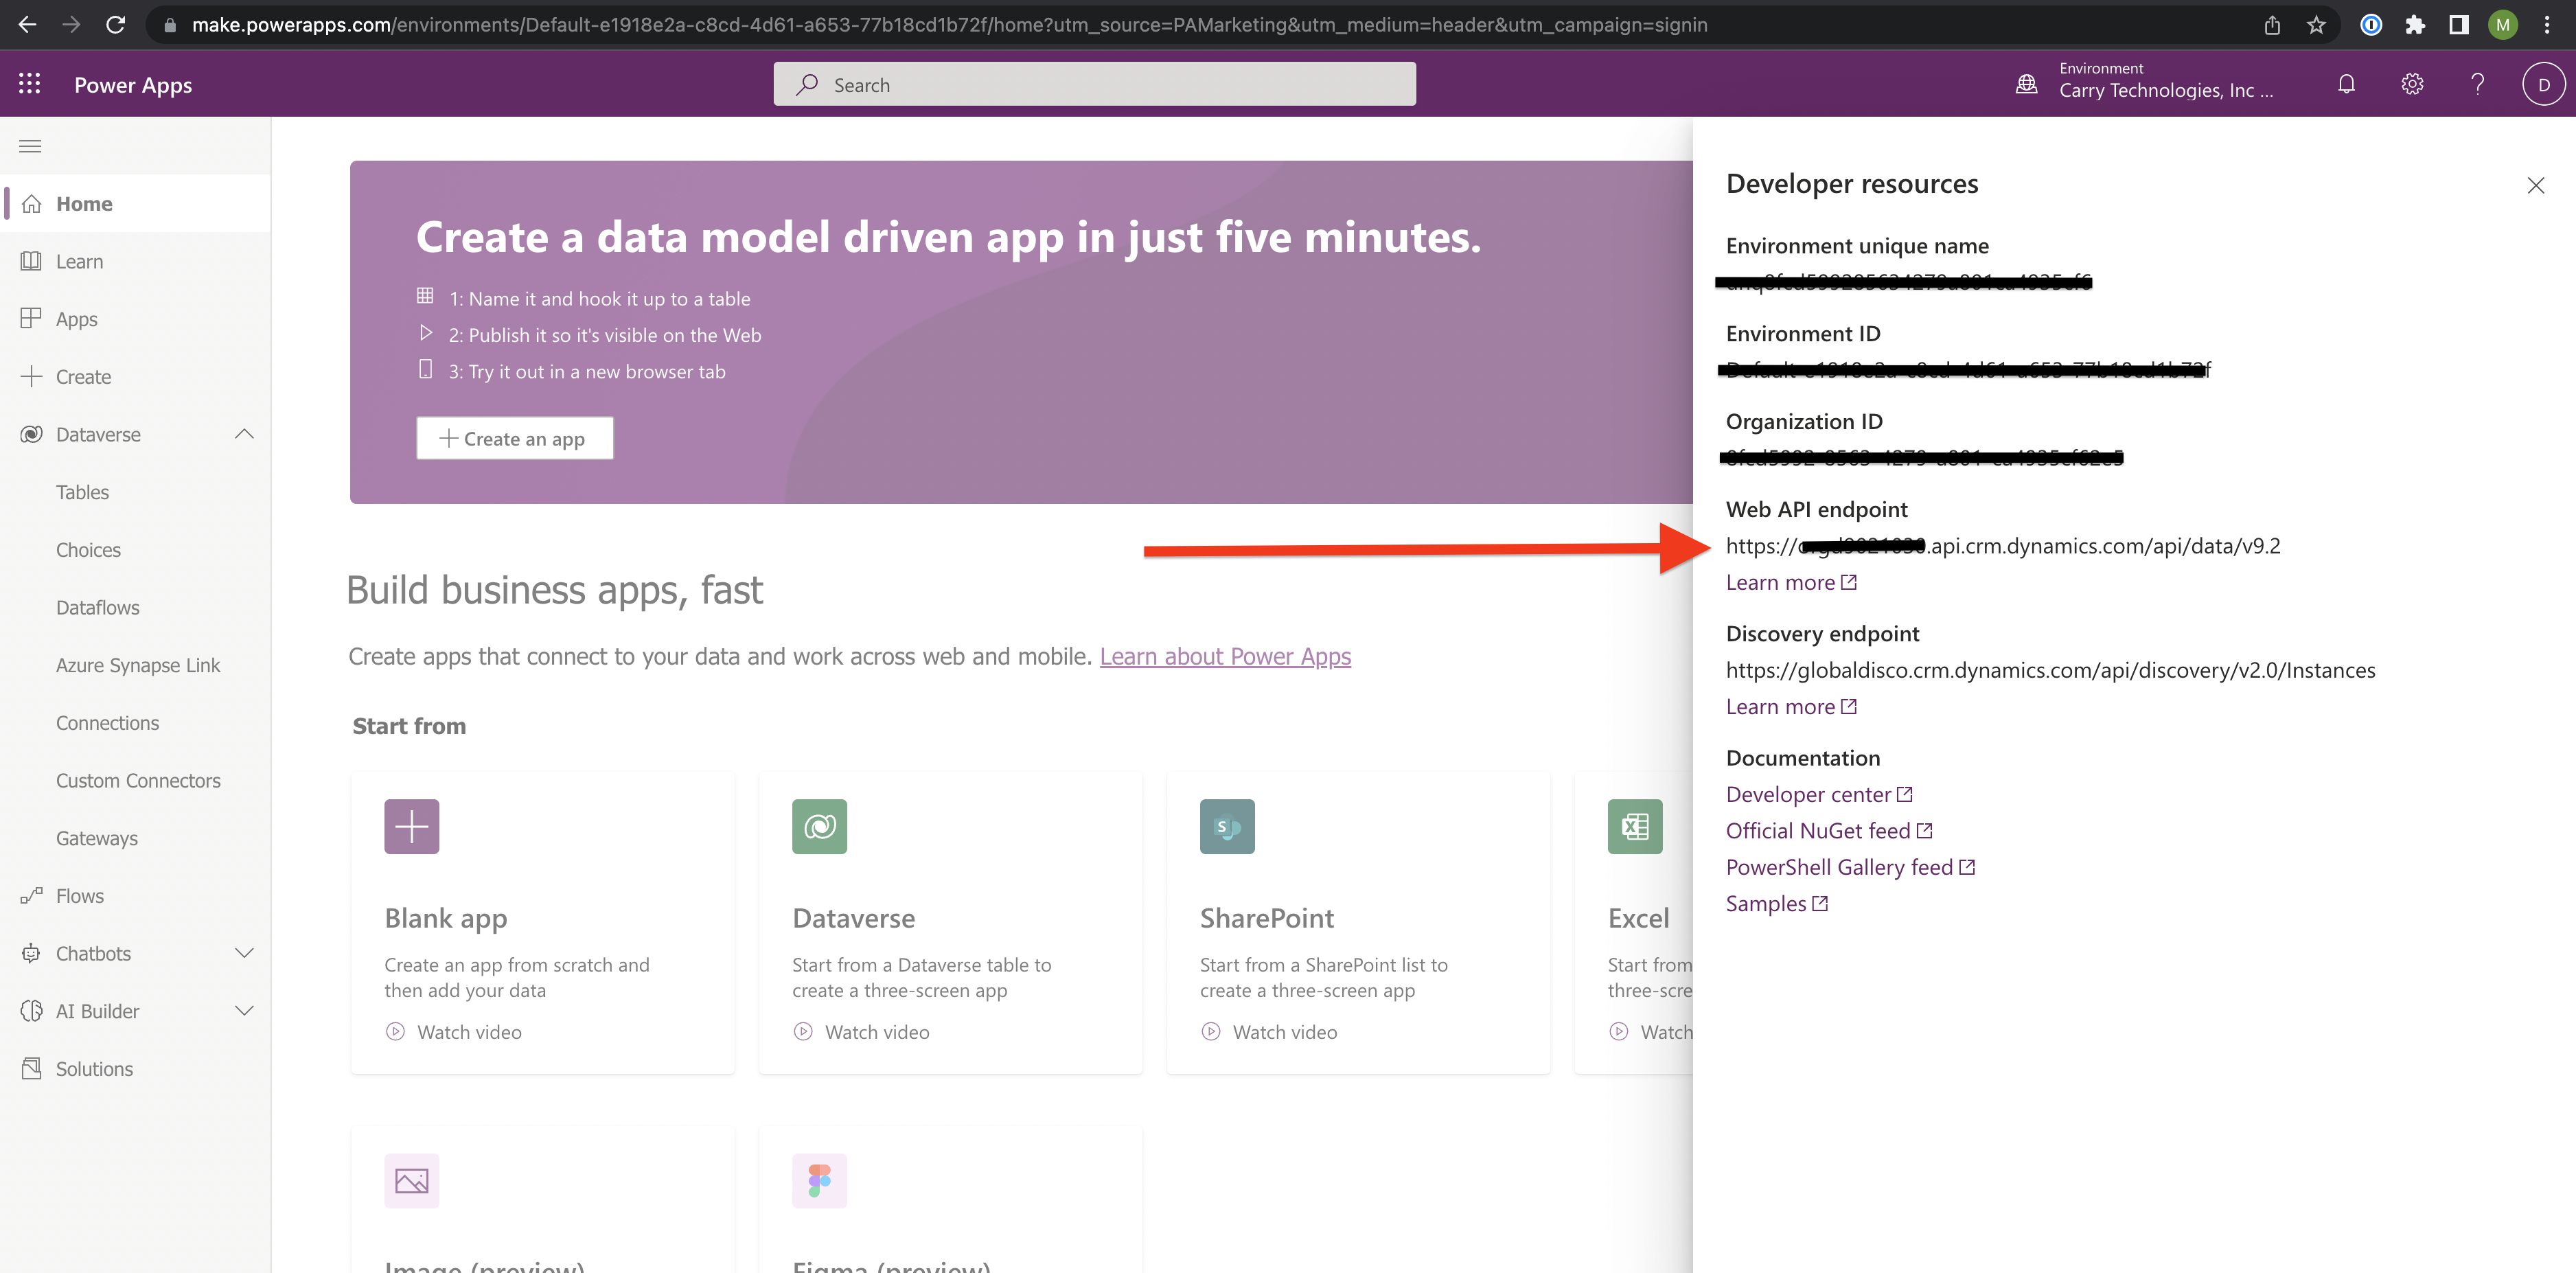
You must enter your Web API endpoint in Hightouch to complete the setup. See How to get your Web API endpoint for information on how to get it.
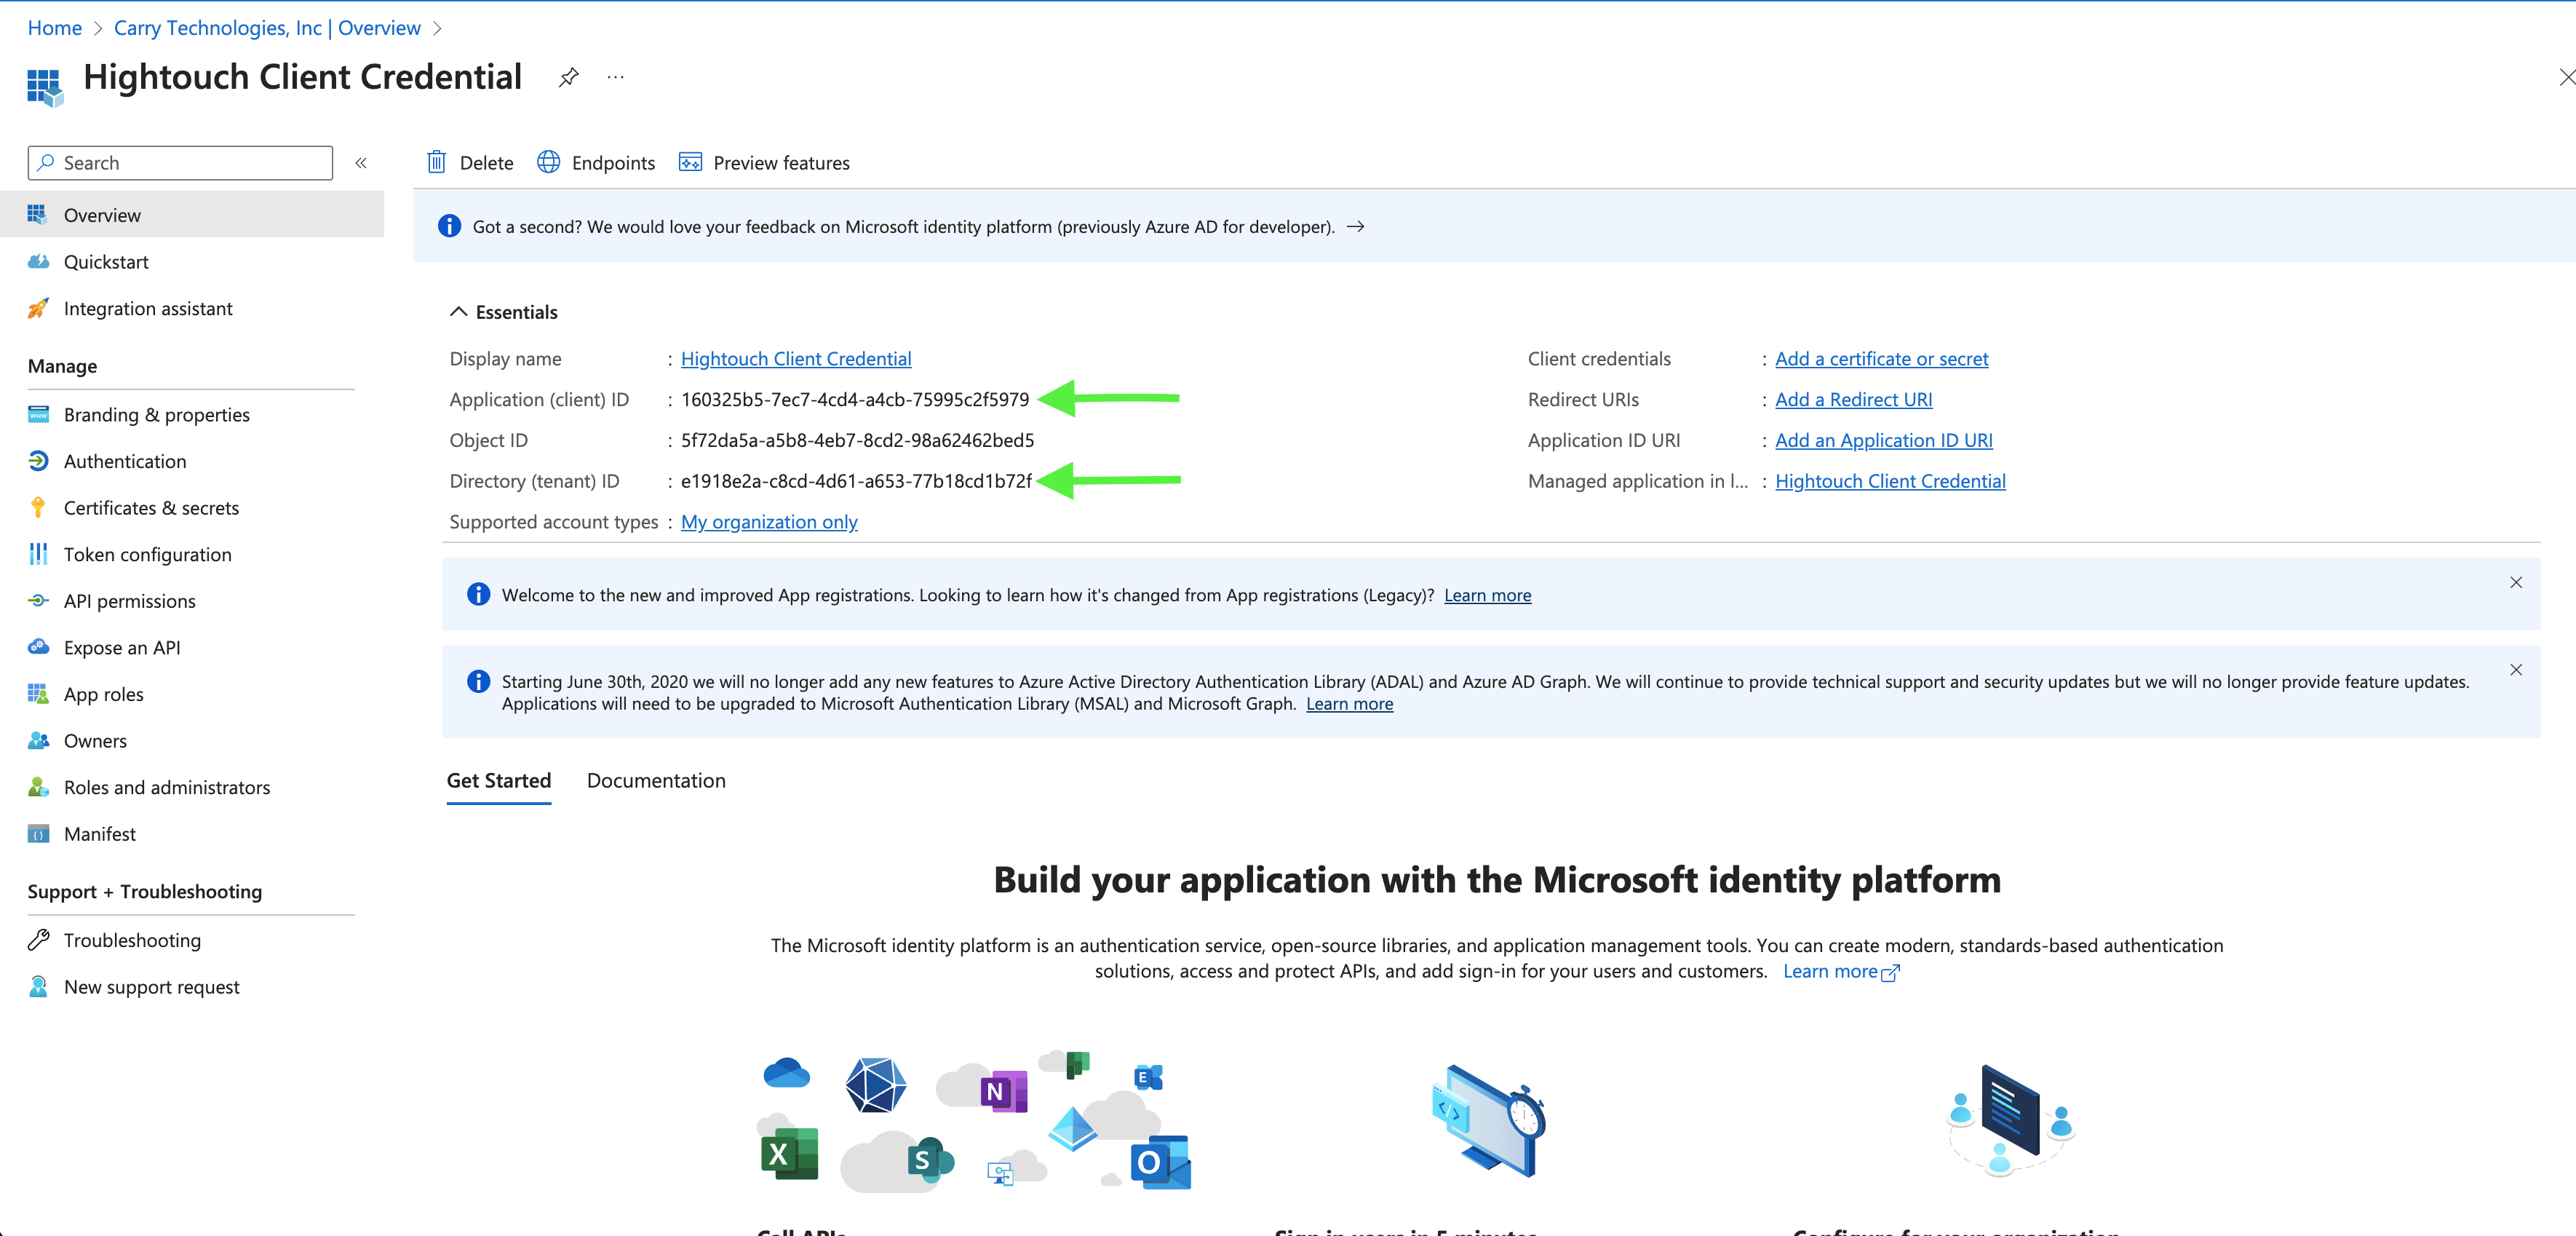
Once an app registration is created, copy the Tenant ID and Client ID in Hightouch.
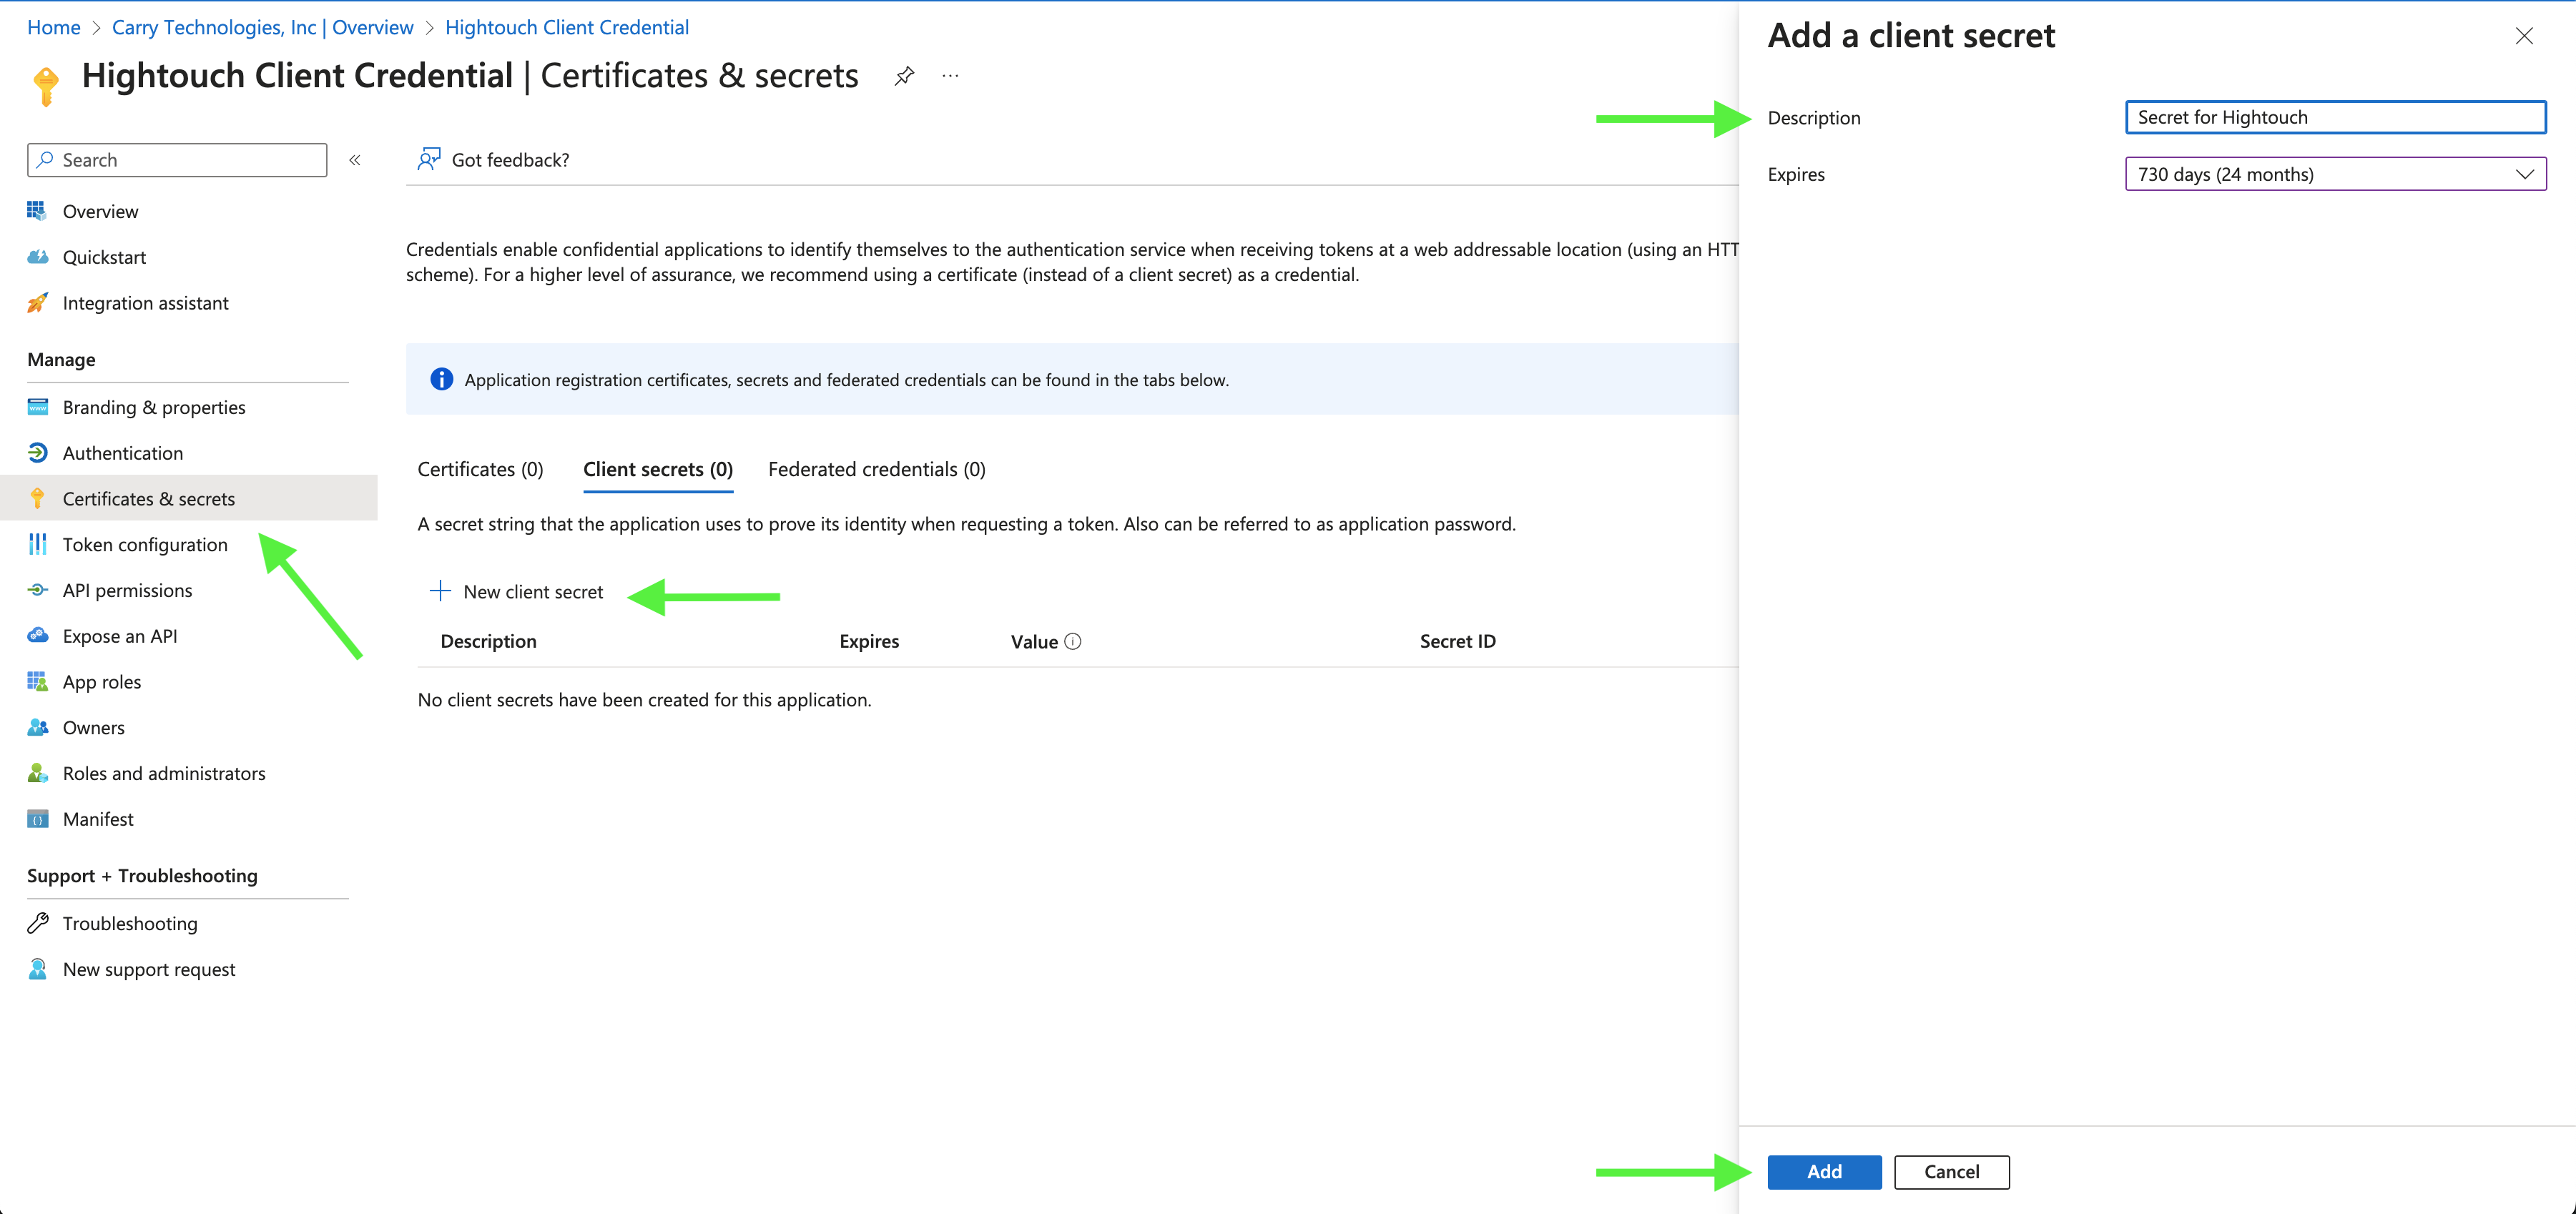
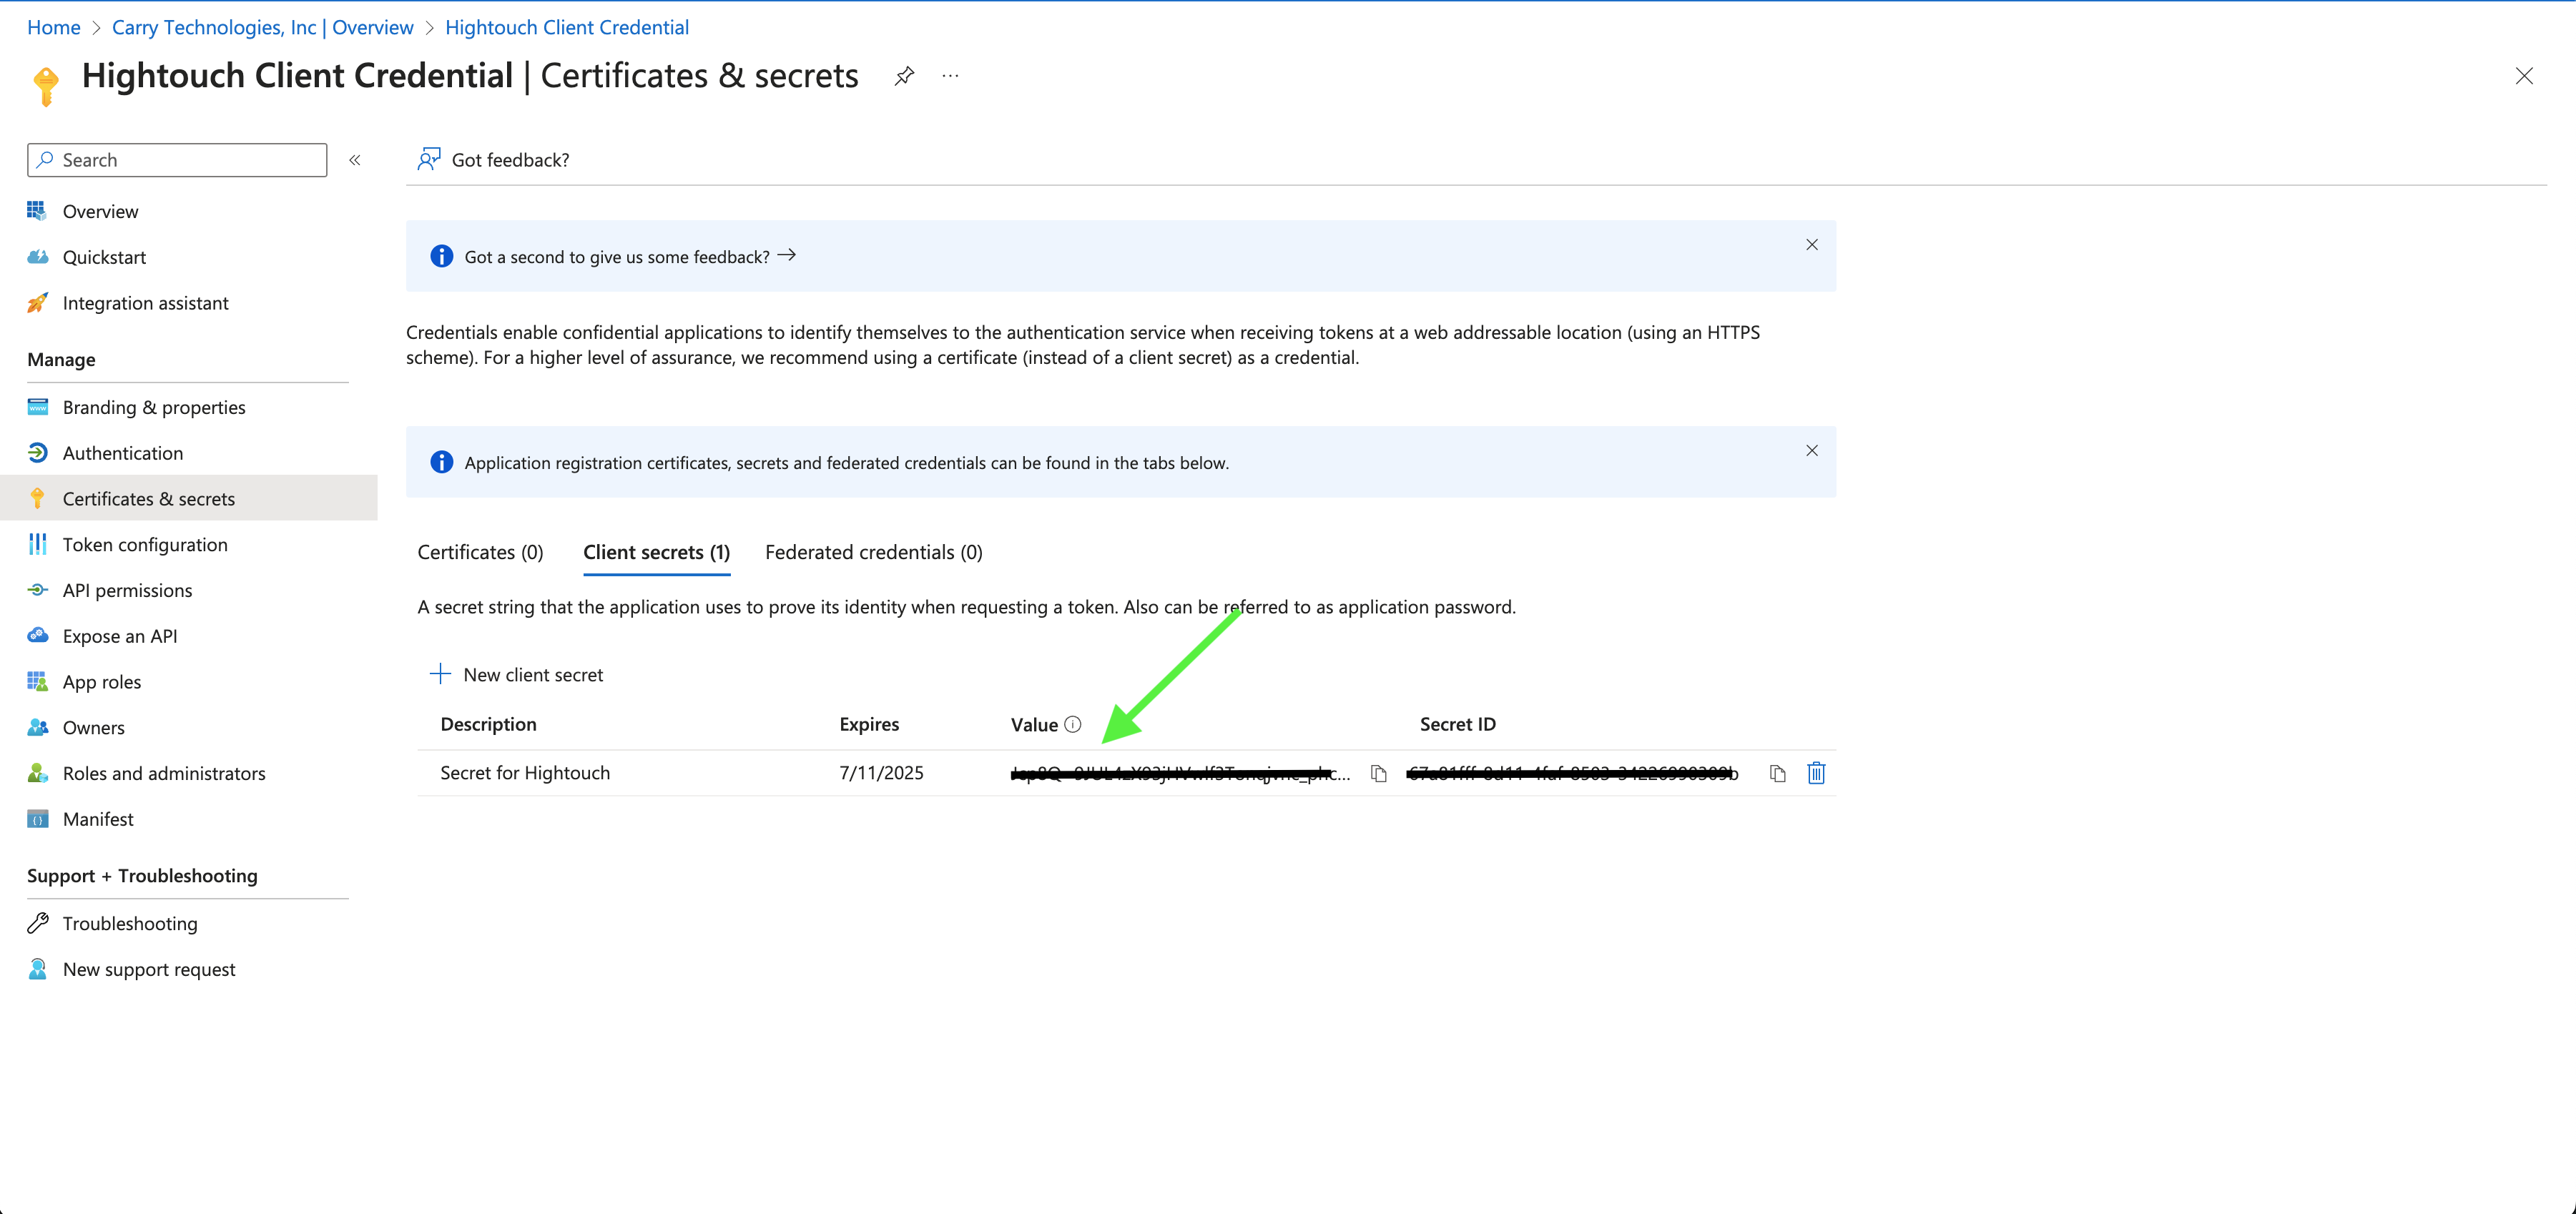
To get a Client Secret, navigate to Certificates & secrets > New client secret.
Copy the value of Client Secret in Hightouch.
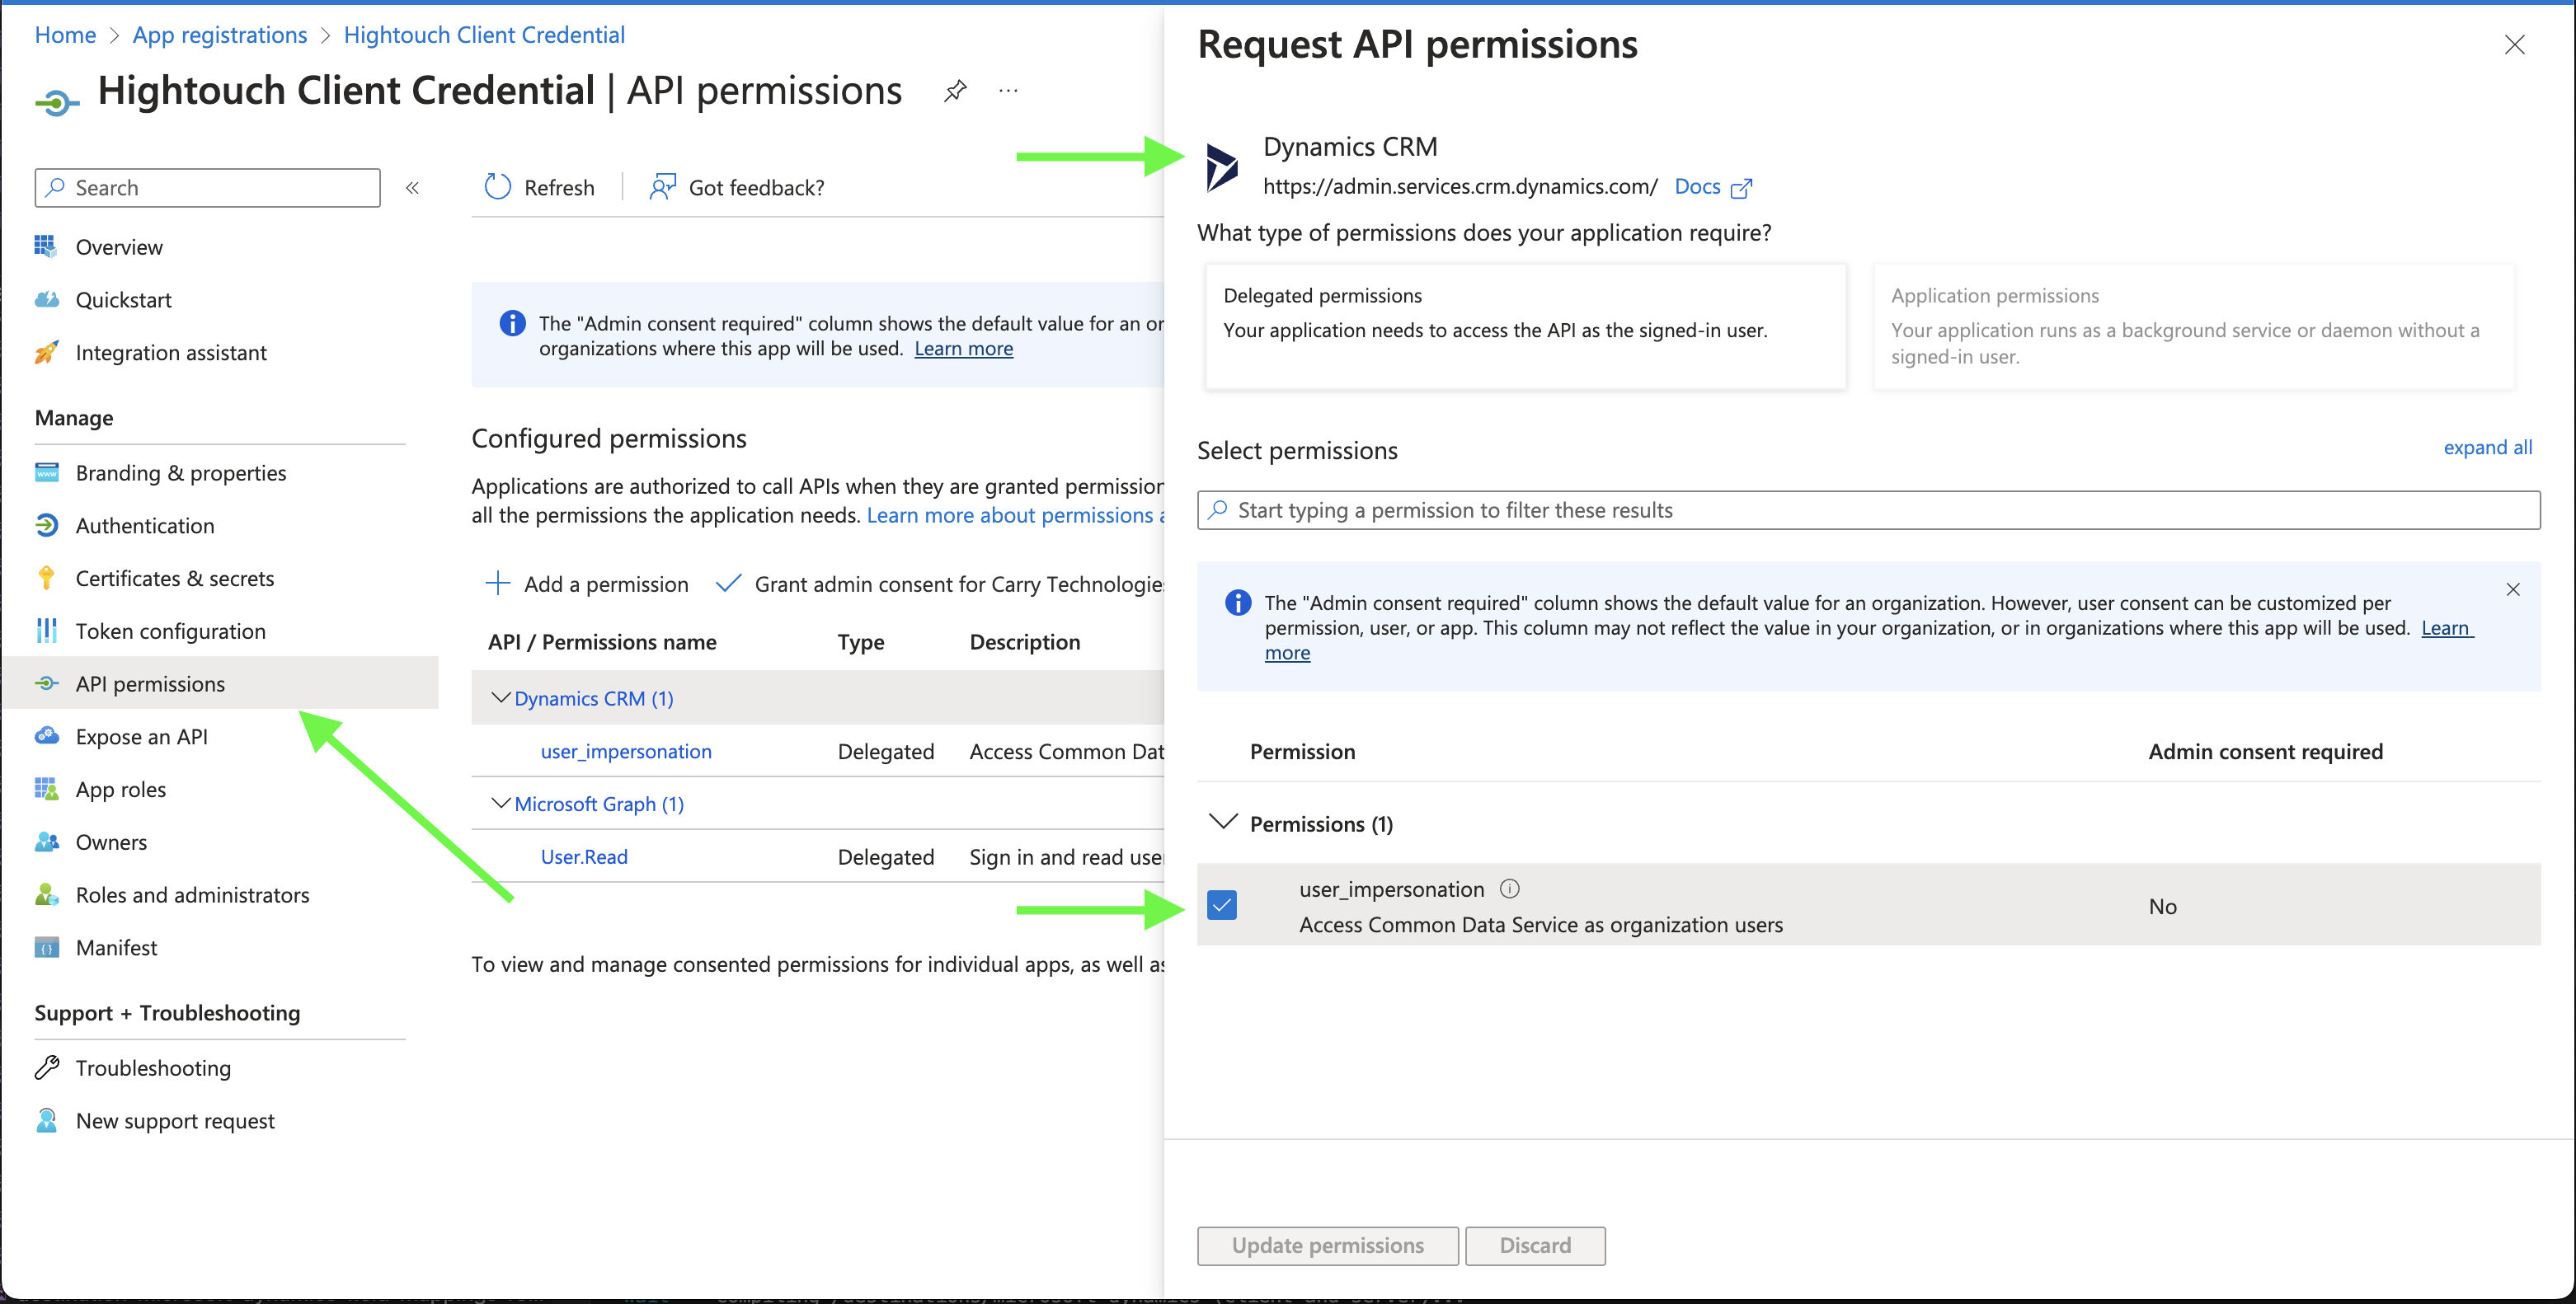
In order to use the created app registration with Microsoft Dynamics 365 API, You must grant API permission to it by going to API Permissions > Add Permissions then select Dynamics CRM and add the user_impersonation permission.
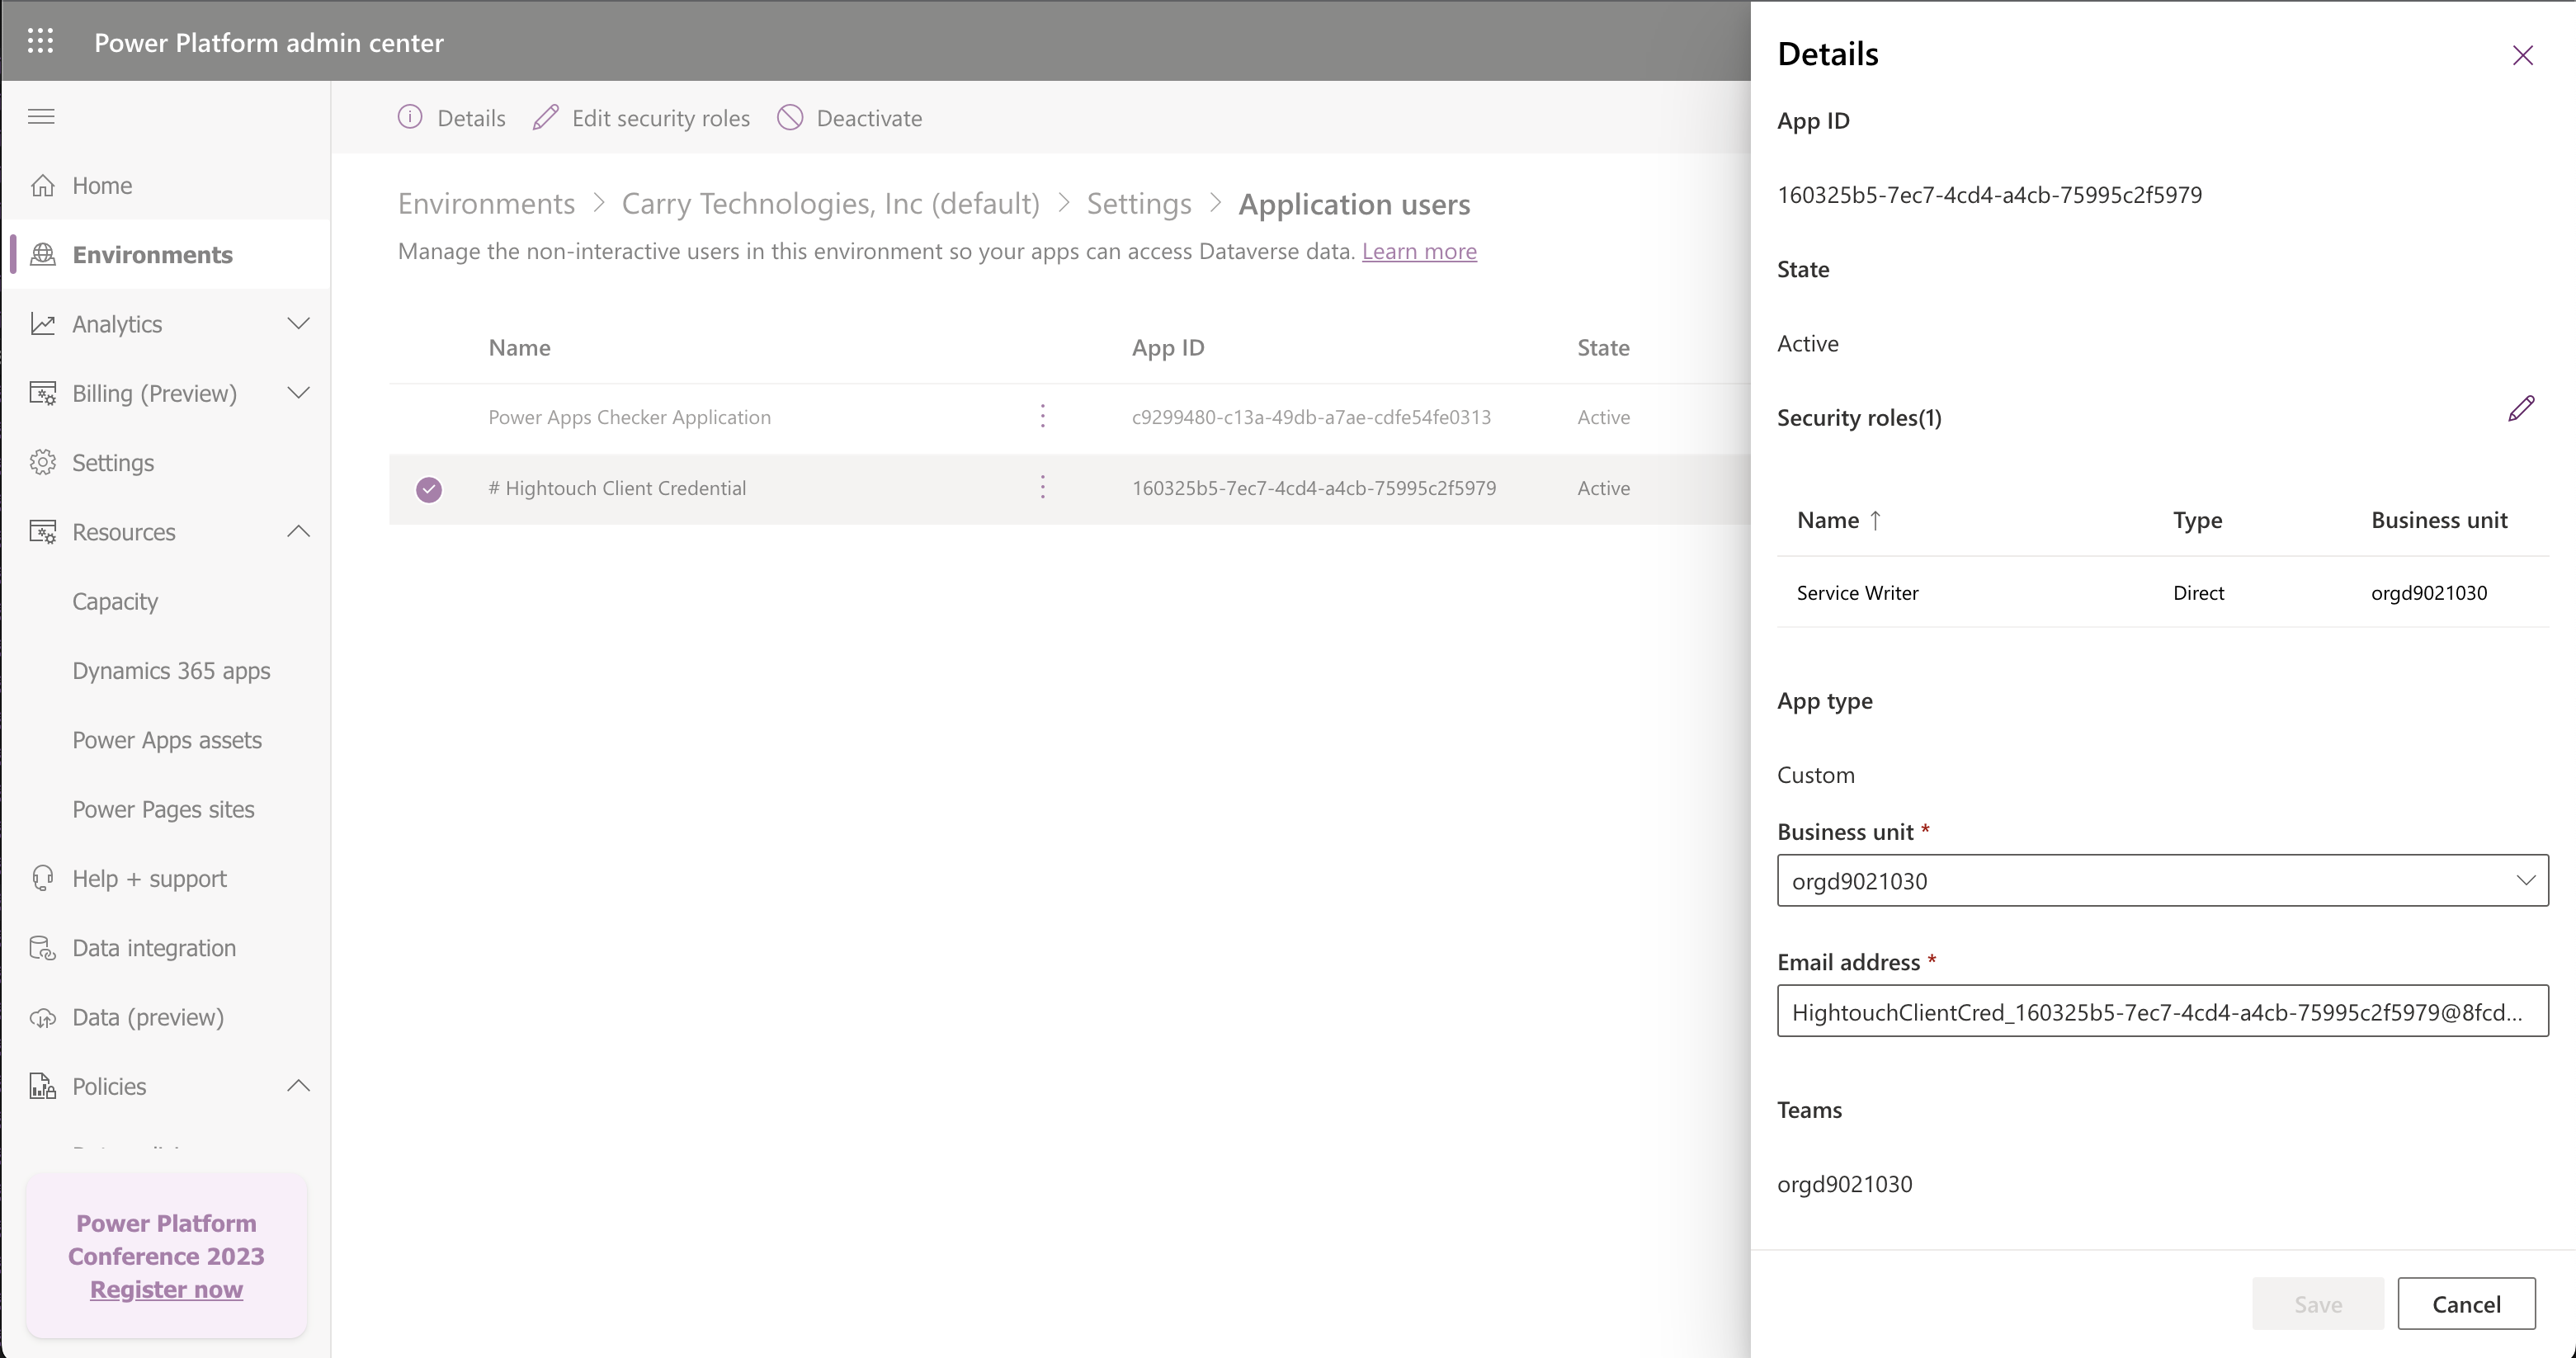
Finally, create a non-interactive application user with the app registration in the Power Platform admin center with Service Writer role. To do this Environments > [the environment you want to connect] > Settings > Application users > New app user.
Before you set up a sync, we recommend you to skim through these concepts to gain an insight on how to effectively sync your data into Microsoft Dynamics 365.
Dataverse is the source of truth for your Dynamics 365 applications.
Microsoft Dynamics 365 destination will sync your data into the Dataverse which will then allows you to use the data directly in your Dynamics 365 applications.
For more information about Dataverse see Microsoft's documentation.
GUID is the auto-generated primary key in your Dataverse tables. You are allowed to use GUID to match query results in Hightouch with rows in your Dataverse tables by default.
Although GUIDs are available by default, we recommend the use of alternate keys
for record matching in your Hightouch syncs.
Alternate keys are custom unique identifiers that can be derived from one or more columns in your Dataverse table.
it's a flexible way to set up a unique identifier in your Dataverse table to be use for record matching between your query results in Hightouch and your rows in Dataverse.
In most cases, you won't have access to Dataverse GUID in your external data warehouse for record matching so alternate keys are convenient solution.
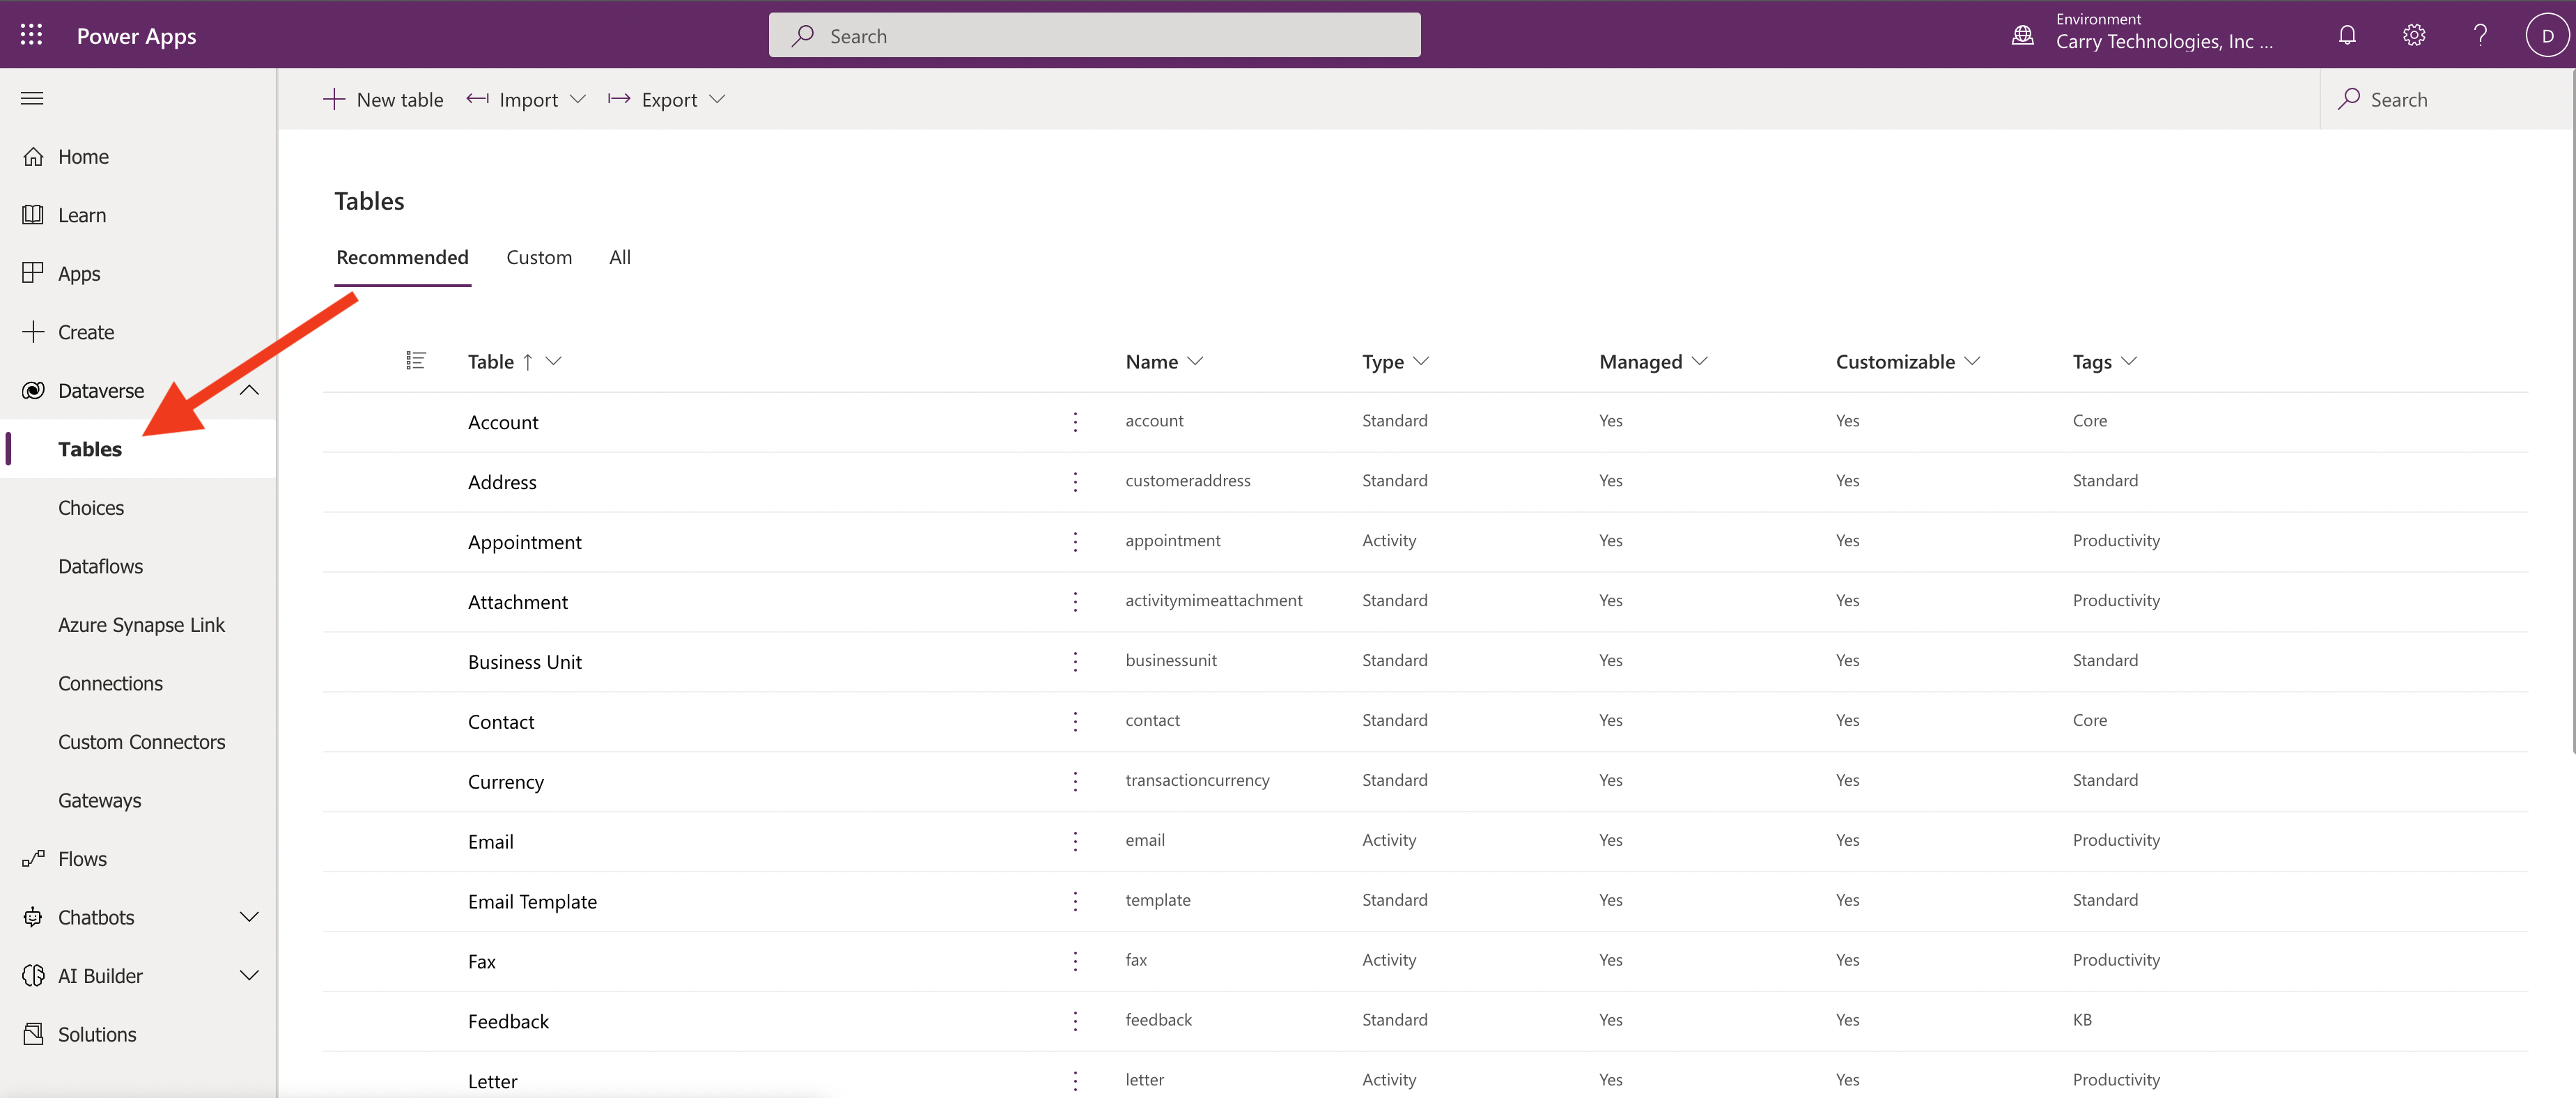
In the Power Apps, navigate to tables in Dataverse.
Select the table you want to sync to. In this walk through, we will use the Account table.
Please make sure that you are always working on the correct environment in
Power Apps. If you haven't set up your environment yet, go to this
link
for more information. Here is an
article
from Microsoft on environment strategy.
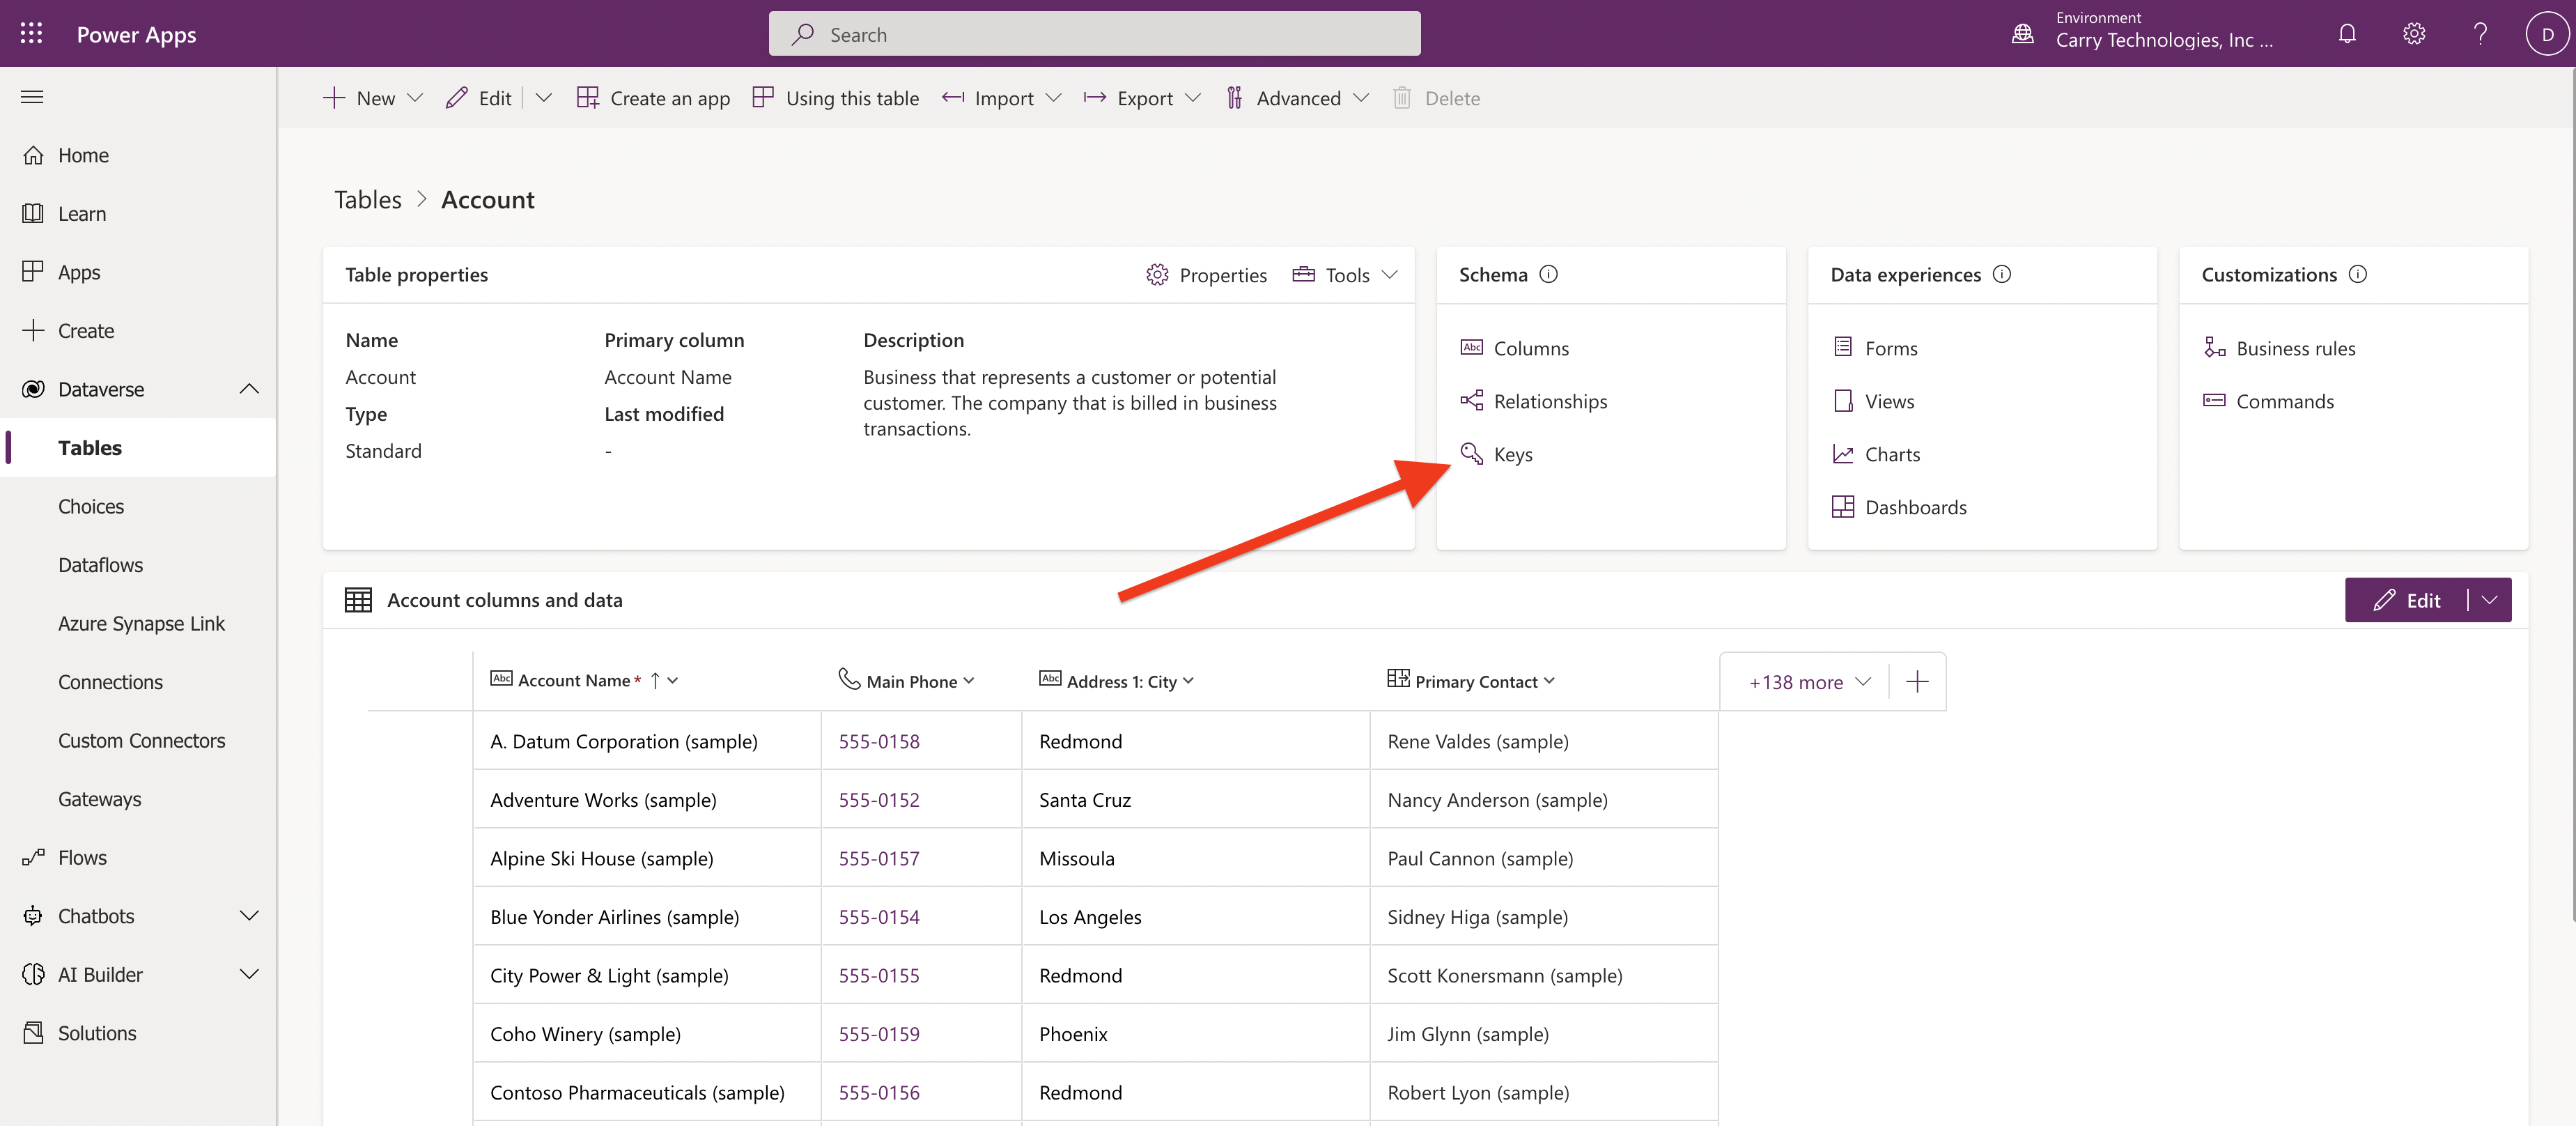
Once you are in the table view, select keys to open the alternate keys view.
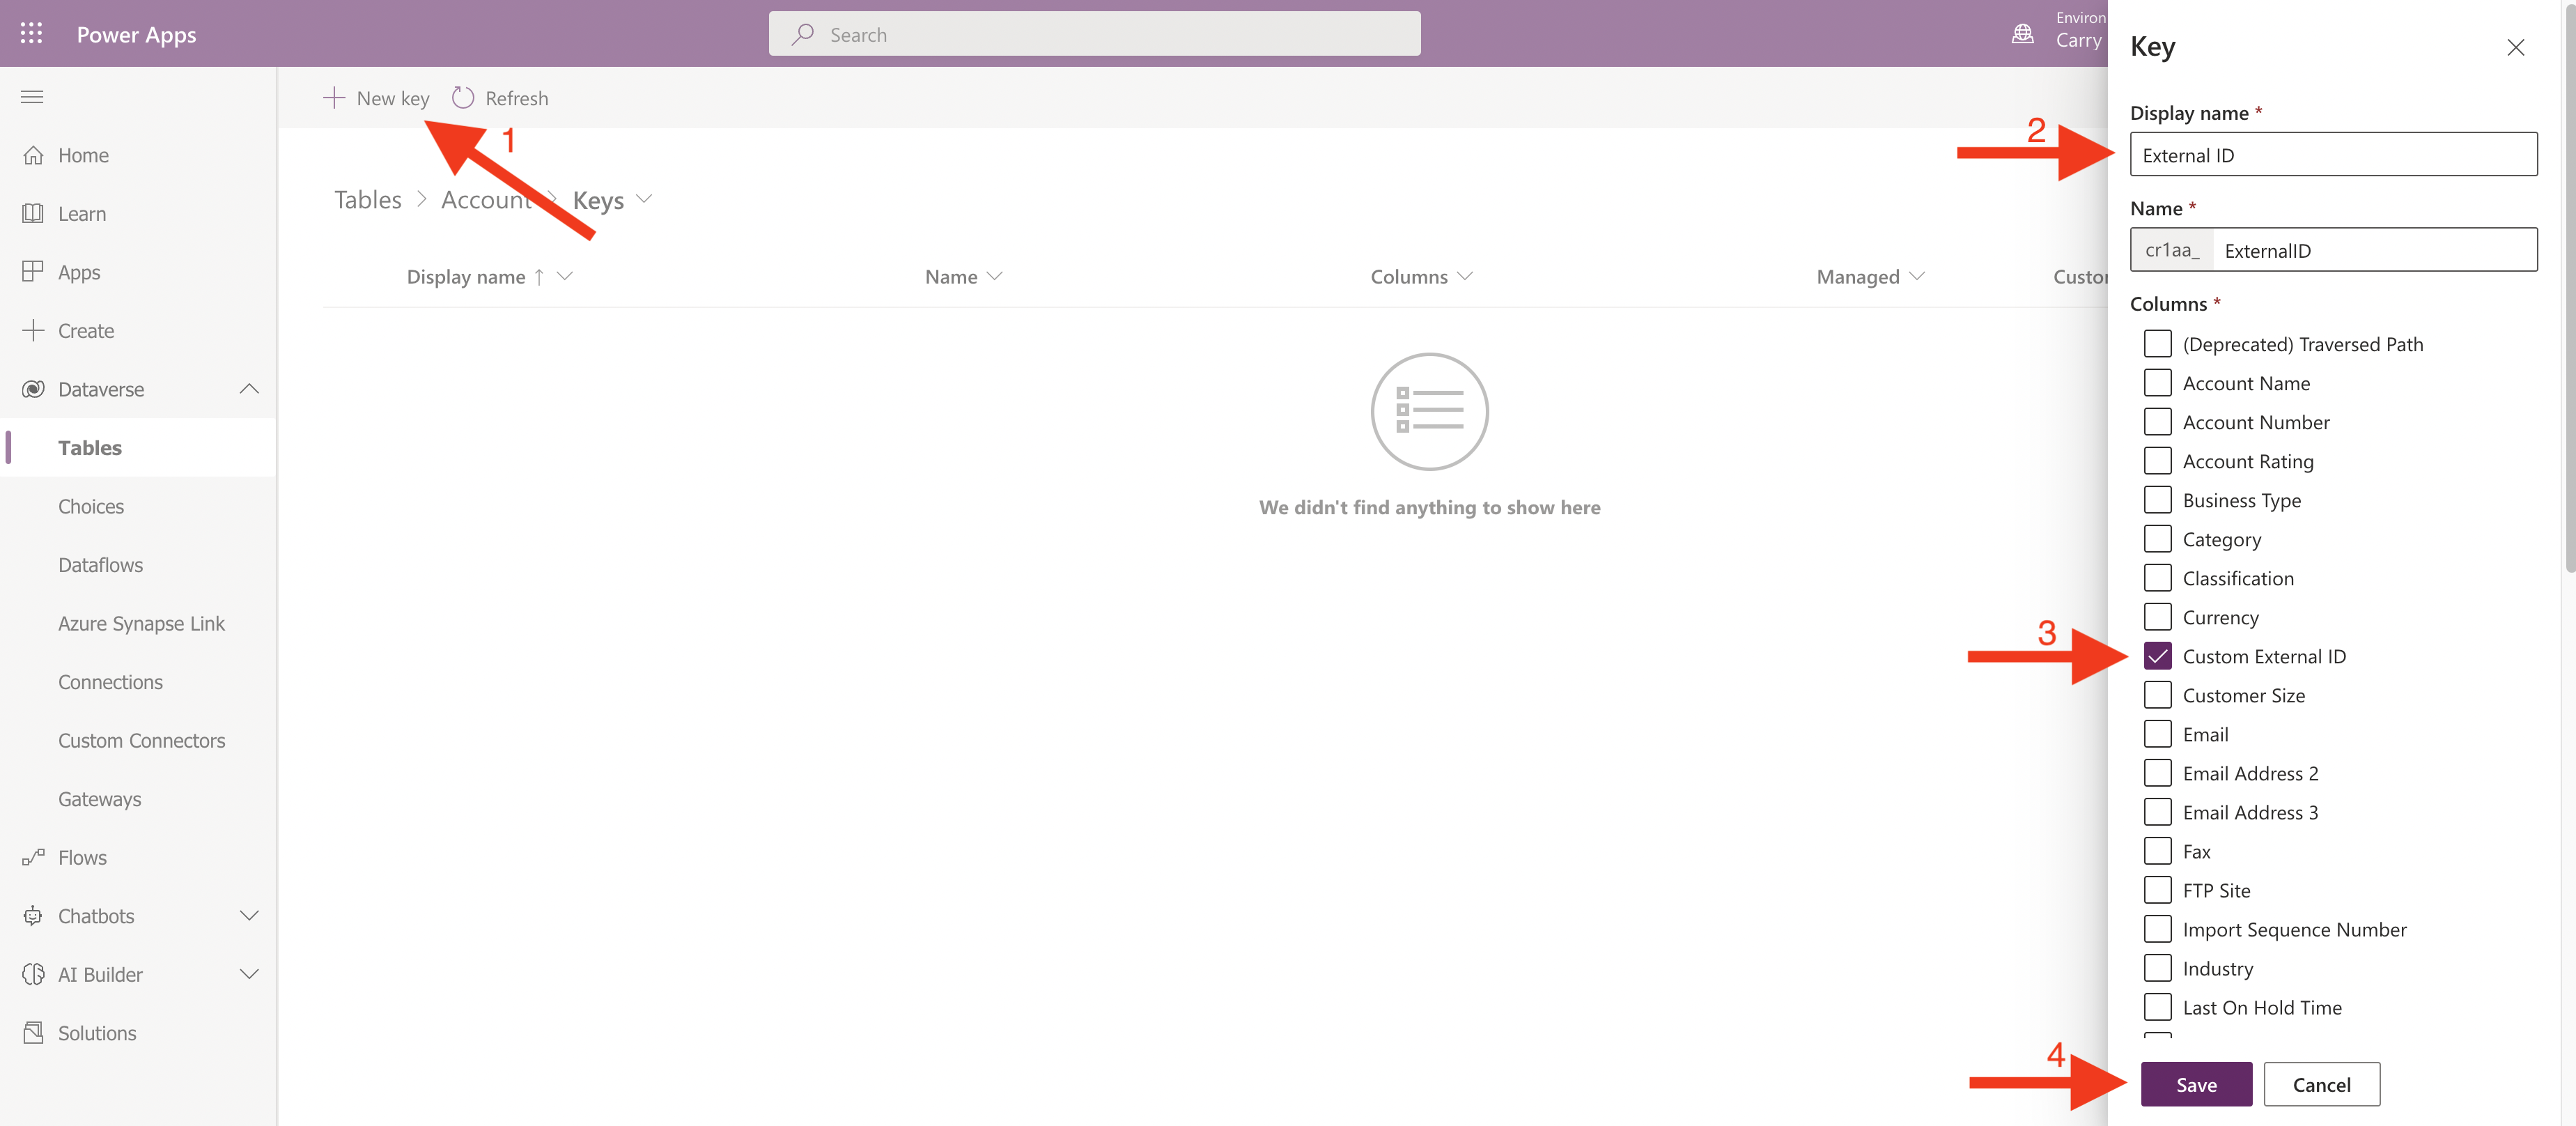
In the keys page:
(1) Click New Key then in the pop-up on the right, enter the configuration for the key you are about to create.
(2) Enter a label for this key. This label is the label that will be displayed in Hightouch's ID mapping section.
(3) Select a column that you want to use as an alternate key.
Note that alternate keys must be unique and must meet the requirements described in the Dynamics 365 docs. If you do not have a column that meets these requirements, you can manually add a column and use it. In our example below, We're using a column that we created called Custom External ID.
If you are creating a new column to be used as external ID, you may have to
backfill the new column first before they can be used to avoid accidental duplicates.
(4) Once configured, hit save button to create the alternate key.
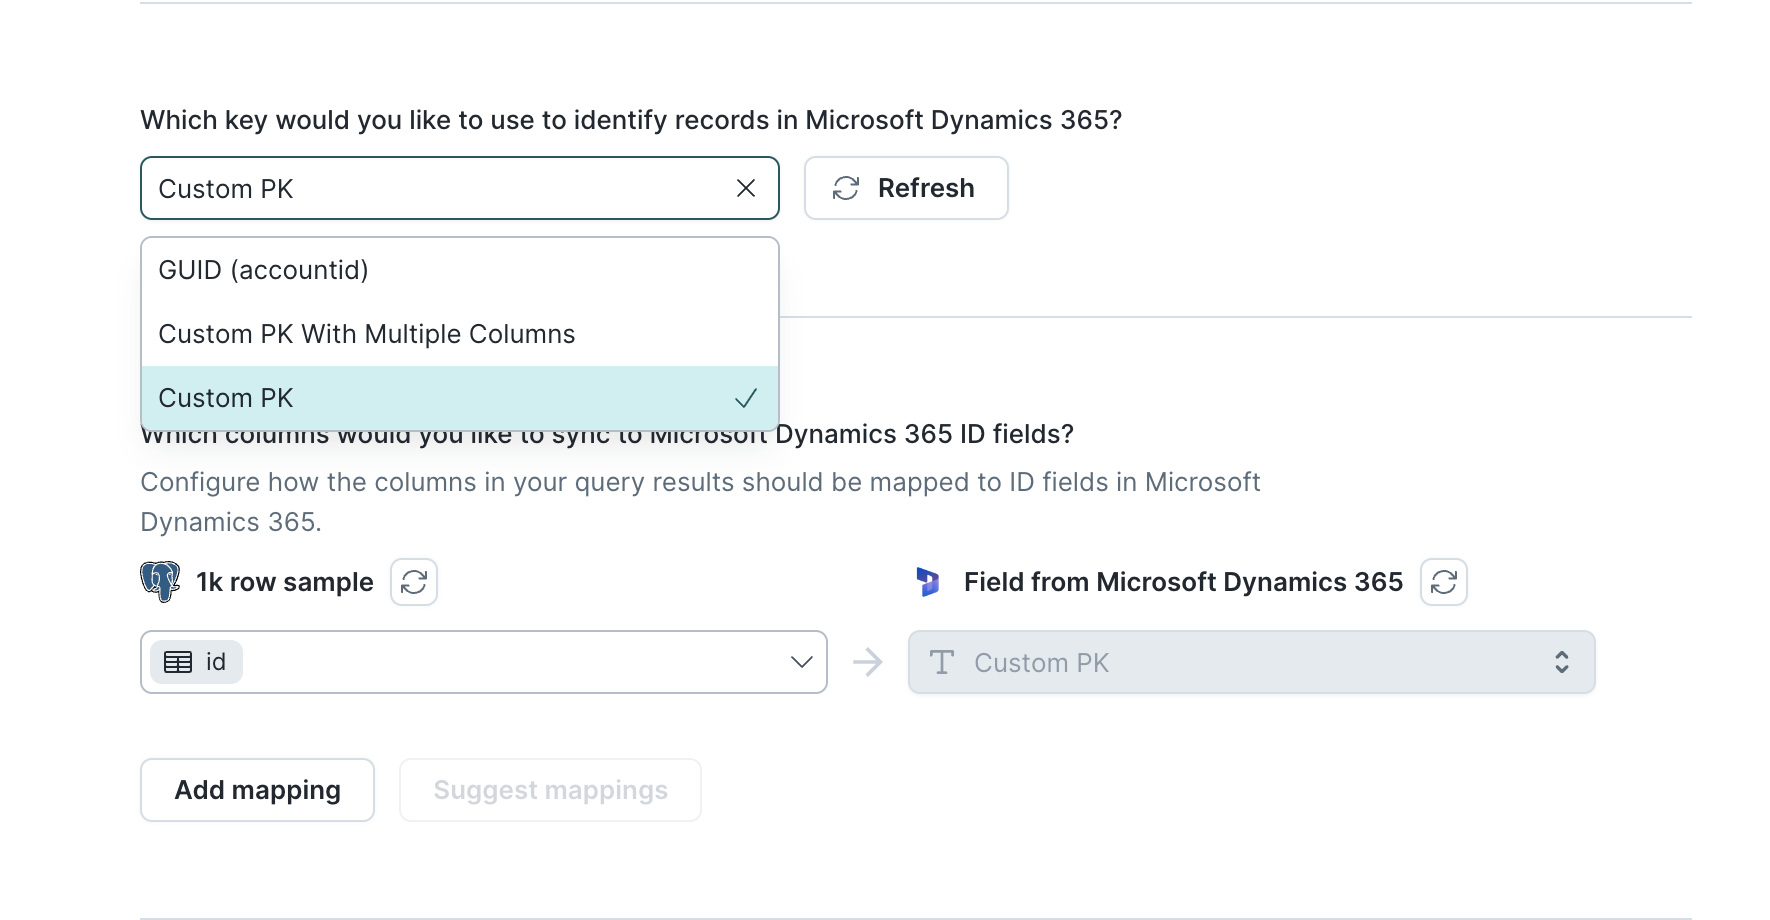
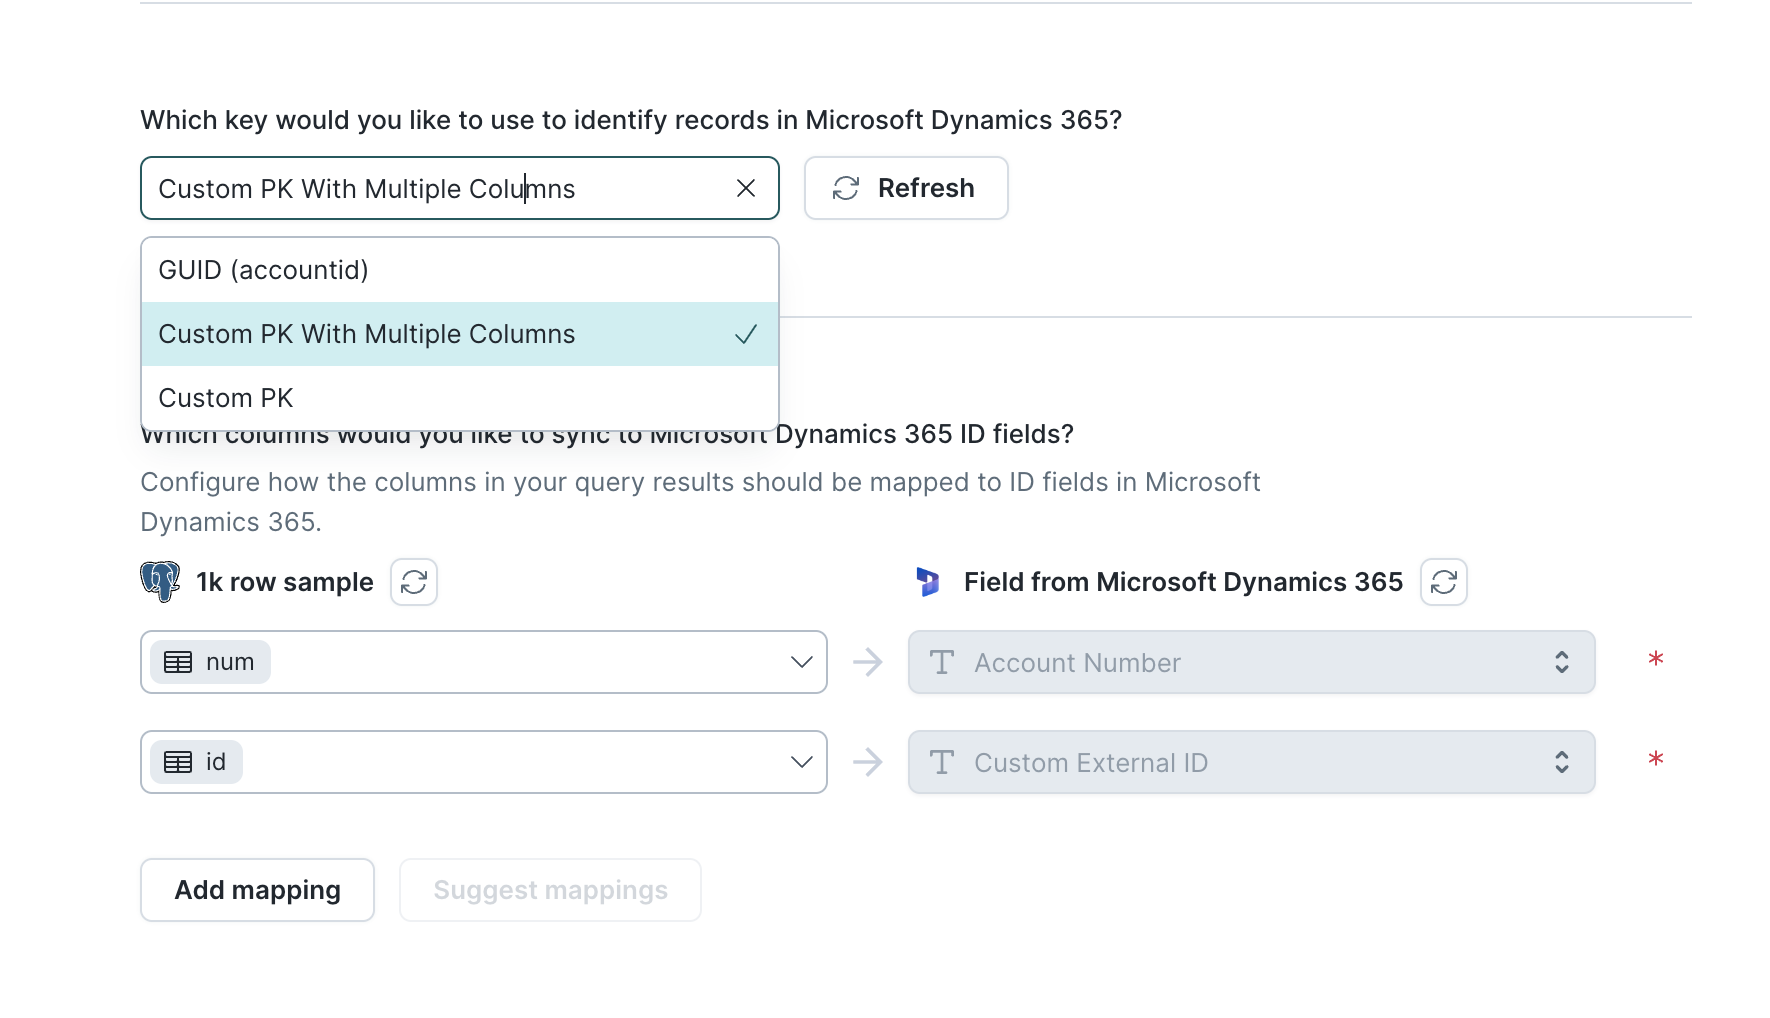
The created alternate keys will appear as an option in the identifier section of your Hightouch sync configuration. Select the name of your alternated key then map the columns for that alternate key in the ID fields mappings section below.
If your alternate key is composed of multiple columns, you will have to map those columns in the ID fields mappings section.
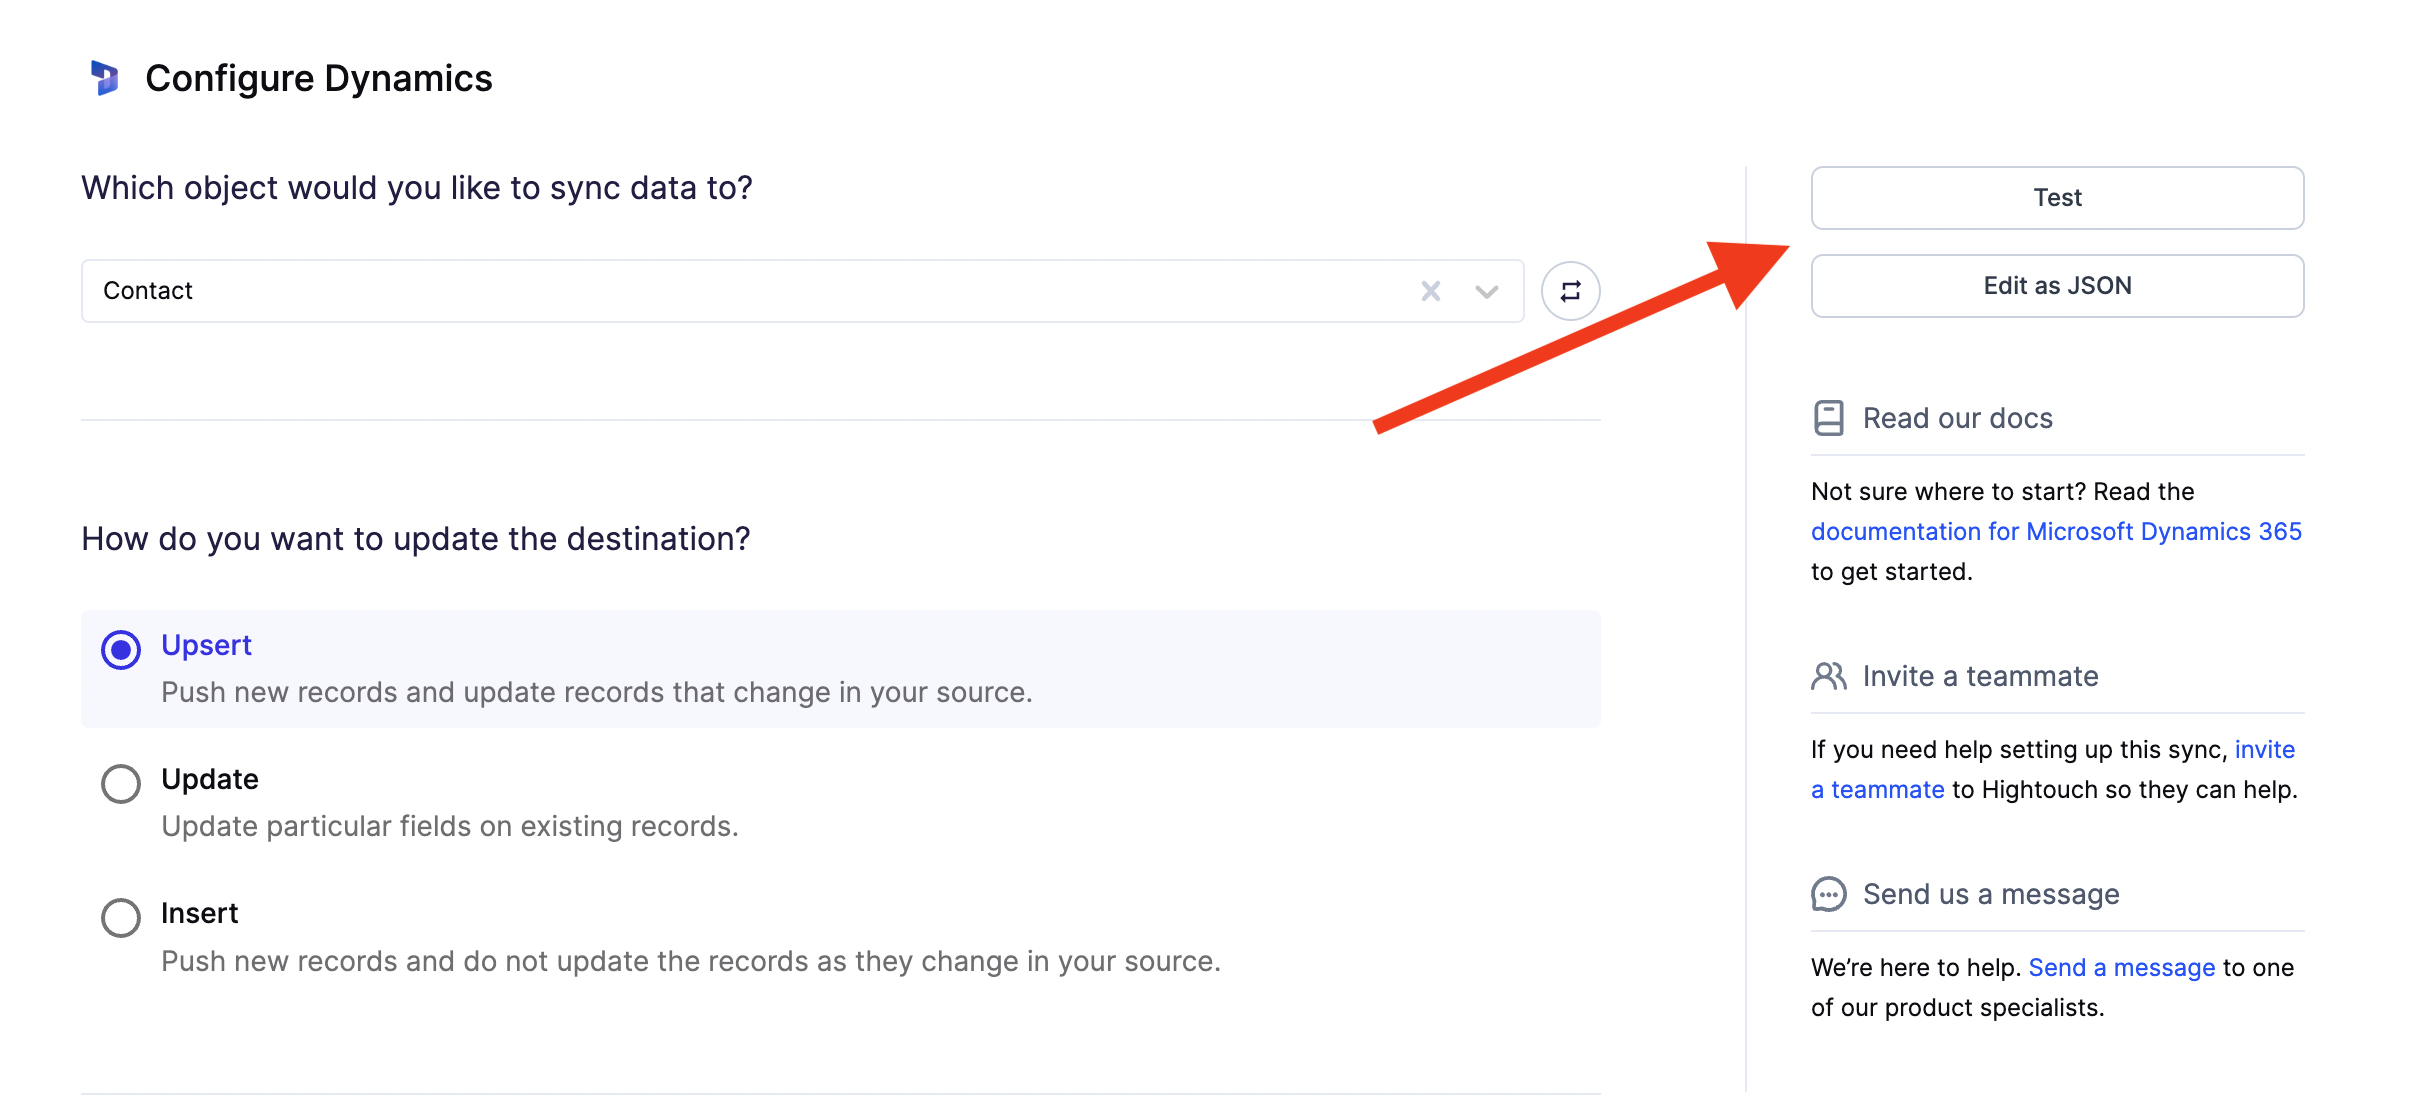
Once you've set up your Microsoft Dynamics 365 destination and have a model to pull data, you can set up your sync configuration to begin syncing data. Go to the Syncs overview page and click the Add sync button to begin. Then, select the relevant model and the Microsoft Dynamics 365 destination you want to sync.
To match rows from your model to objects in Microsoft Dynamics 365, you need to select a model column and corresponding Microsoft Dynamics 365 field. You can match on any of the following Microsoft Dynamics 365 fields:
In Insert mode, Microsoft Dynamics 365 automatically generates an identifier for every new record synced, so there is no need to match an existing record.
Hightouch lets you sync object fields via field mapping.
You can map data from any of your model columns to the default object fields.
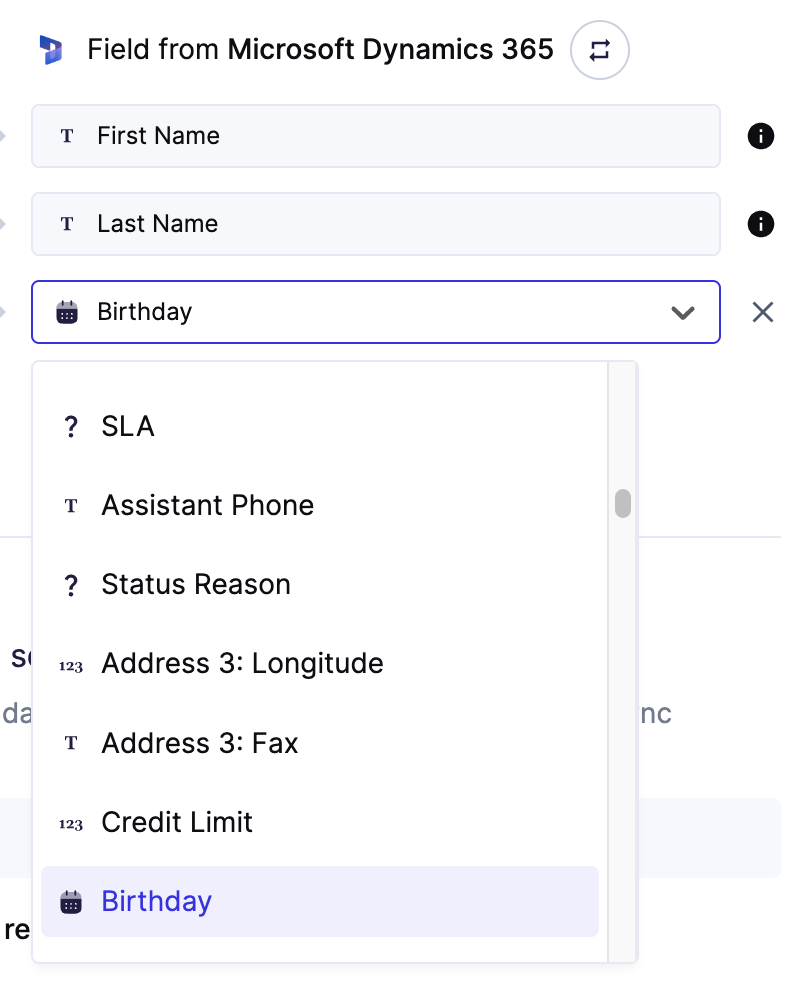
Field types
Ensure your model columns data types match the data types of the fields you want to sync to. Microsoft Dynamics 365 destination will not automatically cast your data to the data types they are expected to be in your table in Dataverse. This means that you are responsible for casting them to the valid type they need to be in. The image below shows an example of fields we pulled from Dataverse along with their types. The icons on the left indicate the type of the column. As you may notice, there are icons with ?. This indicates that the type is either complex or unexplored by Hightouch. Reference the Dynamics 365 docs for more details on types.
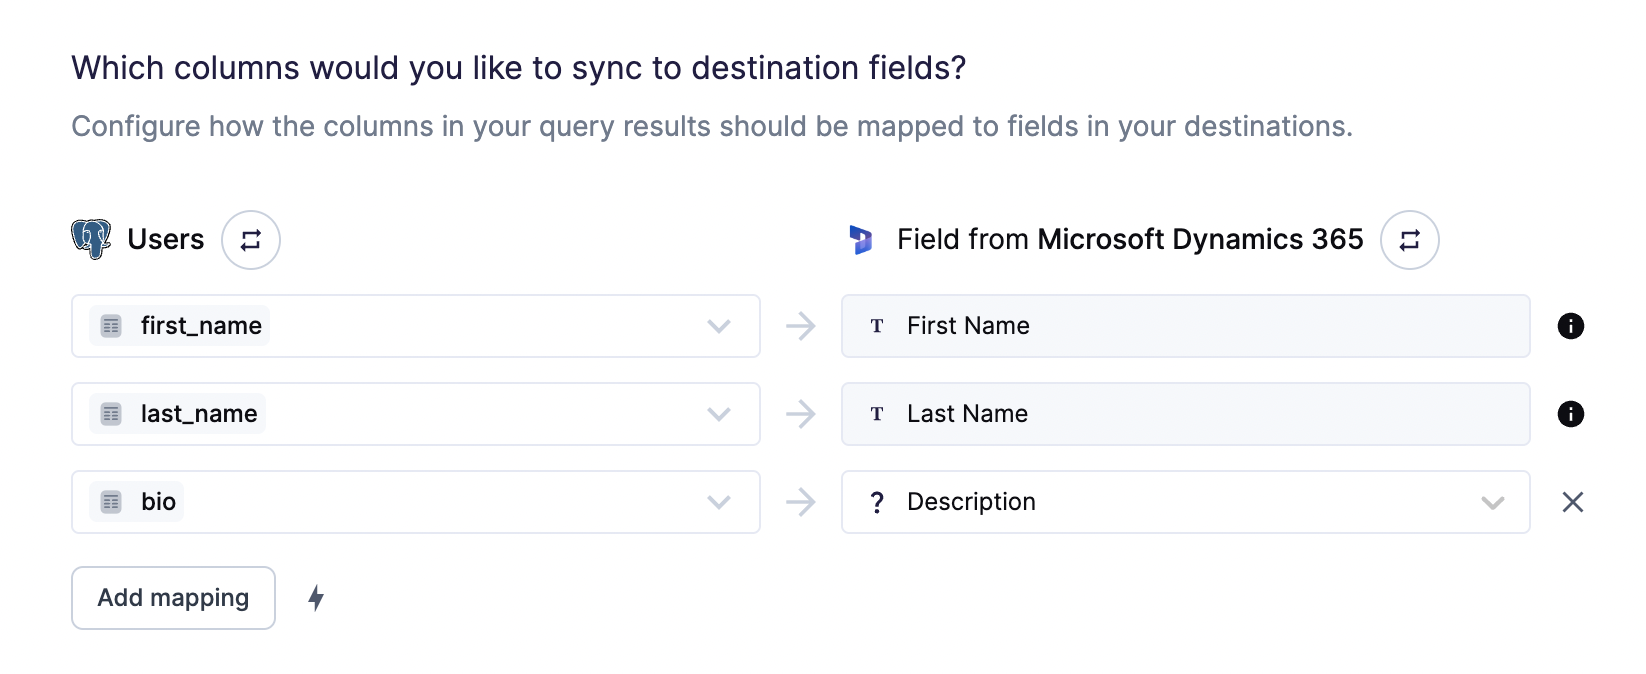
Required fields
You may have noticed that First Name and Last Name appear to be read-only in the destination side while Description is editable.
These read-only fields are fields that are marked as Business required in Dataverse.
This means that whenever you create a sync, you must send data for these fields.
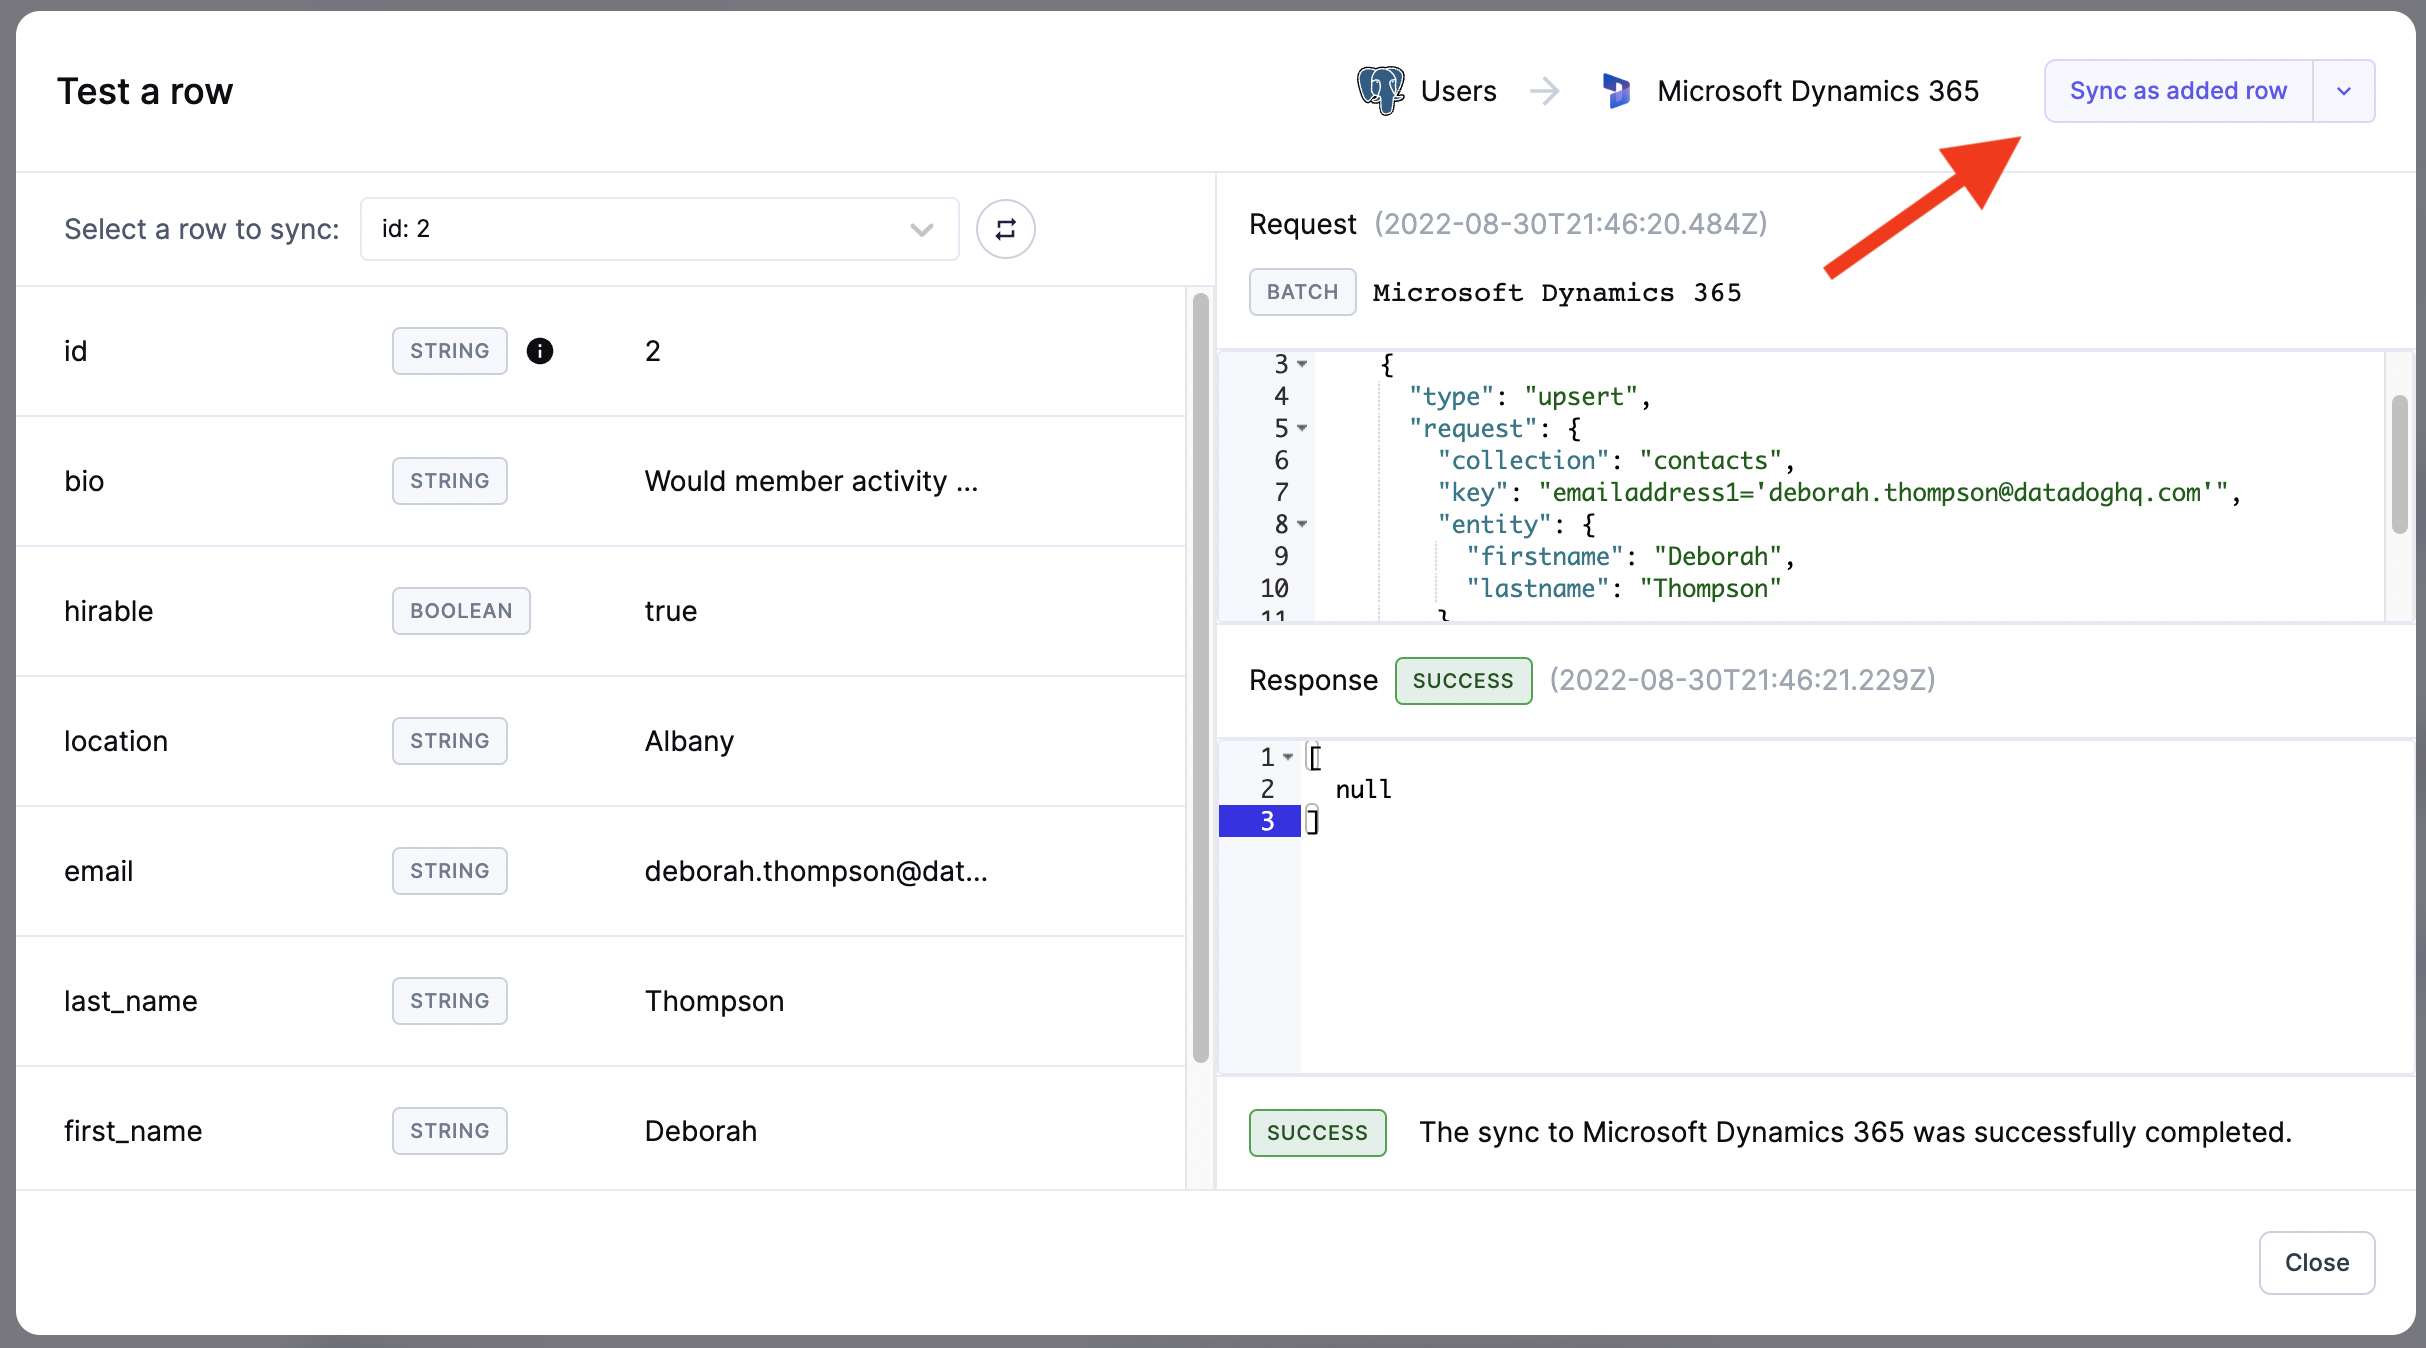
To validate that your configuration is working, we highly recommend that your to run a test.
Click on Test button to open the test pop-up.
Click on the Sync as added row to make the request.
The result on the right will indicate if the request to Dataverse is successful.
Be aware that requests made through here will persist data into your
destination as if you ran an actual sync. When working on a production
environment, please make sure that you fully understand the risks.
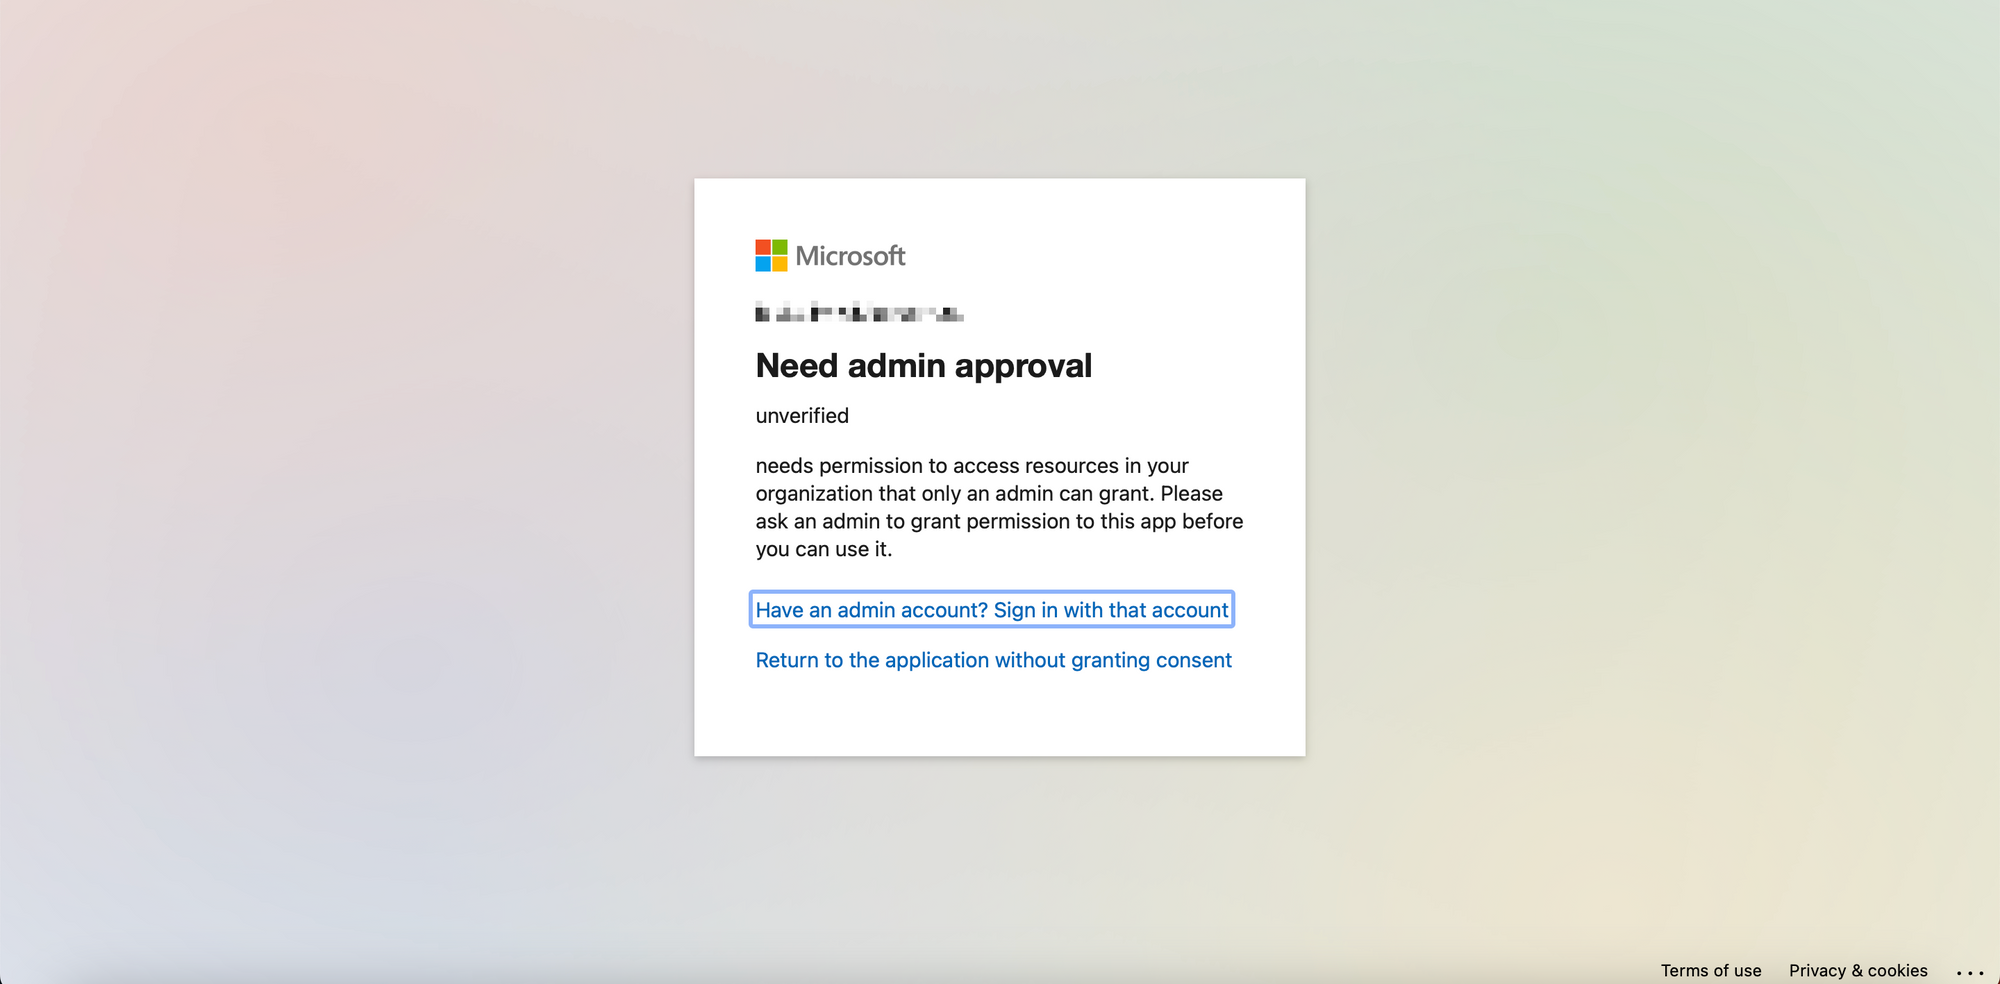
If you see a Need admin approval page appear when accessing Microsoft's OAuth login flow, your Azure Active Directory user account might not have the necessary permissions to connect applications to your organization.
Ask one of your Azure organization's admins to edit your user account permissions.
To date, our customers haven't experienced any errors while using this destination. If you run into any issues, please don't hesitate to . We're here to help.
Hightouch provides complete visibility into the API calls made during each of your sync runs. We recommend reading our article on debugging tips and tricks to learn more.