
Transfer data at scale from your warehouse to Azure Blob Storage
Overview
With Hightouch, you can export all the data in your warehouse to JSON, CSV, or Parquet files in any of your Azure Blob Storage containers. Whether it's for internal processes, analytics, or product data, our Azure Blob Storage integration allows you to securely and easily transfer data at web-scale.
Supported syncing
| Sync Type | Description | Supported Sync Modes |
|---|---|---|
| Any data set | Sync data from a source to Azure Blob Storage as JSON, CSV, or Parquet files | Insert, All, Diff |
- All: All mode creates one file with all the rows in the query results, every time the sync runs.
- Insert: Insert mode creates one file with the rows that were added since the last sync.
- Diff: Diff mode creates three files, one for rows added, one for rows changed, and another for rows removed since the last sync.
For more information about sync modes, refer to the sync modes docs.
The order of rows and columns in uploaded files may differ from how they appear in your model. This is expected behavior and applies to all sync modes. Learn more about row and column ordering →
Connect to Azure Blob Storage
Go to the Destinations overview page and click the Add destination button. Select Azure Blob Storage and click Continue. You can then authenticate Hightouch to Azure Blob Storage using Azure credentials. You can select credentials you previously created or click New credentials to set them up.
See the guide for configuring Azure credentials to learn how you can set up a service account and use its credentials. The IAM user whose credentials you use must have programmatic access enabled and permission to write to the Azure Blob Storage container you want to use.
Next, enter your Blob Storage Account name and Container name to complete setup. You can find these in the Azure Portal. Go to Storage accounts and open the storage account you want to use. The account name is in the top left above Storage account.
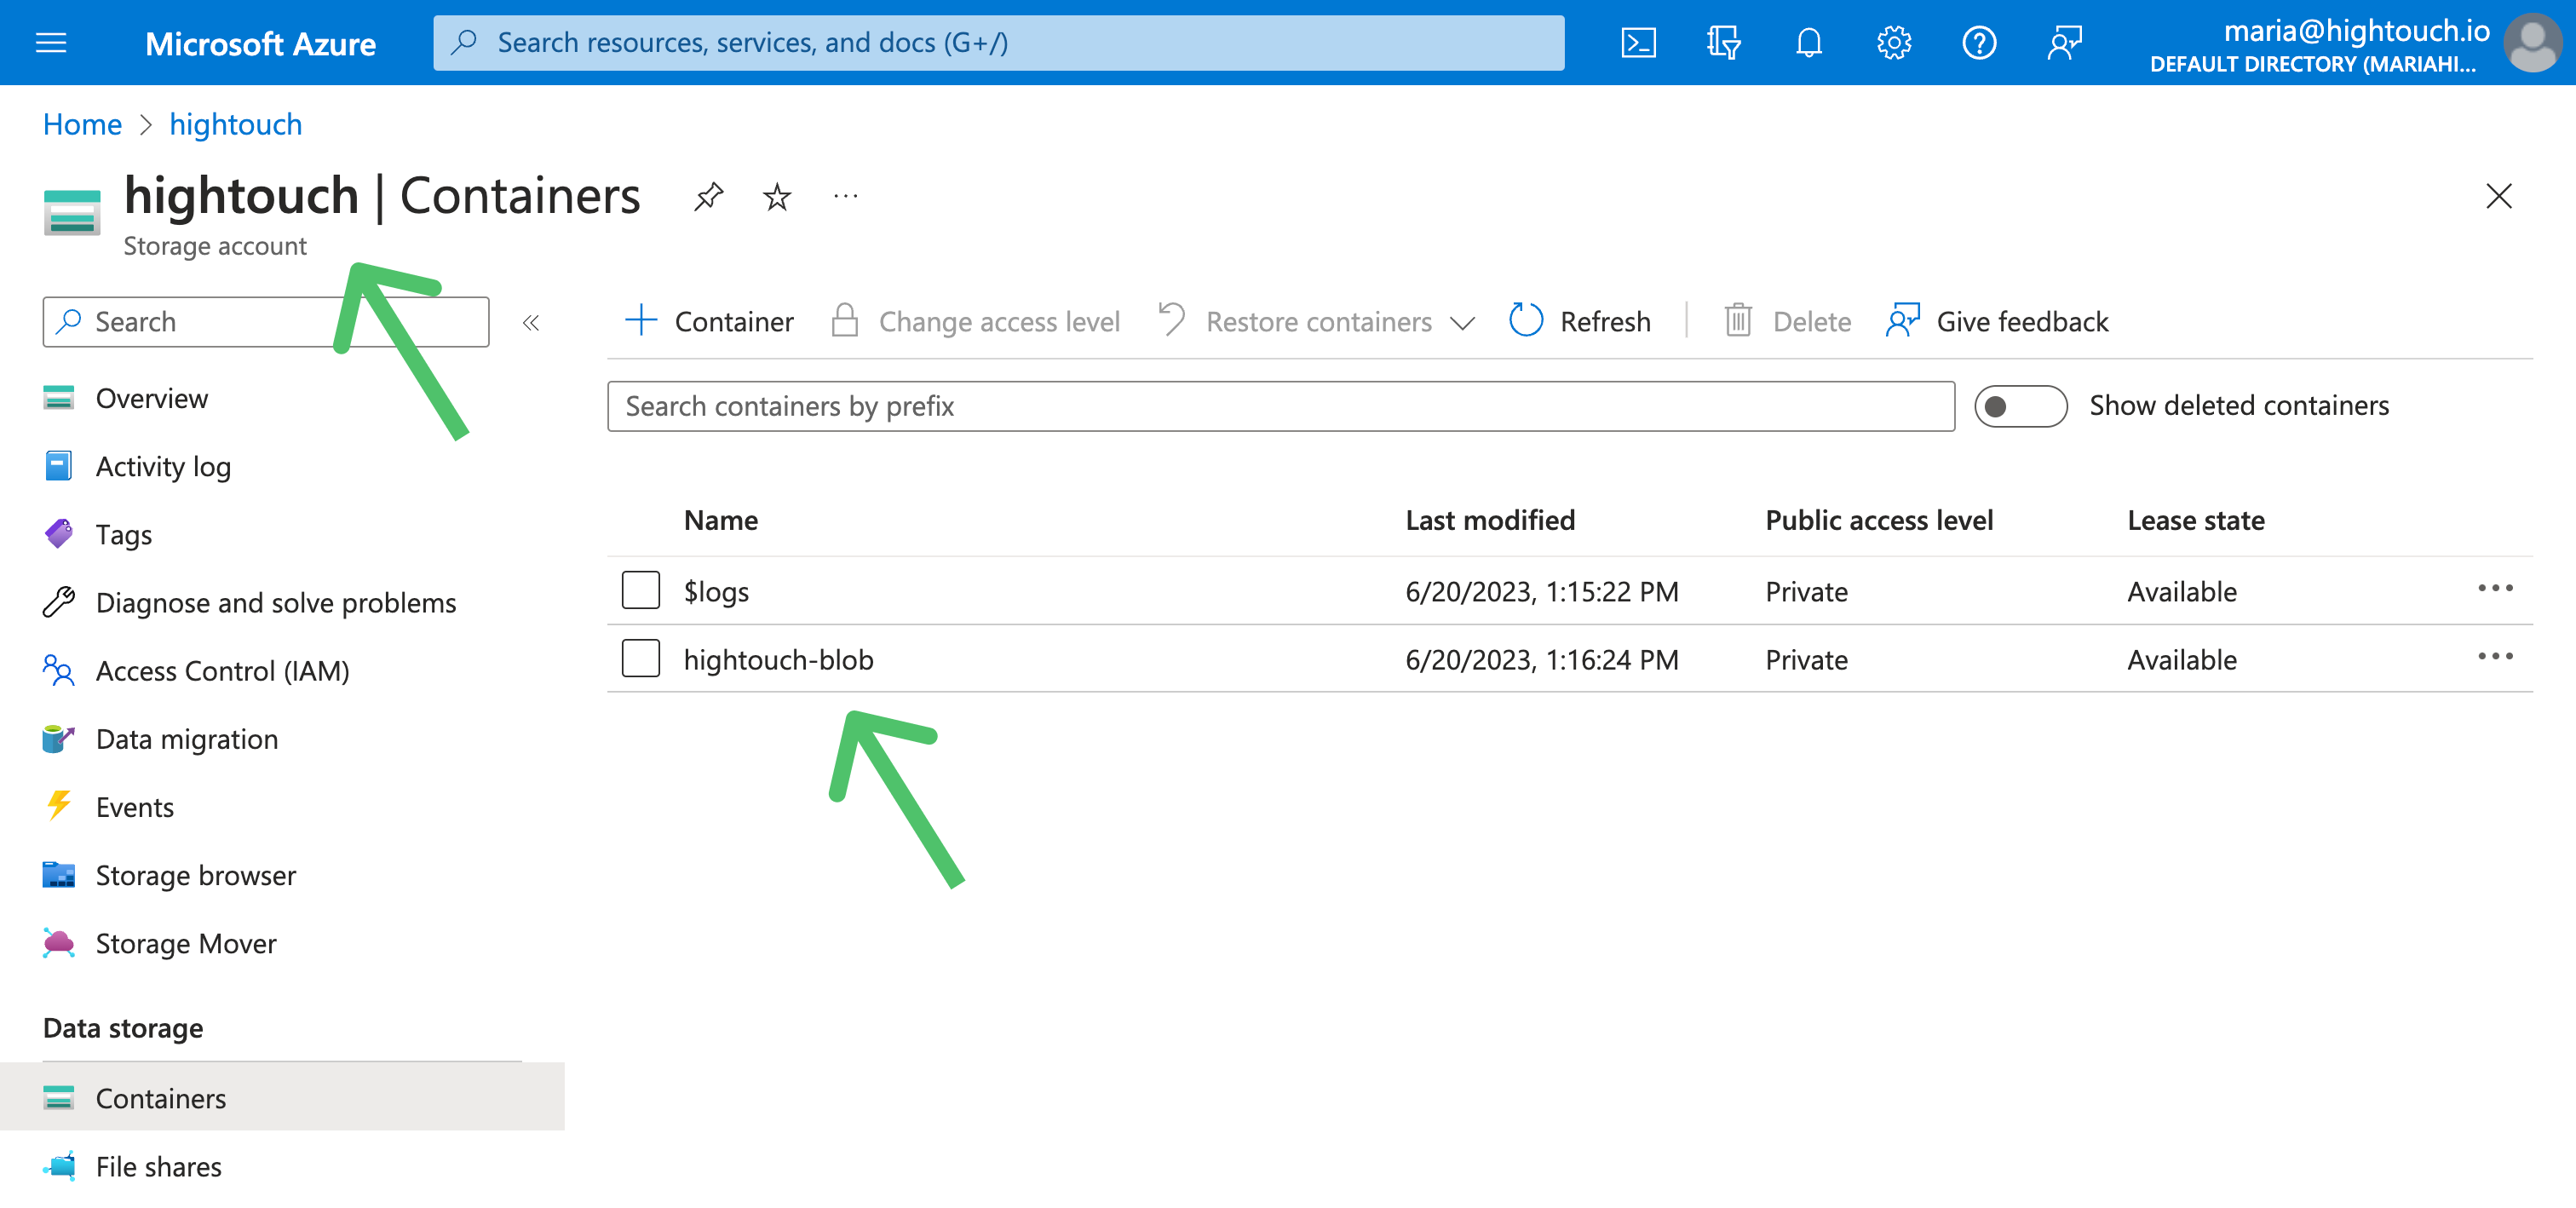
You can see your container names once you open Containers in the left side menu. If you want to create a new container for Hightouch to sync to, you need create it before you can proceed.
Sync configuration
Once you've set up your Azure Blob Storage destination and have a model to pull data from, you can set up your sync configuration to begin syncing data. Go to the Syncs overview page and click the Add sync button to begin. Then, select the relevant model and the Azure Blob Storage destination you want to sync to.
Select file format
Hightouch supports syncing JSON, CSV, and Parquet files to Azure Blob Storage.
Enter filename
The filename field lets you specify the parent directory and the name of the file you want to use for your results.
You can include timestamp variables in the filename, surrounding each with {}.
Hightouch supports these timestamp variables:
YYYY: Represents the full year in four digits.YY: The last two digits of the year.MM: Two-digit month format (01-12).DD: Two-digit day format (01-31).HH: Two-digit hour format in 24-hour clock (00-23).mm: Two-digit minute format (00-59).ss: Two-digit second format (00-59).ms: Three-digit millisecond format.X: Unix timestamp in seconds.x: Unix timestamp in milliseconds.
All dates and times are UTC.
For example, you could enter upload/{YYYY}-{MM}-{DD}-{HH}-{mm}-result.json to dynamically include the year, month, date, hour, and minute in each uploaded file. Hightouch would insert each file in the upload directory, which would need to already exist in your bucket.
You can also use other variable values to include sync metadata in the filename:
{model.id}{model.name}{sync.id}{sync.run.id}
If a file already exists at the path you entered at the time of a sync, Hightouch overwrites it. To view different versions of the same file in Azure Blob Storage, you can right-click the file and select View versions.
{model.name}.Set filename offset
By default, Hightouch uses the timestamp of the sync run to fill in timestamp variables. You can optionally include an offset in seconds. For example, if you want the filename's date to be 24 hours before the sync takes place, enter -86400 (24 hours * 60 minutes * 60 seconds). If you want the filename's data to be one hour after the sync takes place, you would enter 3600 (60 minutes * 60 seconds).
Columns to sync
You can export all columns exactly as your model returns them or choose to export specific ones.
If you need to rename or transform any column values you're syncing, you can use the advanced mapper to do so. If you choose this option, Hightouch only syncs the fields you explicitly map.
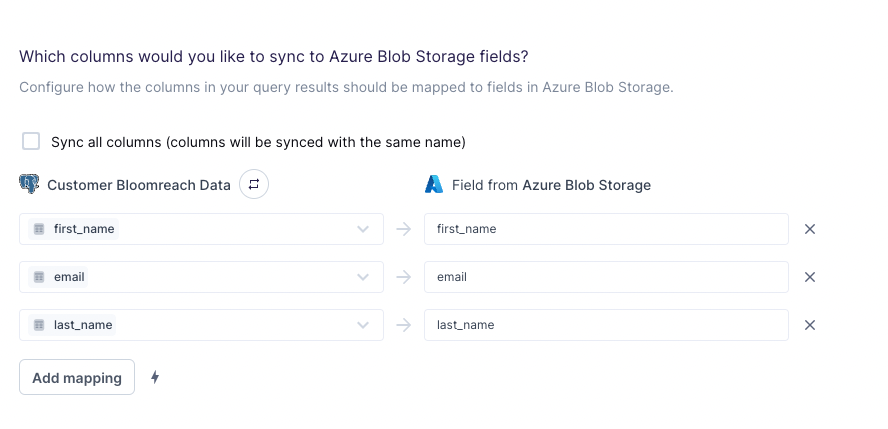
The preceding example shows how to selectively export the first_name, email, and last_name fields. Hightouch exports these fields to new fields in the file and ignores all other columns from your results.
Tips and troubleshooting
Common errors
To date, our customers haven't experienced any errors while using this destination. If you run into any issues, please don't hesitate to . We're here to help.
Live debugger
Hightouch provides complete visibility into the API calls made during each of your sync runs. We recommend reading our article on debugging tips and tricks to learn more.
Sync alerts
Hightouch can alert you of sync issues via Slack, PagerDuty, SMS, or email. For details, please visit our article on alerting.