| Audience | Marketers and operations teams building scheduled, multi-step campaign flows such as welcome series, winback programs, nurture tracks, and cross-channel lifecycle campaigns. |
| Prerequisites |
|
Journeys let you build multi-step campaign flows on a visual canvas with delays, branches, experiments, and sends to destinations. Journeys evaluate on a fixed schedule, so they are not a real-time event processor. Entry, movement, exits, and sends only happen when the journey runs.
Before building your first journey, read Plan your campaign workflow to understand how journeys, priority lists, destination rules, and experiments work together — and where each piece of campaign logic belongs.
What you'll learn
- How journey evaluation works and why it matters for timing
- How to plan entry method, schedule, and sync mode before building
- How to build and configure a journey on the canvas
- How to validate logic, payloads, and end-to-end behavior before launch
- How to monitor performance and debug unexpected behavior
- Design patterns for common journey use cases
How journeys evaluate
Journeys run on a fixed schedule. Members enter, move, exit, and sync only when the journey runs.
Use journeys for lifecycle programs like welcome flows, nurture tracks, and re-engagement. Do not think of them as an instant event-response system.
Think of a journey as a repeated evaluation of current warehouse data. On each run, Hightouch checks who should enter, who should advance, who should exit, and which sends should happen. That makes timing consistent across the full flow — but it also means journeys are not real time.
What happens on each run
At each scheduled evaluation, Hightouch:
- Checks the Start tile and adds members who newly qualify
- Evaluates every active member's current tile and advances them if conditions are met
- Checks global exit criteria and removes qualifying members
- Fires all
Send to destinationsyncs for members who reached or remain at sync tiles - Logs progress for reporting
Each journey run is one full evaluation.
Why timing feels different from real-time systems
Some lifecycle tools react as soon as a user takes an action. Journeys work differently:
- Delays resolve on runs, not on timers. A "1-day delay" means the member advances on the first run after 24 hours have elapsed. If the journey runs every 6 hours, actual wait time could be anywhere from 24 to ~30 hours.
- Exit criteria are checked on runs. If a user makes a purchase between two runs, they stay in the journey until the next evaluation detects the change.
- Hold until is schedule-checked. A Hold until tile is not a real-time event listener. Hightouch checks the condition at each run and advances members when it becomes true.
- Syncs fire on runs. A member reaching a sync tile does not send immediately. The send happens when that journey run processes the tile.
How sync timing follows the journey schedule
Syncs inside a journey run when the journey evaluates — they do not follow their own independent schedules. However, the underlying sync must still be enabled and correctly configured. A paused or misconfigured sync can block expected behavior even if the journey runs normally.
If a journey shows members reaching a sync tile but the sync reports zero records, check that the sync is not paused and that its configuration (model, field mappings, Liquid templates) is valid.
Plan your journey before you build
Most journey confusion comes from building before planning. These decisions affect when members enter, how long delays last, when exits happen, and when data syncs to destinations. Make them before you open the canvas.
Choose the right entry method
| Use this entry type | When the start condition is... | Example |
|---|---|---|
| Enters audience | A user matches an audience right now | Users who haven't purchased in 30 days |
| Performs events | A user did something at a specific time | Users who abandoned a cart, created an account, or submitted a form |
Audience-based entry is simpler and works well when the qualifying condition is a state. Event-based entry is better when the qualifying condition is an action with a timestamp, especially when the journey should start relative to that action.
Choose the right schedule
The evaluation schedule is the most important journey setting because it determines the precision of everything else: when entries are detected, when delays resolve, when exits are checked, and when syncs run.
- Choose the schedule based on the fastest response time you need. If you need to send within an hour of a trigger event, use an hourly or sub-hourly schedule.
- Design delays as multiples of your schedule. A 1-day delay on an hourly schedule resolves predictably. A 30-minute delay on a daily schedule resolves no differently than a 1-minute delay — both advance on the next daily run.
- More frequent runs give you more precise timing, but they also run more warehouse queries. Balance precision against query volume and warehouse cost.
Choose the right sync mode
How you configure the sync on a Send to destination tile determines whether members receive one-time messages or maintain ongoing membership in a destination list.
| Use this mode | When you want to... | Recommended sync mode |
|---|---|---|
| Trigger | Send a one-time message (email, SMS, push) per member per step | Insert |
| Cohort | Maintain a destination list or audience that reflects current journey membership | Upsert or Mirror |
Detailed sync mode guidance, including what to avoid, is in Sync configuration for journeys.
If you need destination-specific filtering (consent, privacy, business rules) that should not change audience membership, configure destination rules separately. Destination rules filter records at sync time, so a journey can behave correctly while the destination receives fewer rows.
When to use one journey vs. multiple
| Situation | Use one journey or multiple? | Example |
|---|---|---|
| Linear flow with few branches | One journey | Welcome journey: one delay, one branch, two outcomes |
| All paths share the same entry and schedule | One journey | Trial onboarding where everyone enters from the same event |
| Easy to follow on one canvas | One journey | Post-purchase follow-up with one entry, one delay, one branch |
| Different use cases need different schedules | Multiple journeys | Cart abandonment runs hourly; winback runs daily |
| You want to update flows independently | Multiple journeys | Onboarding and feature-adoption evolve on separate timelines |
| Canvas is too complex to reason about | Multiple journeys | Split welcome, activation, re-engagement, upsell, and churn into separate journeys |
| Different lifecycle stages need different entry criteria | Multiple journeys | One journey for account creation, another for 30-day inactivity |
What to validate before launch
Before starting a journey, confirm:
- The entry audience or event produces the members you expect
- Delays are multiples of the evaluation schedule
- Exit criteria use stable fields that won't cause unexpected removals
- Sync tiles are configured with the right mode (trigger vs. cohort) and the underlying syncs are enabled
- You've run a simulation to verify branching logic
For guidance on which feature should handle timing, overlap, consent, and measurement, see Plan your campaign workflow.
Required setup
Journeys rely on the parent model defined in your schema. Your parent model must come from a supported warehouse source and use the Lightning sync engine.
Journeys send data to destinations through syncs: sending messages, updating records, or managing audience membership. Connect your destinations and configure syncs before publishing a journey.
Supported sources
Journeys requires the Lightning sync engine, which is available for a specific set of warehouse sources. For the current list, see Lightning sync engine supported sources.
If your source is not listed in the Lightning sync engine docs, Journeys is not currently supported for that source. If you see the message "This source does not support journeys" in the app, to confirm compatibility.
Create a journey
Step 1: Create the shell
-
Go to Customer Studio → Journeys.
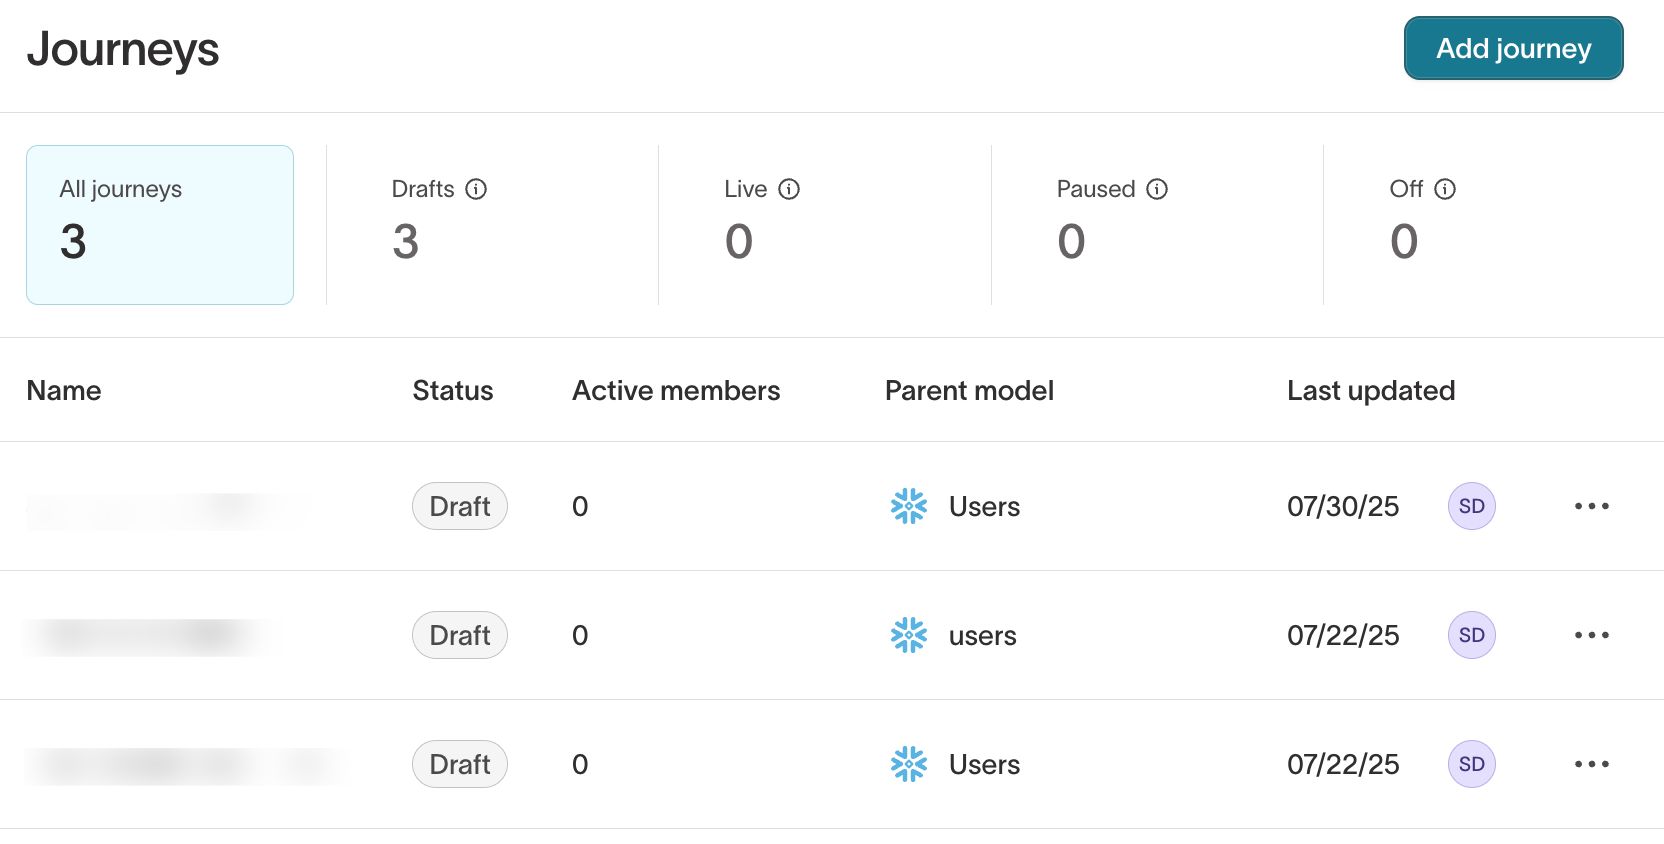
-
Select Add journey.
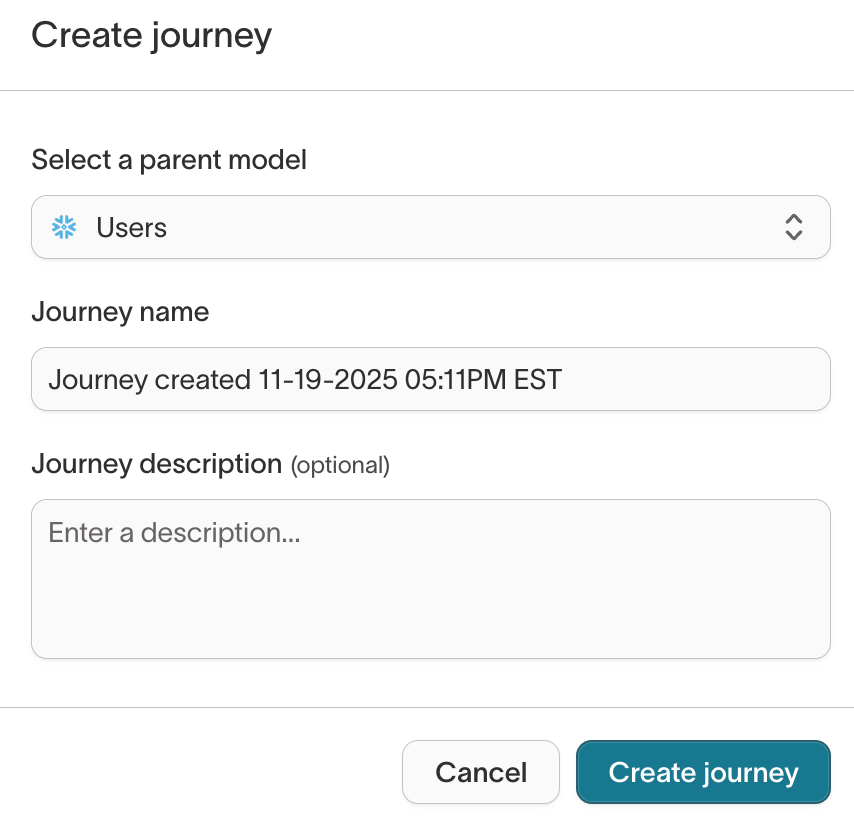
-
In the modal, select a parent model, enter a journey name, and add an optional description.
-
Select Create journey.
You are taken to the journey canvas in Draft mode.
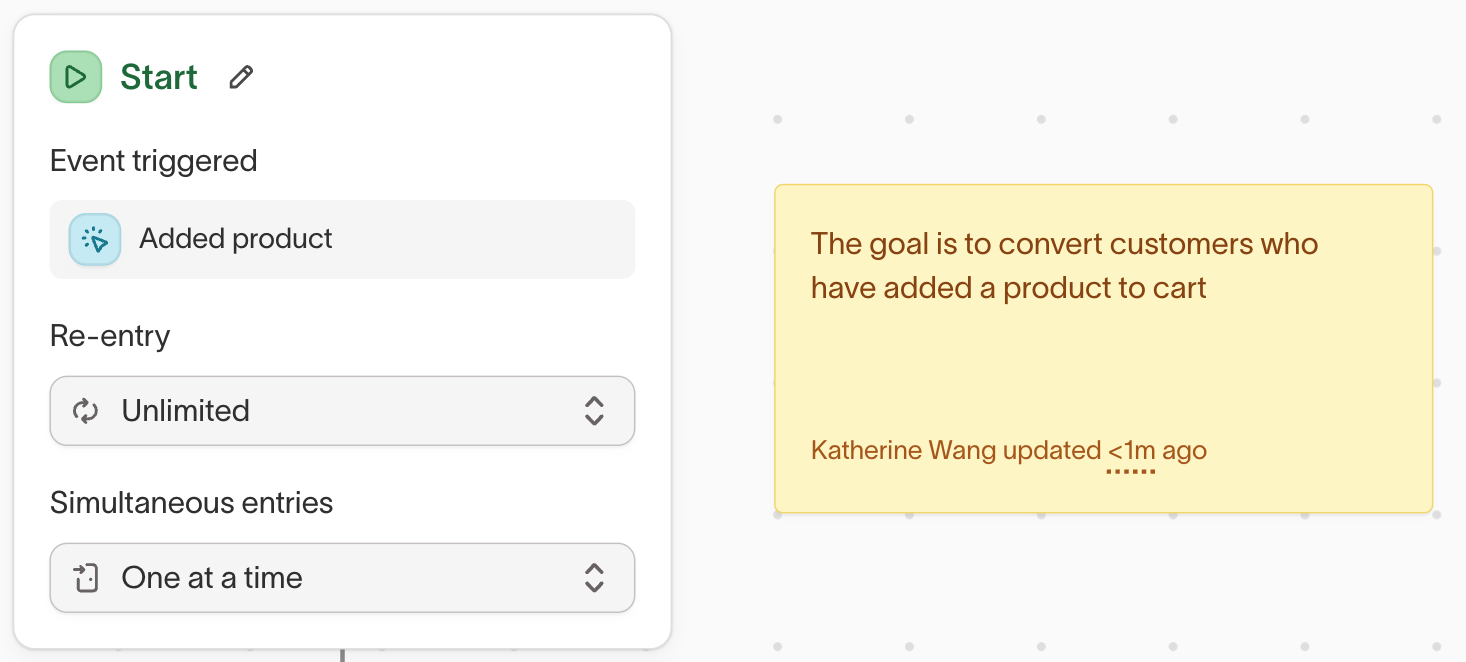
Step 2: Configure the Start tile
The Start tile controls who enters the journey, how often they can re-enter, and whether they are excluded because of other journeys. This is one of the most important setup steps.
Select the Start tile to open its configuration drawer, then select an entry type:
- Enters audience — members enter when they join an audience
- Performs events — members enter when they perform an event
The entry method cannot be changed after the journey is activated. Choose carefully before launching.

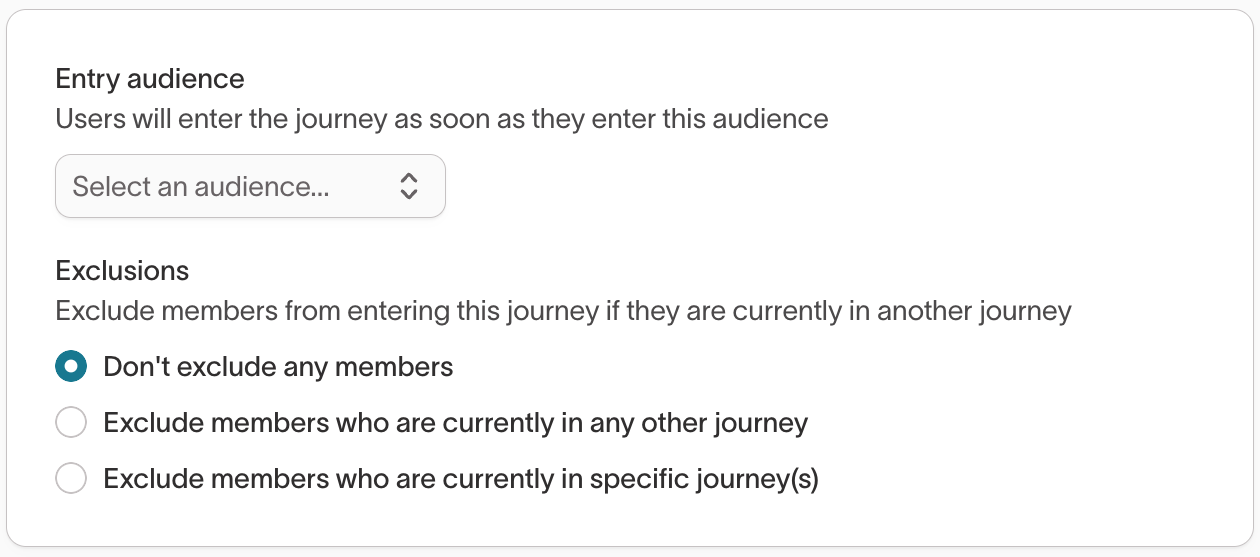
Audience-based entry
-
Select an entry audience.
-
(Optional) Configure exclusions:
- Don't exclude any profiles — the default. Members can be in multiple journeys simultaneously.
- Exclude profiles who are currently in any other journey — prevents overlap across all journeys.
- Exclude profiles who are currently in specific journey(s) — prevents overlap with selected journeys only.
Exclusions prevent members from entering this journey if they are already in another one. They apply at entry time, not later in the flow. Exclusions are scoped to journeys on the same parent model.
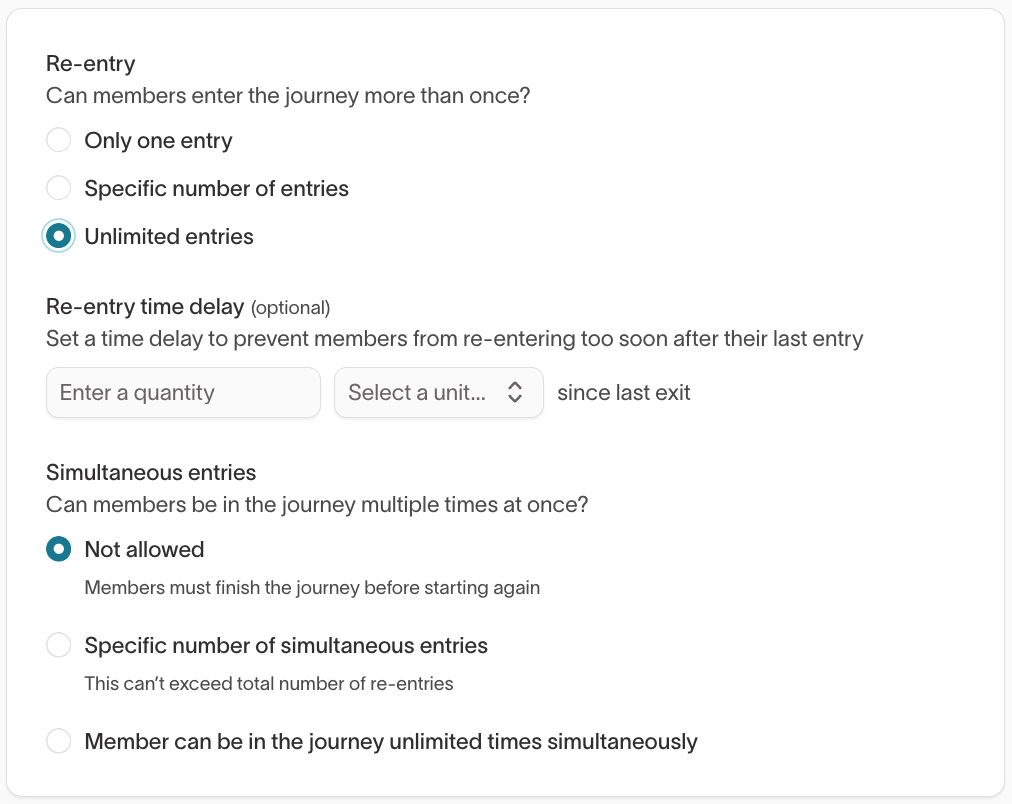
- Select a re-entry behavior:
- Only one entry — the default. Each member can enter the journey once, ever.
- Specific number of entries — each member can enter up to N times.
- Unlimited entries — no cap on re-entry.
You can also set a re-entry delay to prevent members from re-entering too soon after their last exit.

- Select Update to save.
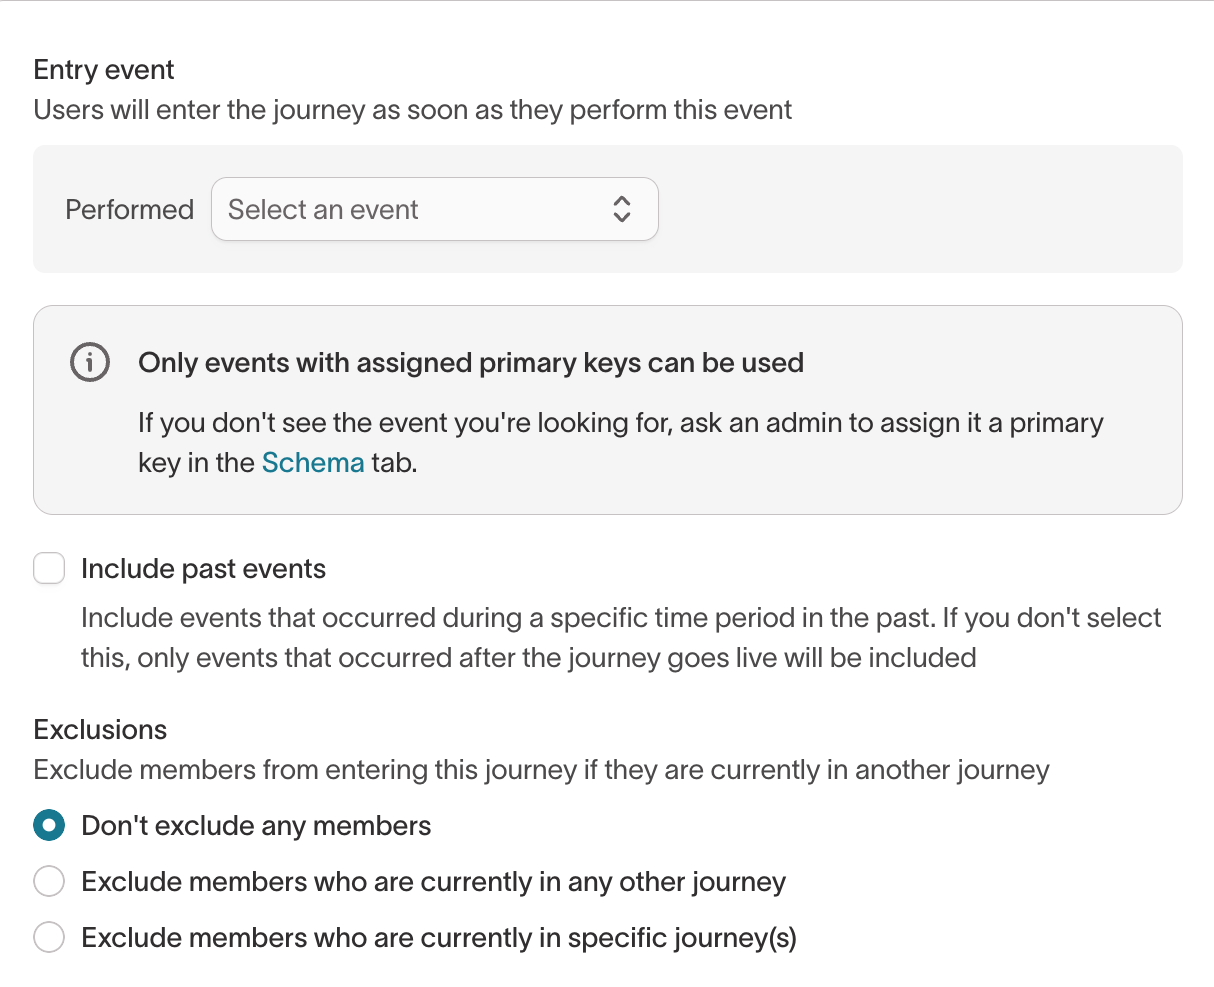
Event-based entry
- Select the event that triggers entry.
Only events with assigned primary keys can be used to enter a journey. A warning appears if the event model lacks a primary key.
-
(Optional) Enable Include past events and specify a lookback window. When disabled, only events occurring after the journey starts qualify.
-
Configure exclusions (same options as audience-based entry).
-
Select a re-entry behavior (same options as audience-based entry).
-
If you selected multiple entries, configure simultaneous entry behavior. This controls whether a member can be in the journey more than once at the same time.
- Not allowed — profiles must finish the journey before starting again
- Specific number of simultaneous entries
- Profile can be in the journey unlimited times simultaneously
The re-entry delay only applies when the member is not currently in the journey. Simultaneous entries can still happen if the member is already in the journey.
- Select Update to save.
Step 3: Add tiles to the canvas
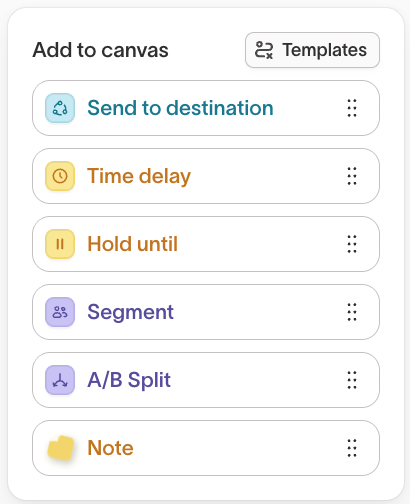
Use the Add to canvas panel to drag tiles onto the canvas, or select the + below any tile.

Available tiles: Time delay, Hold until, Segment, A/B Split, Send to destination, Send email, Send SMS, Send push, Set variable, and Assign coupon.
Canvas interactions
- Pan by selecting empty space and dragging, or scrolling on a trackpad
- Zoom with the +/- buttons or pinch gestures
- Move a tile by selecting and dragging it
- Delete a tile by hovering and selecting the trash icon (the Start tile cannot be deleted)
- Duplicate a tile by hovering and selecting the copy icon
- Select multiple tiles by holding Shift while selecting and dragging around a group
- Clean up the layout by selecting the clean-up icon at the top left of the canvas
- Toggle compact/detail mode to expand or collapse tile details
Step 4: Configure each tile
Each tile opens a configuration drawer when selected.
Time delay
Pauses each member before advancing. Time delay supports three modes:
- Duration — wait a fixed amount of time (e.g., 2 hours, 3 days)
- Specific date — wait until a calendar date and time
- Date from a profile property — wait until a date stored on the member's profile, with an optional plus/minus offset (e.g., 2 days before
subscription_renewal_date)
In all three modes, members advance at the next journey run after the delay condition is met — not at the exact moment. If your journey runs every 6 hours and you set a 1-day duration delay, actual wait time ranges from 24 to ~30 hours.

For duration delays, set the duration equal to or longer than the evaluation interval. A 15-minute delay on an hourly schedule advances on the next hourly run — the same as a 59-minute delay. Sub-interval delays do not add meaningful precision.
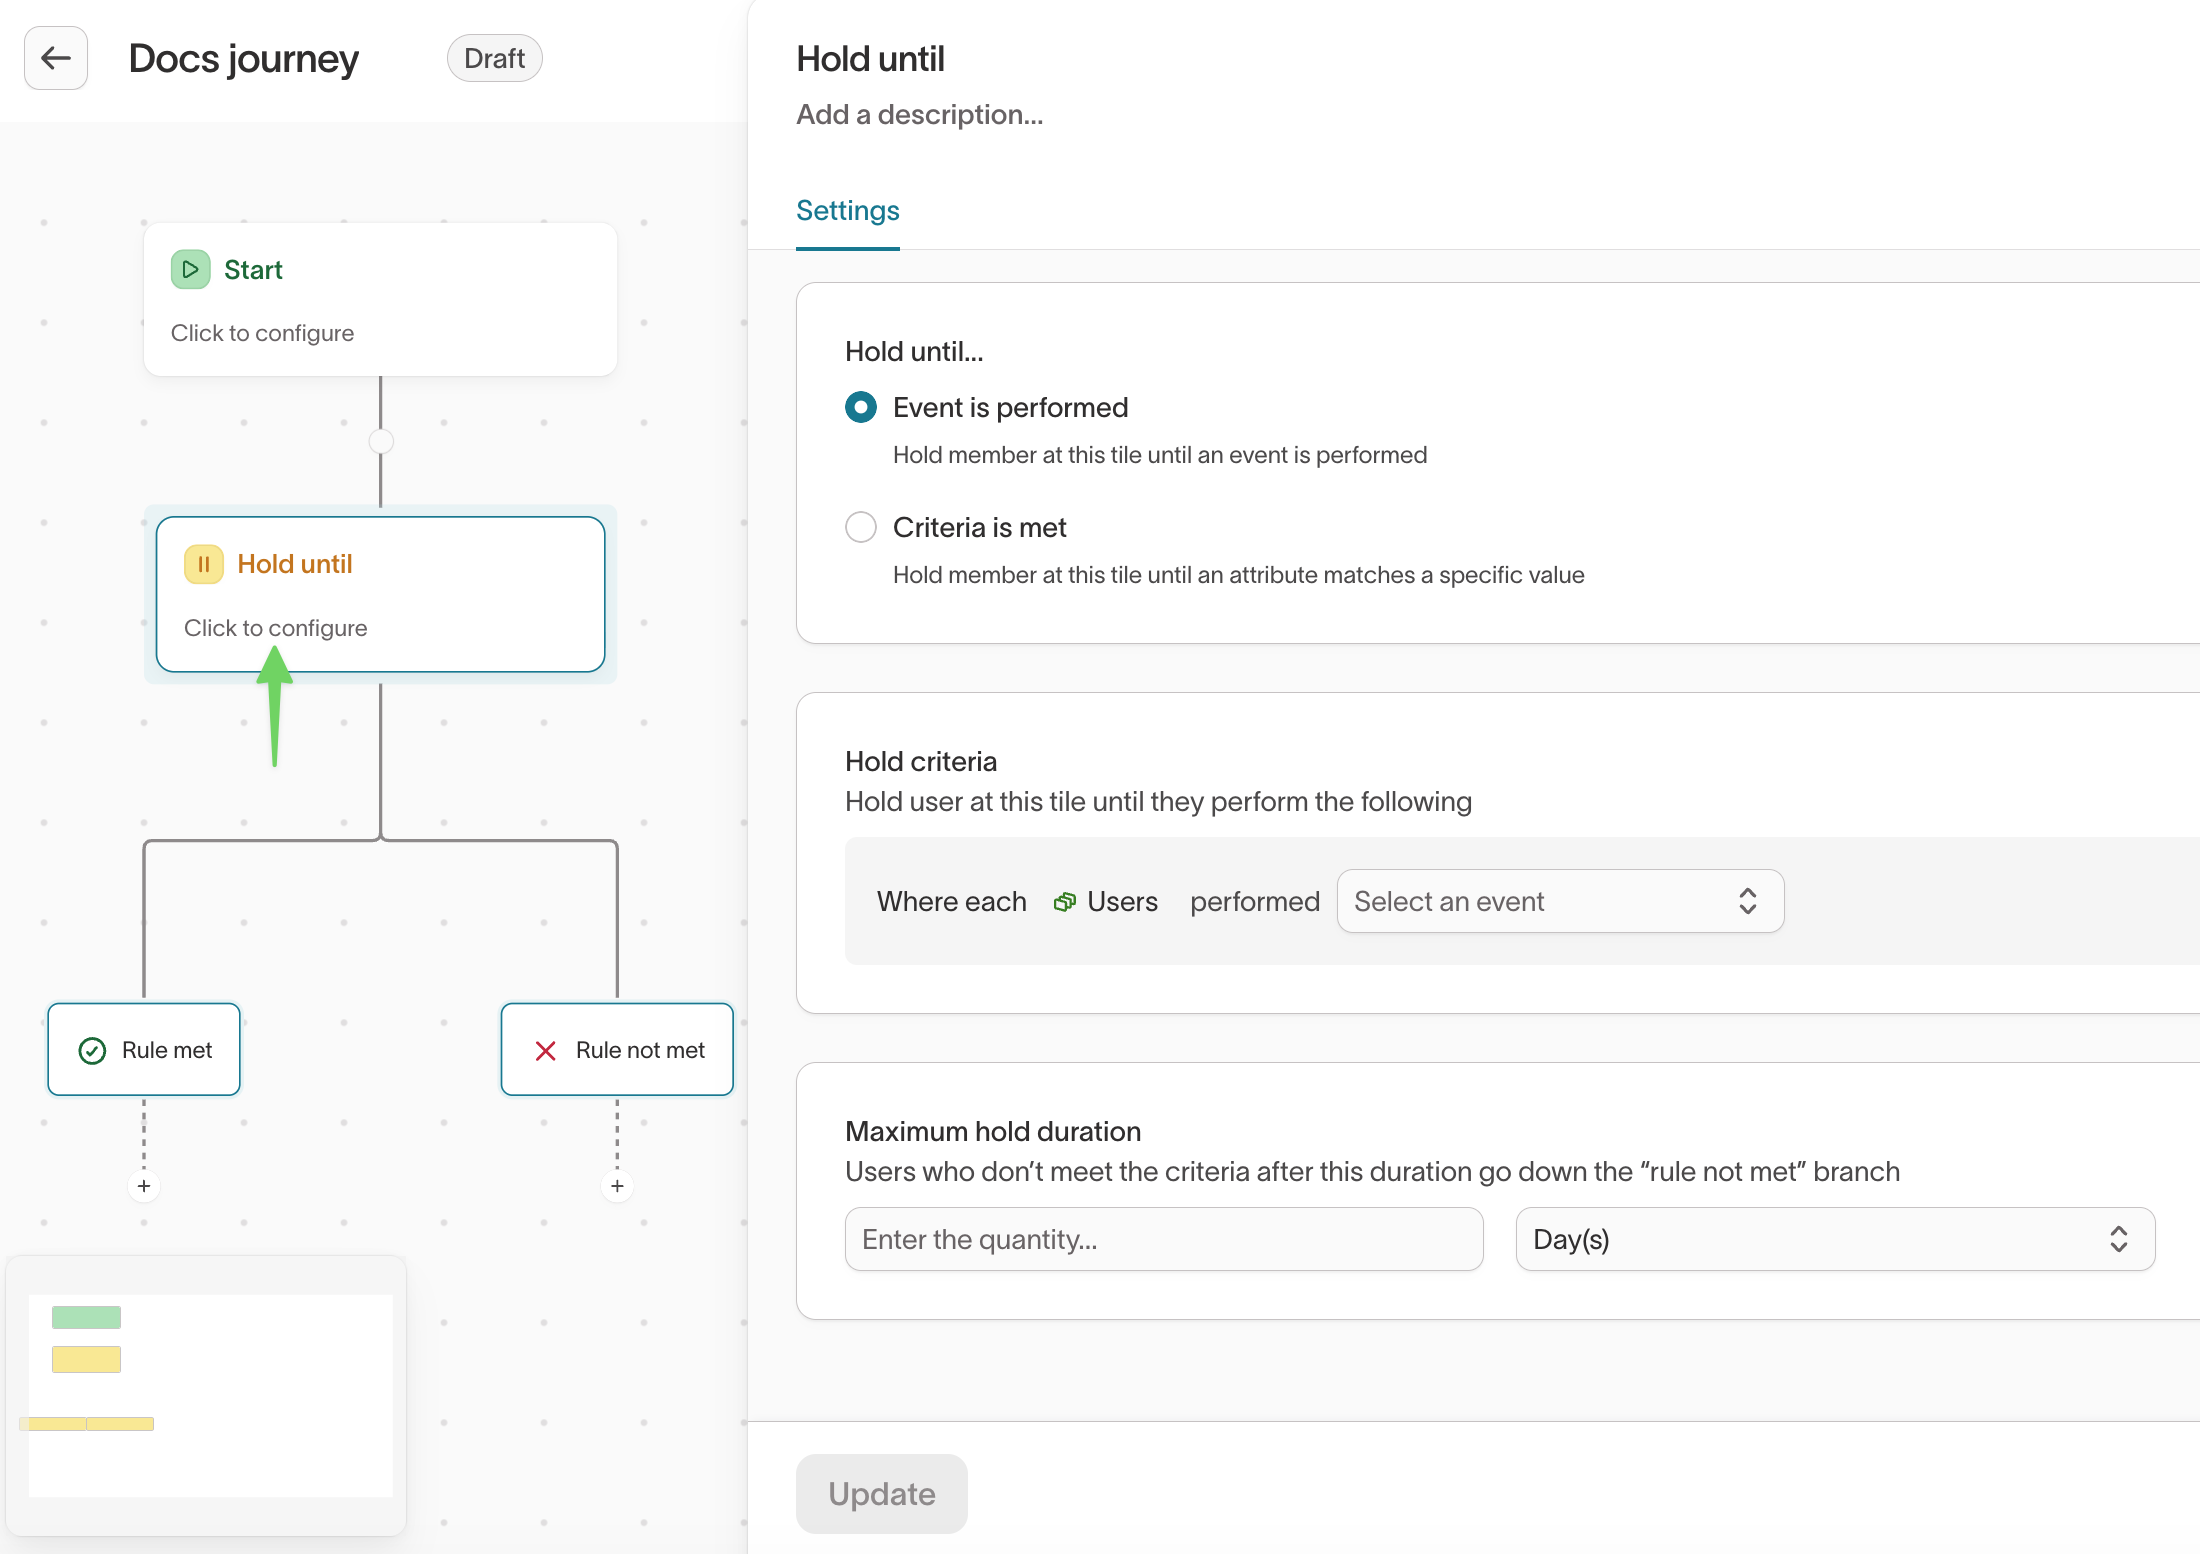
Hold until
Waits for a condition to be met, with a maximum wait time. Hold until creates two paths:
- Rule met — the member advances down this path when the condition is satisfied
- Rule not met — the member follows this path if the condition is still not met when the maximum wait time expires
Hold until is schedule-checked, not real-time. Hightouch evaluates the condition at each journey run. It should not be treated as an event listener that fires the moment something happens.
Examples of hold conditions:
- Order completed within last 7 days
loyalty_tier = Gold- Purchase amount > 50
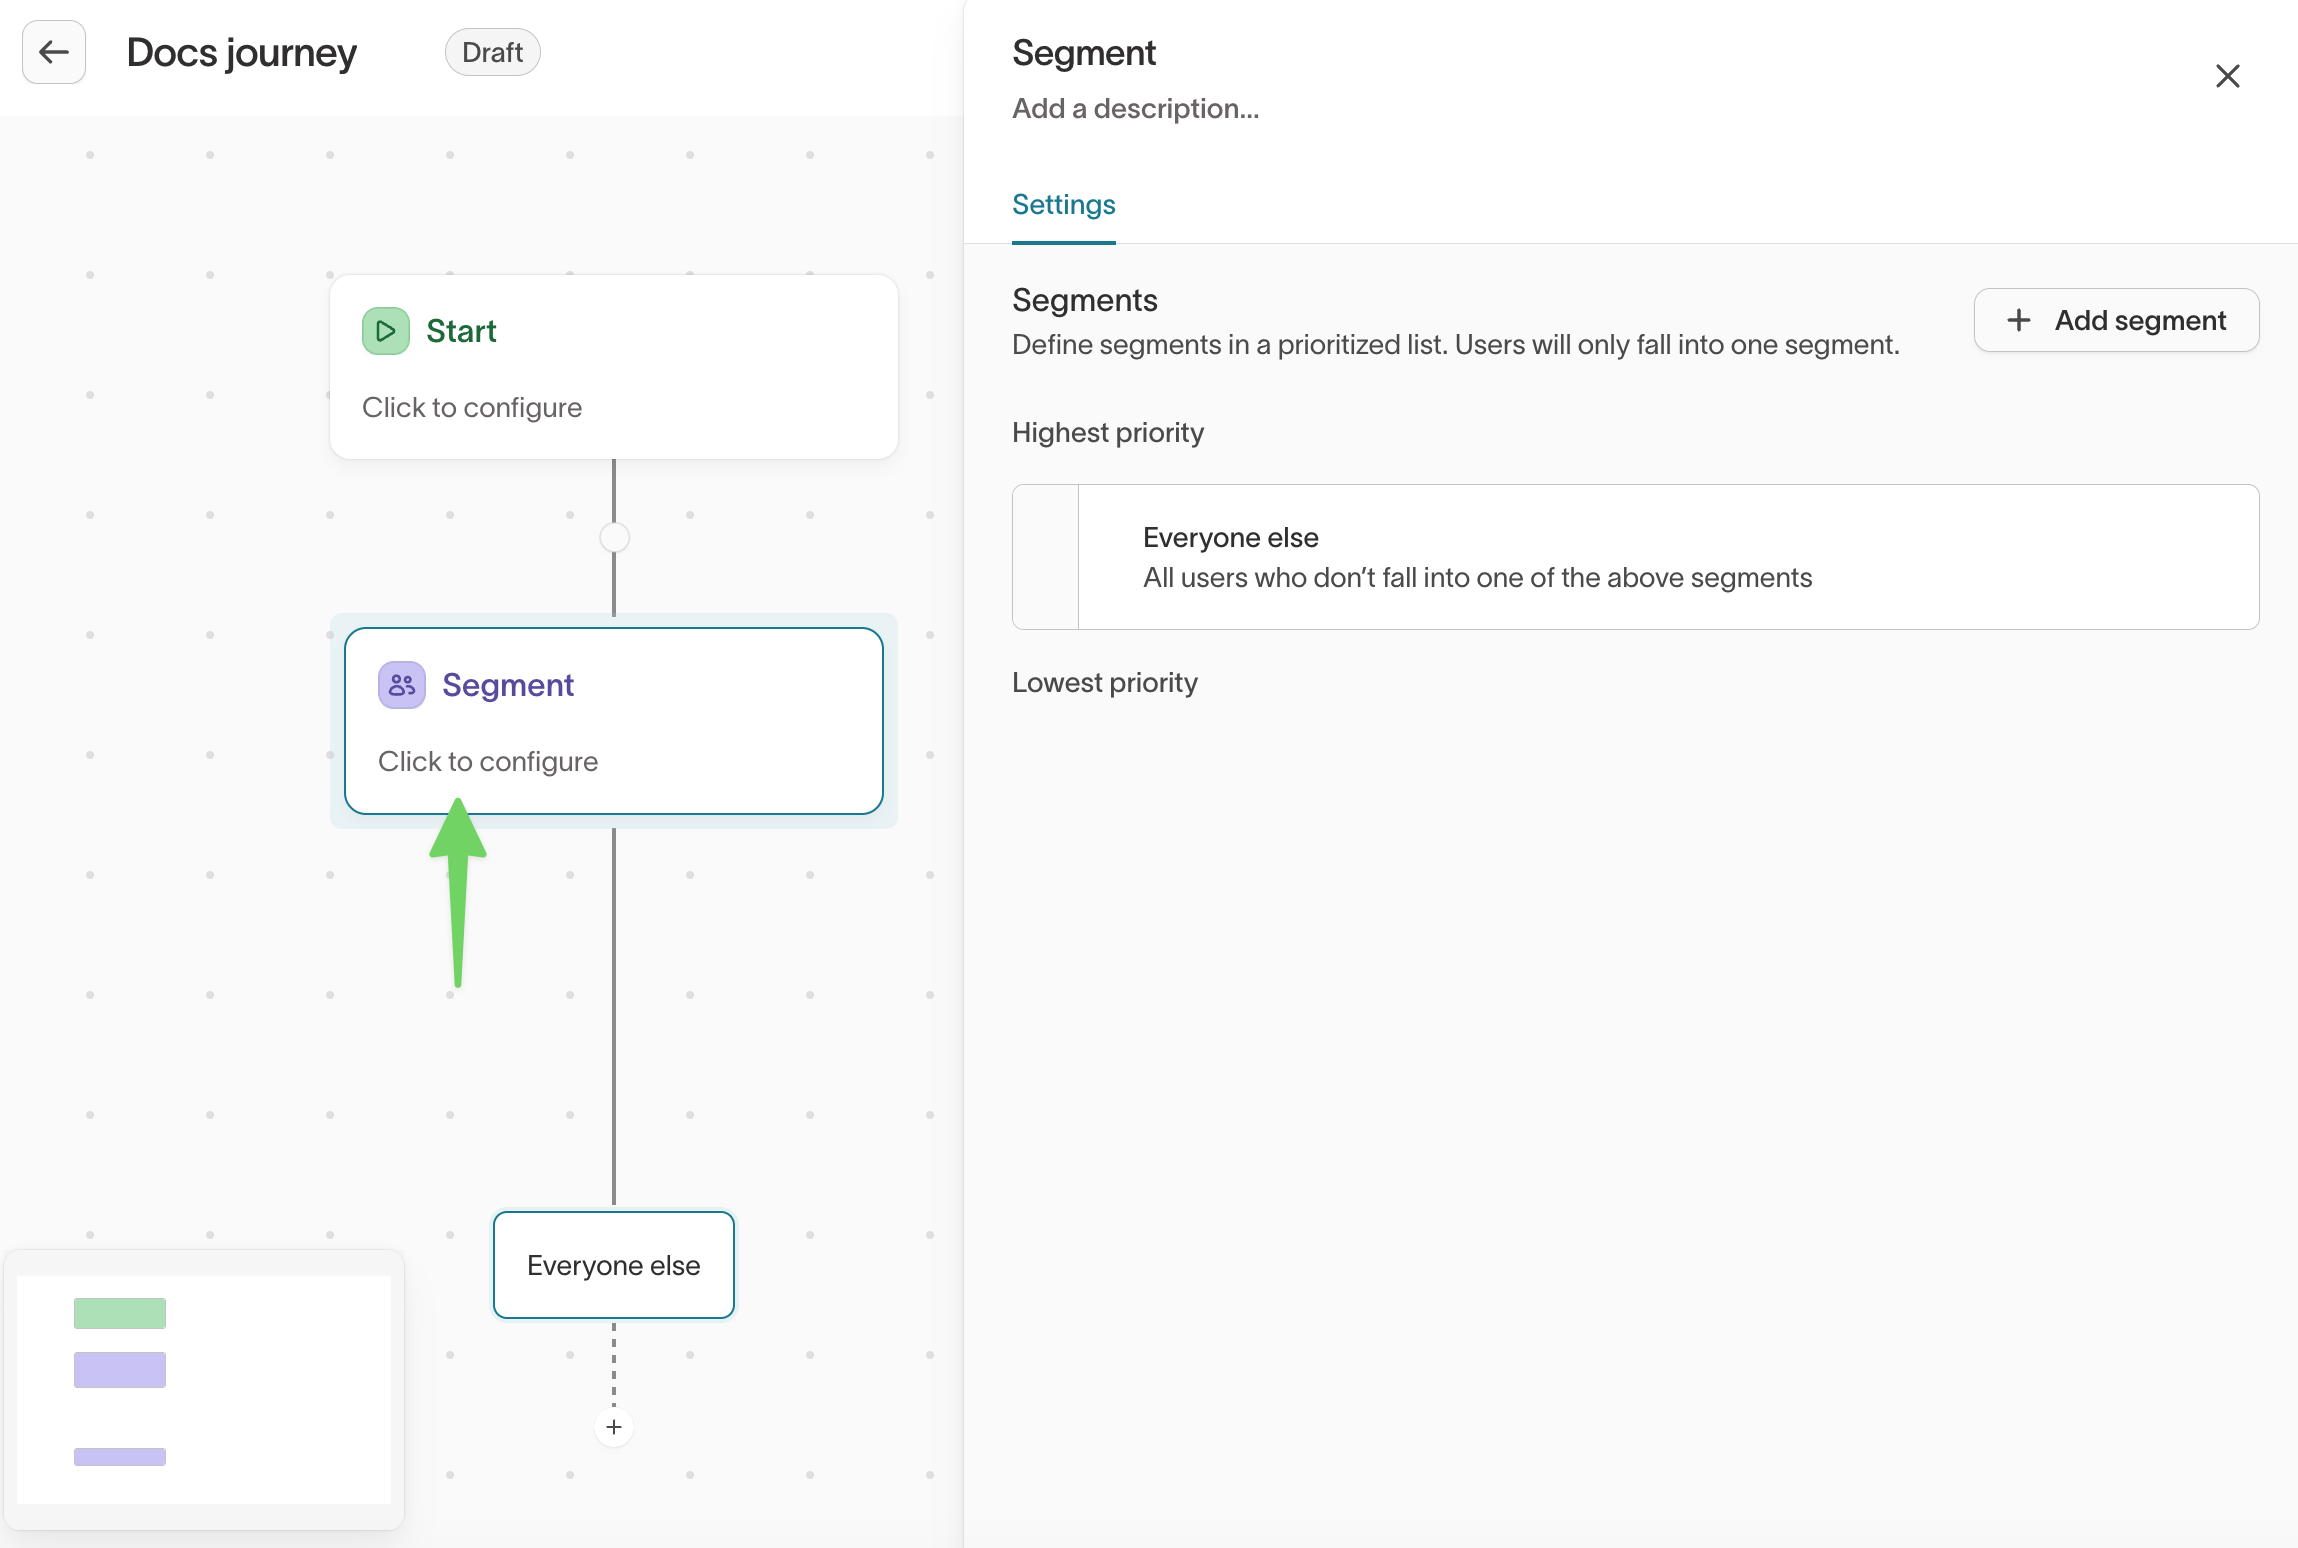
Segment
Branches the journey based on member attributes, traits, audience membership, event history, or relationships.
Branches evaluate top to bottom. The first matching branch wins. If a member could match multiple branches, they follow the first one. Design branch conditions to be mutually exclusive when possible to avoid ambiguity.
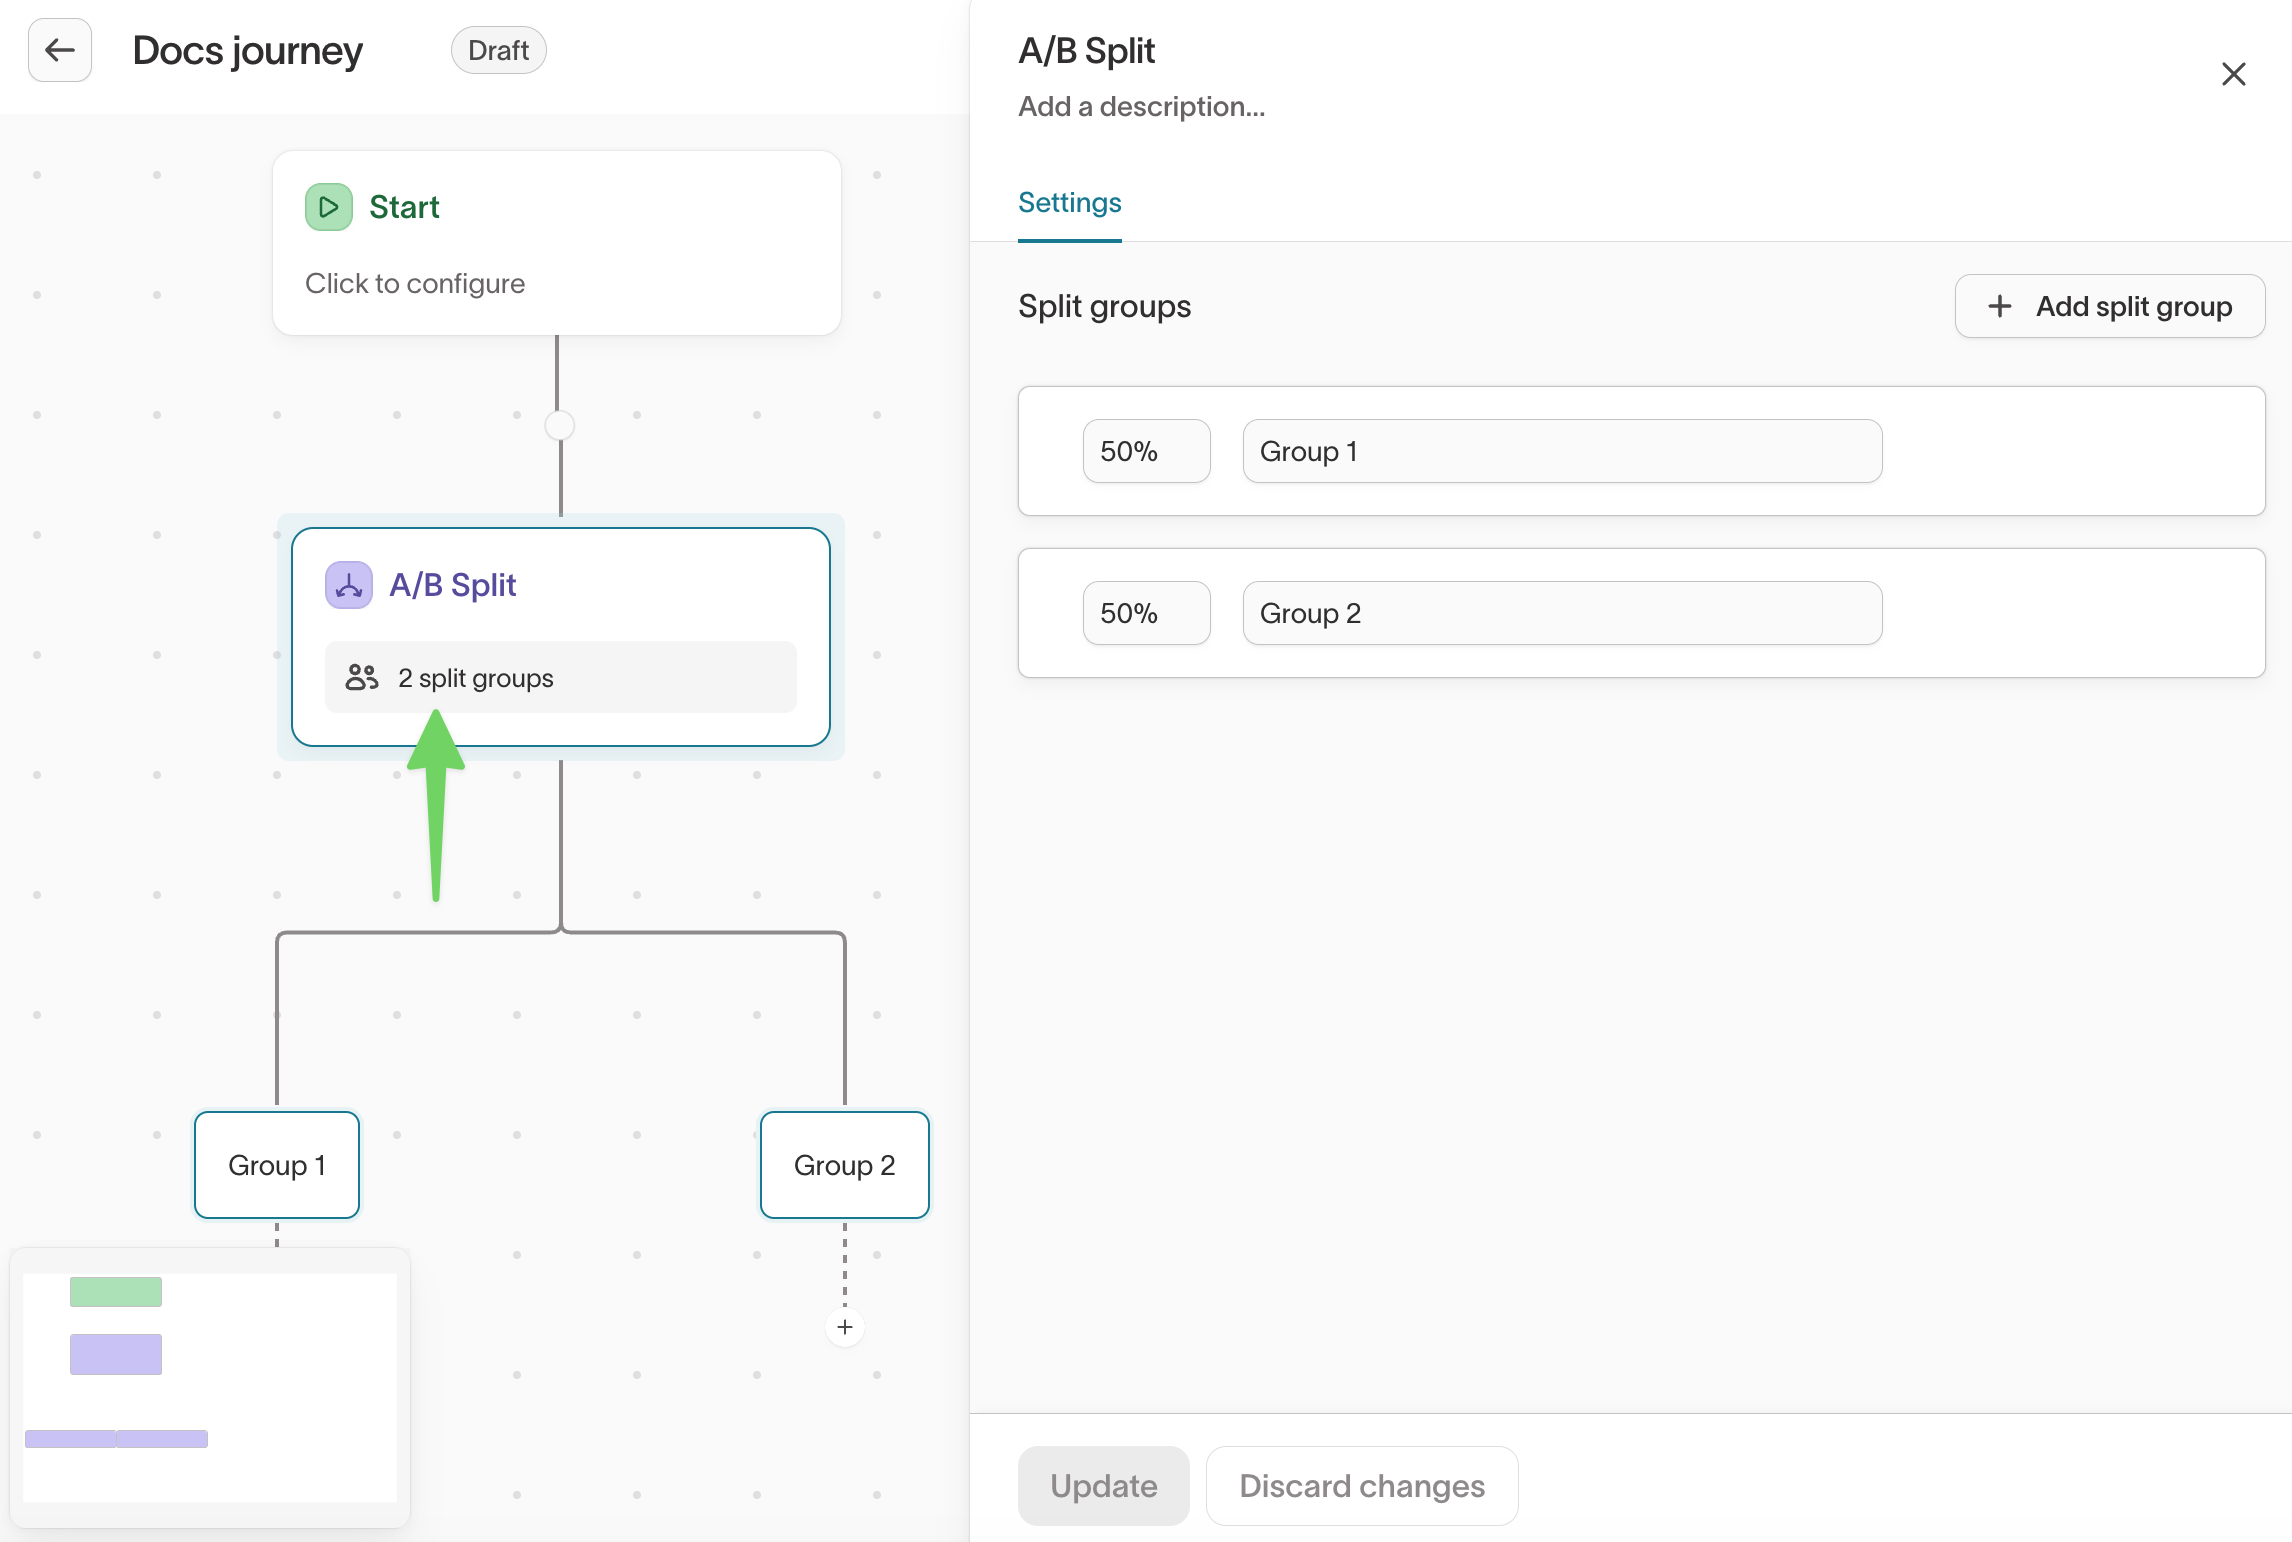
A/B Split
Randomly assigns members to branches for controlled experimentation.
Configure the number of branches, percentage allocation per branch, and group names (e.g., Treatment and Control).
Avoid changing split percentages after the journey goes live. Changing allocations mid-flight can compromise experimental validity.
Measurement: You can attach an experiment to a split tile to measure the impact of different branches on key metrics. In the split tile's details drawer, select Create experiment under Measurement configuration to get started.
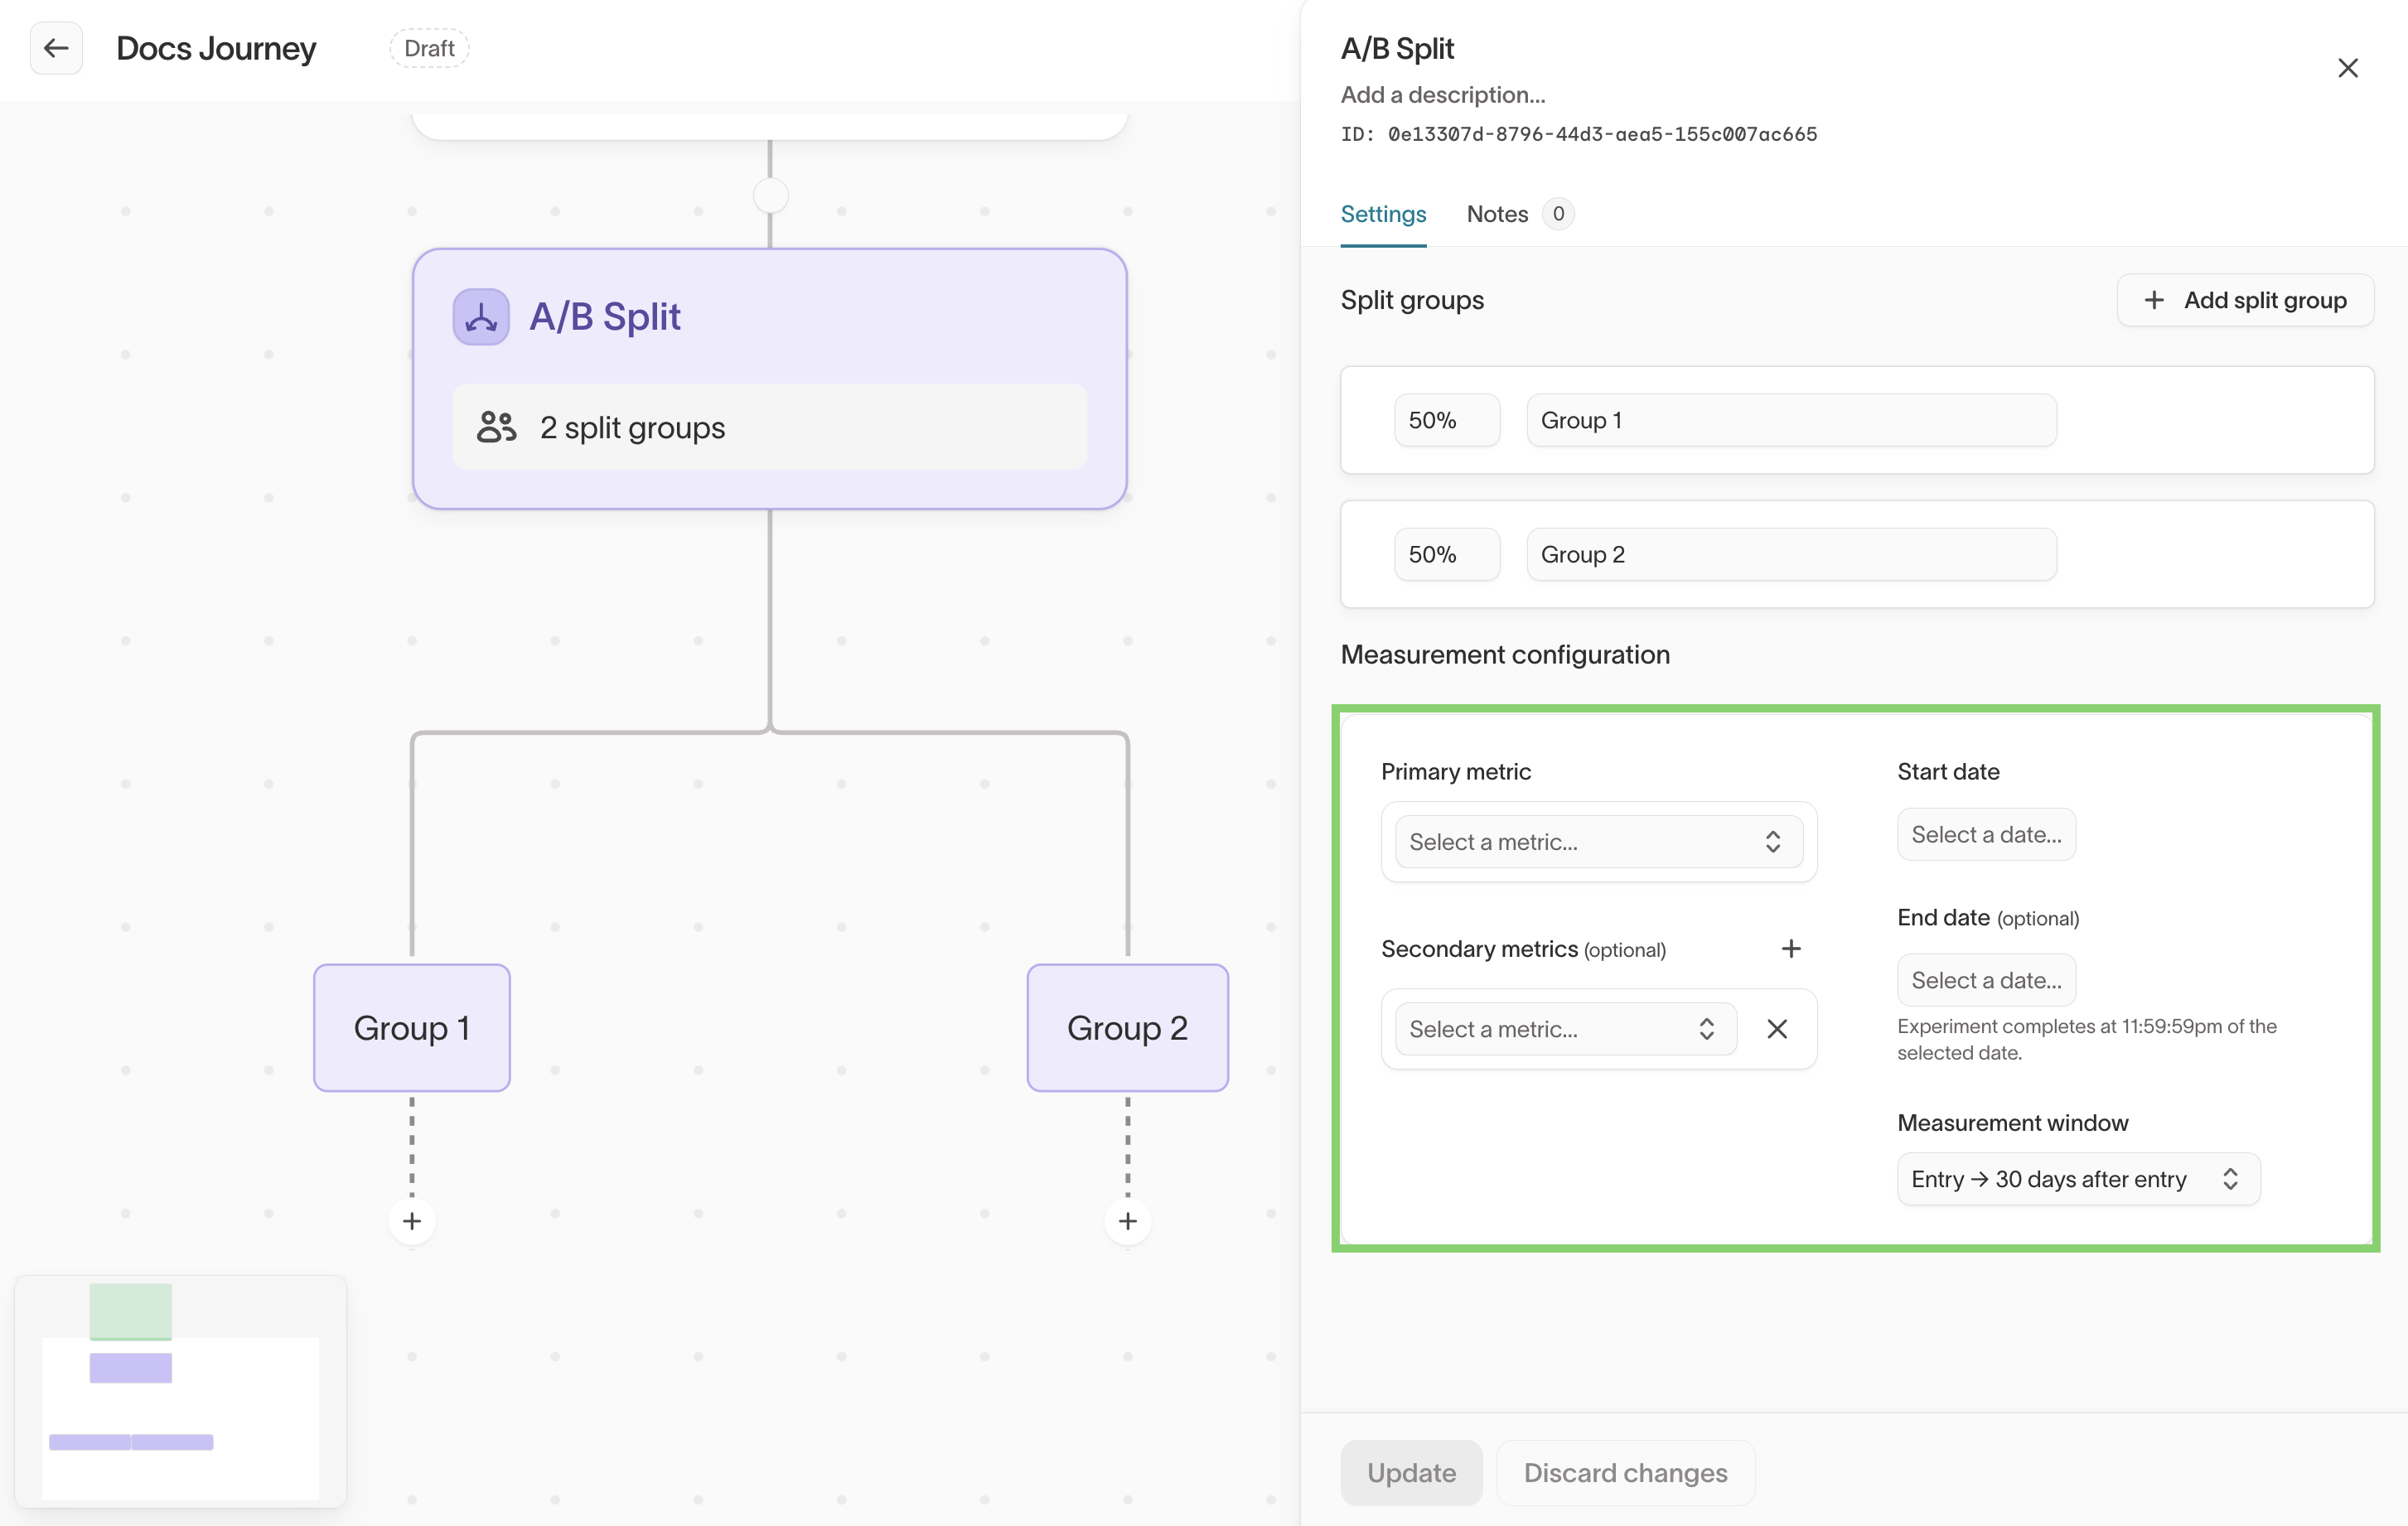
Once created, configure your primary metric, optional secondary metrics, and measurement window. Results are accessible from the split tile or under Intelligence → Experiments. See Experiments for details.
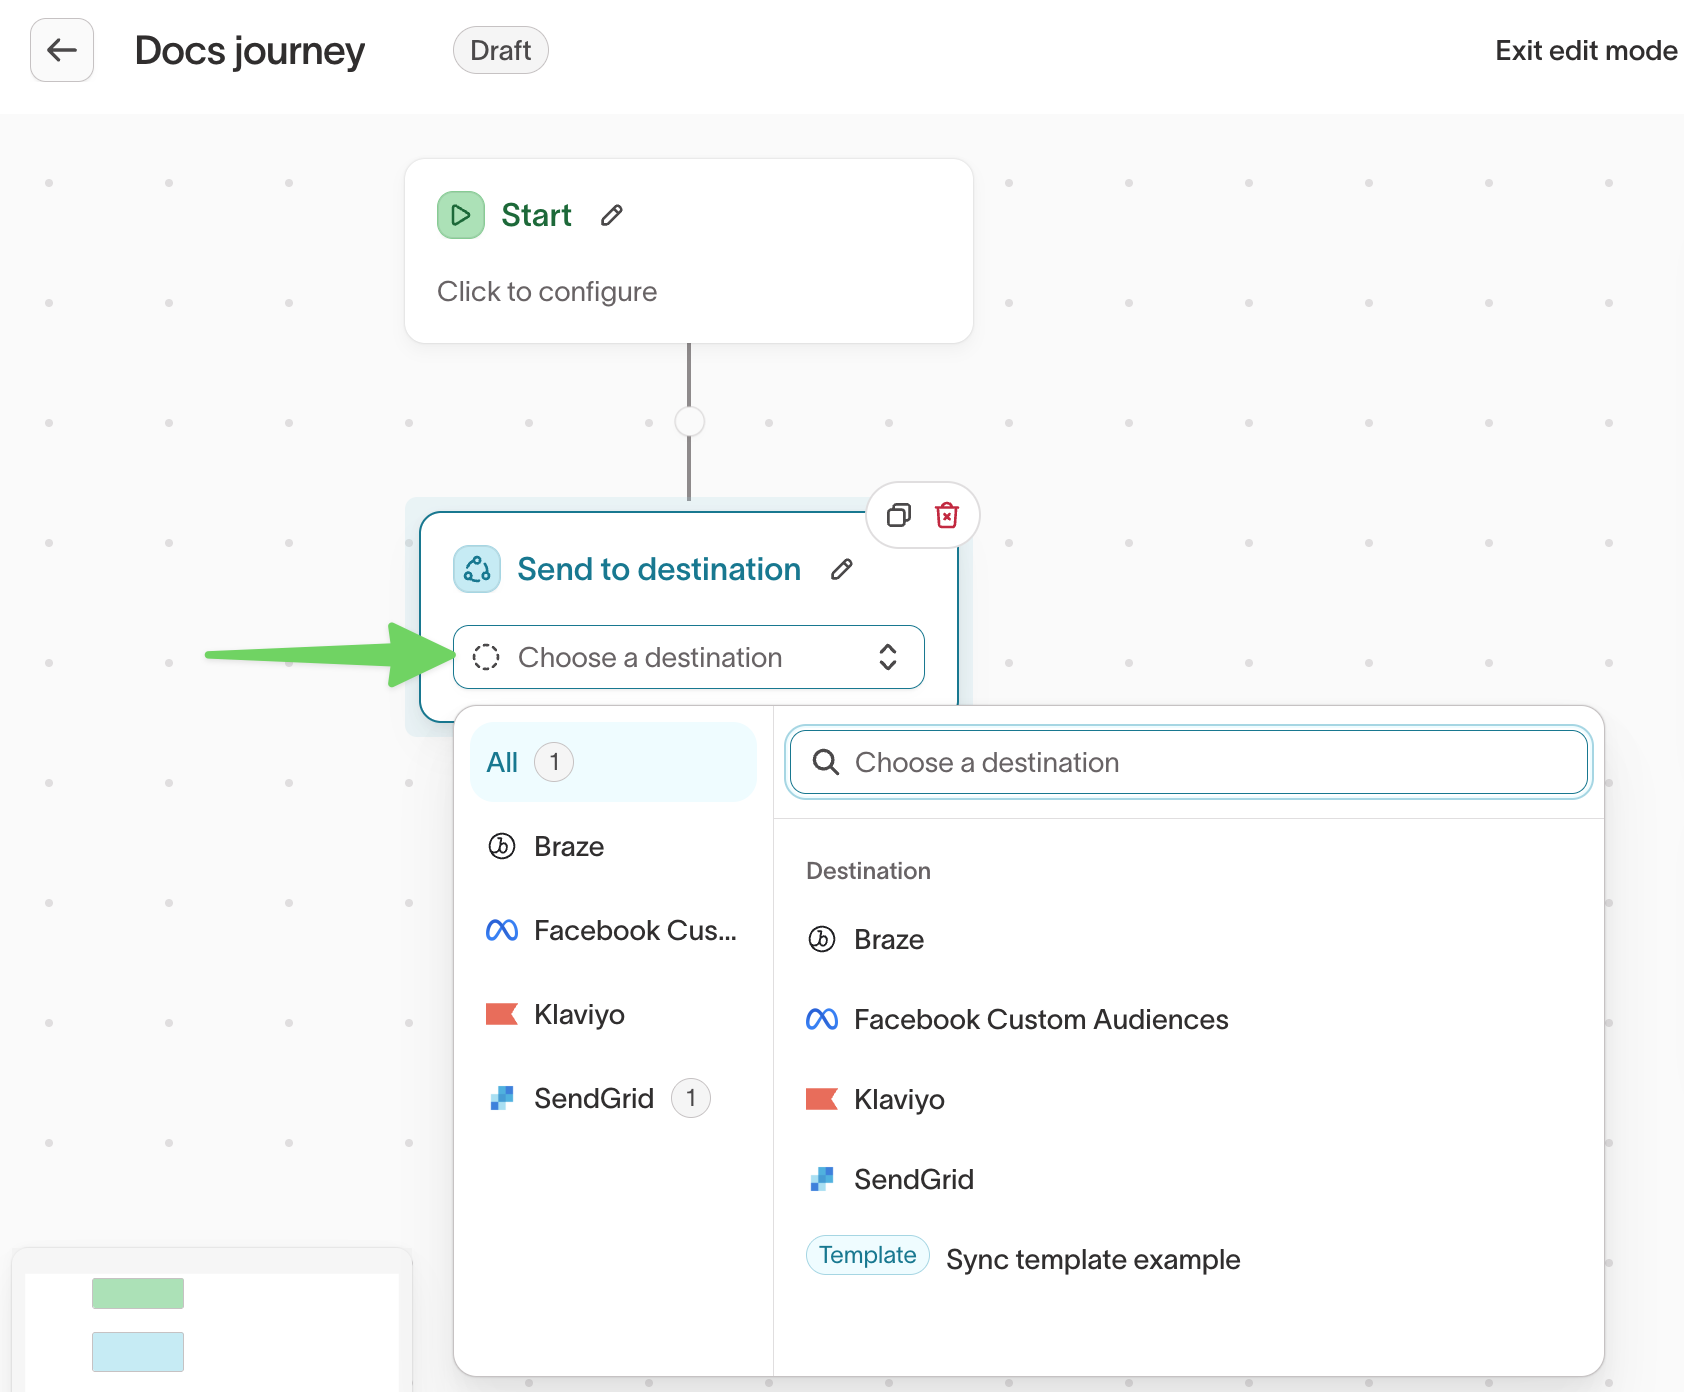
Send to destination
Triggers a sync to a destination. You can select an existing sync or create a new one from the tile.
Syncs inside a journey run when the journey evaluates — they do not follow their own independent schedules. Choose trigger syncs for one-time sends and cohort syncs for maintained destination lists. See Sync configuration for journeys for details.
Set variable
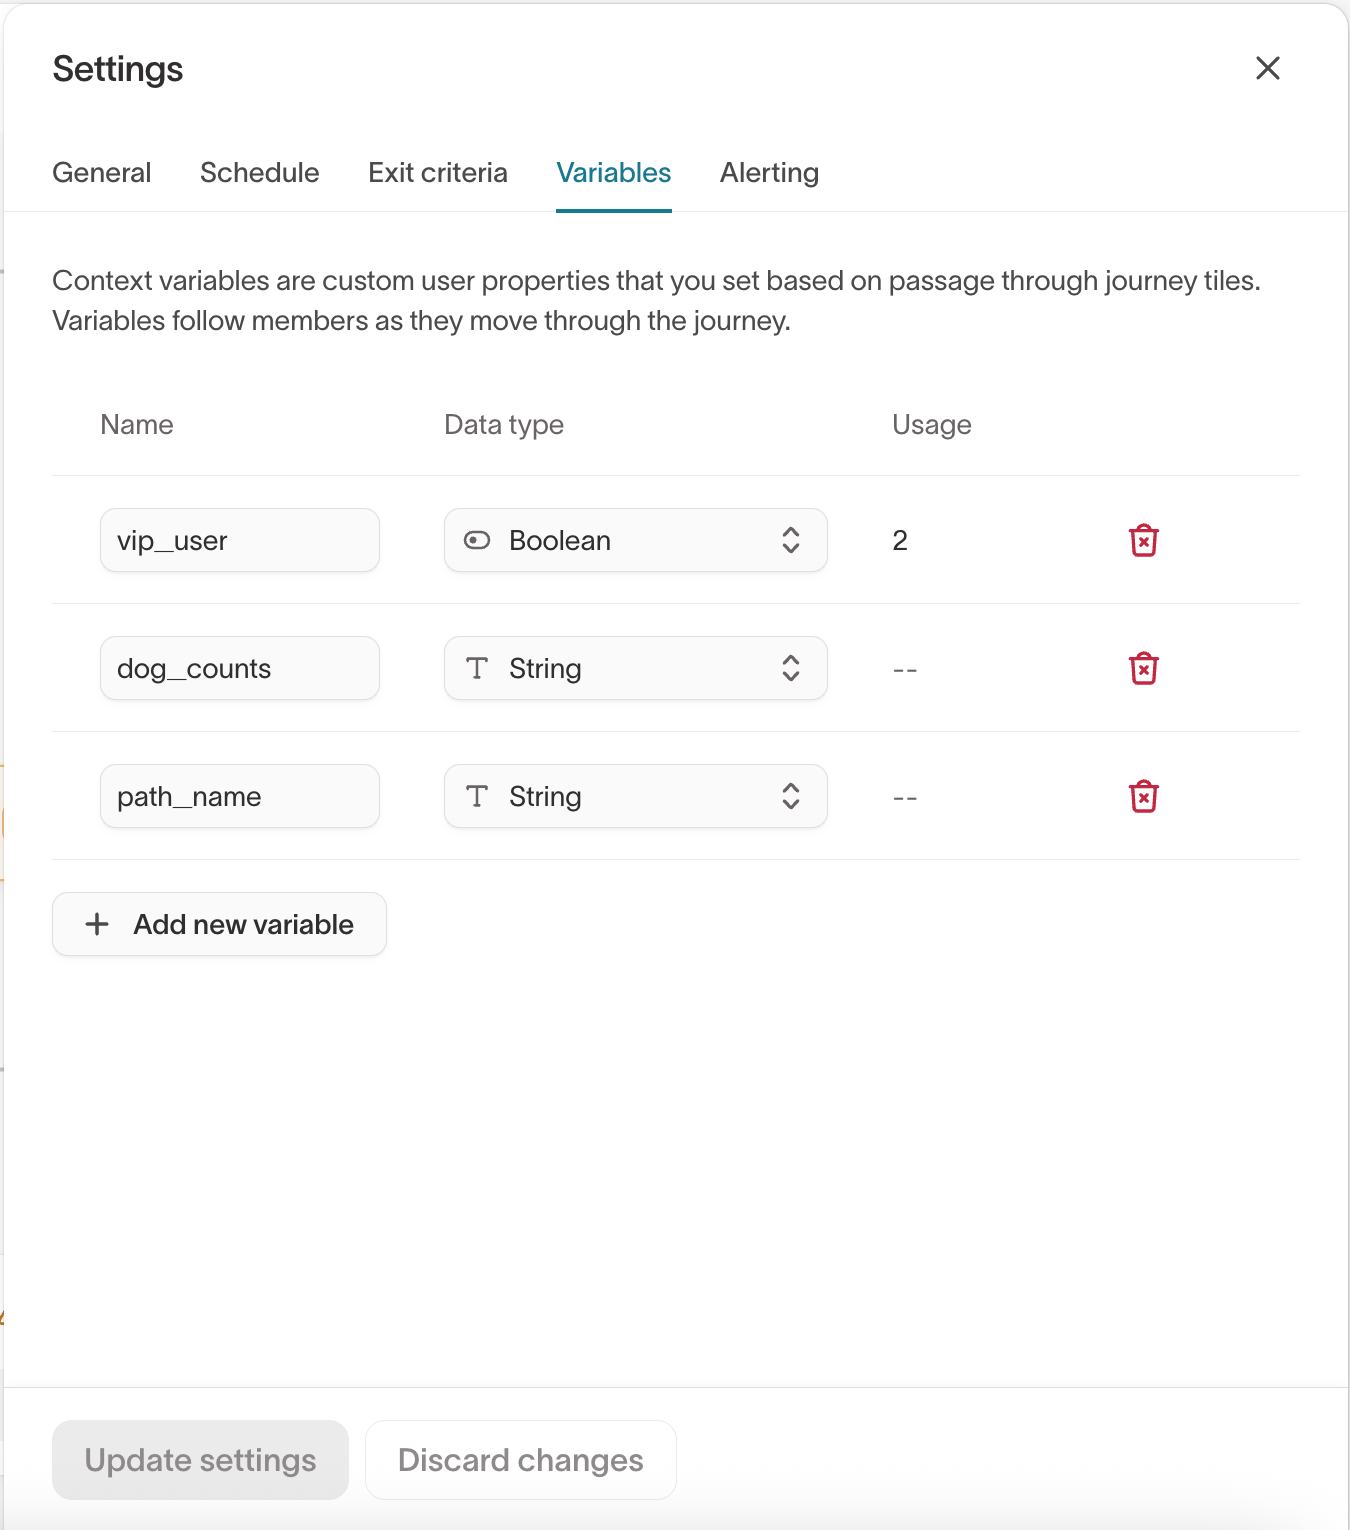
Context variables let you set and carry values as a member progresses through the journey. They're useful for tagging which path a member followed, passing journey state to destinations, or branching on journey-specific data later in the flow.
Define context variables in journey settings, then assign their values in Set variable tiles throughout the journey.
Example: Track whether a member was routed through a VIP path and sync that flag to a destination.
- Define a context variable
vip_userin the journey's settings. - Add a Segment tile that branches on loyalty level.
- On the high-loyalty branch, add a Set variable tile that sets
vip_user=true. On other branches, setvip_user=false.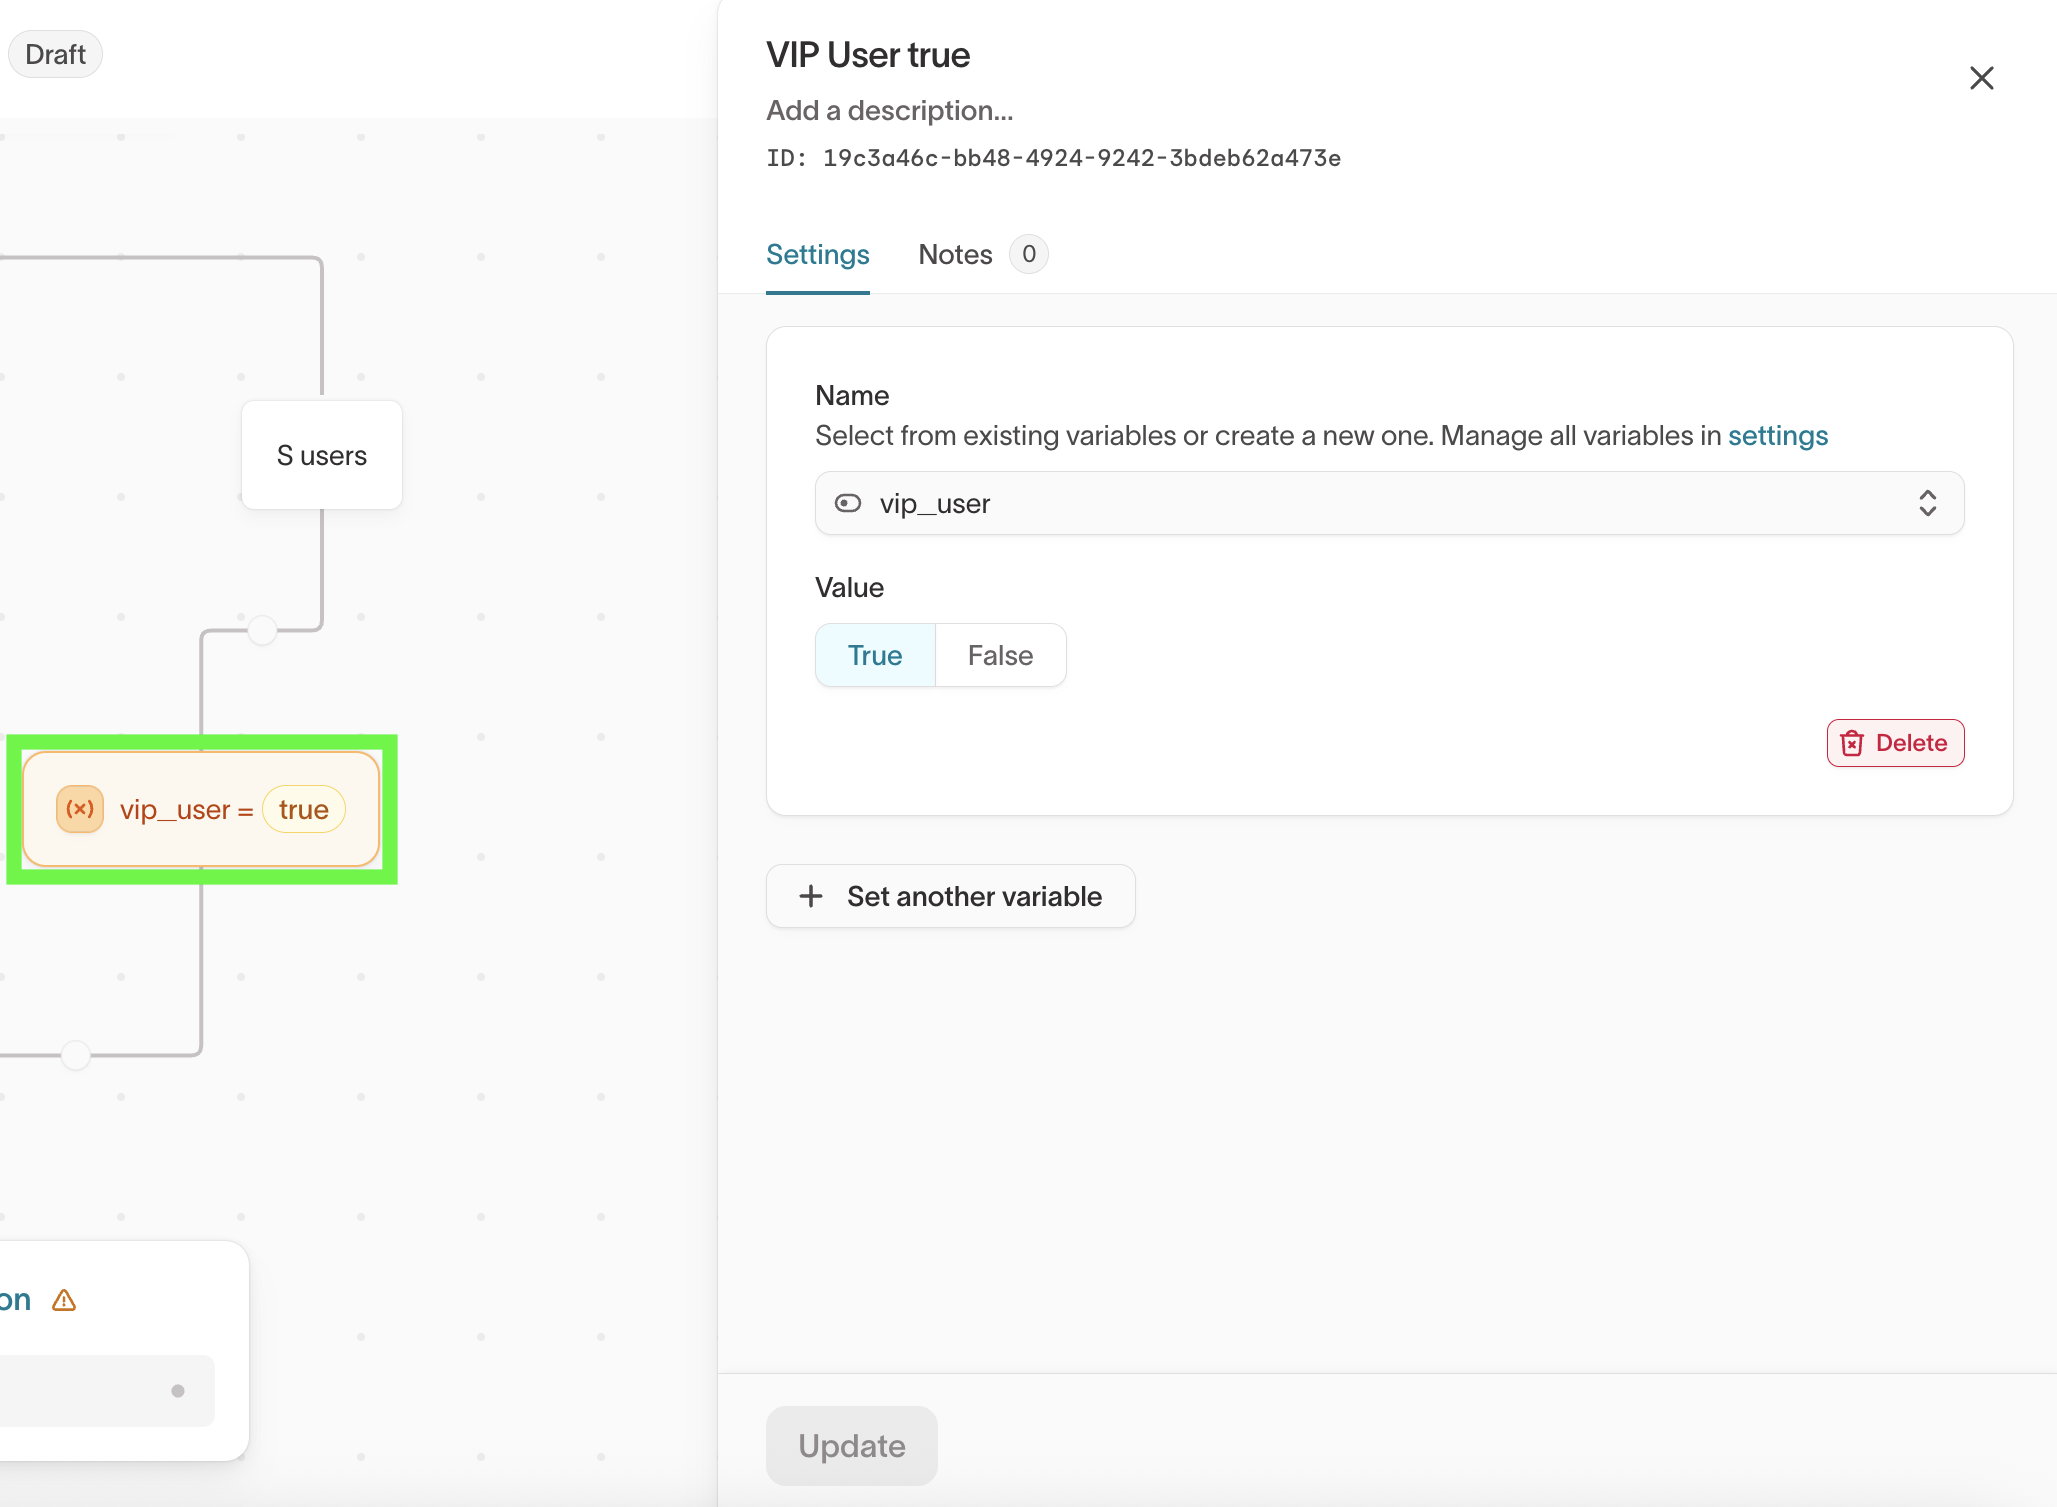
- In a
Send to destinationtile, mapvip_useras a synced field so the destination receives the journey-state flag.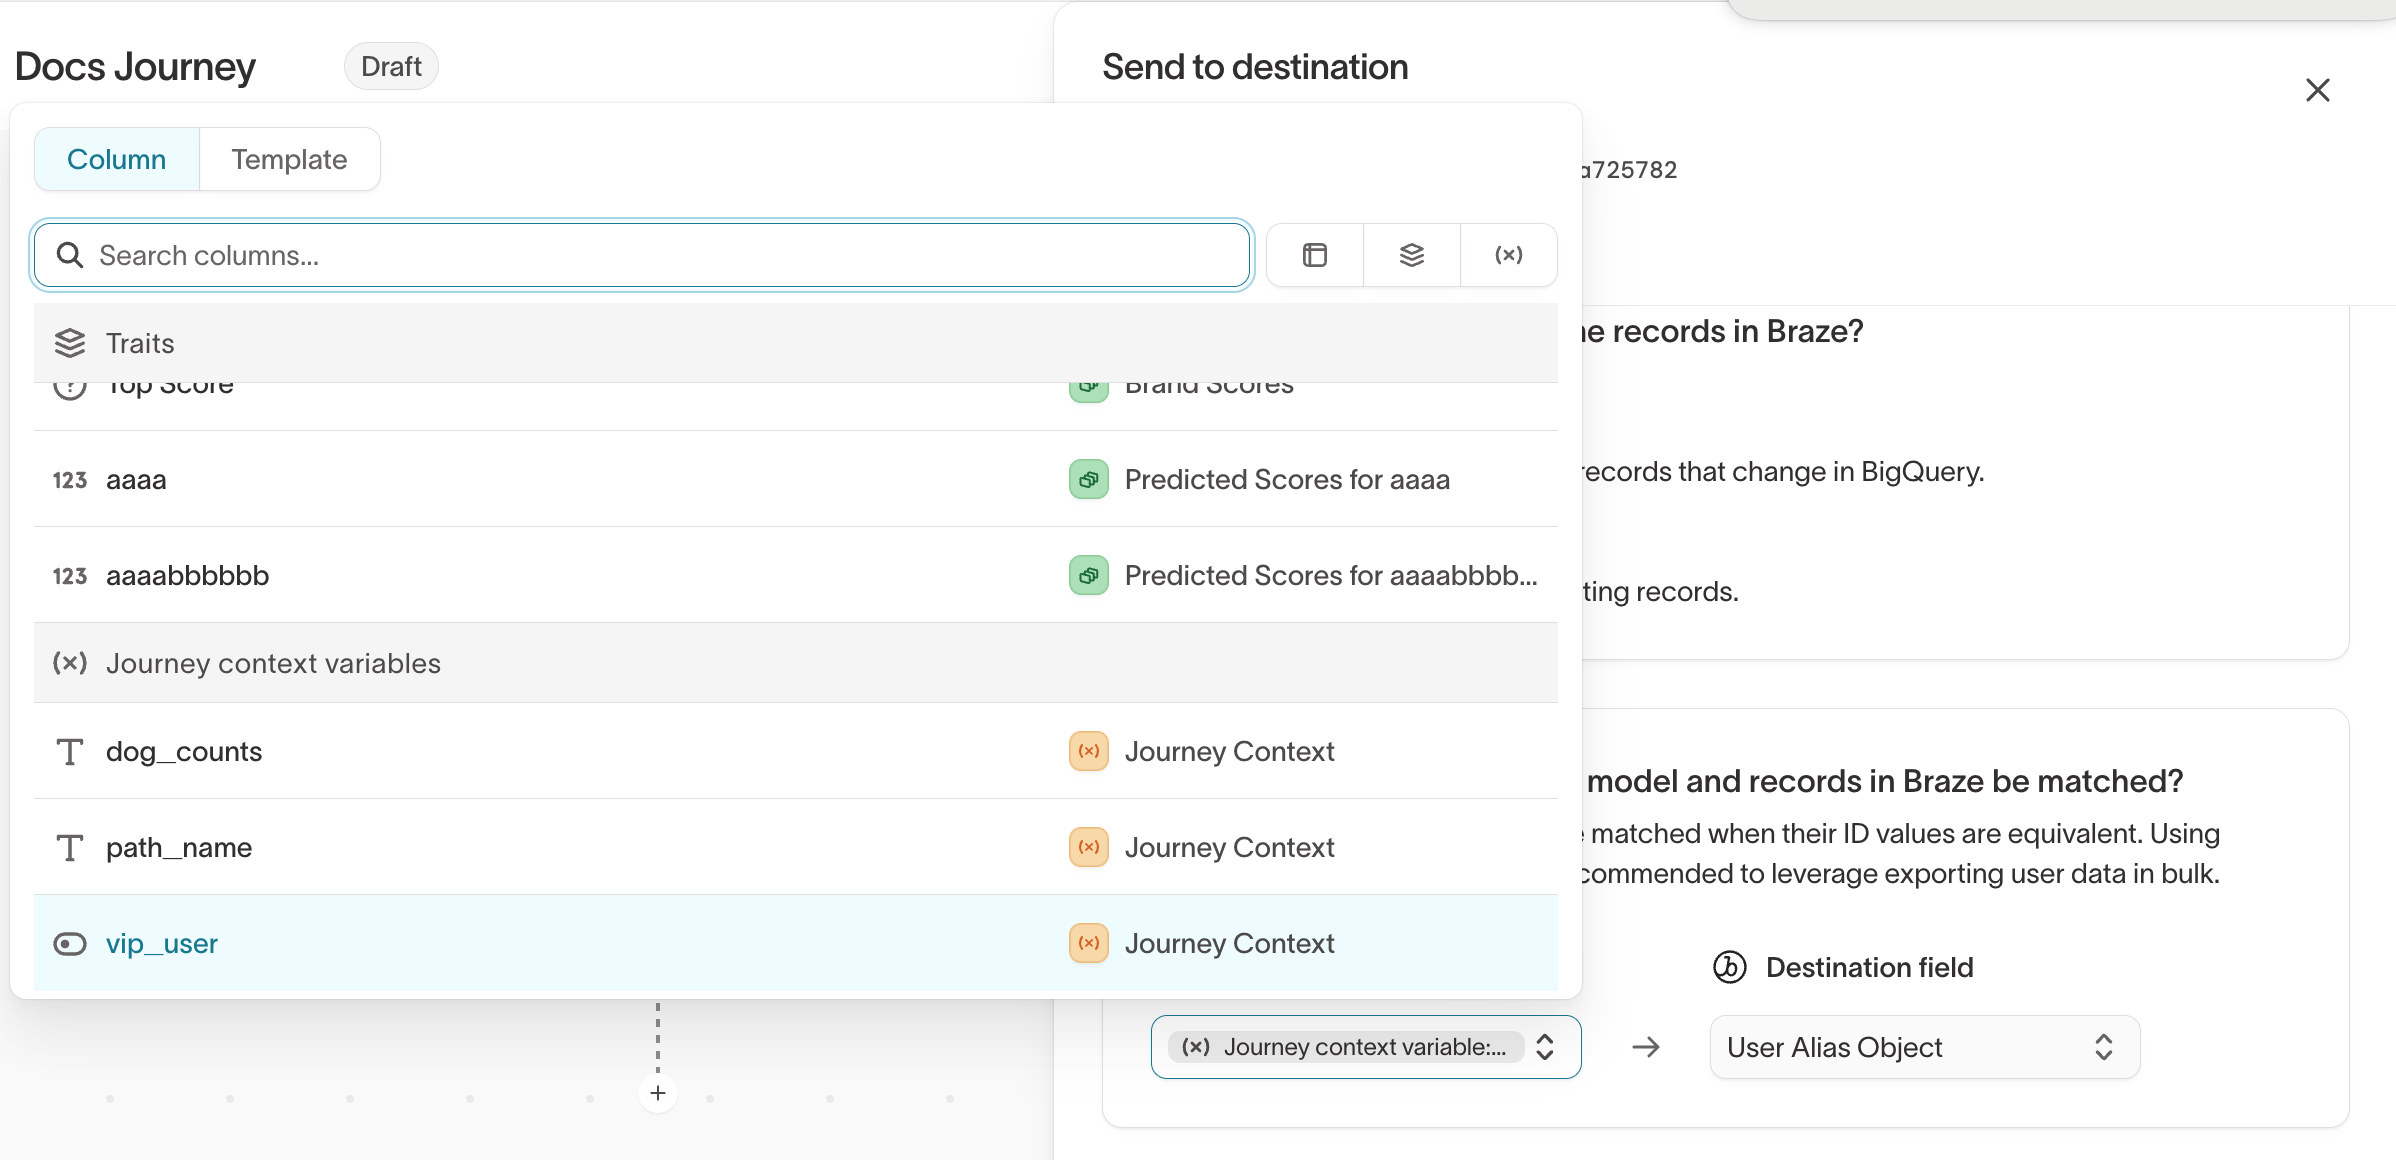
After a journey runs, you can view context variable values in the member details panel.
Set variable tiles write to the journey variables defined in Settings → Variables. The underlying data model uses the term "context variables" — you may see this in warehouse log tables and API responses.
Assign coupon
Assigns a coupon code from a configured coupon pool to each member who reaches the tile. Use this for promotions that require unique, single-use codes.
See Coupon assignment for setup and pool configuration.
Coupon assignment tiles cannot be used in event-triggered journeys. Use an audience-based entry instead.
Edit a journey
Select Edit at the top right of the canvas to enter edit mode.

Editing a live journey affects members currently in the flow. If you add, remove, or reconfigure tiles, members in delays or in-flight branches continue from their current position — but behavior after the edit may change. For complex changes, consider creating a new journey and draining the old one instead of editing in place.
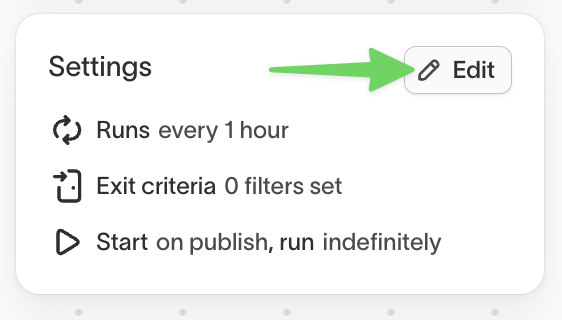
Journey settings
In edit mode, the Settings panel appears on the right. Select Edit to update journey name, description, evaluation schedule, exit criteria, variables, and alerting.
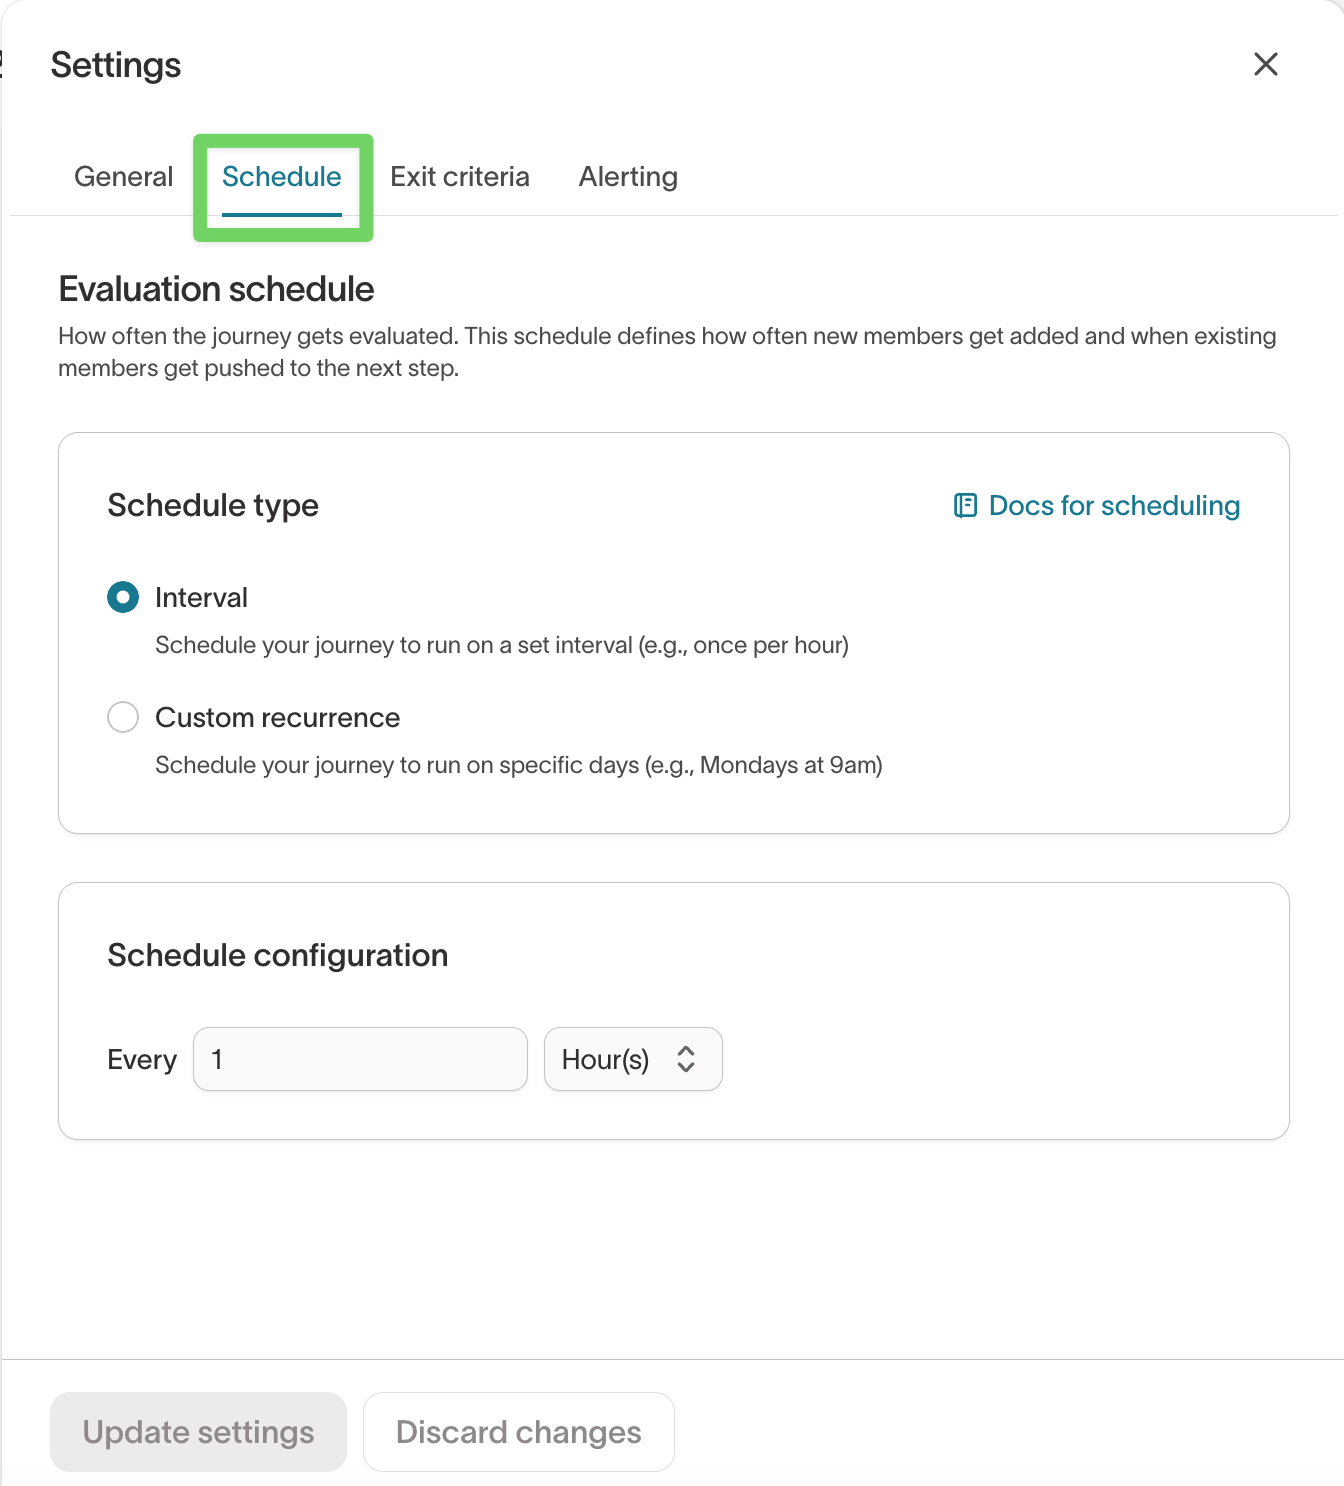
Evaluation schedule
The evaluation schedule controls how frequently the journey runs. This is the single most important setting because it determines the precision of entry detection, delay resolution, exit checking, and sync triggering.
| Schedule type | Description | Example |
|---|---|---|
| Interval | Repeating fixed interval | Every 1 hour, every 30 minutes |
| Custom recurrence | Specific days and times | Weekdays at 9 AM |
Rules of thumb:
- Choose the schedule based on the tightest send precision you need. If a 6-hour window is acceptable, a 6-hour interval works. If you need hour-level precision, use an hourly schedule.
- Design all delays as multiples of the schedule. A 2-hour delay on an hourly schedule resolves predictably. A 2-hour delay on a daily schedule resolves the same as a 1-minute delay.
- More frequent runs increase warehouse query volume. Balance precision against cost.
First run timing:
- Interval schedules run a few seconds after you select Start.
- Custom recurrence runs at the next matching time.
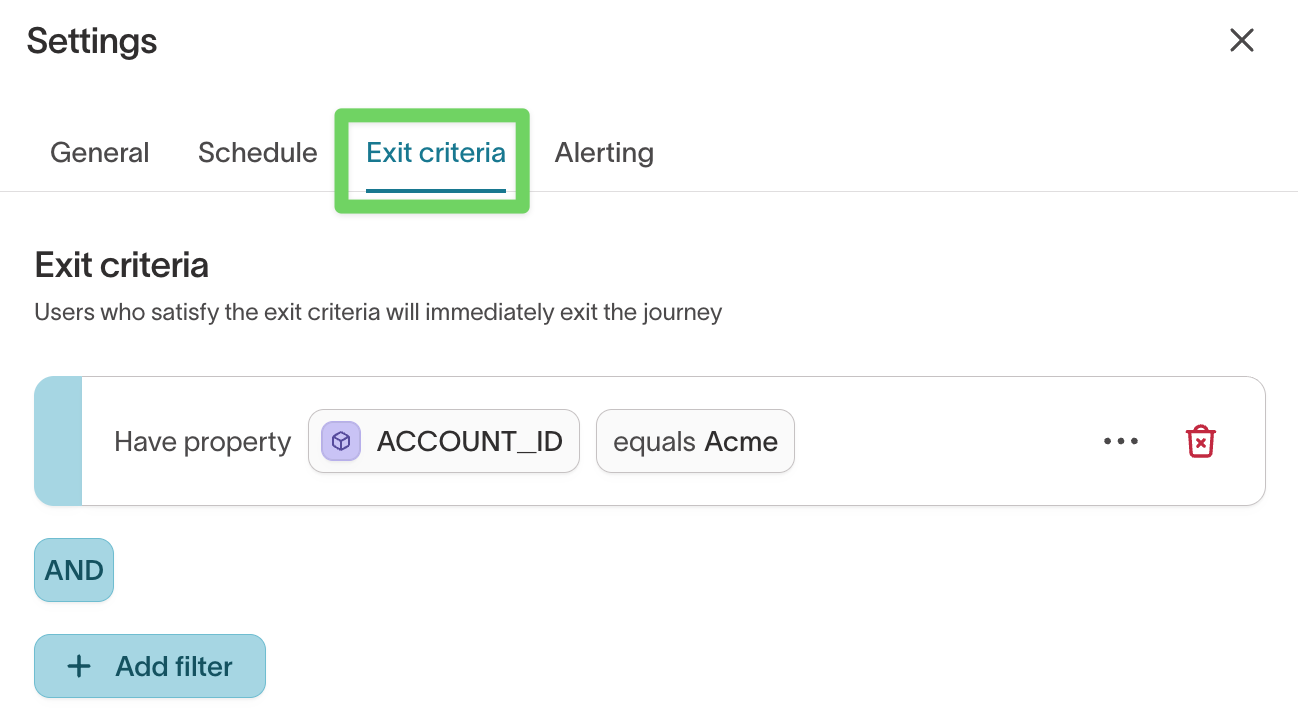
Exit criteria
Exit criteria remove members from the journey when a condition becomes true — for example, when a user makes a purchase, unsubscribes, or joins a different audience.
Exit conditions are checked during each scheduled run, before a member moves through the next step in the journey. A member can be removed mid-run before a later step sends or advances them. Exit conditions are not checked in real time — if a user completes the exit action between runs, they remain in the journey until the next evaluation detects the change.
Avoid using the same volatile field for both entry and exit criteria without considering how it changes. If the entry audience is "users who haven't purchased in 30 days" and the exit condition is "user has purchased," a single purchase both removes the user from the entry audience and triggers exit. This is often correct — but if the field changes frequently (e.g., a rolling window), members can churn in and out unexpectedly. Use stable, one-directional fields for exit criteria when possible.
Debugging exits: If members exit unexpectedly, check the member details panel to see which run removed them and what exit condition matched. Compare the exit timestamp to data changes in your warehouse to confirm the condition was met.
Variables
Define context variables in the Variables tab. Each variable you define here becomes available in Set variable tiles throughout the journey.
Alerting
Alerting notifies you when a journey run fails. Journeys inherit default alert settings from your workspace, and you can override them at the journey level.
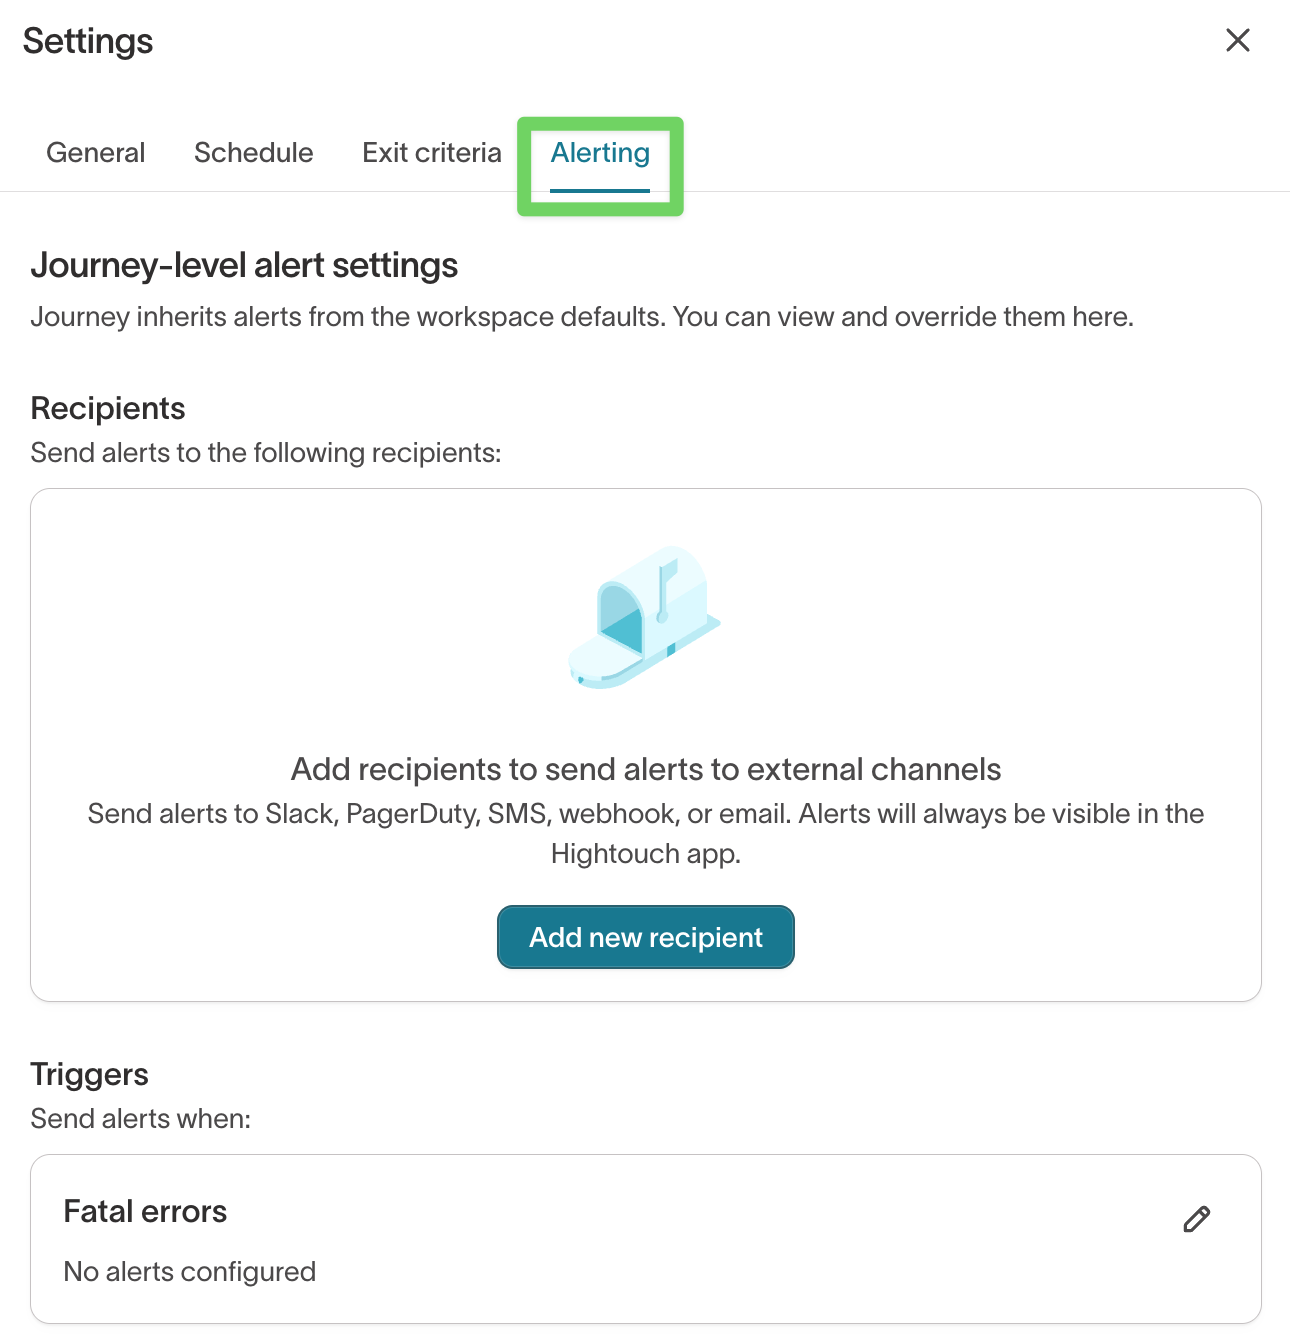
Recipients: Alerts can be delivered by email, Slack, PagerDuty, SMS, webhook, or any channel your workspace has configured. Select Add new recipient to configure delivery.
Triggers: Specify when alerts fire. Journeys currently support alerts for fatal errors — runs that fail during execution. If no trigger is configured, alerts appear in the Hightouch UI only.
Notification behavior: You receive one alert per status change, not per run. A run fails → one warning alert. The next run also fails → no additional alert. The next run succeeds → one recovery alert.
Global defaults are configured under Integrations → Alerting → Journeys. To learn more, see Sync alerting.
Test and validate before launch
Testing a journey involves three distinct steps, each validating different things. Treating simulation as a full end-to-end test is the most common validation mistake.
| Validation step | What it validates | What it does NOT validate |
|---|---|---|
| Simulation | Branching logic, segment conditions, entry criteria | Delay timing, sync payloads, cross-journey interactions, destination platform behavior |
| Test sync | Payload shape, field mappings, Liquid templates, destination formatting | Journey logic, entry/exit behavior, delay timing |
| Live small-cohort run | End-to-end behavior including real timing, real syncs, and real destination delivery | Nothing — this is the full validation |
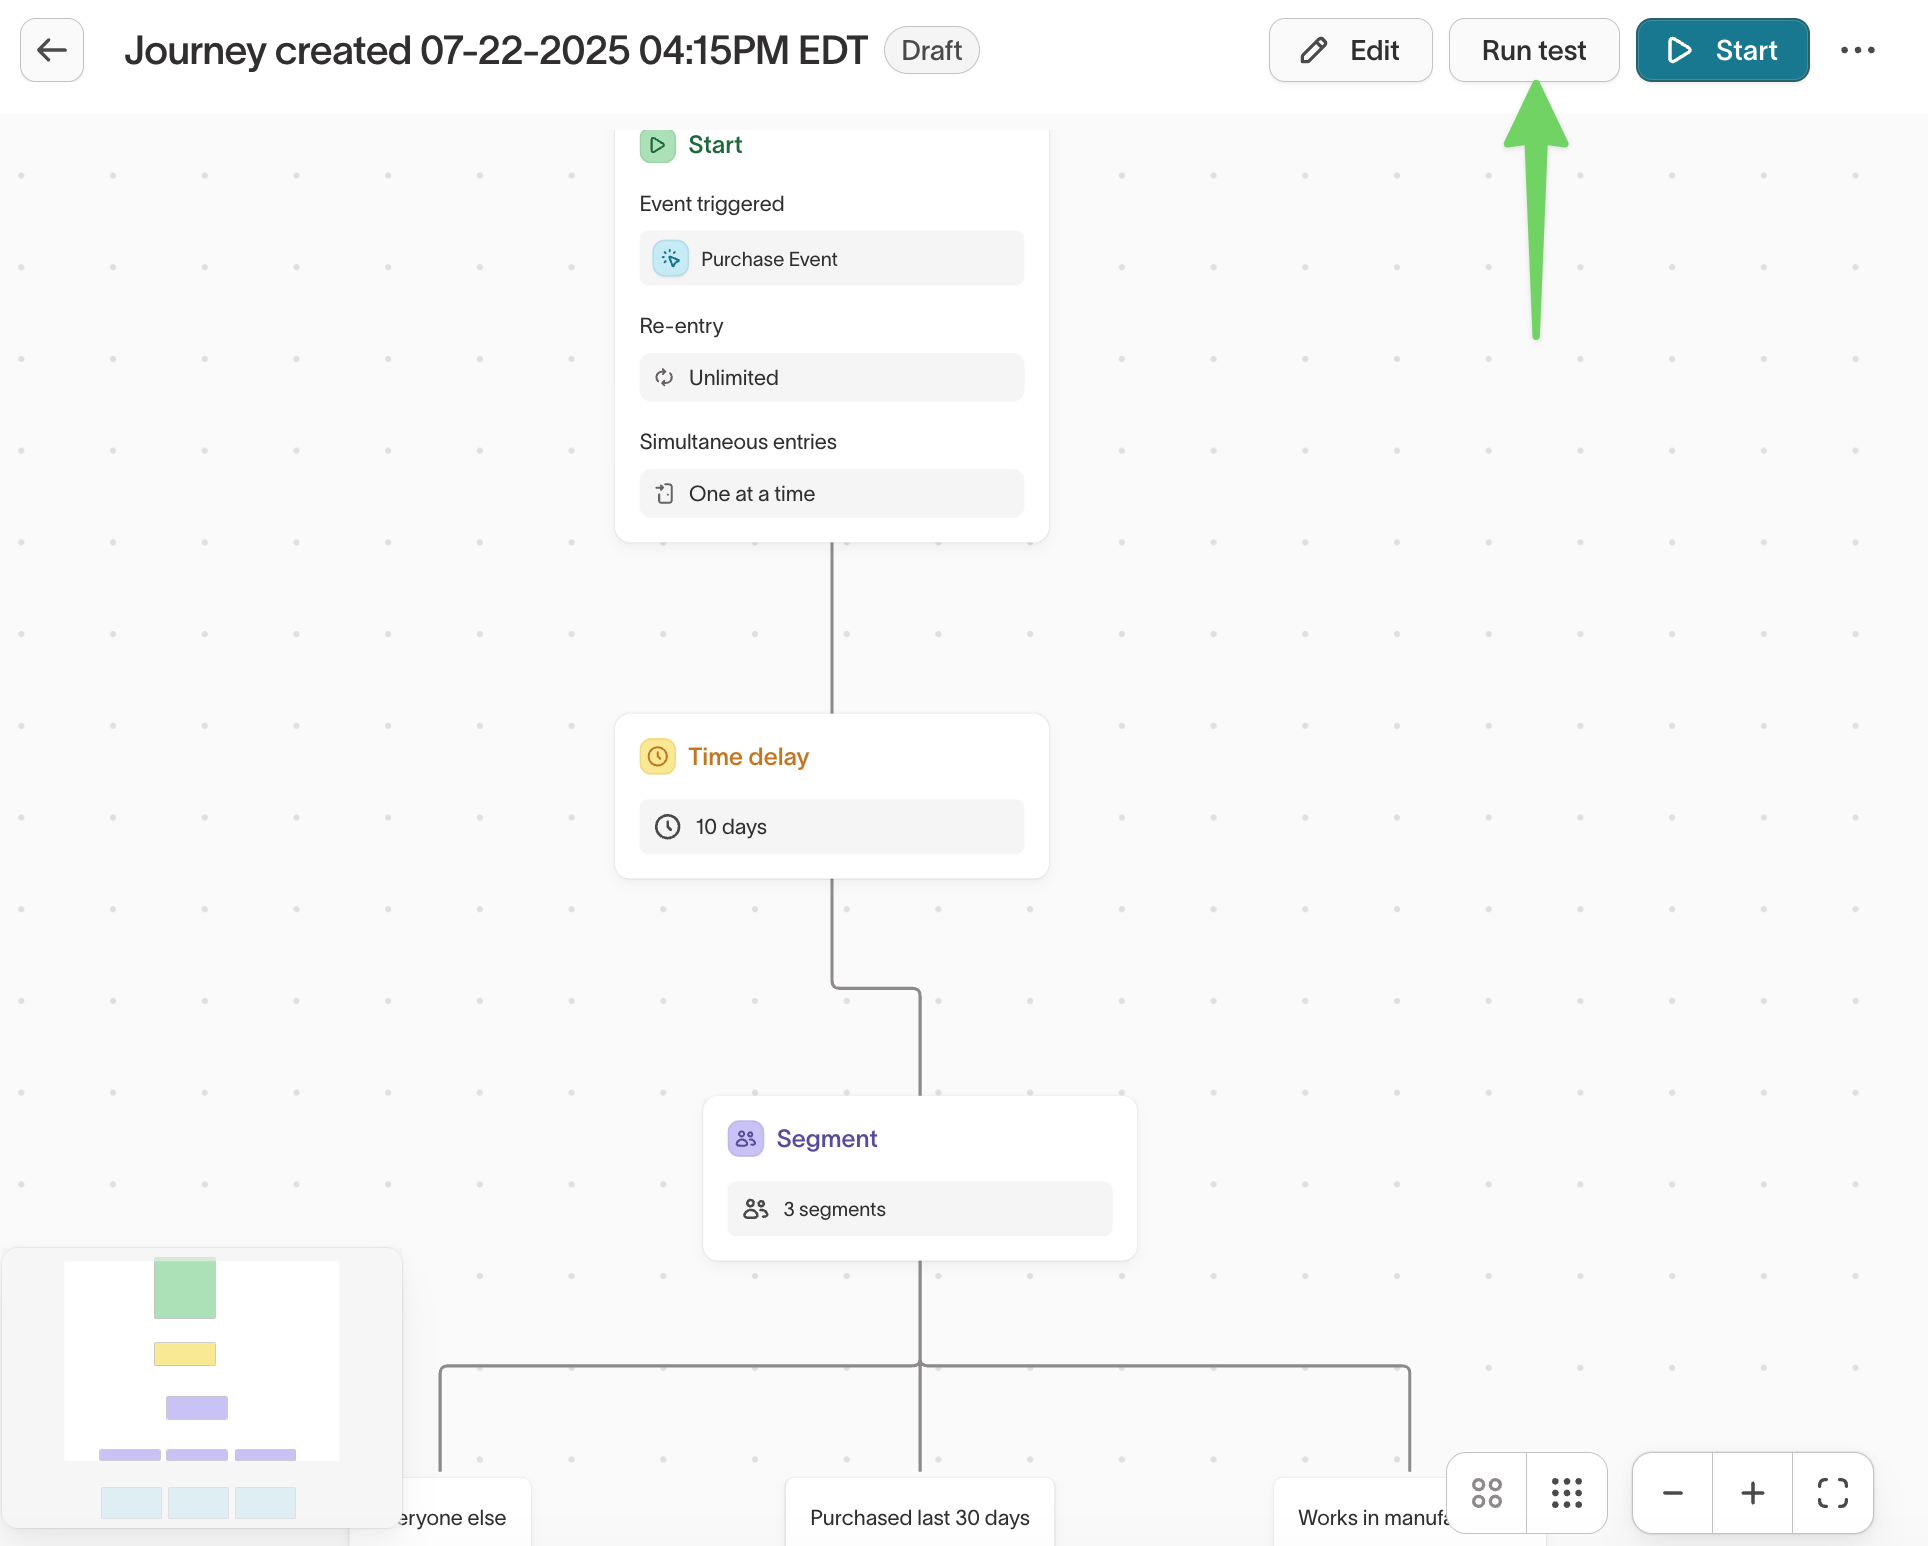
Run a simulation
Simulation shows how members move through the journey's logic without sending data to any destinations. All time delays are skipped.
- Open your journey and select Run test.
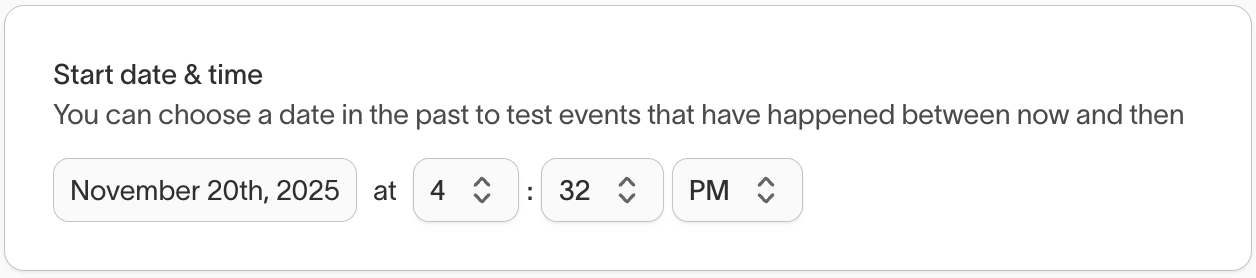
- Set the Start date & time:
- Now simulates new entries based on current data.
- A past date/time tests event-based journeys using historical events with timestamps after the selected start time.
- Choose a test size:
- Single event — simulates the path for one member
- Set of events (default) — simulates all qualifying members, useful for validating branch percentages

- Select Run test. The canvas shows how members enter, which branches they follow, and how many reach each step.

Simulation does not affect journey membership, logs, syncs, or the evaluation schedule. It is a safe, read-only validation step.
Simulation limitations
Simulation validates how the configured logic behaves from the chosen start point. It does not:
- Replay future journey runs day by day — it evaluates all logic in a single pass with delays skipped
- Trigger syncs or send any data to destinations
- Model cross-journey interactions, exclusions, or priority-list behavior
- Reflect destination platform rules (consent filtering, suppression, deduplication)
Use simulation to answer "does the branching logic work?" — not "will the full campaign behave correctly over time?"
Run a test sync
For audience-based journeys, you can test how data is sent from Send to destination tiles without modifying journey logic. Test syncs validate that the correct members and fields reach the destination in the expected format.
Triggering a test sync:
- From a simulation: Use members from the simulated path as the basis for the test sync — this ensures the selected members actually reach the sync tile.

- From a sync tile directly: Select members from the entry audience. These members are not guaranteed to reach the sync tile in a real run.
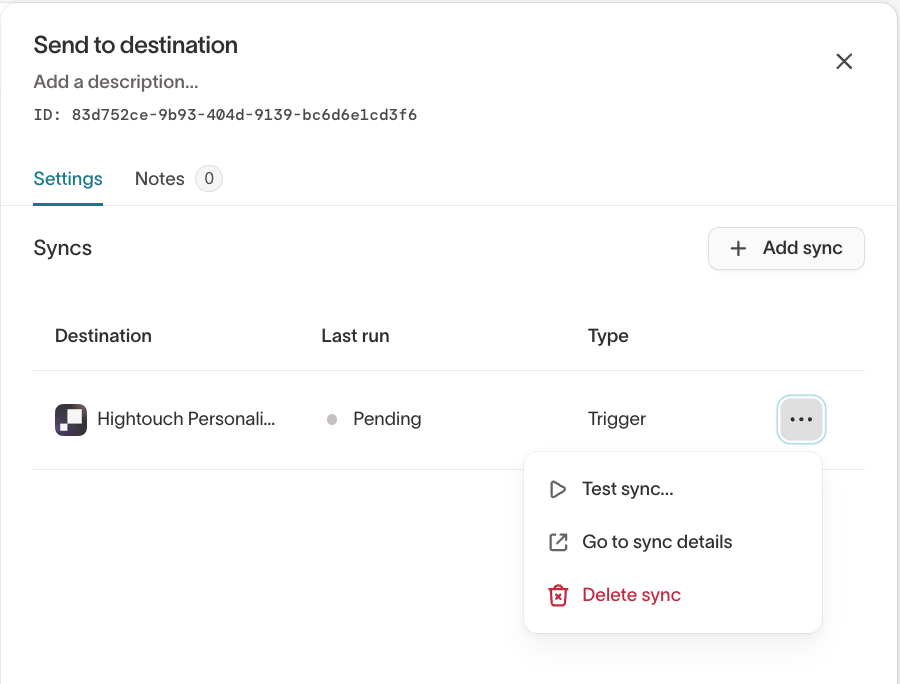
- From a live journey: Select members who have already passed through the tile.
Test data: Test syncs use real journey members. You can override key values (such as email addresses) to prevent test data from reaching real recipients.
- Upload test users via CSV — any fields left blank use original values
- Select existing rows — search for specific members or choose a random member

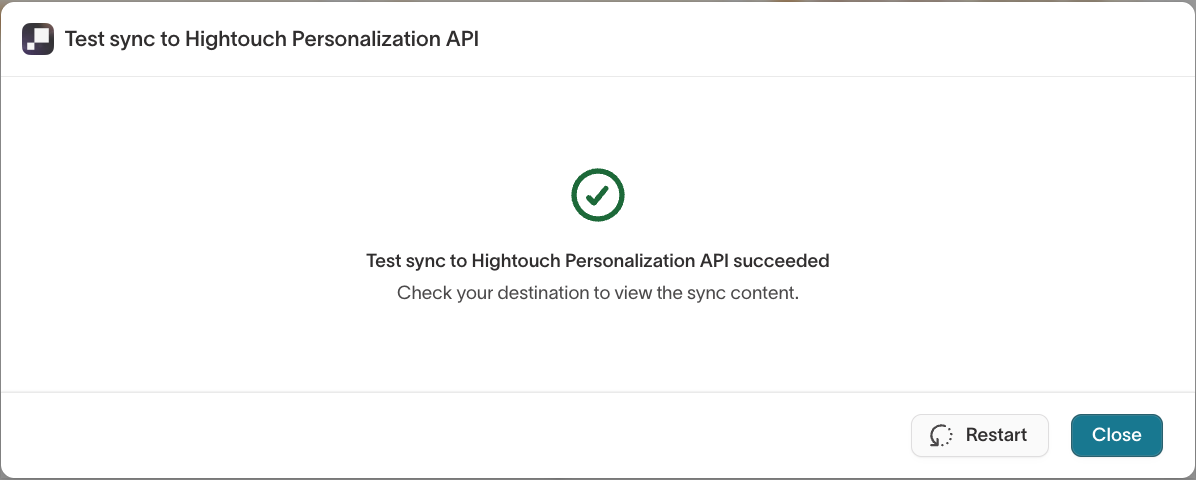
Select Run test to trigger the sync. Review the results to confirm field mappings and payload formatting.
Override recipient fields (such as email) to avoid sending to real recipients
during testing. Some fields may appear redacted in the UI — if not edited,
<Redacted by Hightouch> is used when syncing.
Validate with a live small cohort
After simulation confirms logic and test syncs confirm payloads, validate end-to-end behavior with a small live audience.
- Create a narrow test audience (e.g., internal users or a small segment of real users).
- Configure the journey to use this audience for entry.
- Start the journey and monitor the first several runs.
- Check destinations to confirm data arrived correctly.
- After validation, update the entry audience to your production audience.
This is the only way to validate real timing, real exit behavior, real sync execution, and real delivery to destinations. If you use destination rules, validate them separately — they filter records at sync time and can cause the destination to receive fewer rows than the journey processed.
Publish, pause, resume, and turn off
Activate
Select Activate to start the journey. Interval schedules begin evaluating within seconds. Custom recurrence schedules begin at the next matching time.

Pause
Select Pause to stop all evaluations and sync triggering. Members remain in their current positions. No members enter, advance, exit, or sync while the journey is paused.

Resume
Select Resume to restart evaluation without losing member progress. Members continue from where they were when the journey was paused.
Turn off
Select Turn off to stop the journey permanently. You must choose how to handle members currently in the flow:
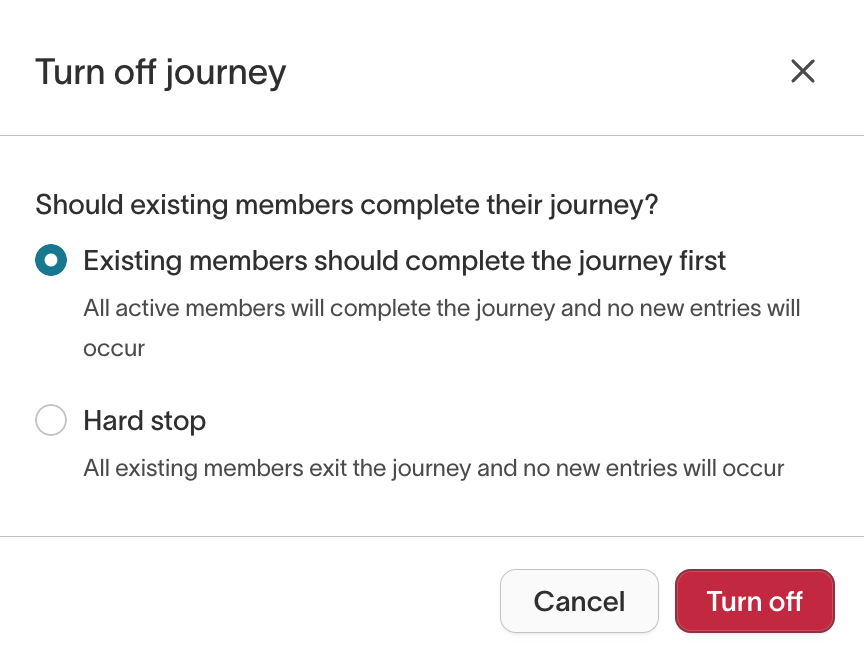
- Existing members should complete the journey first (default) — the journey enters Draining state. No new members enter, but existing members continue advancing and syncing until they finish or exit. The journey transitions to Off automatically once no members remain.
- Hard stop — all members are removed on the next evaluation run.

Draining is the safest option when retiring or replacing a journey. It prevents disruption to members who are mid-flow — they complete their remaining steps, receive any pending messages, and exit naturally.
Trigger a manual run
For active journeys, you can trigger a manual evaluation run outside the regular schedule. This is useful for testing configuration changes or processing members immediately after a data refresh without waiting for the next scheduled run.
Reset a journey
For inactive journeys (Off or Draft), you can reset the journey to clear all member progress, run history, and log data. This returns the journey to a clean state as if it had never run.
Resetting a journey permanently deletes all member data, run history, and journey log table contents. This cannot be undone.
Monitor and debug
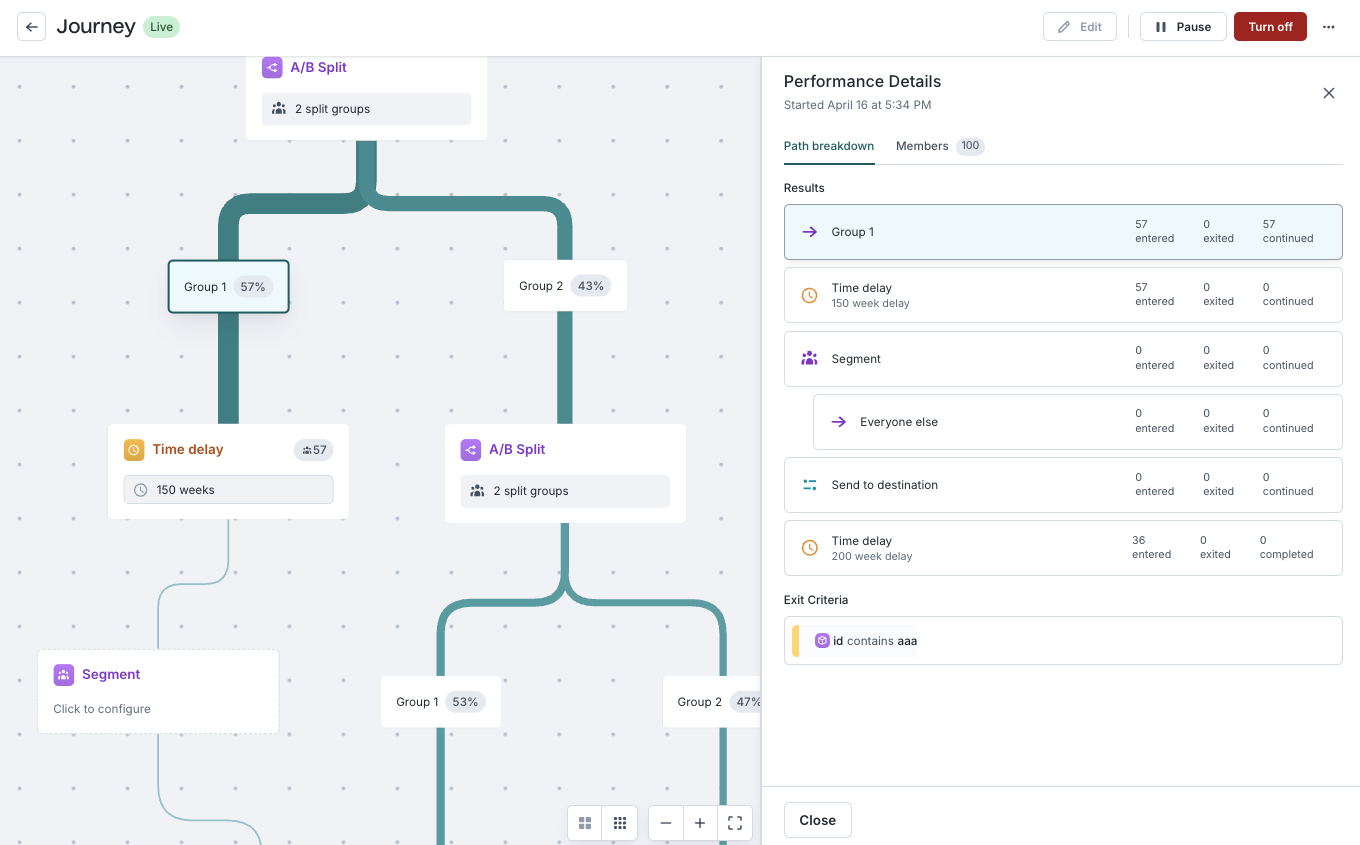
Journey performance
Once a journey is running, the canvas updates to show how members move through each step. Line thickness reflects volume. Hover over any line to see counts.
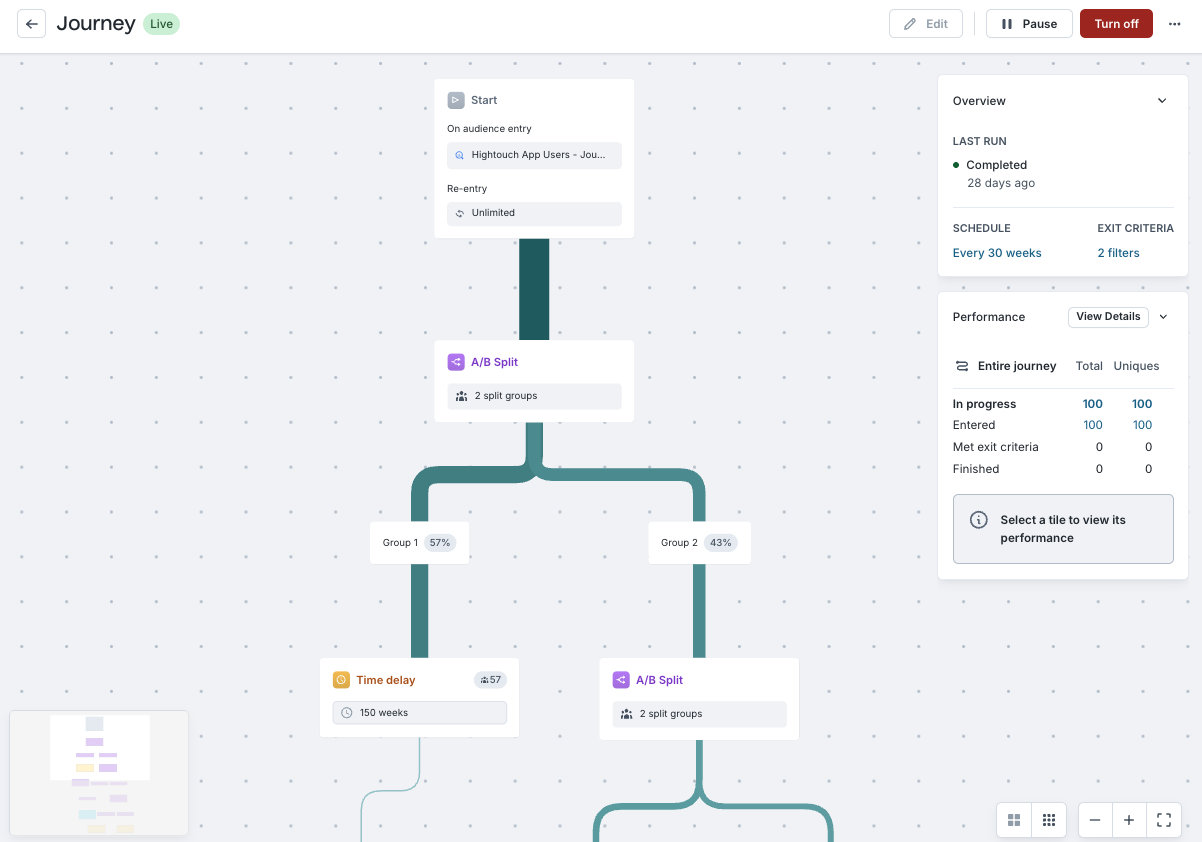
The Performance panel shows high-level metrics across the full history of the journey (unless you reset it):
- In progress — members currently waiting in a tile
- Entered — total members who have ever entered
- Met exit criteria — members removed by global exit rules
- Finished — members who reached the final step
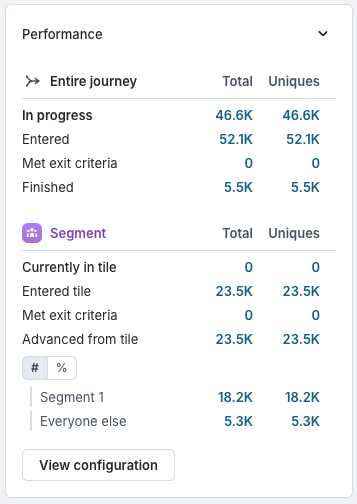
Use these metrics to answer the most common monitoring questions: who entered, where people are waiting, where people exited, and whether branch distribution looks plausible.
Tile-level performance
Select any tile to view step-specific metrics:
- Currently in tile — members waiting at this step (commonly nonzero for Time delay and Hold until)
- Entered tile — members who have ever reached this step
- Met exit criteria — members removed from this tile by exit rules
- Advanced from tile — members who moved to the next step
For Segment, A/B Split, and Hold until tiles, you can view per-branch counts and percentages.
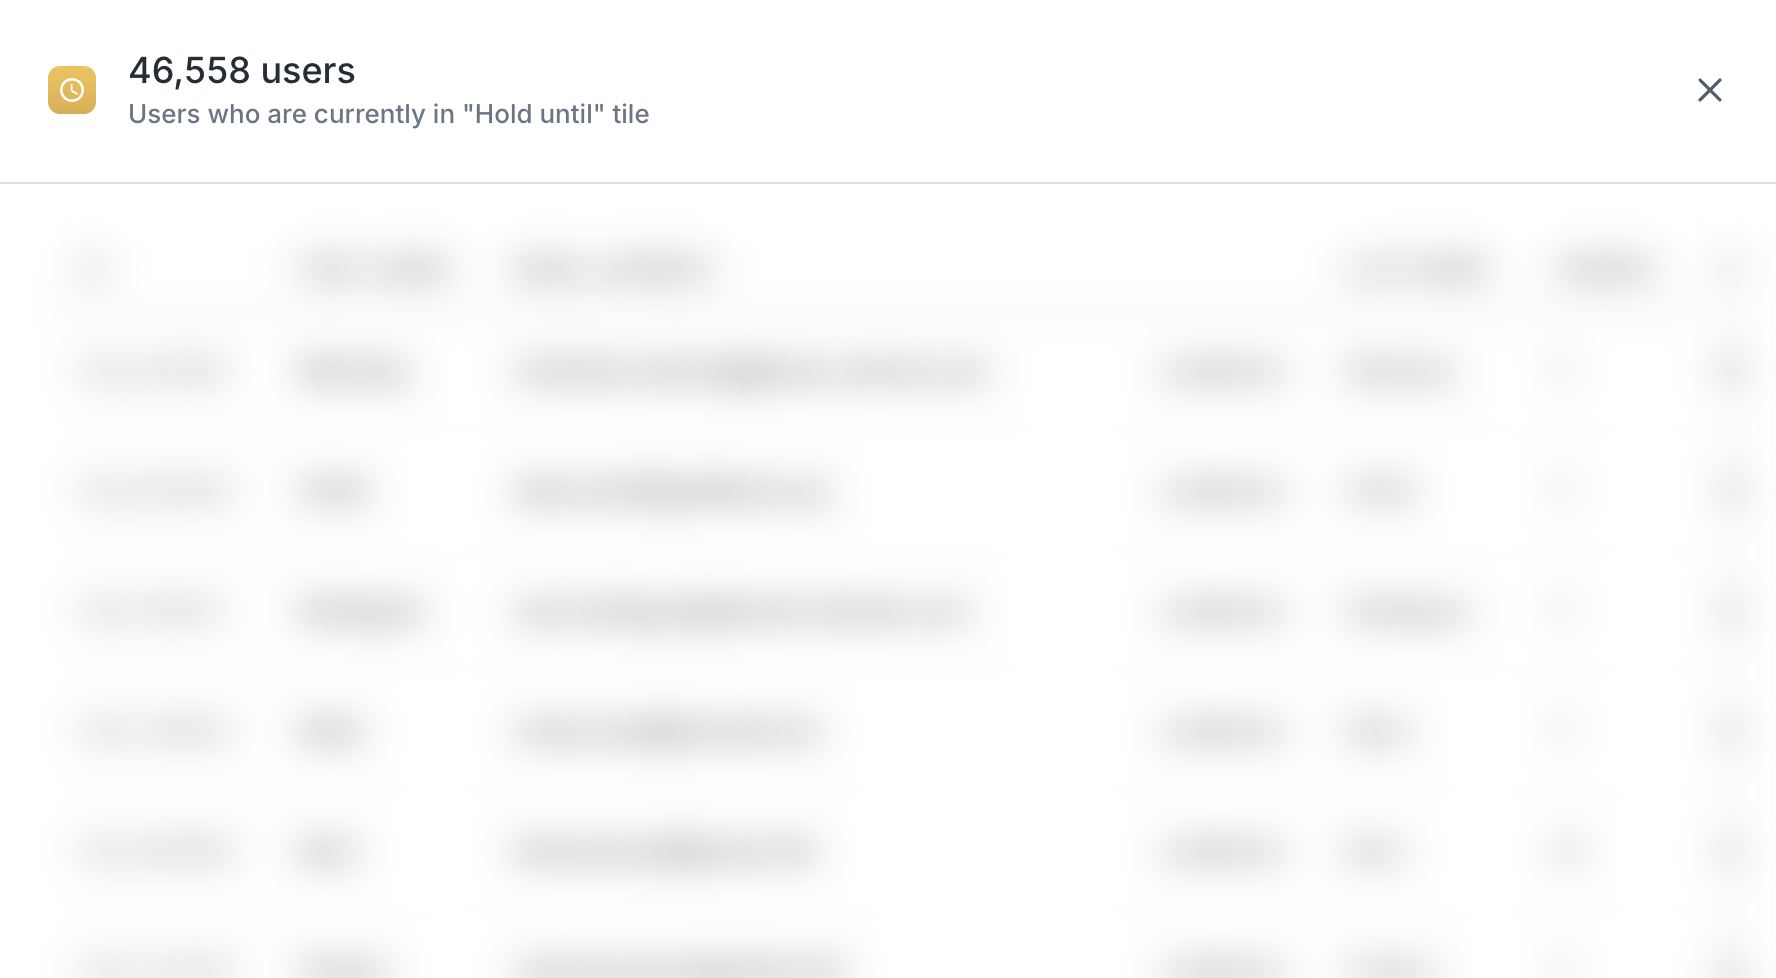
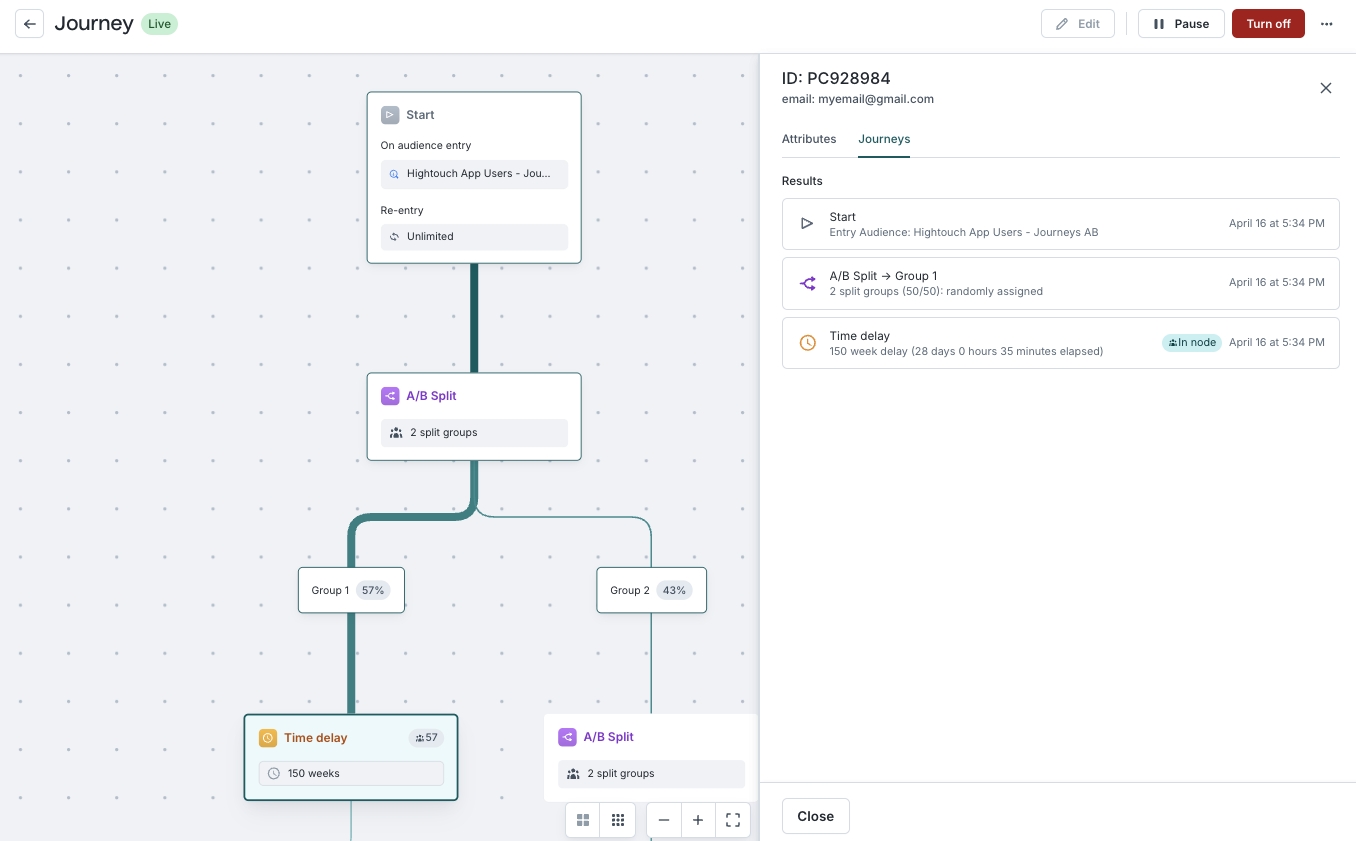
Member-level details
Select a count in the Performance panel to open the member drawer, which shows a sample of 100 random members. You can search by primary key.
Select a member to view their complete attributes and a step-by-step visualization of their path through the journey. This is the fastest way to debug why a specific user entered, exited, or followed an unexpected branch.
Journey logs
Hightouch writes journey data to tables in your warehouse under the HIGHTOUCH_PLANNER schema for reporting, debugging, and custom analytics beyond what the UI provides. Workspace-level read-only views in hightouch_audit aggregate data across all journeys.
For full schema details, see Journey tables and Journey views.
Journey examples
These examples show how to design journeys for common lifecycle use cases. Each focuses on the key decisions: entry method, schedule, sync mode, exit criteria, and branching.
Cart abandonment with staged escalation
Goal: Send a sequence of messages to users who abandon a cart, escalating from email to SMS, and stop if they purchase.
Design decisions:
- Entry: Event-based (
cart_abandonedevent) if your warehouse captures cart events with timestamps. Audience-based (abandoned cartaudience) if you define abandonment as a state rather than an event. - Schedule: Hourly or every 2 hours, since cart abandonment is time-sensitive.
- Exit: Purchase event or audience membership change. Set exit criteria so members leave as soon as a purchase is detected on the next run.
- Flow: Start → 2-hour delay → Segment by email eligibility → Send email (trigger/insert) → 1-day delay → Segment by SMS eligibility → Send SMS (trigger/insert) → End.
- Sync mode: Trigger with Insert for both send steps. Each member should receive each message at most once.
With an hourly schedule, the 2-hour delay resolves within 2–3 hours. If you use a daily schedule instead, the delay resolves on the next daily run — which could be up to ~26 hours.
Welcome journey with state carried through the flow
Goal: Send different onboarding messages to new users vs. reactivated users, and tag which path each member followed.
Design decisions:
- Entry: Event-based (
account_createdorfirst_loginevent). - Schedule: Hourly or more frequent if near-real-time welcome messages matter.
- Flow: Start → Set variable tile assigns
user_typebased on whether the member has prior activity → Segment byuser_type→ New user branch (welcome series) / Reactivated user branch (re-engagement series) → Send to destination withuser_typemapped as a field. - Sync mode: Trigger with Insert for welcome messages.
- Variables: Define a
user_typecontext variable. Assign it in Set variable tiles on each branch. Sync it to the destination so the receiving tool knows which path the member followed.
Re-engagement with fixed evaluation rhythm
Goal: Re-engage users who haven't interacted in 60 days with a multi-touch sequence over two weeks.
Design decisions:
- Entry: Audience-based (
inactive 60+ daysaudience). - Schedule: Daily. Re-engagement is not time-sensitive enough to justify hourly evaluation.
- Exit: Purchase, login, or opt-out. Use a stable field — "last activity date" works better than a rolling window that could cause churn.
- Flow: Start → 3-day delay → Send email 1 → 4-day delay → Send email 2 → 7-day delay → Send final email → End.
- Sync mode: Trigger with Insert for emails. If you also want to maintain a "re-engagement" audience in your ad platform during the journey, add a parallel cohort sync (Upsert or Mirror) that reflects current membership.
For campaign patterns that combine journeys, destination rules, priority lists, and experiments — see Campaign patterns.
Best practices
Start narrow and prove value. Begin with one well-defined journey — a cart abandonment flow or a welcome series. Validate that the timing, branching, and destination behavior work correctly before building complex multi-journey programs.
Create new journeys instead of heavily editing live ones. Major structural changes to a live journey affect members mid-flow in ways that are difficult to predict. For significant redesigns, create a new journey, drain the old one, and transition members to the new flow.
Plan overlap management for interacting journeys. When running multiple lifecycle programs, use journey exclusions, priority lists, and staggered schedules to prevent conflicts. See Manage overlap across programs for detailed guidance.
Priority lists and entry audiences
If your entry audience is inside a priority list, priority is respected when determining who enters. A member who qualifies for a higher-priority audience does not enter a journey tied to a lower-priority one until they drop out of the higher-priority audience.
Sync execution inside journeys
Failed syncs and retries: If a record fails to sync, Hightouch retries on subsequent runs. For cohort syncs, retries stop when the record is removed from the sync. For trigger syncs, retries continue until the record syncs successfully.
Sync sequencing: All Send to destination tiles trigger at the same time — the end of each evaluation run. If you need strict sequencing between two syncs, add a Time delay tile between them so they fire on separate runs.
Choosing sync configurations for journeys
Use these tables when you need to understand how each sync mode behaves inside a journey, or when troubleshooting unexpected sync behavior. For a quick summary, see Choose the right sync mode.
Trigger mode syncs
Best for one-time messages (email, SMS) where you want one event per member per step.
| Sync mode | Behavior | Recommendation |
|---|---|---|
| Insert | Members entering or re-entering the tile during a run are synced. Previously synced members are ignored. | Recommended |
| Upsert | New and updated members are synced, which can cause duplicate sends. | Not recommended |
| Update | Only previously synced members are updated. New members are ignored unless they already exist in the destination. | Not recommended |
| Mirror | All members who have ever passed through the tile are synced every run. | Not recommended |
| Diff | One file per operation (enter, change, remove). | Not recommended |
Cohort mode syncs
Best for maintaining a destination audience or list that reflects current journey membership.
| Sync mode | Behavior | Removal behavior | Recommendation |
|---|---|---|---|
| Upsert | New members sync. Changes to existing members sync. | Members are removed based on journey configuration. | Recommended |
| Mirror | All current members sync every run — no diff performed. | Members are removed based on journey configuration. | Recommended when destination should exactly match journey membership |
| Update | Only existing destination members are updated. New members are ignored. | Members are removed, but deleteMode is usually set to clear (attributes removed, member remains). | Not recommended |
| Insert | New members sync. Changes and removals are ignored. | No removal occurs. | Not recommended |
| Diff | One file per operation. | No removal occurs. | Not recommended |
Avoid deleteMode: do nothing with cohort syncs. Removals will not be
applied, and the destination list will grow indefinitely.
Troubleshooting
If your journey run fails because of warehouse SQL issues (for example, invalid identifiers, unresolved columns, or missing objects), see Resolve SQL compilation errors.
Most troubleshooting issues trace back to three things: evaluation schedule, data freshness in the warehouse, and Start tile configuration. Check these first.
Members are not entering the journey
Why this happens: Entry is checked at each evaluation run. If the entry criteria aren't met at run time — because the audience hasn't refreshed, the event hasn't been ingested, or the member is excluded — no entry occurs.
How to verify:
- Confirm the Start tile configuration: entry source, filters, exclusions, and re-entry settings.
- For event entry, verify the event model has a primary key, the correct event is selected, and the lookback window (if enabled) covers the relevant time range.
- Check the journey's evaluation schedule and last run time — if the journey hasn't run recently, no entries can occur.
- Preview the entry audience to confirm it contains the members you expect.
- Check whether members are entering and immediately meeting exit criteria, which would make it look like no one entered.
Delays or Hold until behavior seems inconsistent
Why this happens: Delays and hold conditions are evaluated on runs, not continuously. A delay doesn't start a countdown timer — it marks when the member entered the tile and advances them on the first run after the delay period has elapsed. This means actual wait times align to the journey schedule.
How to verify:
- Compare the delay duration to the evaluation interval. A 30-minute delay on a daily schedule resolves on the next daily run, not 30 minutes later.
- Check whether multiple delay or hold tiles are chained, causing timing to compound across runs.
- If tighter timing is needed, increase the journey's evaluation frequency.
Members are not exiting when expected
Why this happens: Exit criteria are checked on runs. If the exit-triggering action (a purchase, an opt-out) happens between runs, the member stays in the journey until the next evaluation detects the change in the warehouse.
How to verify:
- Compare the action timestamp (purchase, opt-out) to the journey's run history. If the action occurred after the last run, the member hasn't been evaluated yet.
- Review the exit criteria definition in journey settings — confirm the correct fields and logic are configured.
- Check data pipeline latency. If the warehouse hasn't refreshed since the action occurred, exit criteria can't match.
- Use the member details panel to see which run removed a member and what condition matched.
Members are re-entering unexpectedly
Why this happens: Re-entry settings on the Start tile control how many times a member can enter. If set to multiple or unlimited entries, members re-enter whenever they meet entry criteria again.
How to verify:
- Check the Start tile's re-entry and simultaneous entry settings.
- For event-based entry, confirm whether repeated qualifying events are expected or indicate a data issue.
- If re-entry is intentional but happening too frequently, add or increase the re-entry delay.
Sync tile shows members but sync reports zero records
Why this happens: The journey moved members to the sync tile, but the underlying sync didn't process them. This is usually a sync configuration issue, not a journey issue.
How to verify:
- Confirm the sync is not paused. A paused sync does not process records even when the journey triggers it.
- Check that the sync's model is correctly linked to the journey output.
- Validate any Liquid templates in the sync configuration — a malformed template can cause the sync to produce zero rows.
- Review the journey run history to confirm members reached the tile during a completed run, not during a simulation.
Tile counts don't match destination counts
Why this happens: The journey processed the expected number of members, but the destination received fewer. The discrepancy typically comes from the destination side, not the journey.
How to verify:
- Check whether the destination applies additional filtering: consent rules, suppression lists, deduplication, or audience caps.
- If the sync uses cohort mode with removal on exit and the tile is the final step, members may be removed before the destination processes them. Add a Time delay tile after the sync tile so members remain in the sync for at least one run.
- Check for a
Users might never be syncedwarning on the sync tile, which indicates the configuration may prevent records from reaching the destination. - Review destination rules or priority lists that may narrow synced records.
Journey run fails
Why this happens: A journey run can fail if the underlying warehouse query errors out — for example, due to invalid identifiers, missing objects, permission changes, or query timeouts. Network connectivity issues between Hightouch and your warehouse can also cause failures.
How to verify:
- Check the journey's run history for the specific error message.
- For SQL-related errors (invalid identifiers, unresolved columns, missing objects), see Resolve SQL compilation errors.
- Verify that warehouse credentials and permissions haven't changed. The service account Hightouch uses must have read access to the parent model's underlying tables.
- If the failure is intermittent, check whether your warehouse has concurrency limits or query timeout settings that the journey run is hitting.
- Configure alerting to get notified on failures so you can respond quickly.
Members are receiving duplicate sends
Why this happens: Duplicate sends typically come from sync mode misconfiguration rather than a journey logic issue. In trigger mode, Upsert syncs resend to members whose attributes have changed, even if they've already been sent to. Re-entry settings can also cause a member to pass through the same Send to destination tile multiple times.
How to verify:
- Check the sync mode on the
Send to destinationtile. For one-time messages, use Trigger with Insert — this syncs each member once per tile visit and ignores previously synced members. - Check the Start tile's re-entry settings. If members can re-enter, they pass through
Send to destinationtiles again on each entry. - For cohort syncs, confirm
deleteModeis configured — without it, members accumulate in the destination and may be reprocessed. - Review the member details panel to see whether the member entered the tile once or multiple times.
Members follow an unexpected branch
Why this happens: Segment tiles evaluate branches top to bottom and route members to the first matching branch. If conditions overlap, members may consistently route to an earlier branch even though they also qualify for a later one.
How to verify:
- Open the Segment tile and review branch order. Branches are evaluated from top to bottom — the first match wins.
- Check whether branch conditions overlap. If a member qualifies for multiple branches, they always take the highest one.
- Use the member details panel to see which branch a specific member took and when.
- If the issue only appears in live runs but not simulation, check data freshness — the warehouse data at run time may differ from what you tested against.
Simulation results differ from live runs
Why this happens: Simulation validates branching and conditions in a single pass with delays skipped. Live runs involve real timing, real data freshness, real exit evaluation, cross-journey interactions, and destination platform behavior — none of which simulation models.
Recommended approach:
- Use simulation to validate branching and conditions.
- Use test syncs to validate field mappings and payload formatting.
- Use a small live cohort to validate end-to-end behavior.
- When comparing live results to expectations, check data freshness — warehouse data may have changed between when you ran the simulation and when the live journey evaluated.
Journey notes
Notes let you leave context about goals, tile behavior, or intentional edge cases directly on the canvas. They help teammates understand complex journeys without digging through configuration drawers.
You can add notes in three ways:
- Drag a note from the tile library onto the canvas or onto a specific tile.
- Add a note directly on the tile.
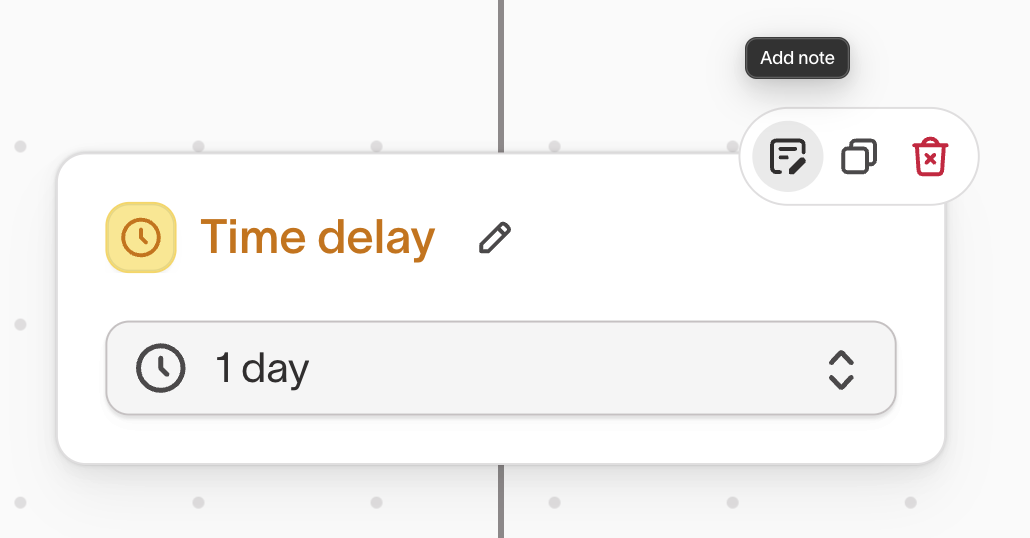
- Open the tile drawer and add a tile-specific note.
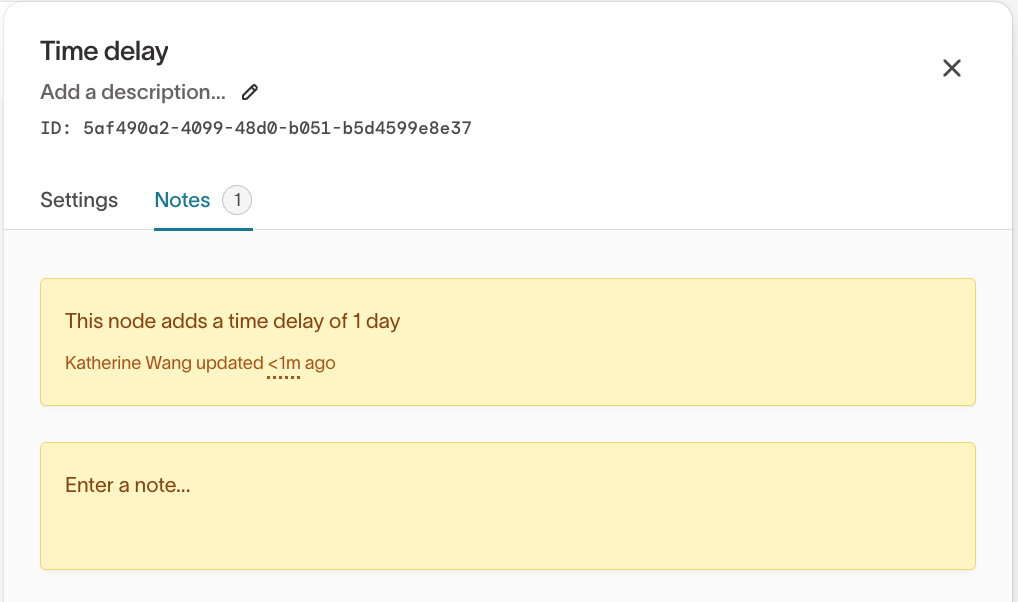
Notes carry over when a journey is created from a template. The journey creator appears as the author of template-inherited notes.
Journey templates
Journey templates let you save and reuse common journey structures so teams can build consistent lifecycle flows without starting from scratch. See Journey templates.
You can also apply sync templates to journey syncs to standardize destination configuration across teams. Most sync template changes propagate to derived journey syncs, but Journey Setting Configurations (Trigger/Cohort mode) do not propagate. If you change the sync mode on a template, update the journey syncs individually.
What's next
- Campaign workflow — manage overlap, priority, and coordination across multiple journeys and audiences.
- Priority lists — control which audiences and journeys take precedence when members qualify for multiple programs.
- Warehouse tables reference — full column-level schemas for journey log, metadata, and context tables.
- Destination rules — apply frequency caps, suppression, and channel preferences to journey sends.
- Experiments — measure journey effectiveness with holdout groups and split tests.