
Optimize ad delivery with targeted in-sync audiences
Supported syncing
| Sync type | Description | Supported sync modes | API reference |
|---|---|---|---|
| Any data set | Sync data from a source to an Ad Manager cloud storage bucket as a CSV file | Insert, All | Segment Population API |
The Google Ad Manager 360 (GAM 360) destination allows you to batch upload identifiers to audience segments in bulk by sending your desired segments to an Ad Manager cloud storage bucket. The segments appear as a CSV file, which you can then use in GAM 360.
The integration supports these sync modes:
- Insert: Insert mode creates a CSV file with the rows that were added since the last sync.
- All: All mode creates a CSV file with all the rows in the query results, every time the sync runs.
For more information about sync modes, refer to the sync modes docs.
Prerequisites
Before you can use Hightouch to batch upload your identifiers to GAM 360, ensure you've completed these steps, taken from Google Ad Manager Help:
- Locate and submit your network code. Find your network code in Ad Manager under Admin > Global settings > Network code.
- Ensure that you've created an active first-party audience segment with which you want to associate the identifiers. If you don't want this segment to collect users using your own inventory, select "Publisher Managed" as the Population method.
Expect to wait up for 24 hours from the time of segment creation to the time when you can perform batch upload.
- Create a Google Group that contains all Google Accounts that will have access to upload and view files.
Once your account manager has completed your setup, you can create the file of identifiers you want to upload.
Connect to Google
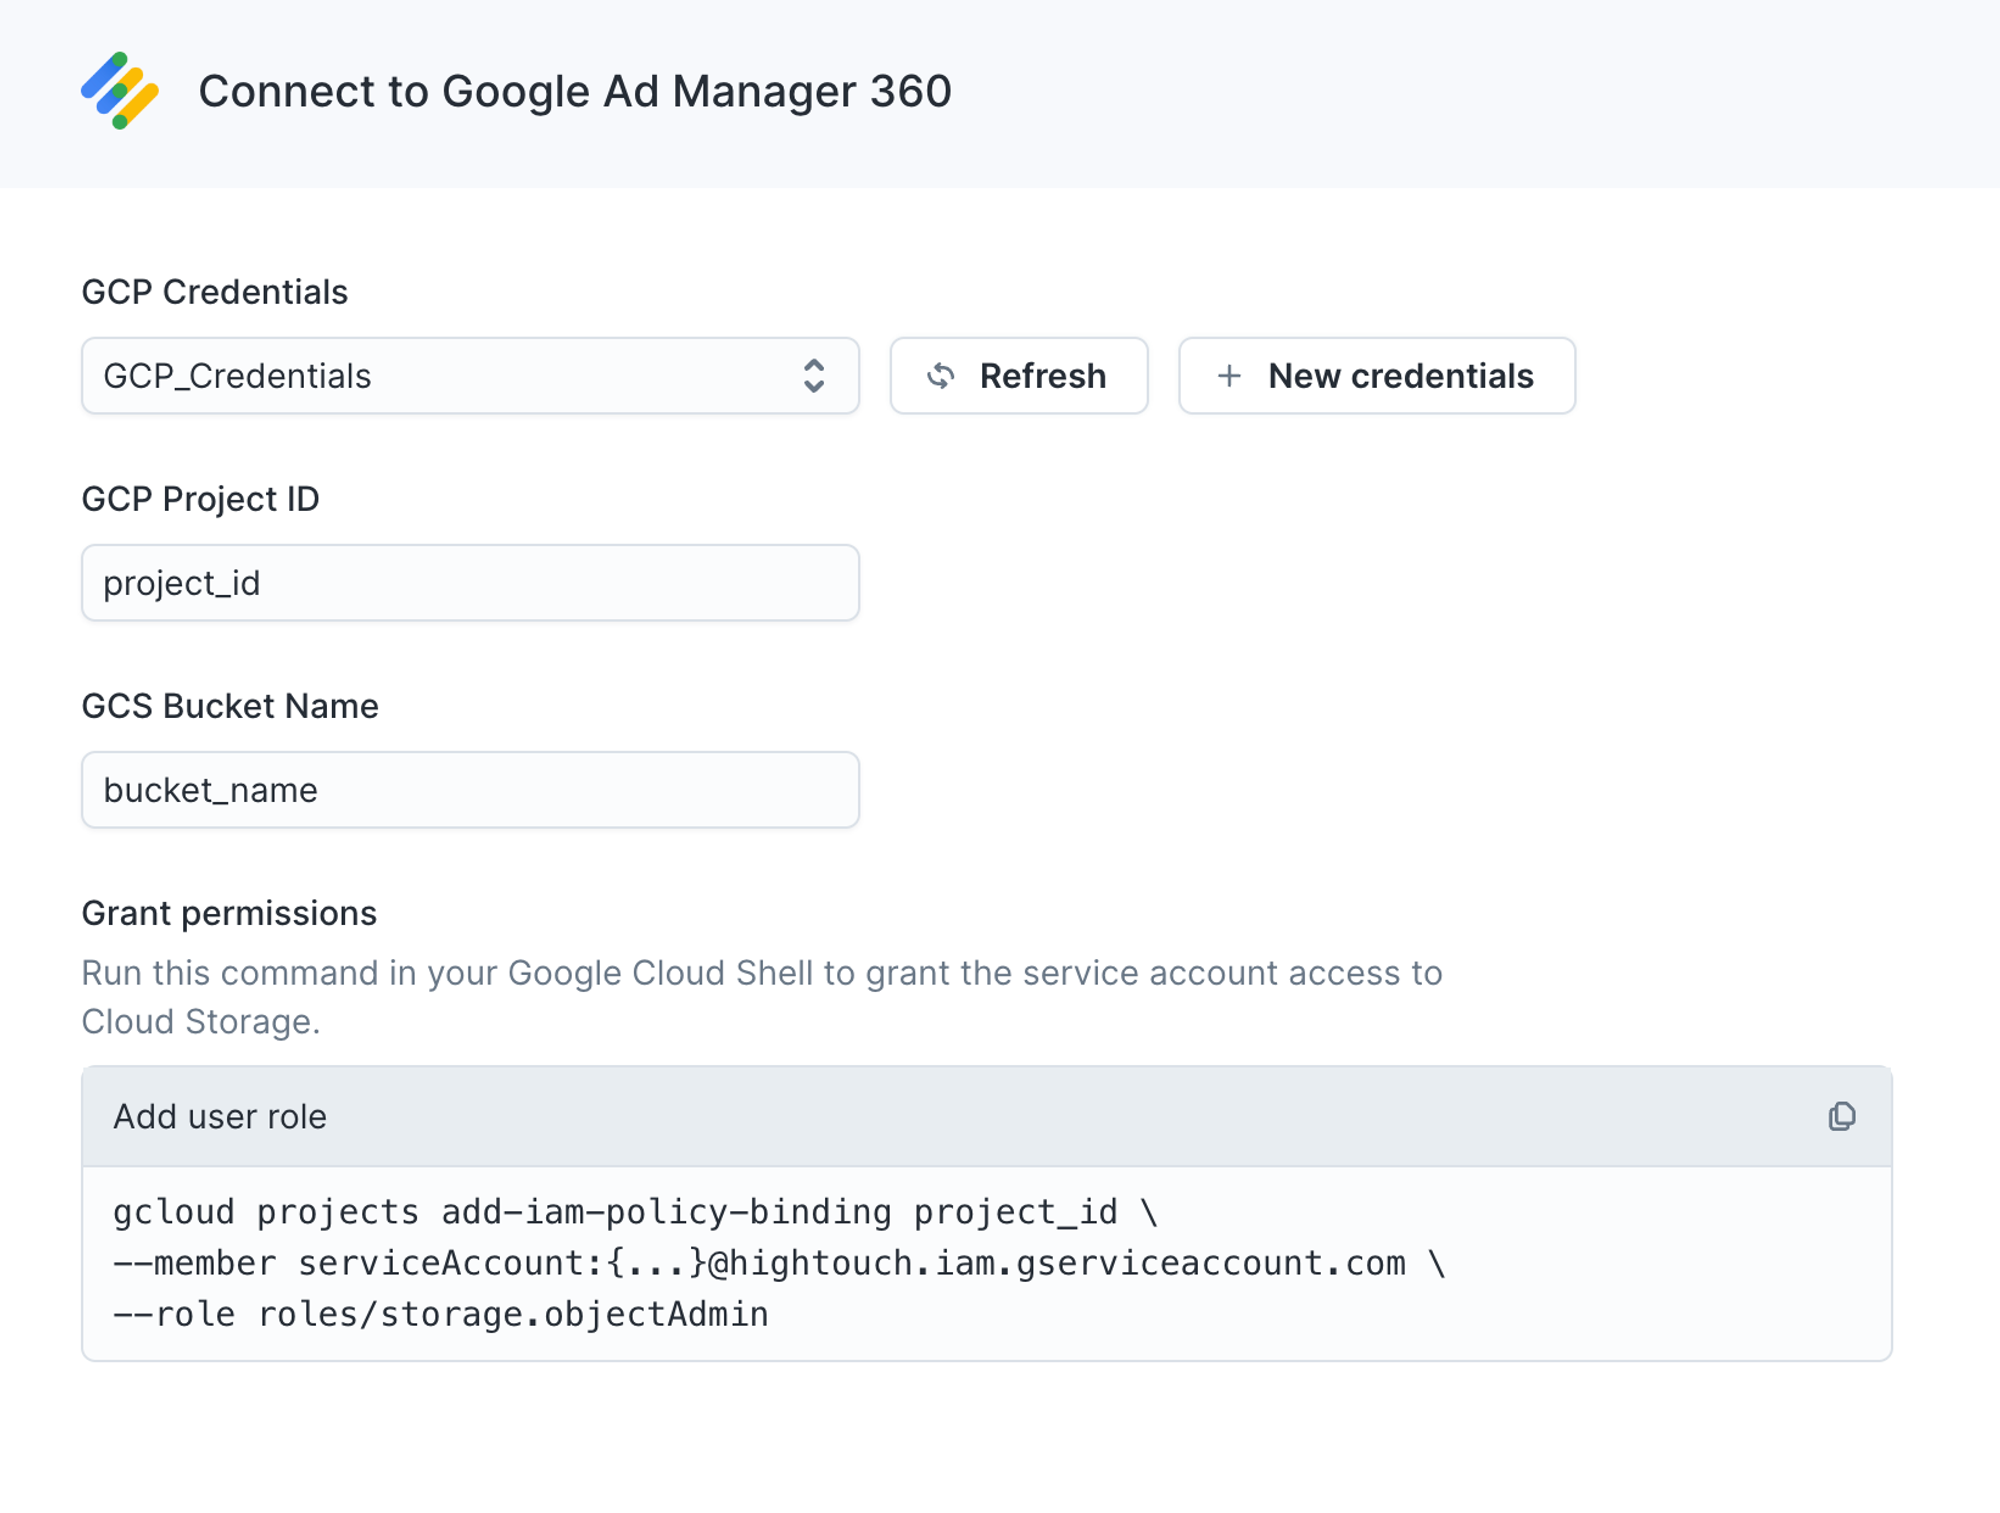
Go to the Destinations overview page and click the Add destination button. Select Google Ad Manager 360 and click Continue. You can then authenticate Hightouch to Google Ad Manager 360 by entering your:
- GCP Credentials: if you need to create a cloud credential, consult our documentation
- GCP Project ID: you can follow these steps to find it
- GCS Bucket Name: this be should just be the name of the bucket, not a URL
Once you've done this, ensure you run the gcloud command to grant Hightouch's service account the Storage Object Admin role. To run this command, you need to install the gcloud CLI tool. Otherwise, if you use Google Groups, you can also assign this role to a group member by using the Admin console or Google Groups.
Sync configuration
Once you've set up your Google Ad Manager 360 destination and have a model to pull data from, you can set up your sync configuration to begin syncing data. Go to the Syncs overview page and click the Add sync button to begin. Then, select the relevant model and the Google Ad Manager 360 destination you want to sync to.
Syncing data sets
List of identifiers
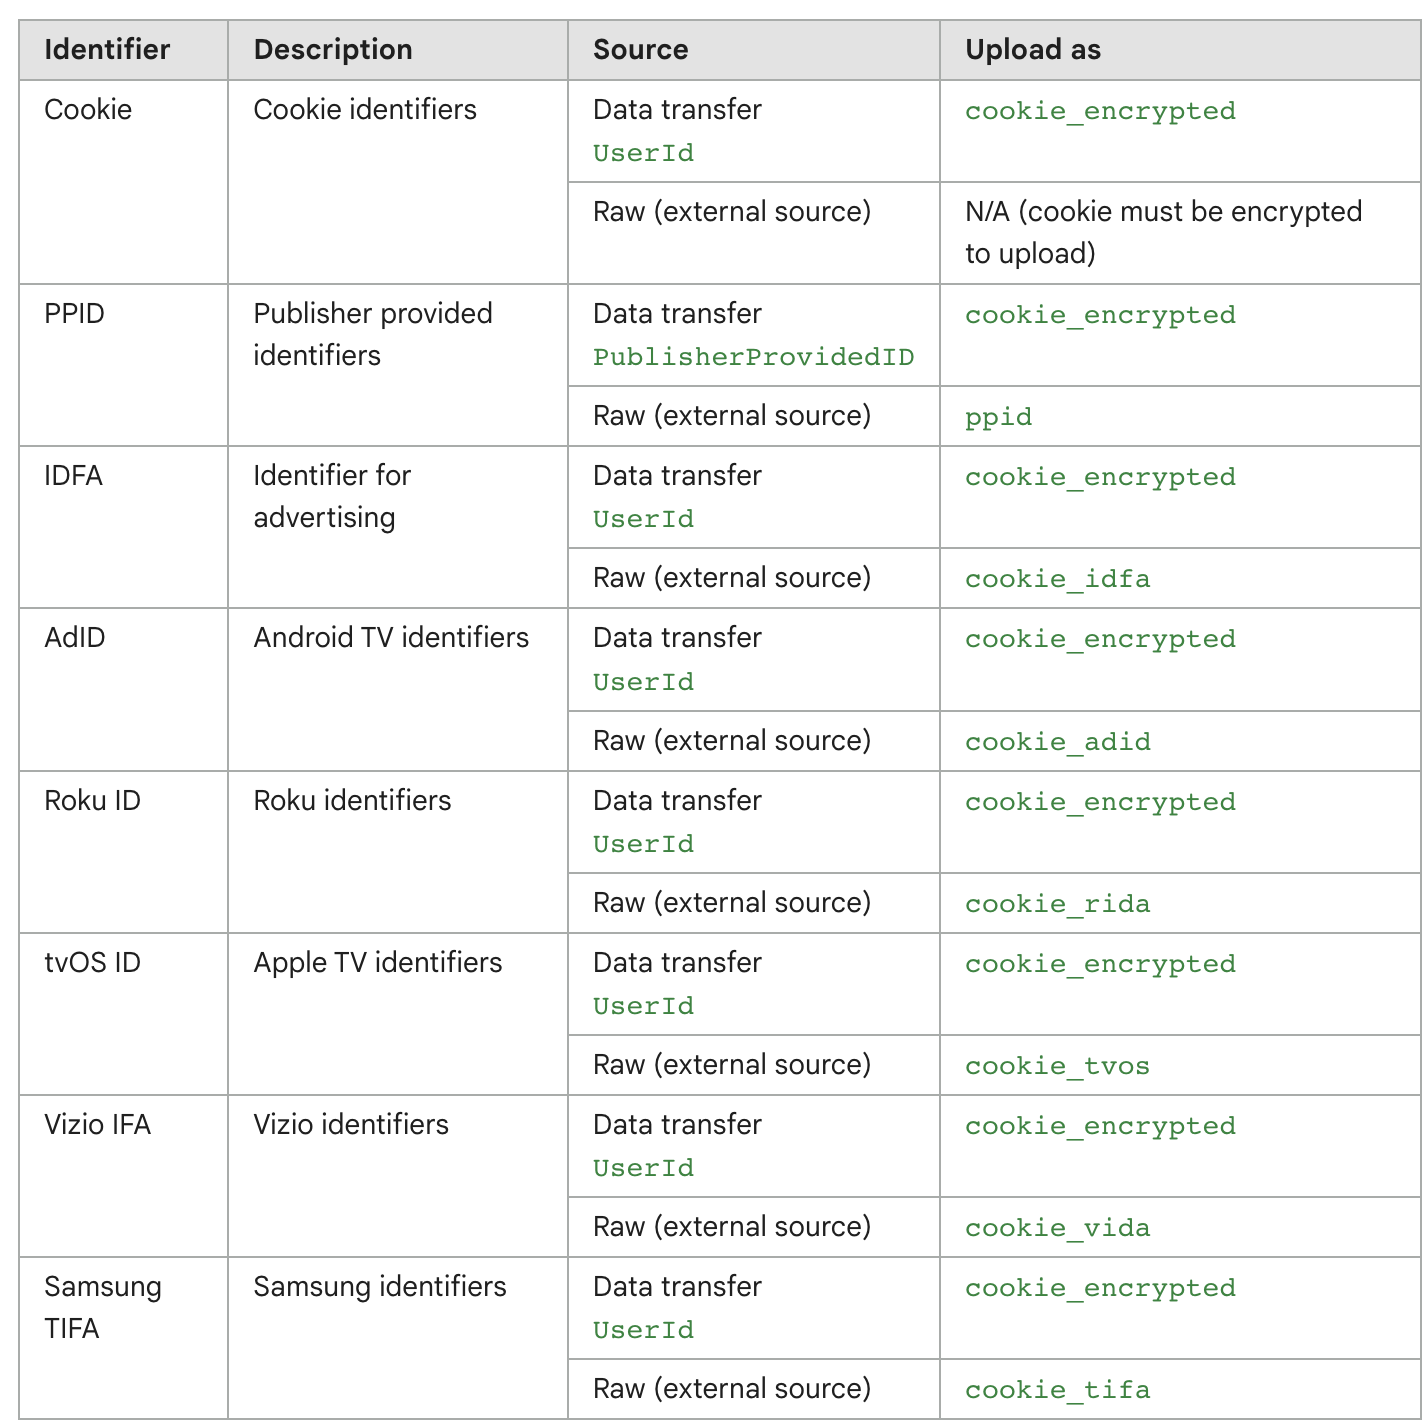
The GAM 360 destination supports several different identifier types.
In the first mapping section, select the column corresponding to the list of identifiers you want to batch upload on the left. On the right, select the type of identifiers that are being uploaded to each segment.
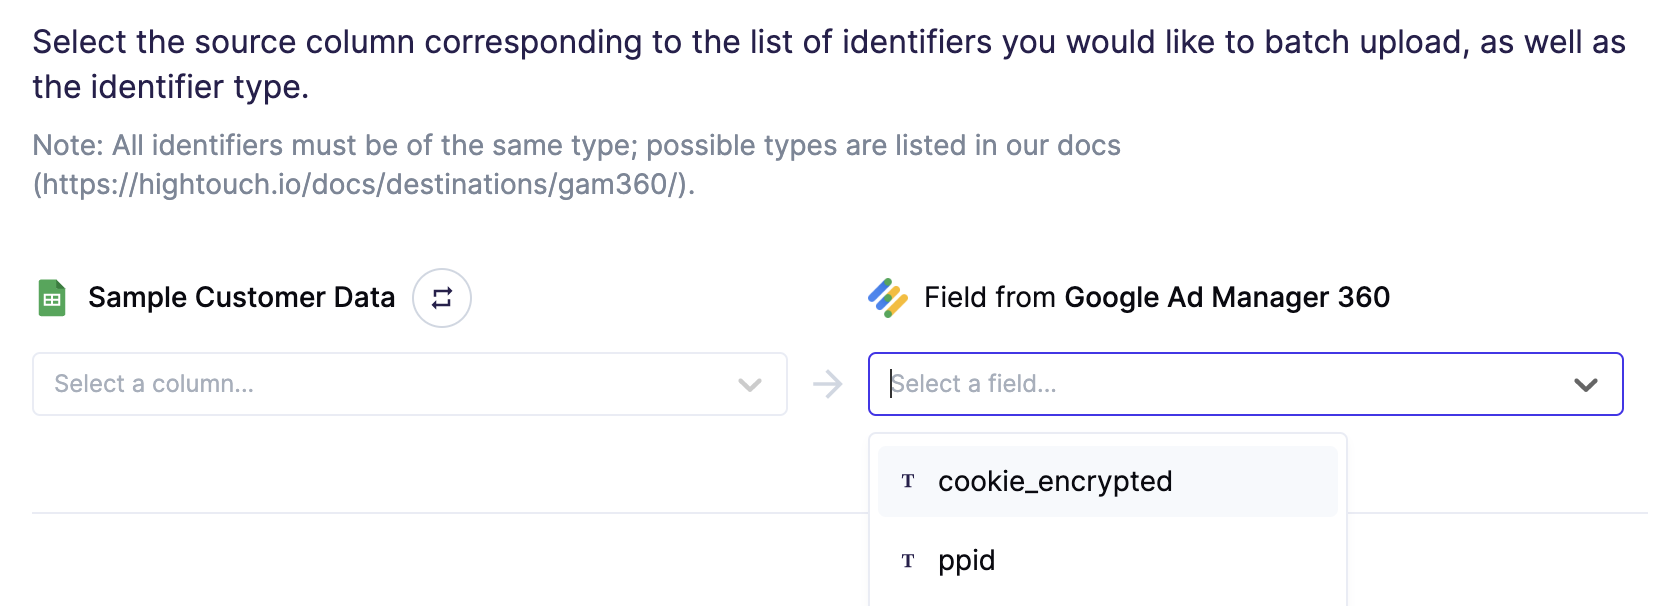
You can find the full list of identifiers in Google's docs.
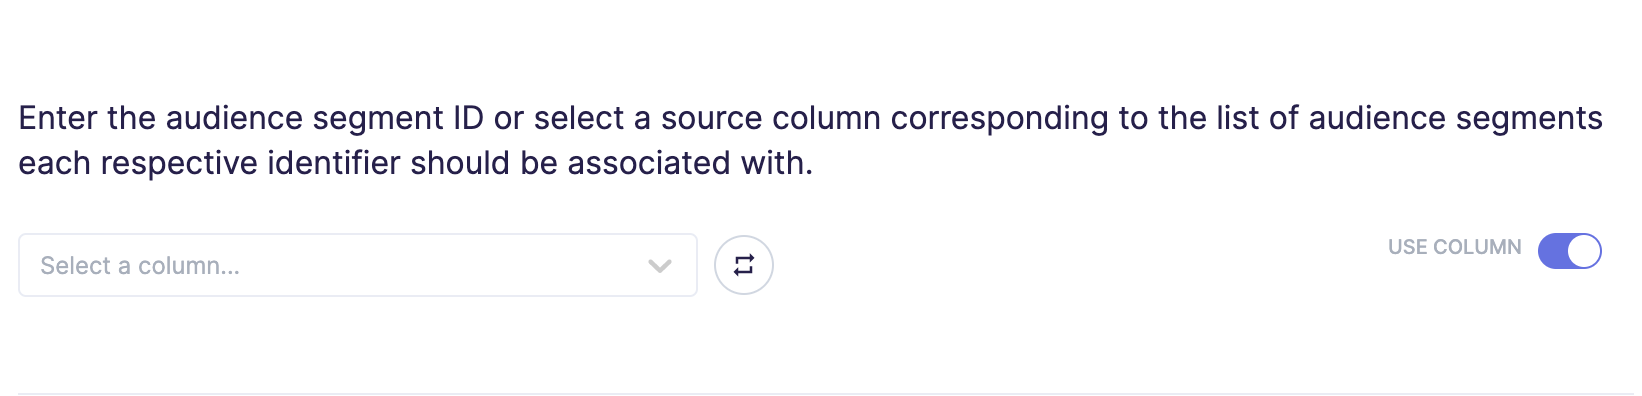
Audience segment identifiers
In the next section, you need to denote the audience segment IDs with which the identifiers from the previous section should be associated. You can either specify a column from your model to associate each identifier with a different segment, or a static value to associate all identifiers with the same segment. Use the toggle on the right of the field to flip between these two options.
Enter filename
The filename field lets you specify the parent directory and the name of the file you want to use for your results.
You can include timestamp variables in the filename, surrounding each with {}.
Hightouch supports these timestamp variables:
YYYY: Represents the full year in four digits.YY: The last two digits of the year.MM: Two-digit month format (01-12).DD: Two-digit day format (01-31).HH: Two-digit hour format in 24-hour clock (00-23).mm: Two-digit minute format (00-59).ss: Two-digit second format (00-59).ms: Three-digit millisecond format.X: Unix timestamp in seconds.x: Unix timestamp in milliseconds.
All dates and times are UTC.
For example, you could enter upload/{YYYY}-{MM}-{DD}-{HH}-{mm}-result.json to dynamically include the year, month, date, hour, and minute in each uploaded file. Hightouch would insert each file in the upload directory, which would need to already exist in your bucket.
You can also use other variable values to include sync metadata in the filename:
{model.id}{model.name}{sync.id}{sync.run.id}
If a file already exists at the path you entered at the time of a sync, Hightouch overwrites it.
Set filename offset
By default, Hightouch uses the timestamp of the sync run to fill in timestamp variables. You can optionally include an offset in seconds. For example, if you want the filename's date to be 24 hours before the sync takes place, enter '-86400' (24 hours * 60 minutes * 60 seconds).
Empty file results
In insert mode, you can select how Hightouch should handle empty results files. Empty result files can occur if your model's query results haven't changed since the last sync.
You can select whether to skip empty files. If you skip empty files, it means Hightouch won't export any files if your model's query results haven't changed since your last sync.
Example exported file
Example file content for encrypted cookie IDs:
cookie_encrypted,list_id
ScpJKu-yV8je93qkd32MOA,3153490
w2gsrUcwxF-OiJTRmQswQA,3153490
Example file content for raw AdIDs:
cookie_adid,list_id
38400000-8cf0-11bd-b23e-10b96e40000d,3153490
38400001-8cf1-11be-b23f-10b96e40000e,3153490
Tips and troubleshooting
Common errors
To date, our customers haven't experienced any errors while using this destination. If you run into any issues, please don't hesitate to . We're here to help.
Live debugger
Hightouch provides complete visibility into the API calls made during each of your sync runs. We recommend reading our article on debugging tips and tricks to learn more.
Sync alerts
Hightouch can alert you of sync issues via Slack, PagerDuty, SMS, or email. For details, please visit our article on alerting.