| Audience | Marketers and operations teams creating a journey |
| Prerequisites |
|
Create a journey by choosing who enters, adding the tiles members move through, setting exit criteria and a schedule, then testing and activating it.
For details about each available tile, see Journey tiles.
Before you create a journey
Before you configure the journey, decide:
- What should trigger entry? Members can enter when they join an audience or perform an event.
- What should happen after entry? Decide where members should wait, branch, receive messages, or sync to a destination.
- What should cause a member to exit? Define the conditions that should remove them before they reach the end.
- How precise does the timing need to be? This determines how frequently the journey should run.
If you only need to activate an audience in a destination without delays or branching, sync the audience directly instead.
Journeys identify and de-duplicate members by the parent model's primary key. Use a stable, unique primary key: if the key isn't unique, or if it changes for a member (for example, when identity resolution reassigns it), a journey can re-enroll members or send duplicate messages.
1. Create the journey
- Go to Customer Studio > Journeys.
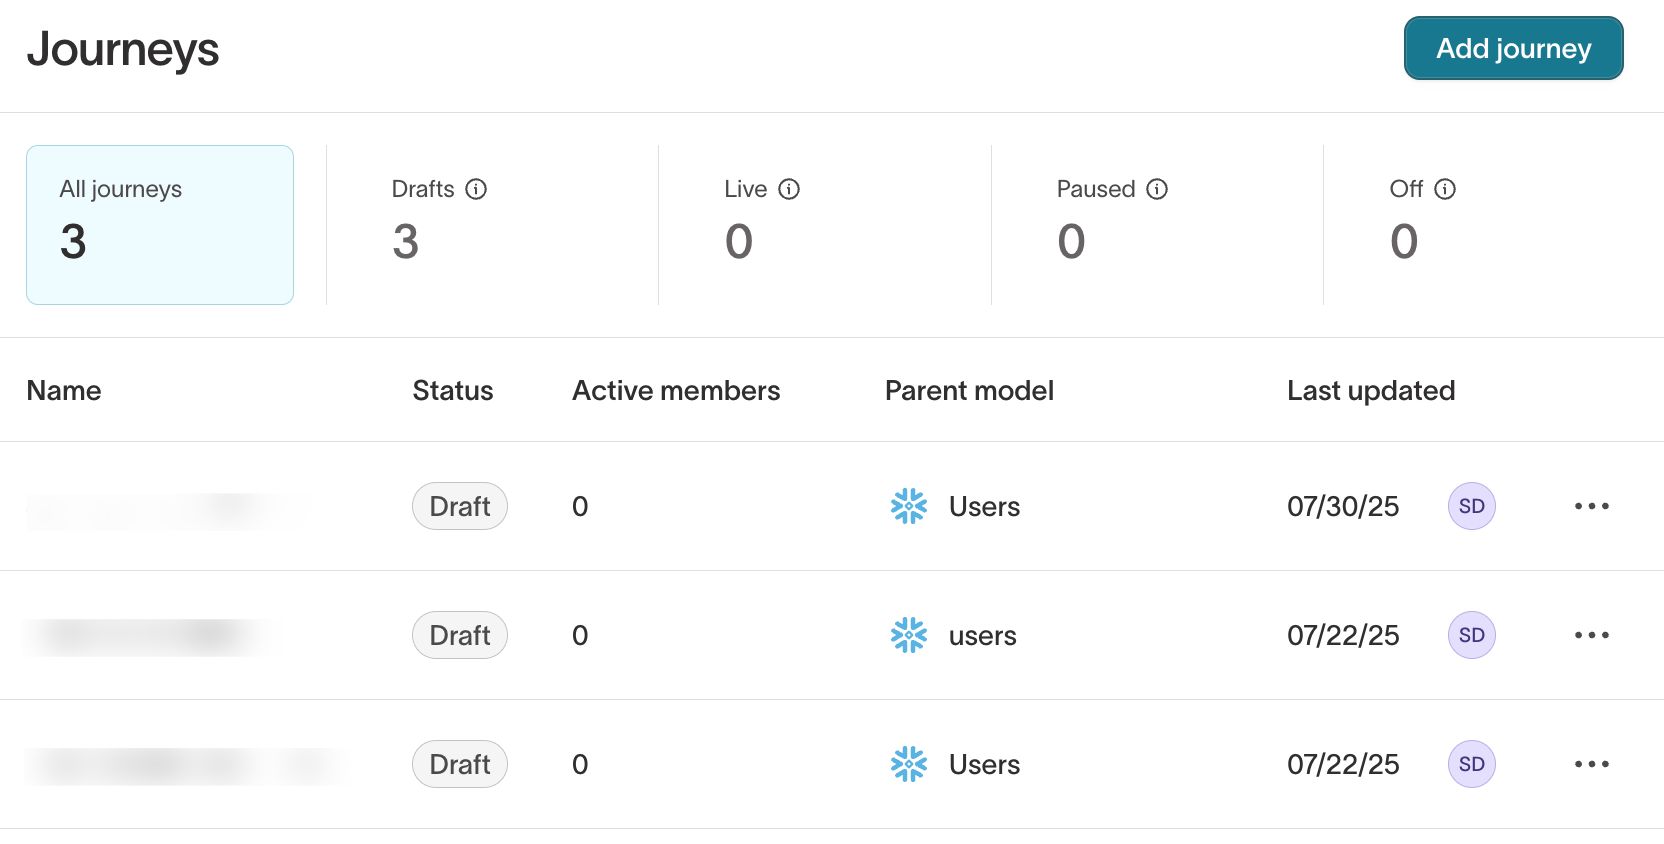
- Select Add journey.
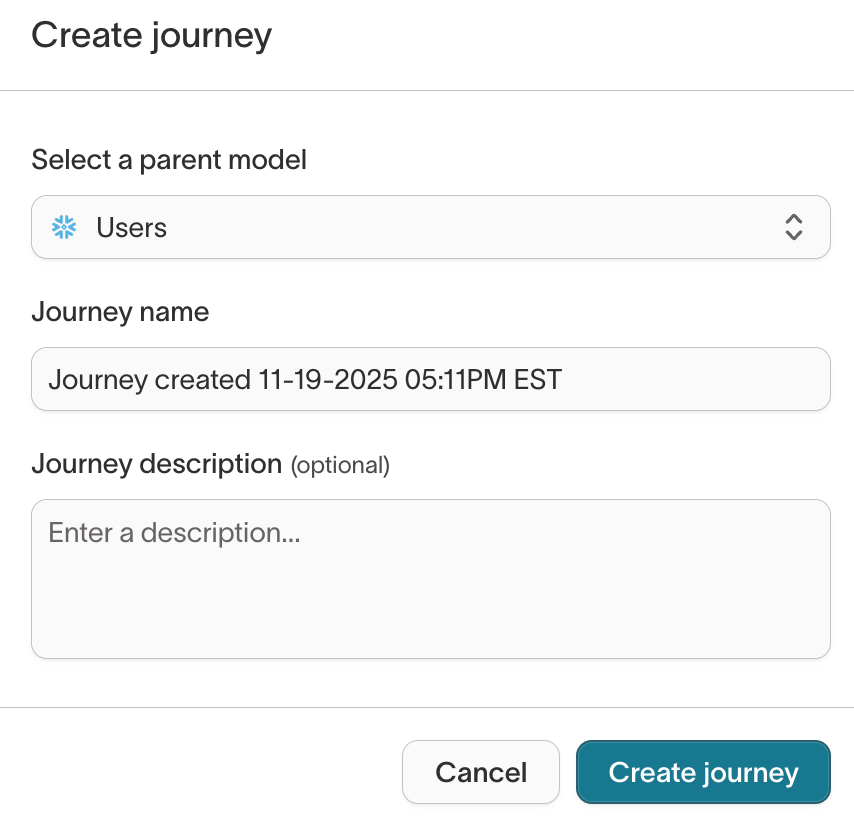
- Select a parent model, enter a journey name, and optionally add a description.
- Select Create journey.
The journey canvas opens in Draft mode.
2. Choose who enters
The Start tile defines how members enter the journey. Select it, then choose the entry type that matches the condition you want to use:
| Entry type | Use when | Example |
|---|---|---|
| Enters audience | Entry is based on a current state | Members who haven't purchased in 30 days |
| Performs events | Entry is based on an action with a timestamp | Members who abandoned a cart |
Use audience entry when qualification is based on a state. Use event entry when the journey should start from a specific action and time, such as abandoning a cart or creating an account.
You can't change the entry type after the journey's first run. Confirm that it represents the intended trigger before you activate the journey.
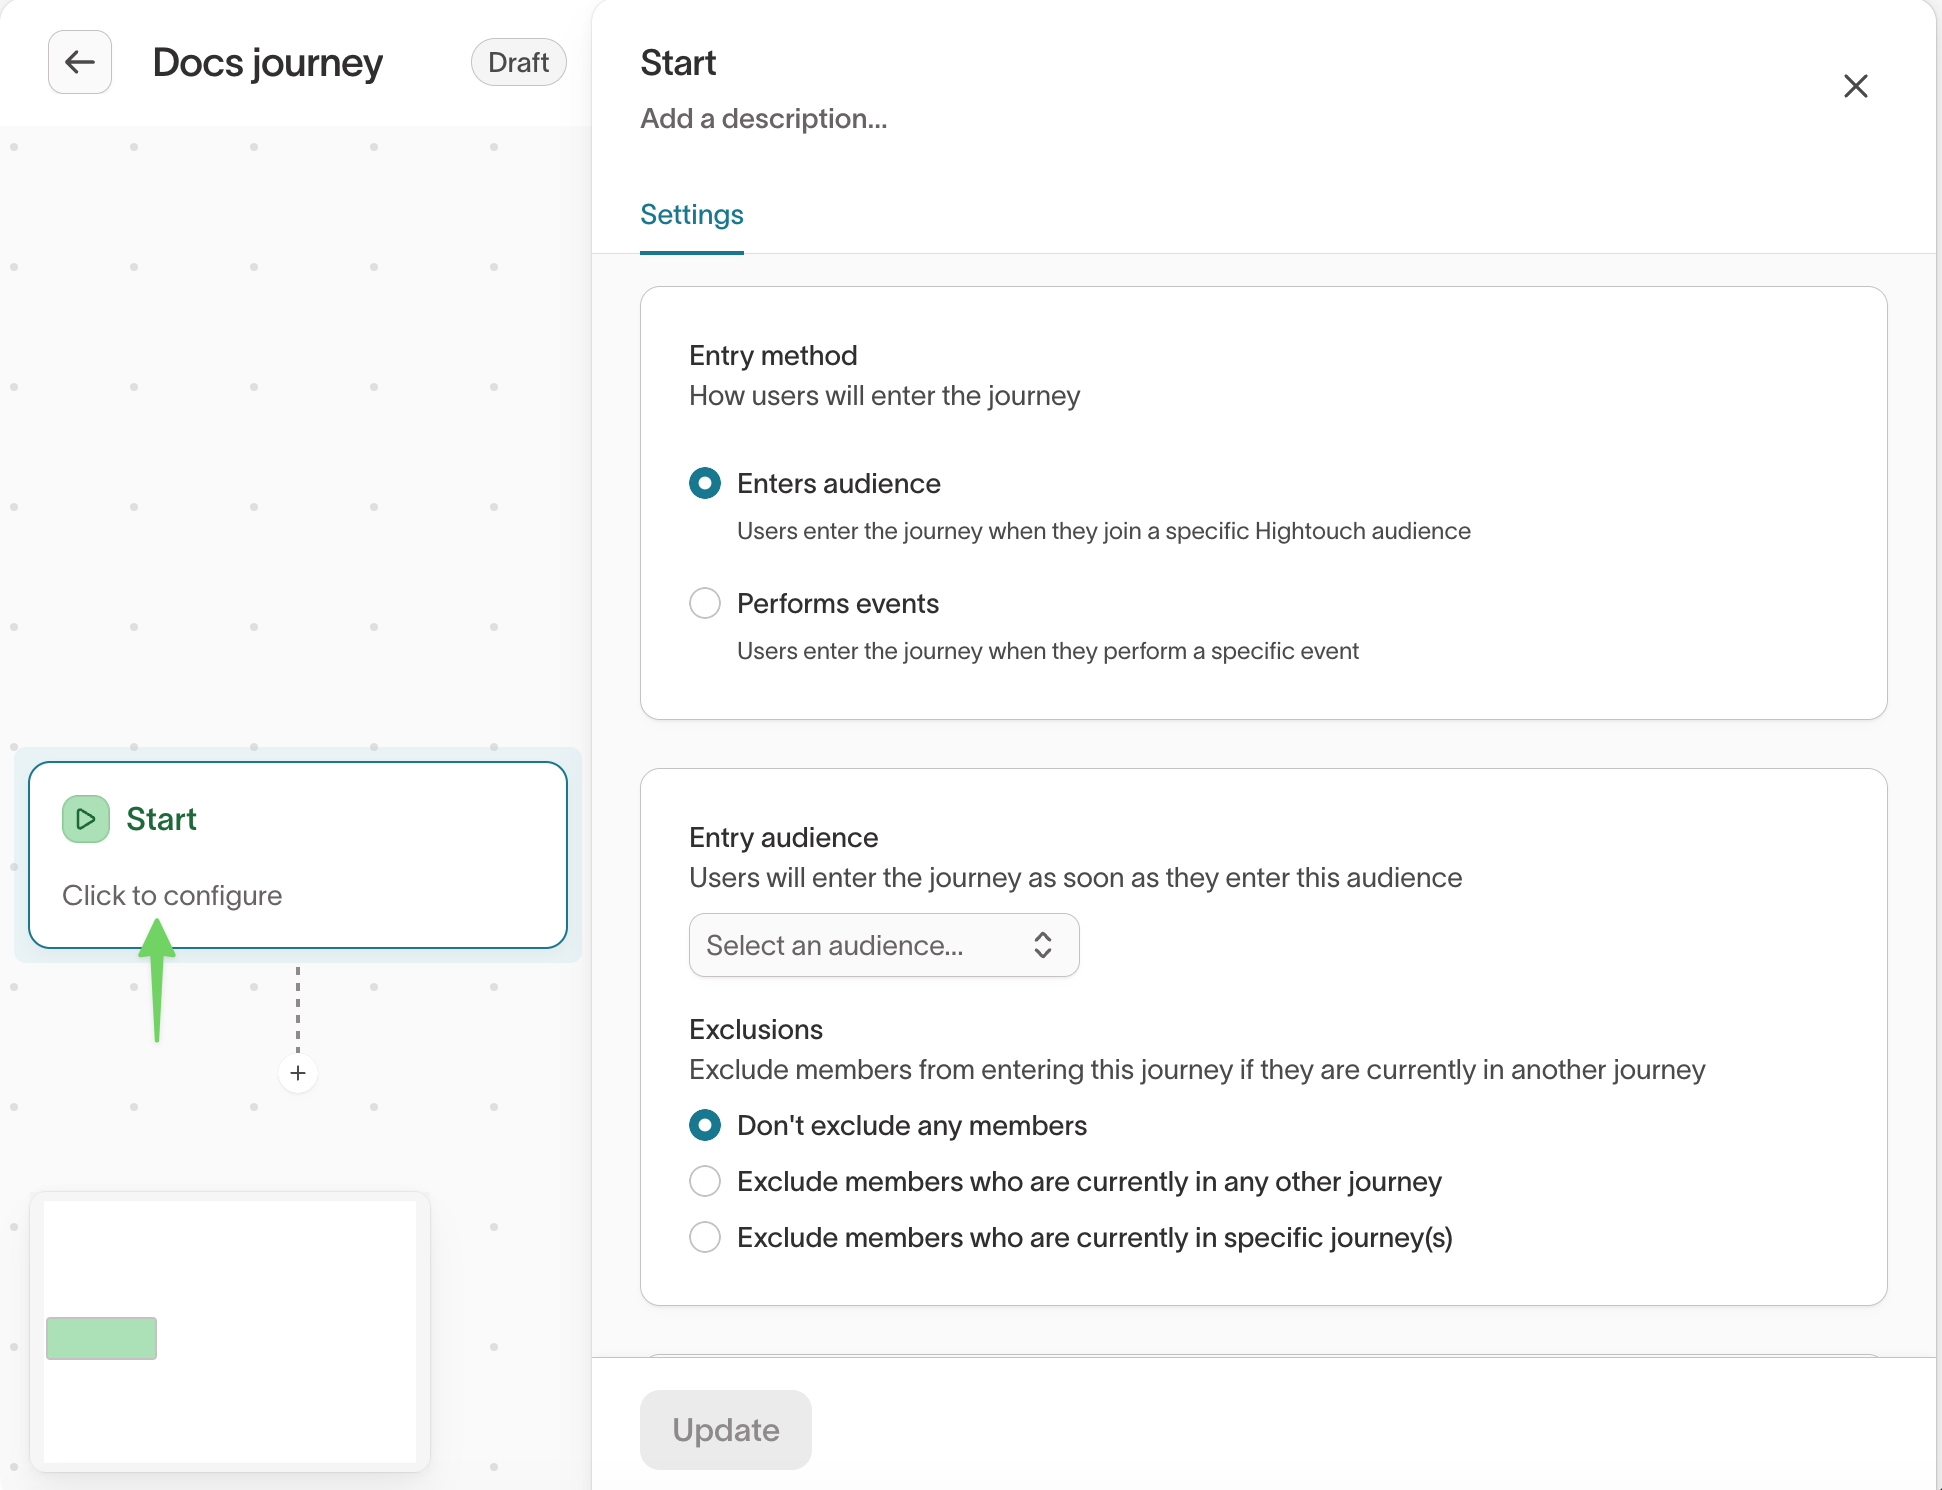
Use an audience for entry
- Select an entry audience.
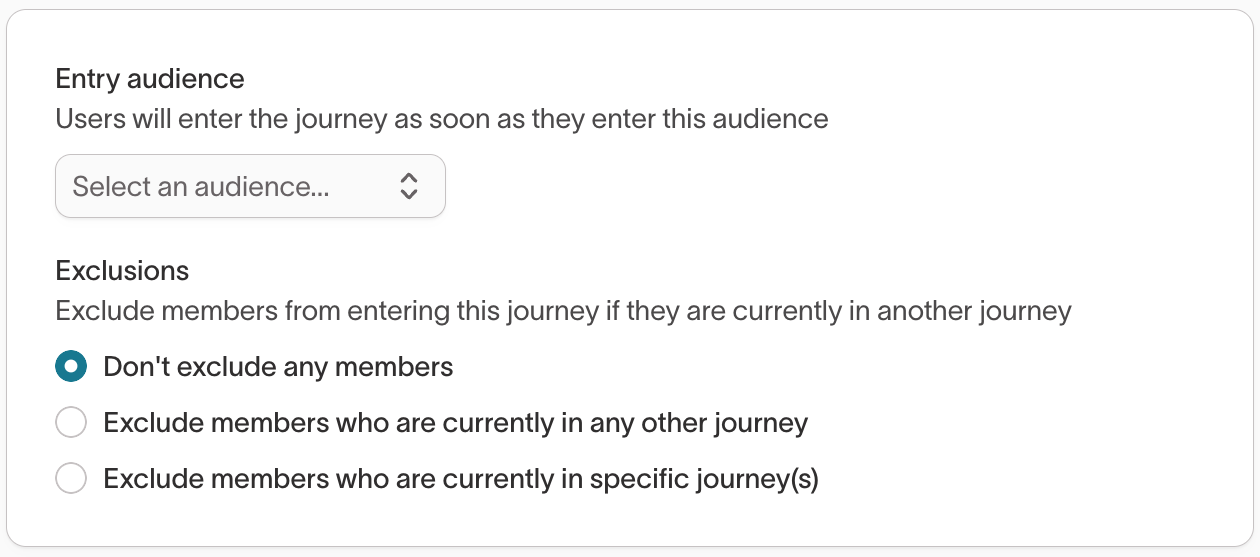
- Configure re-entry and exclusions, if needed.
- Select Update.
On the first run after activation, an audience journey enrolls everyone currently in the entry audience. On later runs, it enrolls members as they newly join the audience.
Use an event for entry
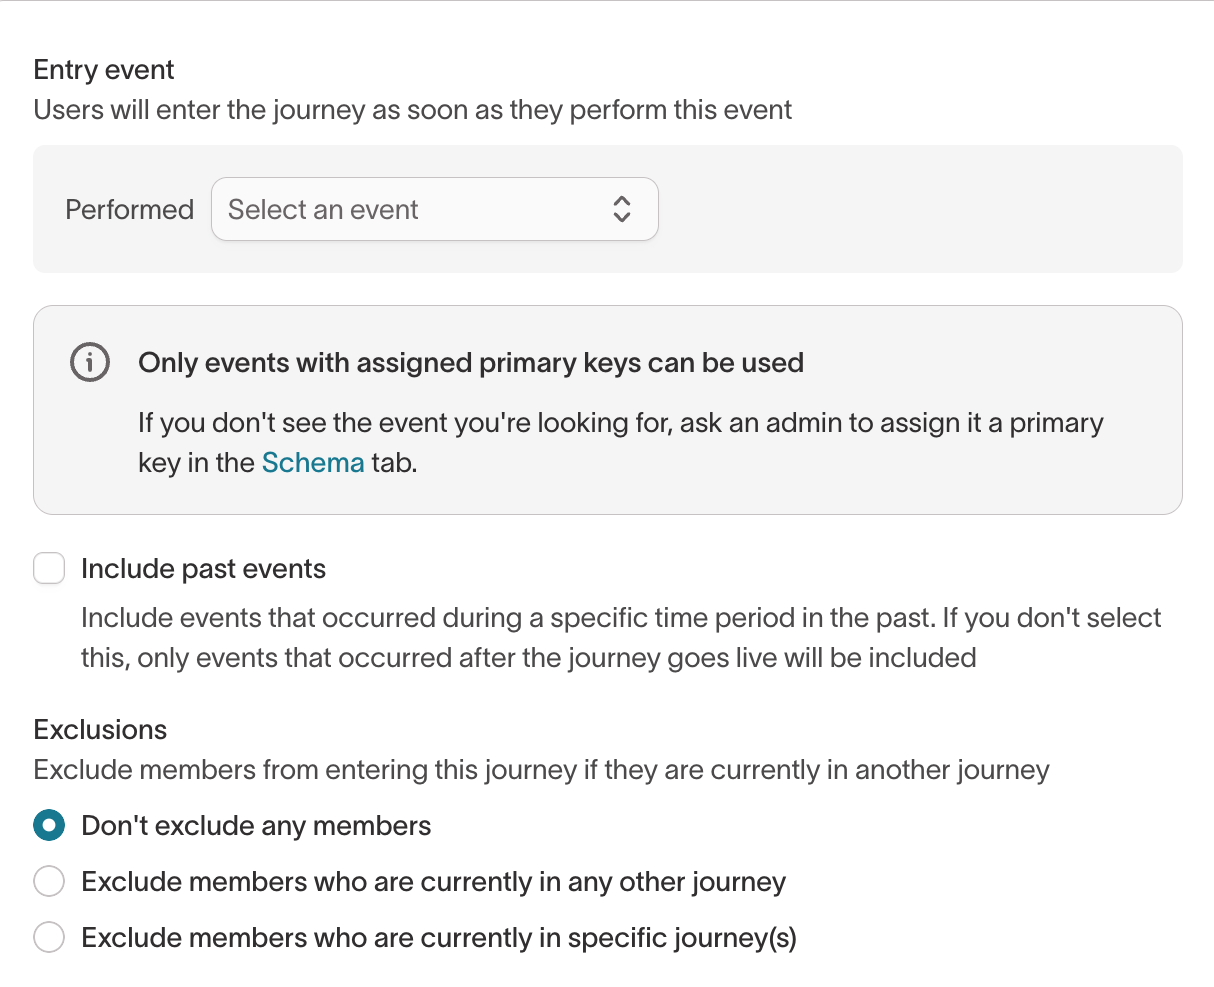
- Select the event that triggers entry.
Only events with assigned primary keys can enter a journey. Events without a primary key are unavailable for selection.
- Optional: Enable Include past events and set a lookback window. When disabled, only events that occur after the journey starts qualify.
- If the parent model has subset categories, select a subset in each required category under Subsets. See Subsets.
- Configure re-entry and exclusions, if needed.
- Select Update.
Configure entry behavior
The default entry settings allow each member to enter once and don't exclude members who are already in other journeys. Change them when your workflow requires different behavior.
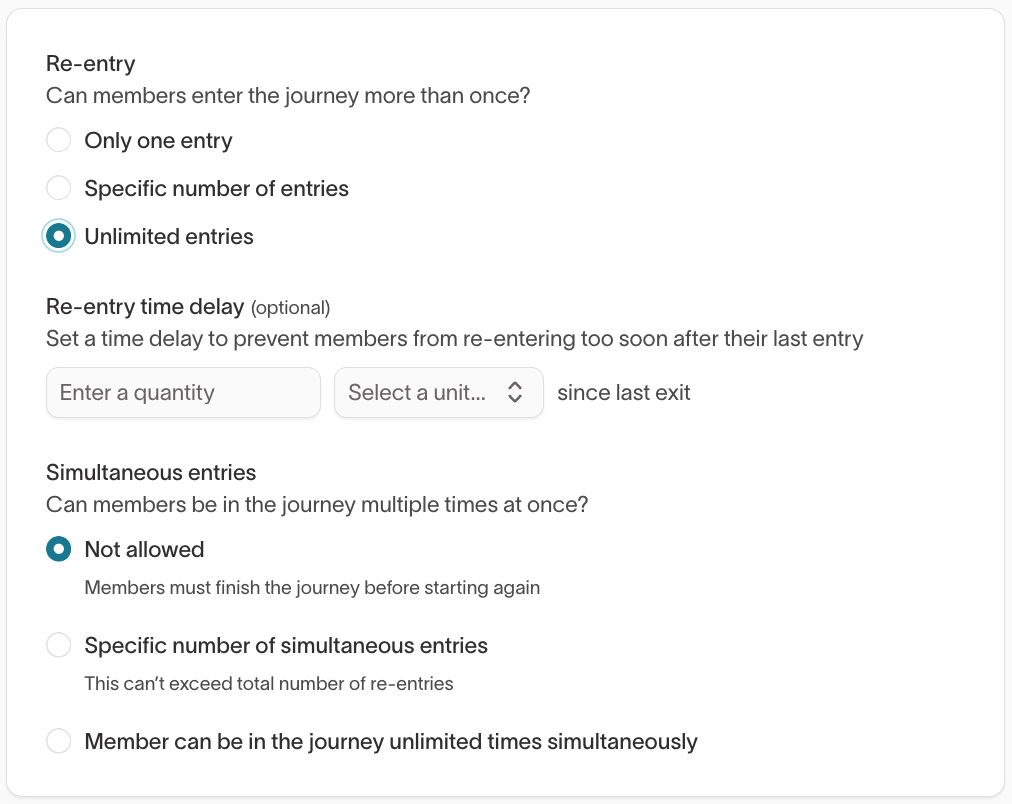
Re-entry
Re-entry controls how many times a member can enter:
- Only one entry (default) — The member can enter once.
- Specific number of entries — The member can enter up to a set number of times.
- Unlimited entries — The member can enter any number of times.
Set a Re-entry time delay to prevent members from re-entering too soon after their previous exit.

Simultaneous entry
For event-based journeys that allow multiple entries, simultaneous entry controls whether the same member can have more than one active entry at the same time. You can prevent simultaneous entries, set a limit, or allow an unlimited number.
The re-entry delay applies only when the member isn't currently in the journey. If the member is already participating, the simultaneous-entry setting determines whether another event can create an additional entry.
Exclusions
Exclusions prevent a member from entering this journey while they're already in another journey on the same parent model:
- Don't exclude any profiles (default) — Members can participate in multiple journeys at the same time.
- Exclude profiles who are currently in any other journey — Prevents entry while the member is in any other journey.
- Exclude profiles who are currently in specific journey(s) — Prevents entry while the member is in a journey you select.
Exclusions are checked when a member enters. They don't remove members who are already in progress.
If the entry audience belongs to a priority list, audience priority can also affect whether a member qualifies to enter.
Subsets
Subsets restrict which rows of the parent model a journey can use. Where a journey gets its subsets depends on the entry type:
- Enters audience — The journey uses the entry audience's subsets. There is nothing to configure on the Start tile.
- Performs events — Events aren't scoped by an audience, so you select subsets on the Start tile. The Subsets card lists every subset category on the parent model. A category marked optional can stay empty. A required category must have a selection before you can select Update.
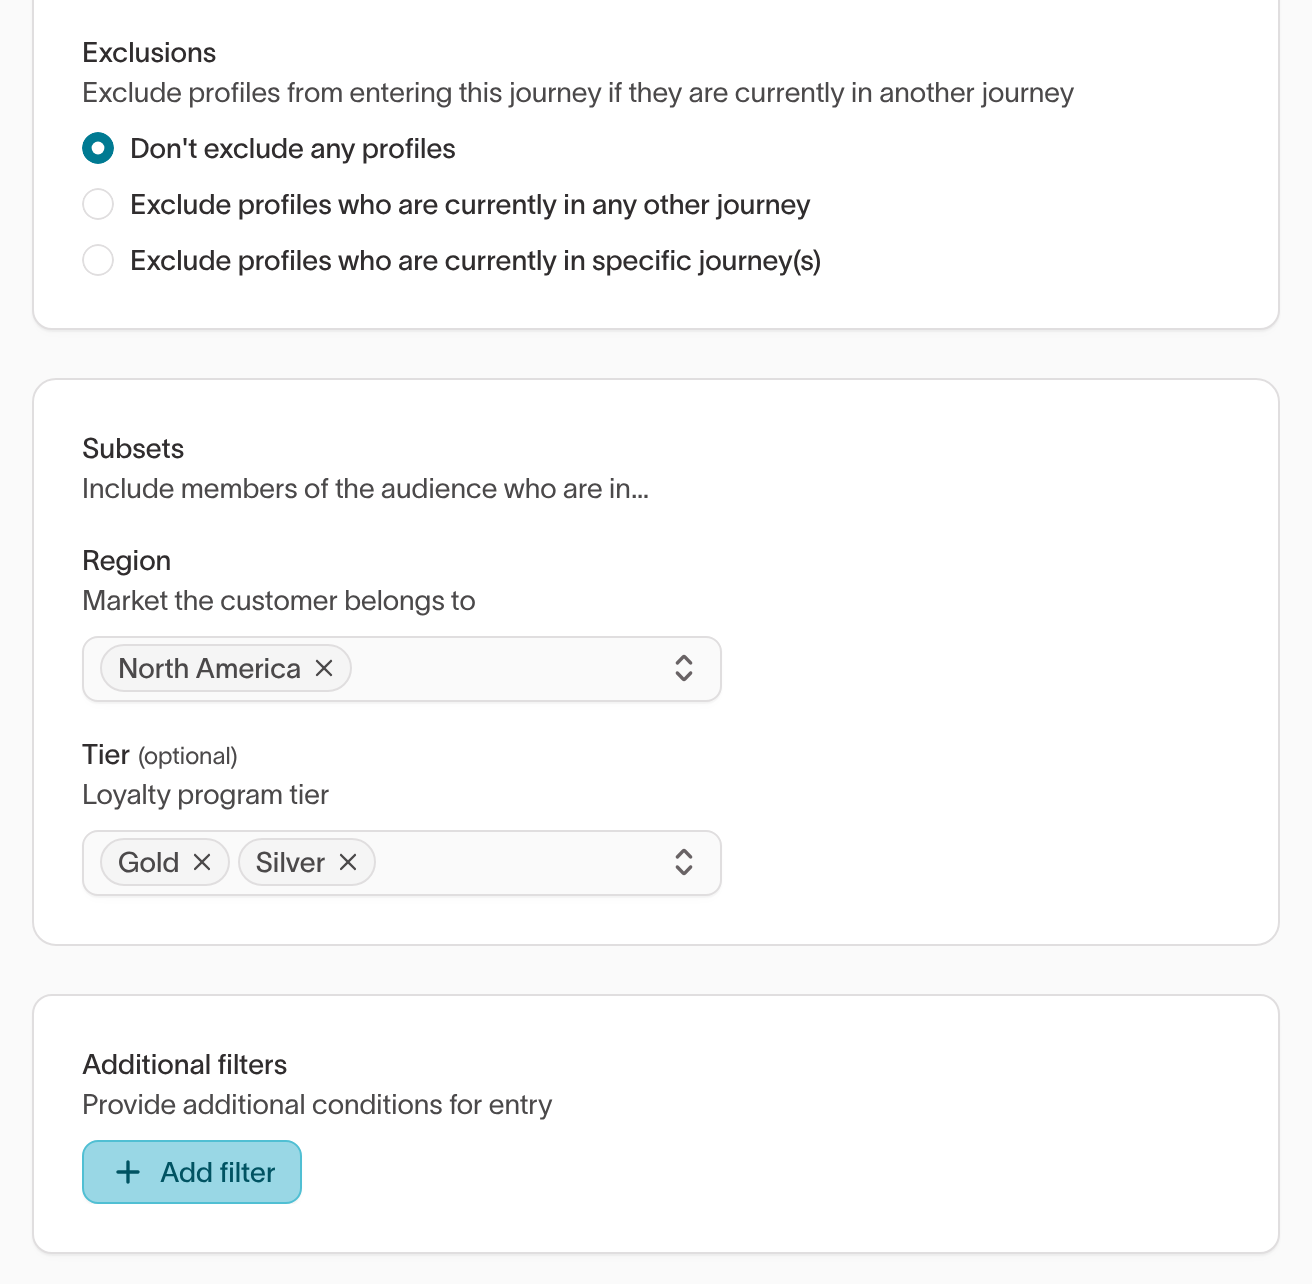
Within a category, a member must match any selected subset. Across categories, a member must match every category that has a selection. This is the same rule the audience builder applies. Hightouch applies the selection when a member enters the journey. Members already in the journey aren't removed if they stop matching.
Send email, Send SMS, and Send push tiles check the same selection again when they send, so a member who stops matching isn't sent those messages. See Send from a journey.
You can only select subsets your user groups have access to. Subsets you can't use appear disabled. If a required category has exactly one subset you can use, Hightouch selects it for you.
If a subset selected on the Start tile is deleted, the journey's runs fail, so members the subset excluded can't enter. To fix it, open the Start tile in edit mode and select Remove deleted subset. You can't update the tile until you do. If removing it leaves a required category empty, select a new subset for that category. If it leaves an optional category empty, members the deleted subset excluded can enter again.
3. Add journey tiles
Add the tiles members should move through after they enter. Drag a tile from the Add to canvas panel, or select the + below an existing tile.
Journey tiles can:
- Control timing — Time delay, Hold until
- Create different paths — Segment, A/B Split
- Send messages or data — Send email, Send SMS, Send push, Send to destination
- Carry or assign information — Set variable, Assign coupon
Configure each tile in the order members should encounter it. See Journey tiles for configuration and evaluation behavior.
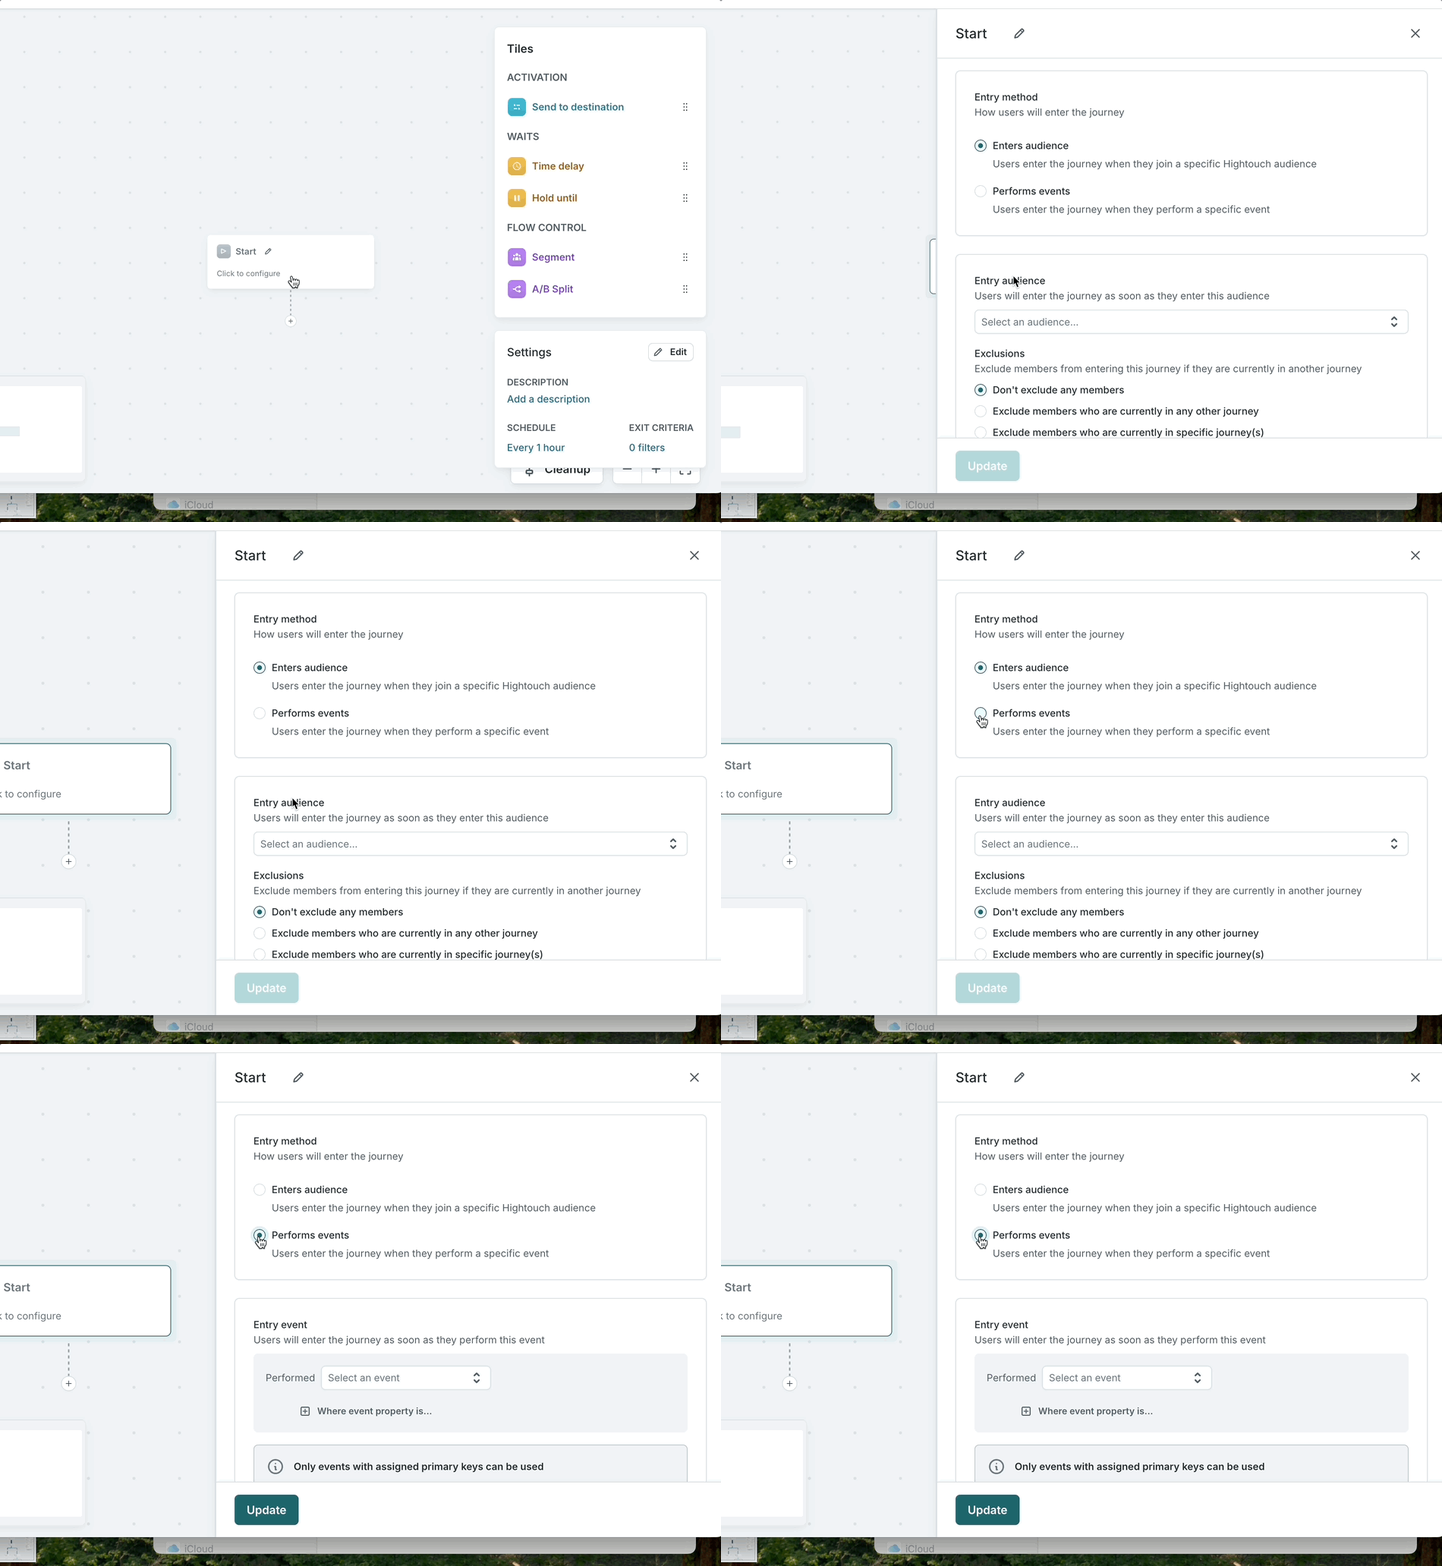
Drag empty space to pan around the canvas, and use the + and - controls to zoom. Use the controls on a tile to move, duplicate, or delete it, and hold Shift to select multiple tiles. Use the clean-up control to tidy the layout. You can't delete the Start tile.
Add journey notes
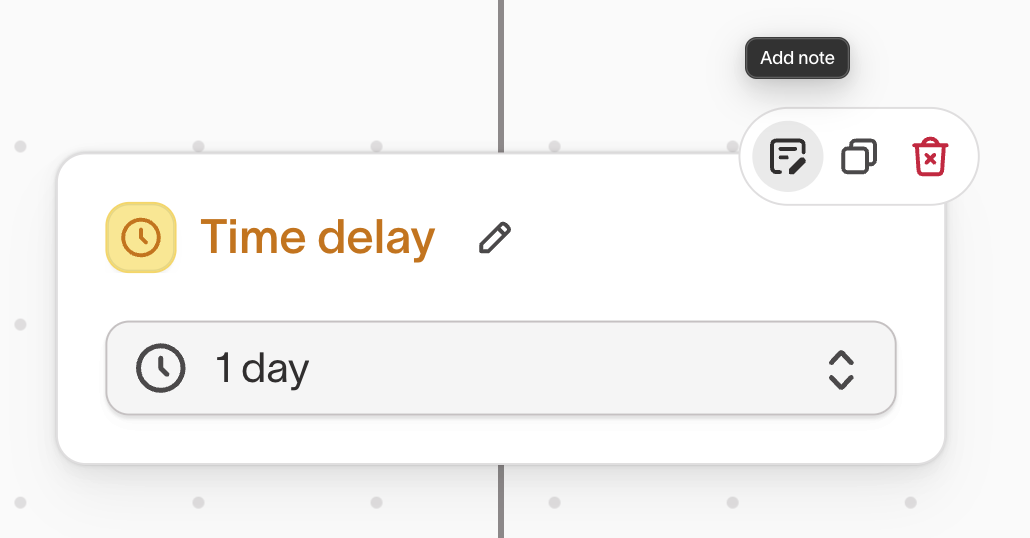
Add notes to record context about the journey or a specific tile directly on the canvas.
You can add a note by:
- Dragging a note from the tile library onto the canvas or a tile.
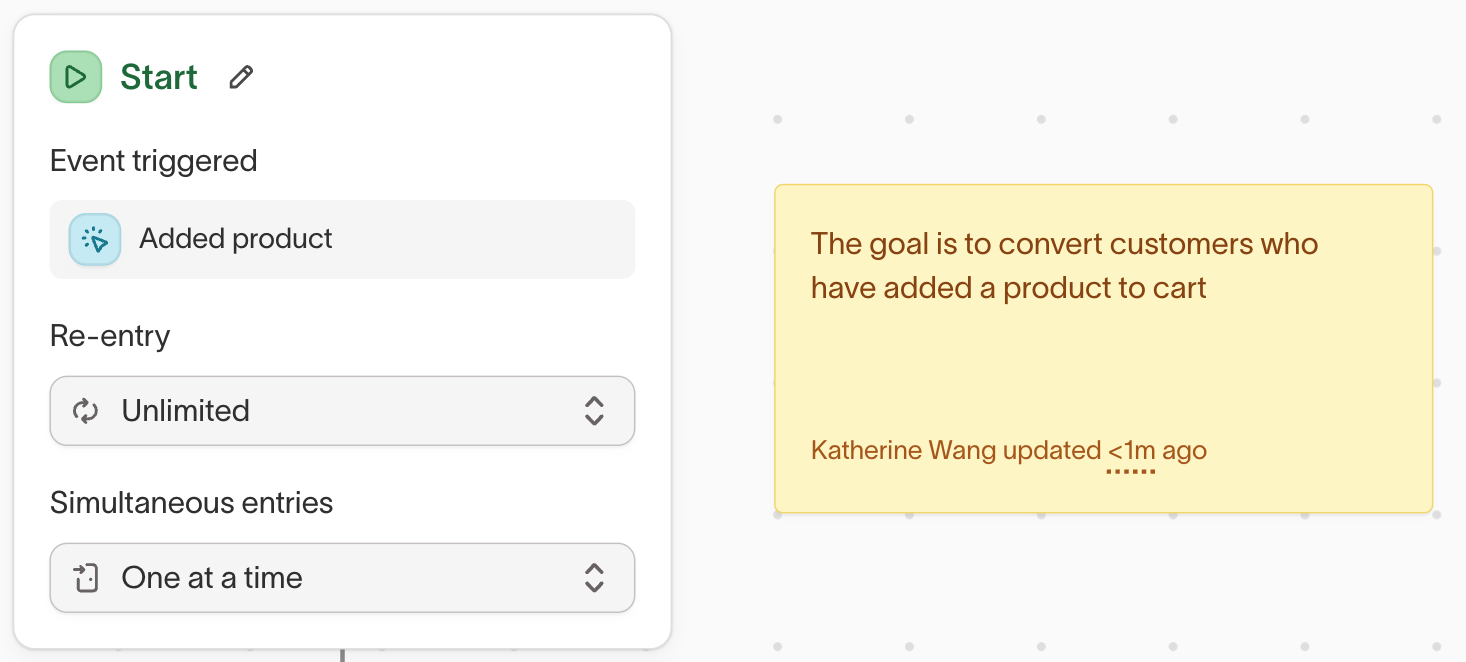
- Adding a note directly to a tile.
- Opening a tile and adding a note from its configuration.
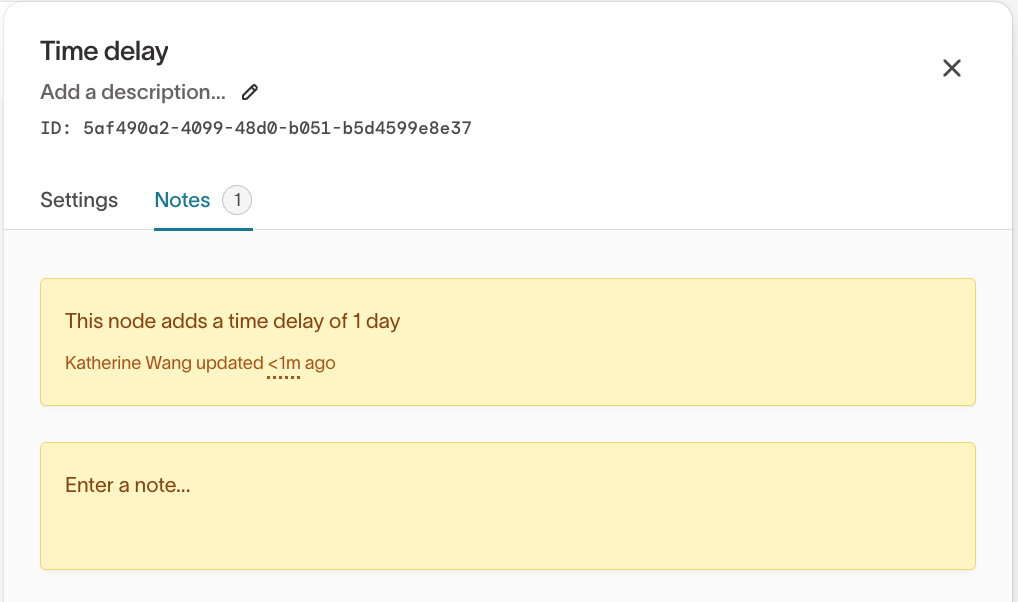
Notes are copied when you create a journey from a template. Copied notes are attributed to the person who creates the journey.
4. Set exit criteria
Exit criteria remove members when a condition becomes true, such as making a purchase, unsubscribing, or changing audience membership. Configure them in the journey settings.
On each scheduled run, Hightouch checks exit criteria before advancing members. If a condition is met, the member exits before later tiles can send a message or sync data. If the condition becomes true between runs, the member remains in the journey until the next run detects it.
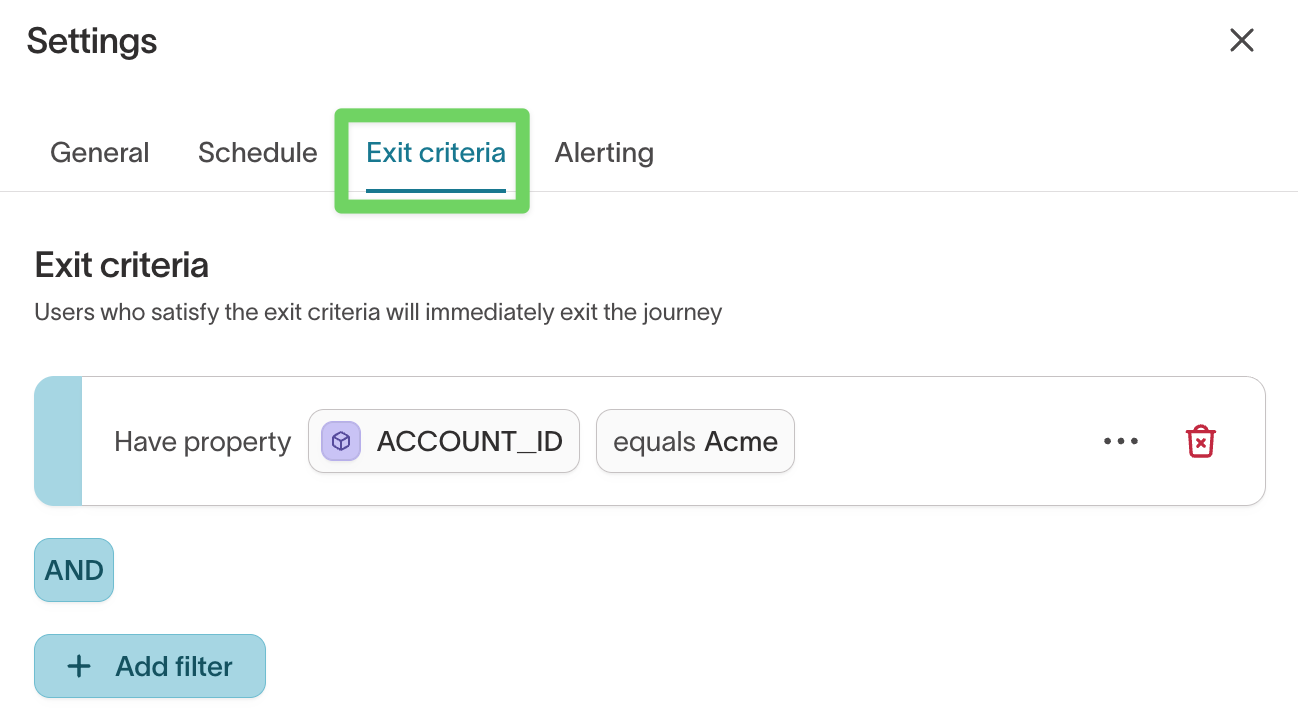
Use exit conditions that are unlikely to become false again. For example, if members enter because they haven't purchased in 30 days, a purchase is a clear exit condition. Avoid exit conditions based on values that can repeatedly change, because members may leave and later qualify to enter again.
5. Set the schedule
The journey schedule determines how often Hightouch checks for new entries, evaluates exit criteria, advances members, and runs destination syncs.
Choose a schedule based on the timing precision your workflow requires:
| Schedule type | Description | Example |
|---|---|---|
| Interval | Runs at a repeating interval | Every hour or every 30 minutes |
| Custom recurrence | Runs on specified days and times | Weekdays at 9 AM |
For example, an hourly schedule may be appropriate for cart abandonment, while a daily schedule may be enough for a winback journey.
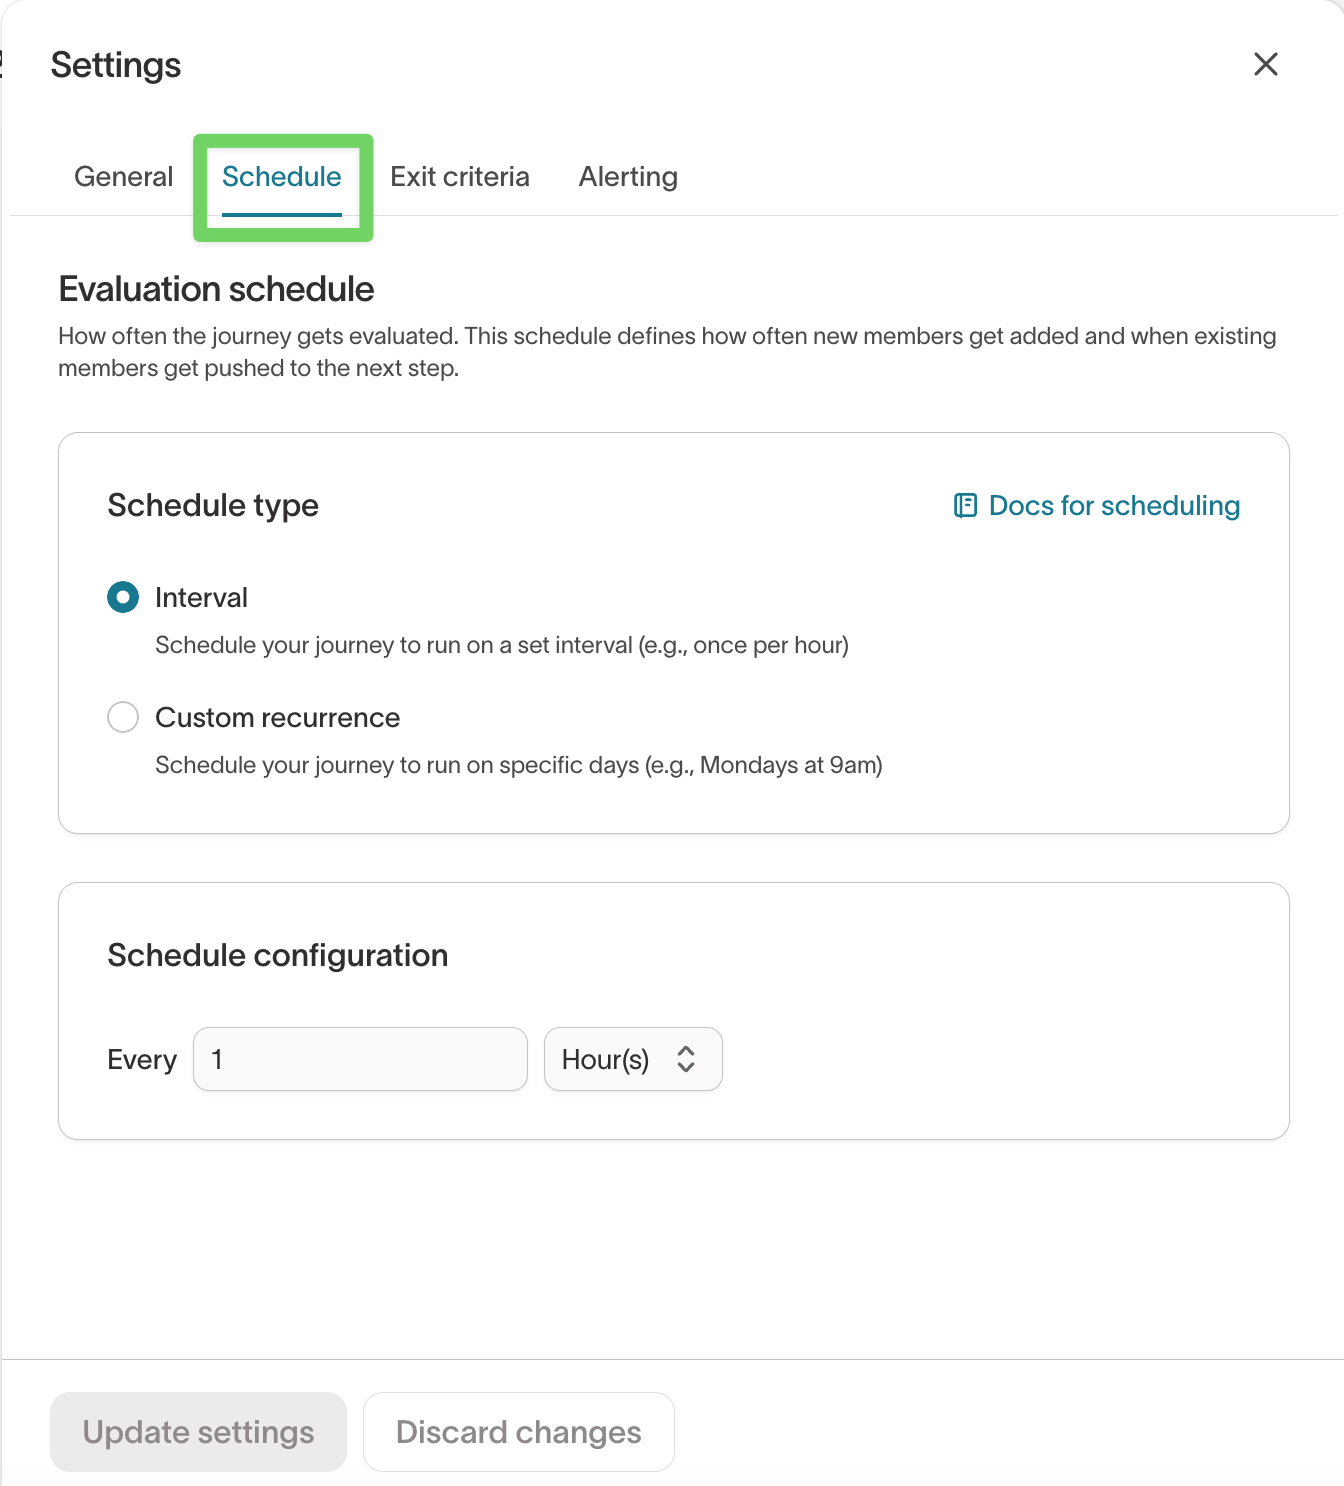
Members only advance when the journey runs. On a daily schedule, a one-minute delay and a one-day delay can both resolve on the next daily run. More frequent schedules evaluate delays more precisely but use more warehouse queries. See How the schedule affects timing.
6. Test and activate
After configuring the journey, validate its logic, test destination actions, and run it with a small live cohort before launching it broadly.
See Test and launch a journey for the complete validation and launch process.
Examples
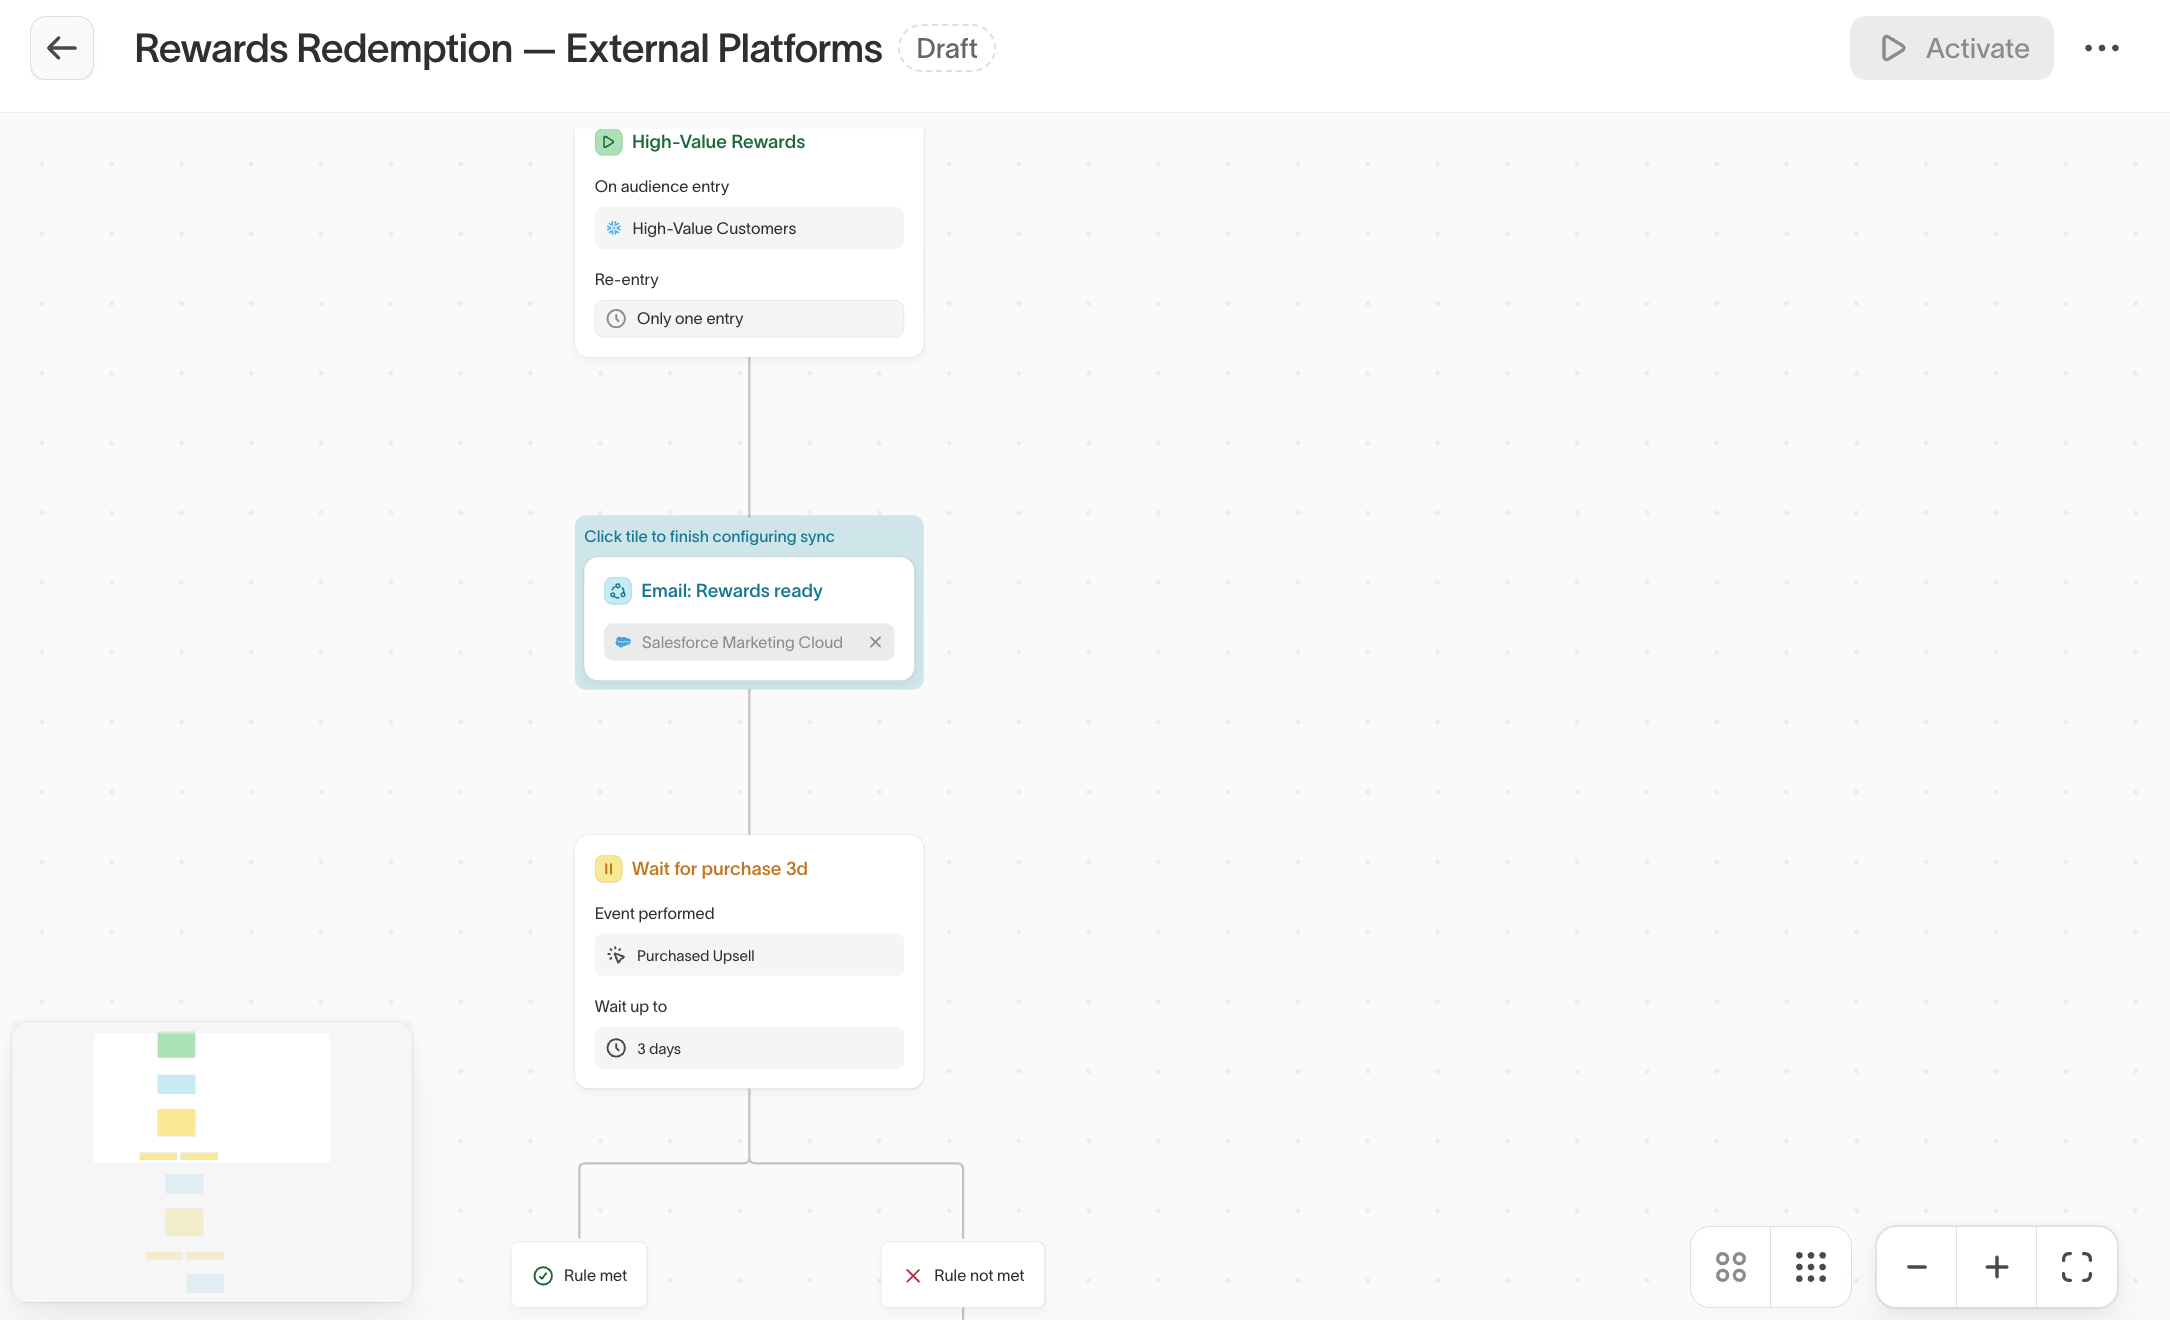
Welcome series
A new member signs up, receives a welcome email, and receives a reminder only if they haven't activated.
- Entry: Event-based (
signed_up) - Schedule: Hourly
- Flow: Start → welcome email → three-day delay → Hold until first action → reminder if the action doesn't occur → End
- Exit: First purchase or another key activation event
Cart abandonment
A member abandons a cart and receives a sequence that stops when they purchase.
- Entry: Event-based (
cart_abandoned), or audience-based if abandonment is represented as a state - Schedule: Hourly
- Flow: Start → two-hour delay → Send email → one-day delay → Segment by SMS eligibility → Send SMS → End
- Exit: Purchase event
Re-engagement
A member who has been inactive for 60 days receives a three-message sequence and leaves when they re-engage.
- Entry: Audience-based (
inactive 60+ days) - Schedule: Daily
- Flow: Start → email 1 → four-day delay → email 2 → seven-day delay → final email → End
- Exit: Purchase, login, or opt-out
Next steps
- Journey tiles to configure delays, branches, messages, destination syncs, variables, and coupons.
- Test and launch a journey to validate the journey before members are affected.
- Journey templates to reuse a journey structure.