
Empower your operations by syncing modeled data into your warehouse
Supported syncing
| Type | Description | Supported Sync Modes |
|---|---|---|
| Any data set | Sync data from any source to a Databricks table | Upsert, Insert, Mirror |
For more information about sync modes, refer to the sync modes docs.
Connect to Databricks
Go to the Destinations overview page and click the Add destination button. Select Databricks and click Continue. You can then authenticate Hightouch to Databricks.
Hightouch allows you to authenticate with Databricks using one of two methods: Either OAuth or a Personal Access Token (PAT).
We recommend using OAuth for configuring new connections.
Configuring a service principal with OAuth
-
Create a service principal.
-
In your Databricks workspace, go to the user dropdown at the top right and select Settings.
-
In the Identity and access page, find Service Principals and click Manage.
-
Choose Add new, give your service principal a name, and click Add.
-
Take note of the Service Principal name as well as the Application id listed on the Service Principal Configurations page. This is a UUID (for example,
63fc7e90-a8a2-4639-afd8-36ef6bb67cfa). You may need this later to complete setup. -
Create an OAuth secret pair.
-
On the page for the Service Principal created above, to go the Secrets tab.
-
Click Generate secret. A dialog will pop up with a Secret and a Client ID. Take careful note of these values as it is only visible now; you can't look it up later.
-
Grant the necessary catalog permissions to your new Service Principal. The above steps are sufficient to connect and authenticate, but the Service Principal may not be authorized to execute queries against your Databricks catalog. Depending on your Databricks workspace configuration, it may already be configured with the necessary permissions; but if the connection test fails, you may need to follow these steps.
-
In the Databricks sidebar on the left, click Catalog and locate your schema in the tree view.
-
Select the schema and open the Permissions page. Click the Grant button.
-
In the Principals input box, type the name of your new Service Principal.
select the Data Editor preset or manually grant the following permissions:
USE SCHEMAEXECUTECREATE VOLUMEREAD VOLUMESELECTMODIFYCREATE TABLE- Make sure to enable the checkbox at the bottom to "Also grant
USE CATALOG"
-
You may also need to configure warehouse permissions. As with the previous step concerning catalog permissions, your Databricks workspace configuration may or may not automatically grant the Service Principal permission to use the compute resources. You can read more about it in the Databricks docs.
-
In the Databricks sidebar, click Compute and find your data warehouse. It may be located on the SQL warehouses page.
-
On the far right column of the row corresponding to the desired warehouse, click the icon for the kebab menu ⋮, then Permissions.
If you do not see the Permissions option, you may lack the privileges necessary to configure permissions—even if you are a Databricks workspace admin. If this happens, please contact your Databricks account admin.
- Enter the name of your Service Principal and ensure that the setting in the dropdown is set to Can use. Click Add.
Alternative: Configuring a Personal Access Token (PAT)
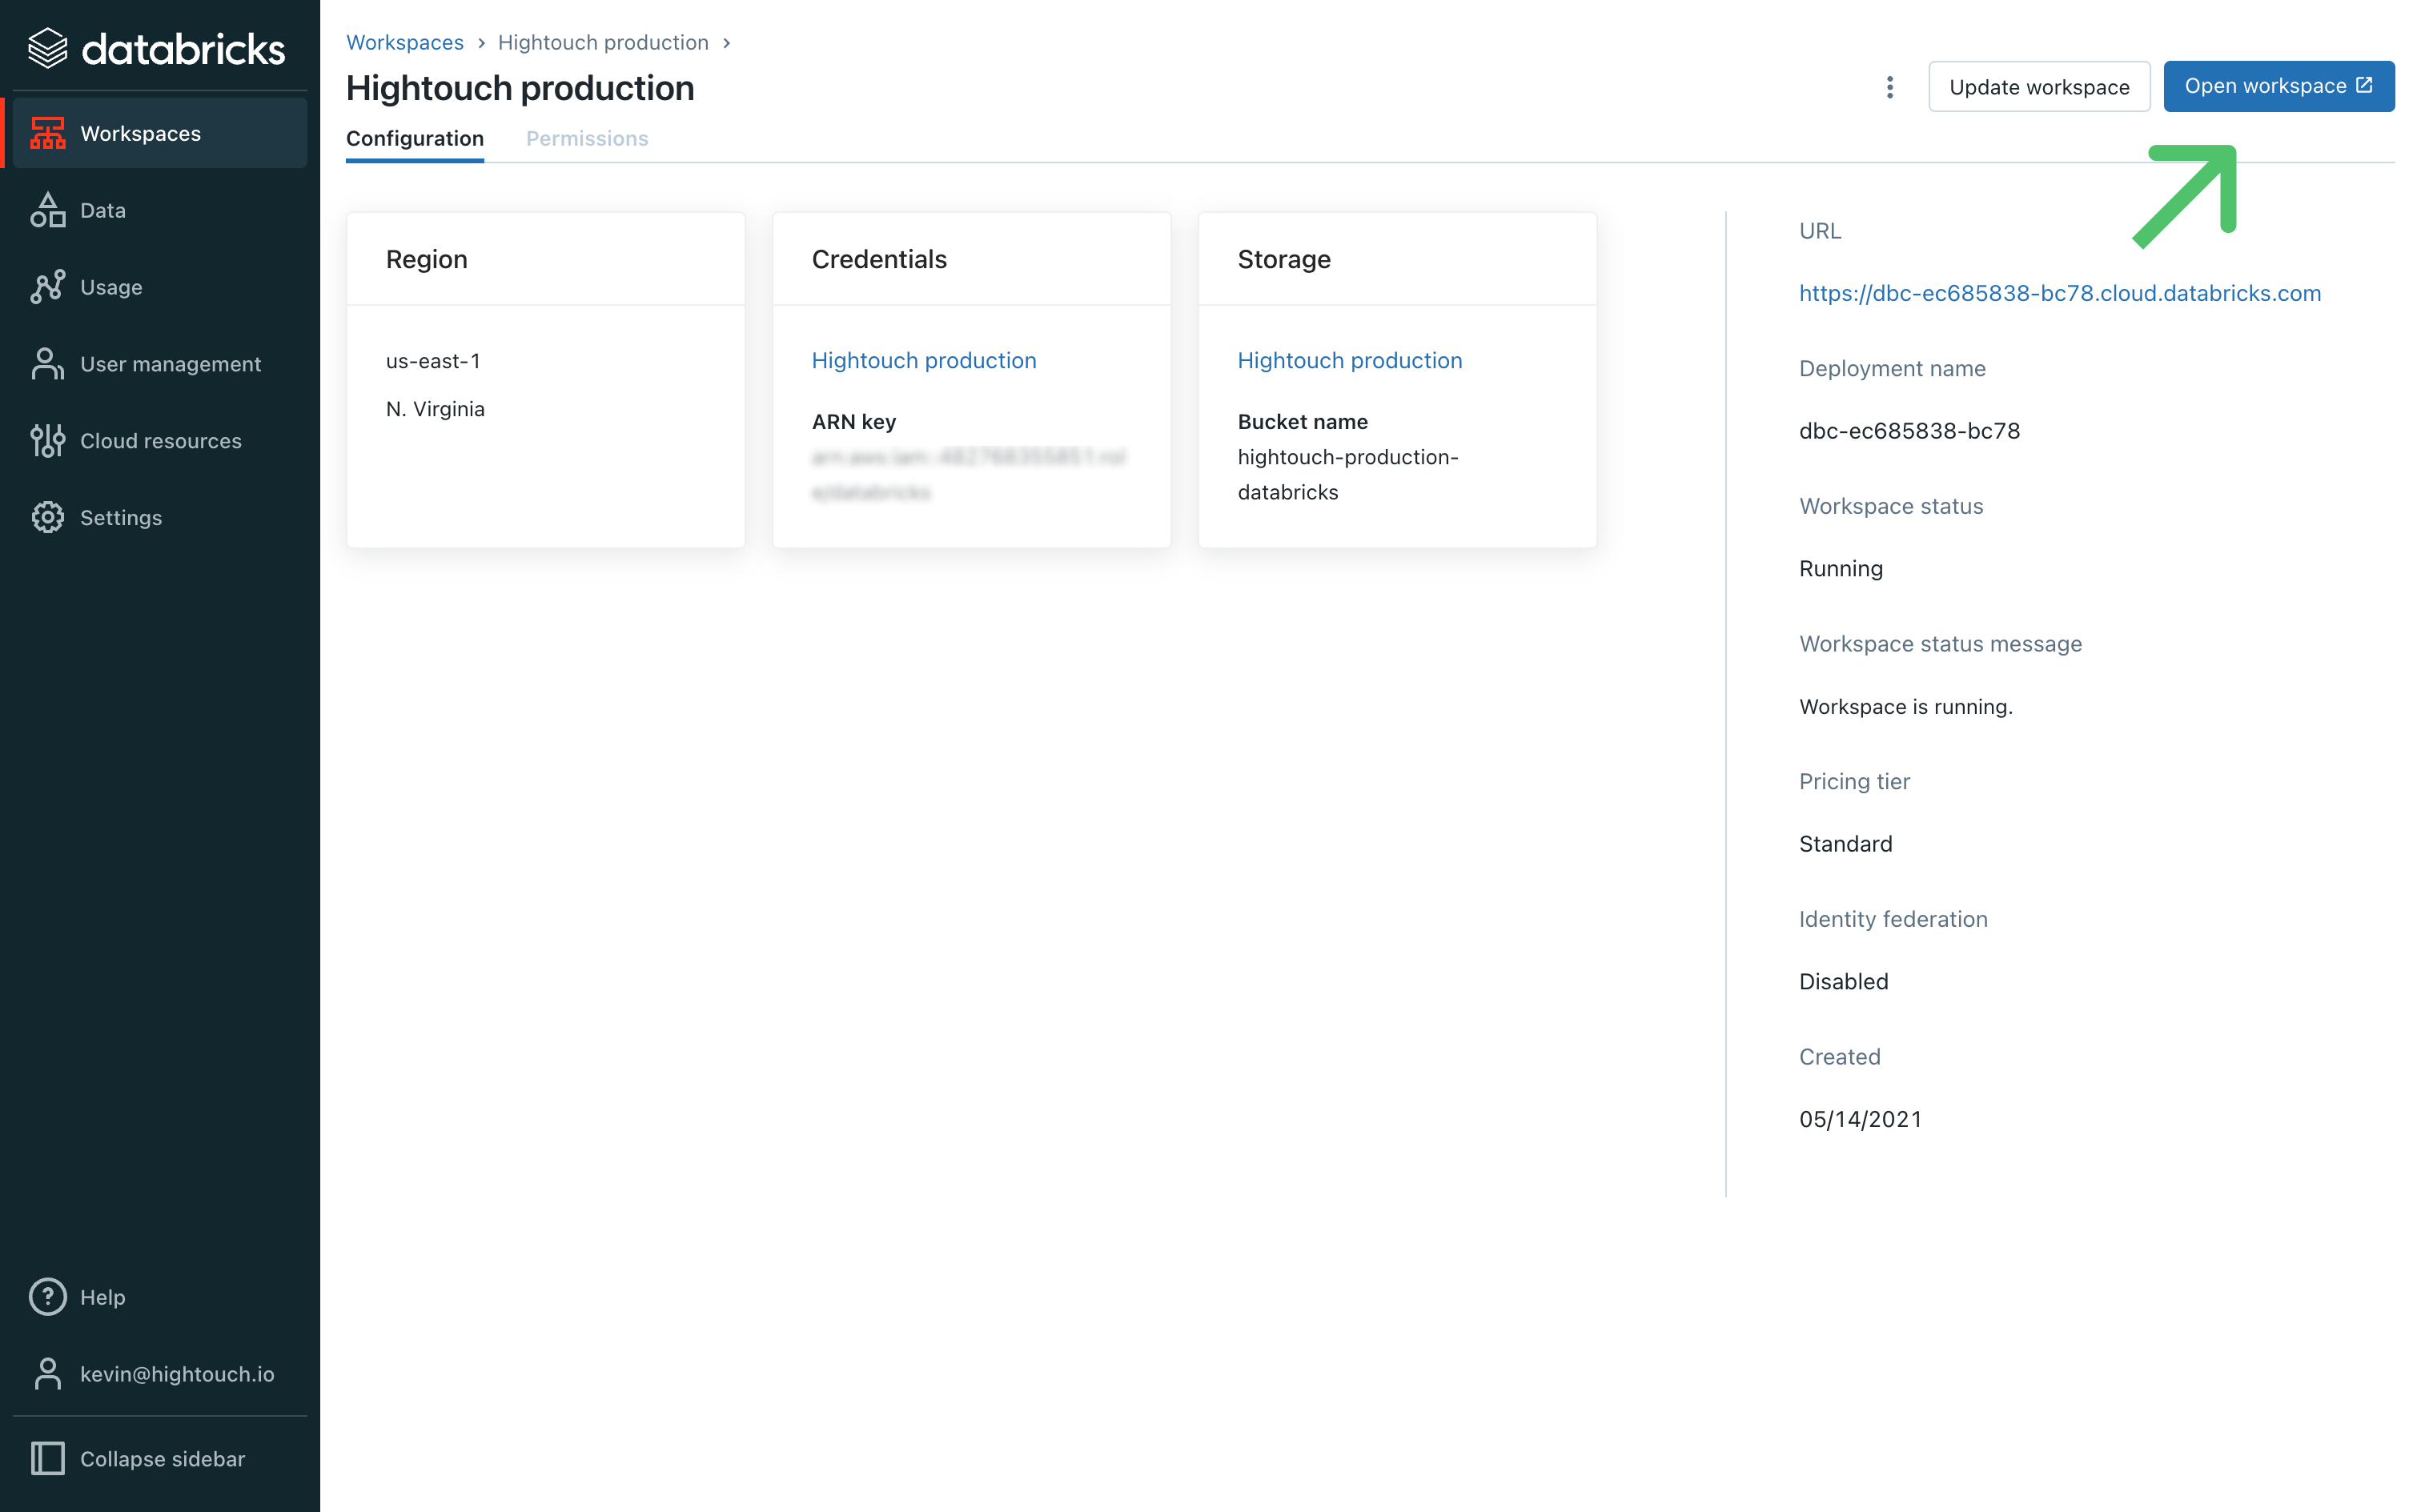
- In your Databricks Account console, go the Workspaces page. Select the relevant workspace and then click Open workspace.
- In your workspace, go the Compute page and click the relevant cluster. This brings you to its Configuration tab.
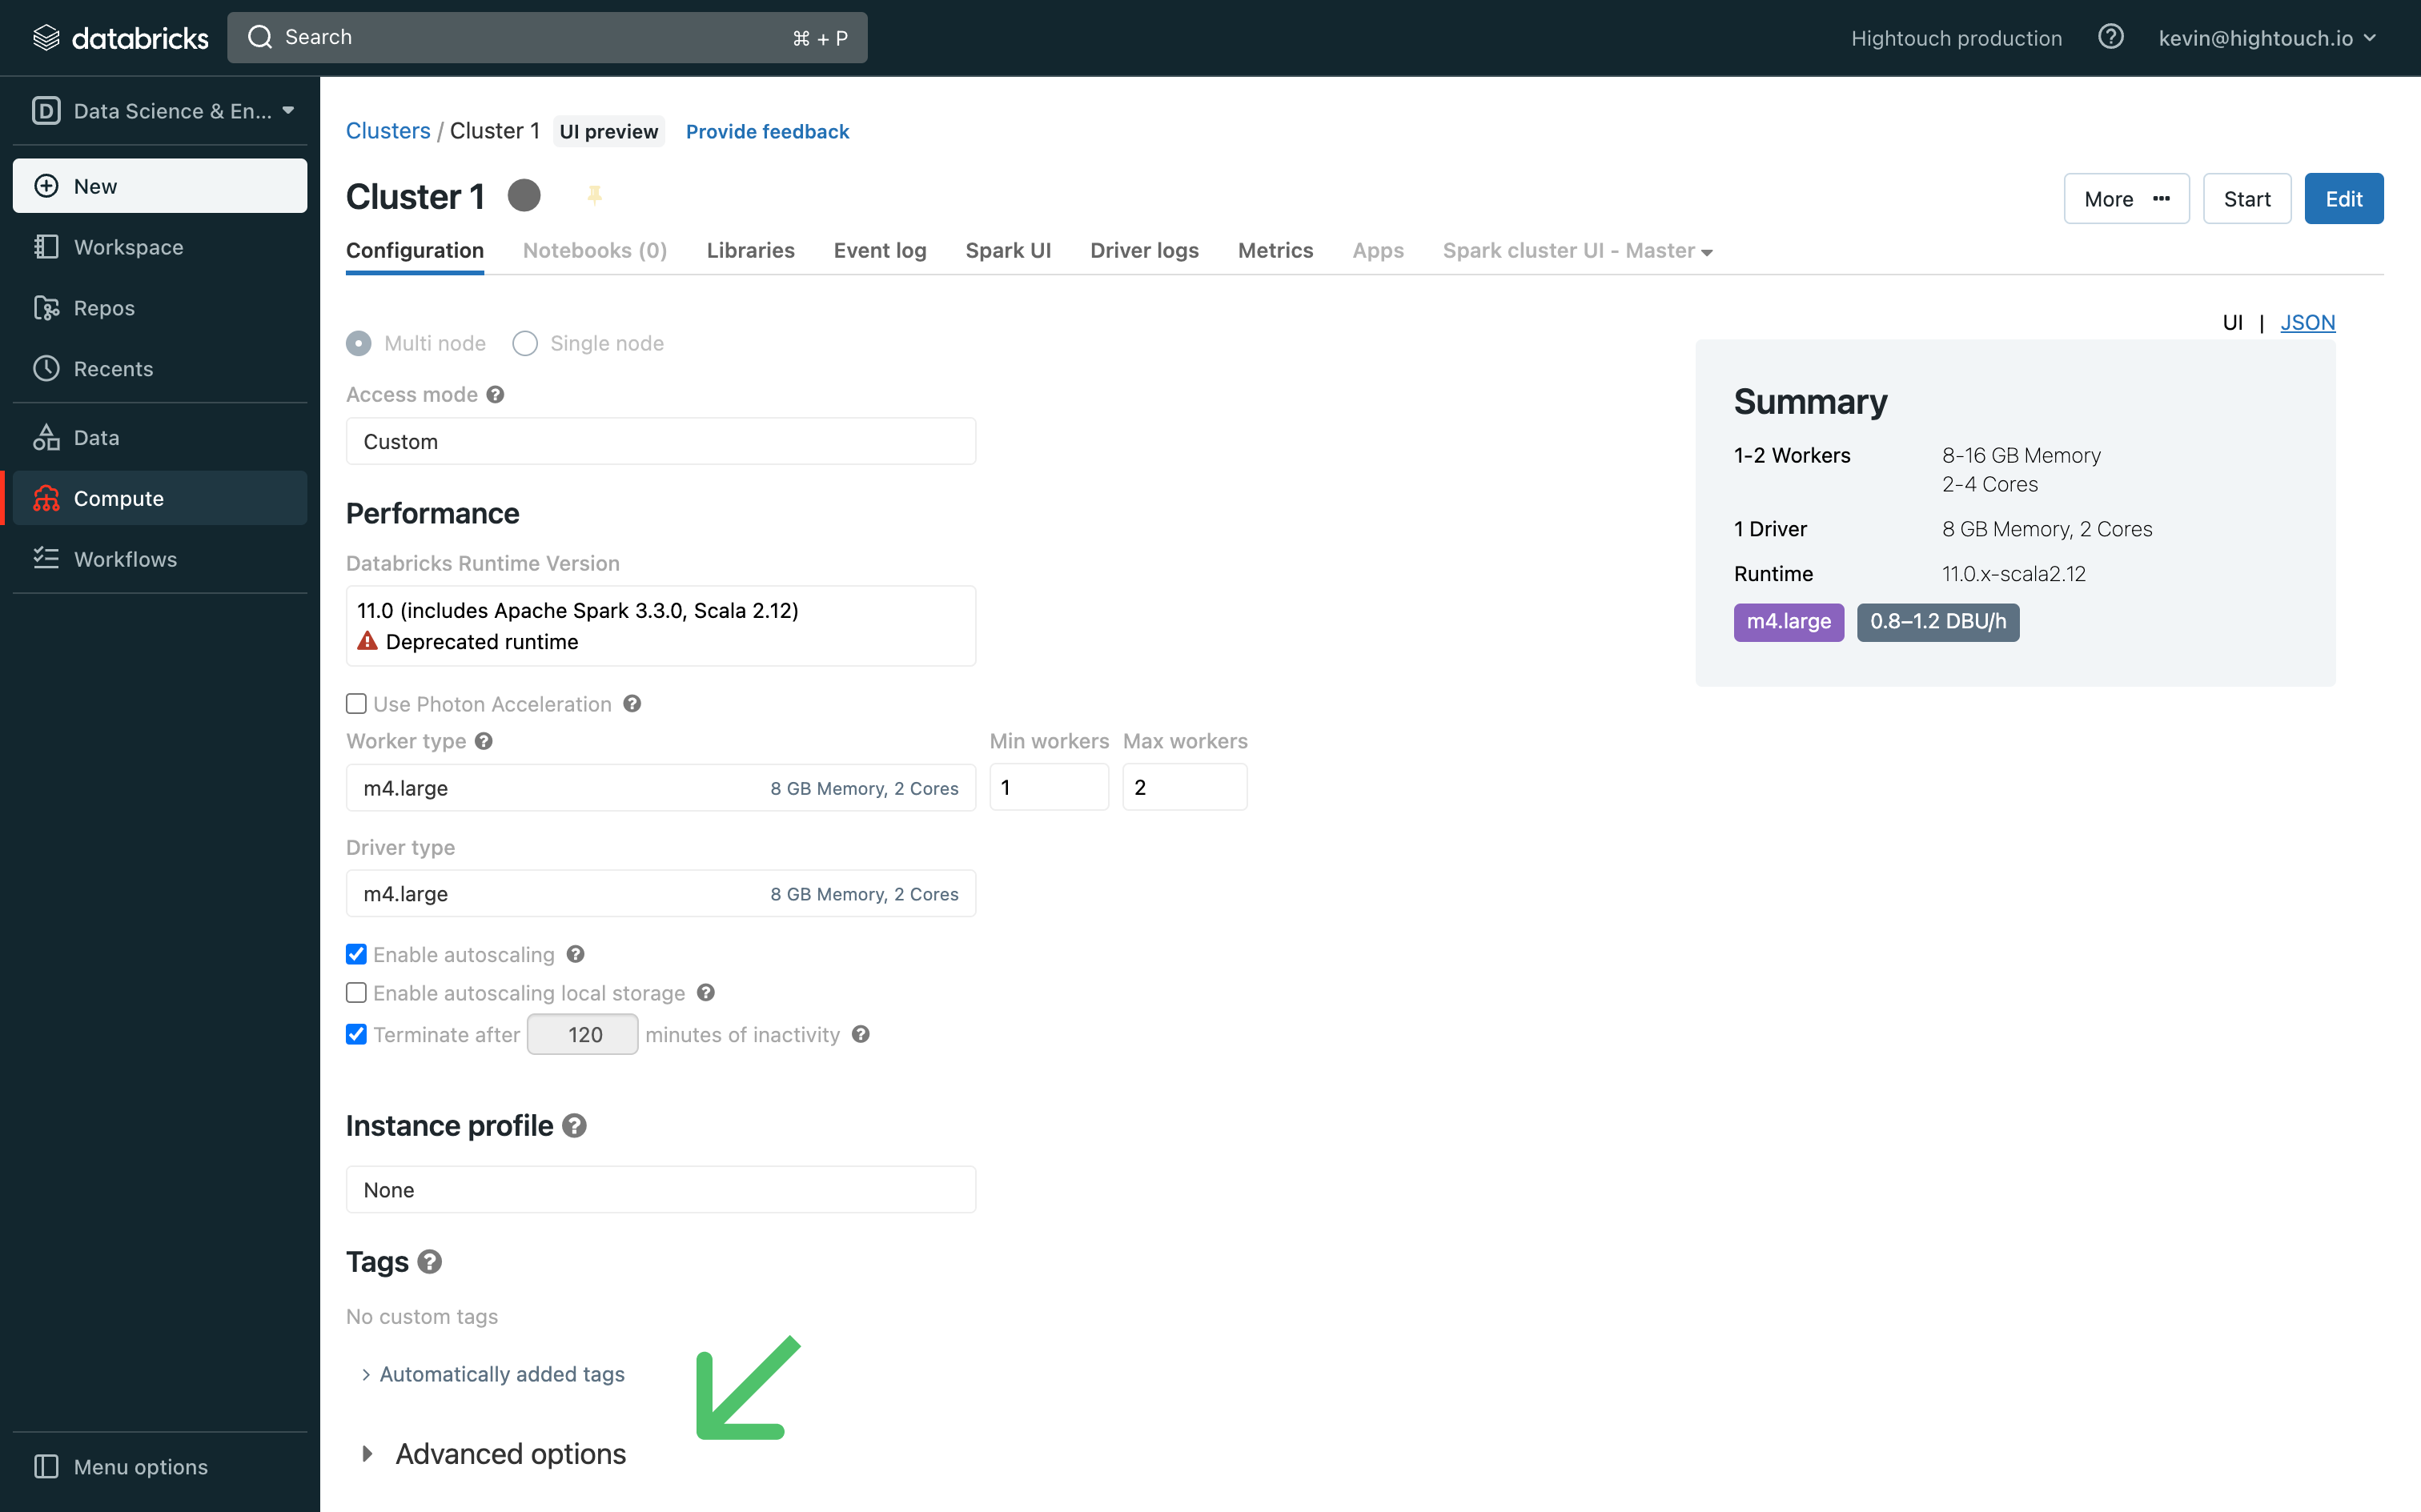
- At the bottom of the page, expand the Advanced Options toggle and open the JDBC/ODBC tab.
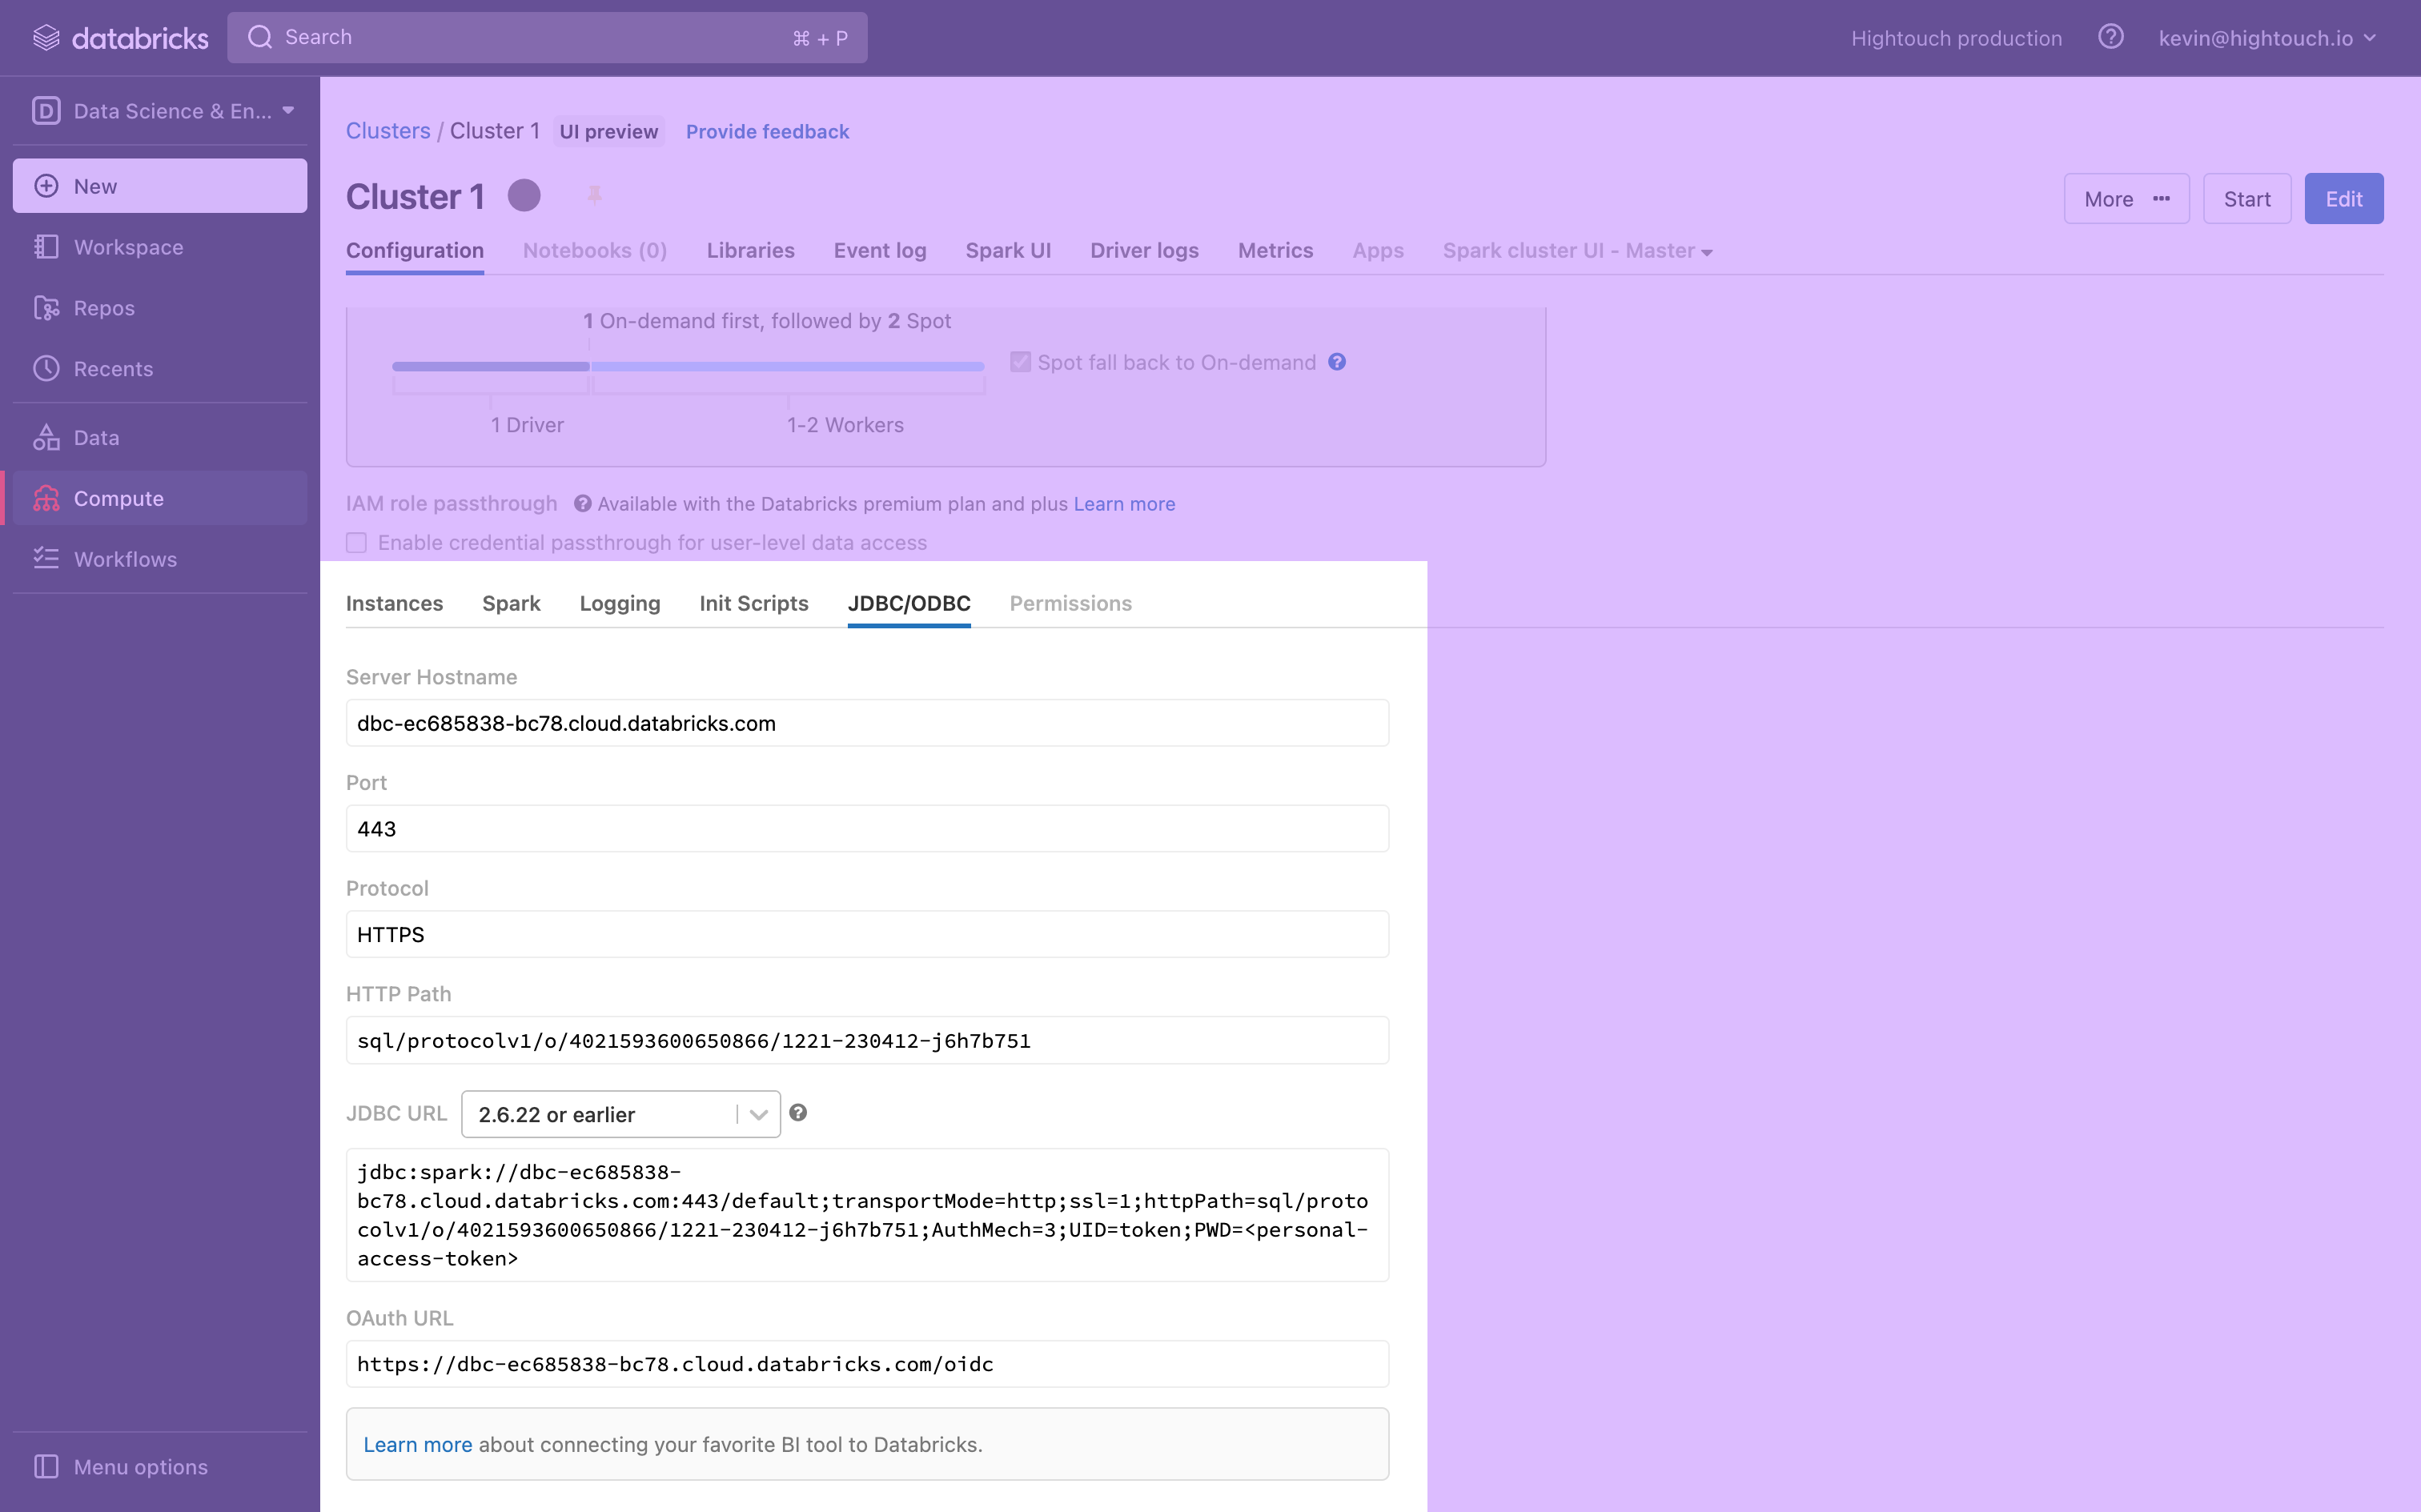
-
This tab displays your cluster's Server Hostname, Port, and HTTP Path, which you need to connect to Hightouch. Keep the tab open, or save these to a secure location.
-
Create a Personal access token by following the Databricks documentation.
Once you've saved these Databricks credentials, you're ready to set up the connection in Hightouch.
Sync configuration
Once you've set up your Databricks destination and have a model to pull data from, you can set up your sync configuration to begin syncing data. Go to the Syncs overview page and click the Add sync button to begin. Then, select the relevant model and the Databricks destination you want to sync to.
Hightouch supports Upsert mode using the MERGE INTO statement, with the option to delete removed rows, Insert mode using the INSERT INTO statement, and Mirror mode which will TRUNCATE the table and then use the INSERT INTO statement to insert all rows from the model.
Mirror mode will remove any existing data in the table before inserting all rows from the model
Record matching
To match rows from your model to rows in Databricks, Hightouch requires you to select a unique identifier in the table you are syncing to. The model column you select must be the same as the primary key column you selected in your model.
The Databricks column you select must be set as a PRIMARY KEY column within Databricks.
You can see columns that fit this criteria as available options in records matching section.
If there are no fields in the dropdown, you must add a unique type column to your Databricks table. Then, click the refresh icon to access the newly created column.
Column types
If you see type errors, it may be because your model is producing the wrong format. If so, use typecasting or liquid templating to resolve the issue.
Field mapping
You can sync columns from your model to the columns in your Databricks table.
Batch size
You can tune the number of rows Hightouch upserts or inserts per query based on your needs and database threshold. The default is 50,000 rows per batch.
If you want to increase the sync's speed, you can increase the batch size. Keep in mind that in upsert mode, Databricks fails the entire batch of rows if it detects any erroneous row. If you suspect that you will have many bad rows, don't use a high batch size. To avoid locks, ensure you account for your database's capacity when increasing the batch size.
Delete behavior
The delete behavior you select dictates what to do when a row no longer appears in your model's query results. You have the following options:
| Behavior | Description |
|---|---|
| Do nothing | Keep the row in Databricks |
| Delete row | Remove the row from Databricks entirely |
Tips and troubleshooting
Common errors
To date, our customers haven't experienced any errors while using this destination. If you run into any issues, please don't hesitate to . We're here to help.
Live debugger
Hightouch provides complete visibility into the API calls made during each of your sync runs. We recommend reading our article on debugging tips and tricks to learn more.
Sync alerts
Hightouch can alert you of sync issues via Slack, PagerDuty, SMS, or email. For details, please visit our article on alerting.