
Keep your team's feature flags up-to-date with fresh targeting rules and lists of users
Supported syncing
| Type | Description | Supported Sync Modes | API Reference |
|---|---|---|---|
| Segment rules | Update inclusion or exclusion rules in an existing segment | Add, Remove | Segments docs |
| Synced segments | Sync a full segment, or set of contexts, to LaunchDarkly | Add, Remove | Synced segments docs |
For more information about sync modes, refer to the sync modes docs.
Connect to LaunchDarkly
Go to the Destinations overview page and click the Add destination button. Select LaunchDarkly and click Continue. You can then authenticate Hightouch to LaunchDarkly.
Enter the following required fields into Hightouch:
- Access Token
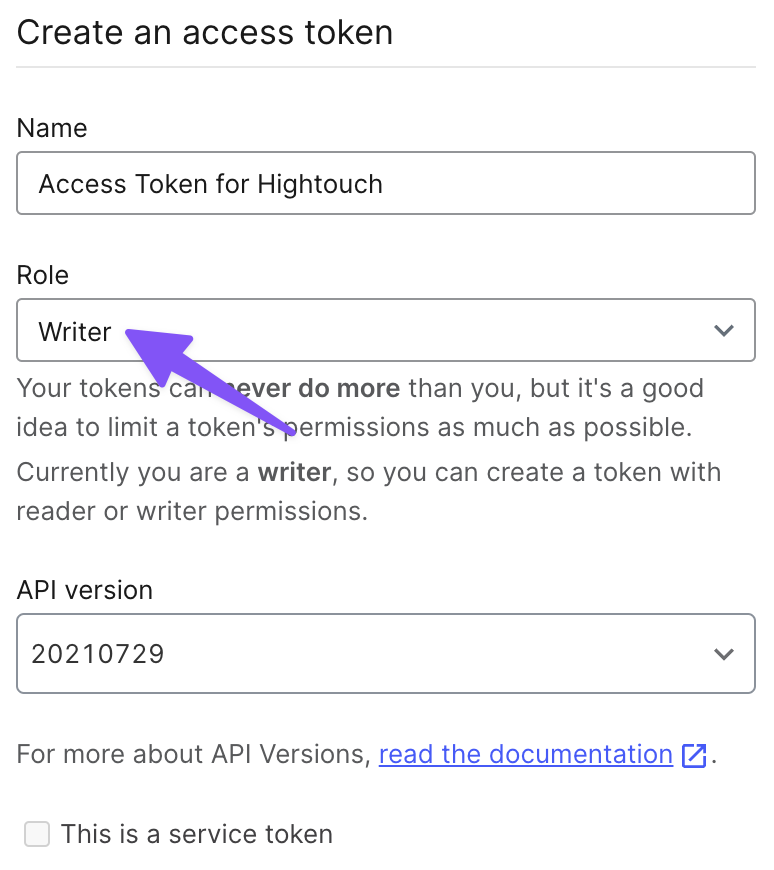
Create an access token
- Log in to LaunchDarkly
- Visit your Account settings page
- Click on the Authorization tab
- Click on Create token
- Give your token a name and assign it the Writer role
- Click Save token and copy the new token that appears in the Authorization page
Sync configuration
Once you've set up your LaunchDarkly destination and have a model to pull data from, you can set up your sync configuration to begin syncing data. Go to the Syncs overview page and click the Add sync button to begin. Then, select the relevant model and the LaunchDarkly destination you want to sync to.
Syncing segment rules
Sync data from any source to LaunchDarkly segments by updating inclusion or exclusion rules for an existing segment.
Hightouch can sync data to a LaunchDarkly segment in three ways:
- Target users for inclusion
- Target users for exclusion
- Target users who match a custom rule
Record matching
You can match rows from your model to a segment in LaunchDarkly on any column in your model and any field in LaunchDarkly. Ensure the data types of the model column and LaunchDarkly field you select match. Refer to the record matching docs for more information.
Targeting users for inclusion or exclusion
The most common way of using our LaunchDarkly destination is to sync a model containing a list of user IDs for inclusion or exclusion in a particular segment.
Targeting users who match a custom rule
Hightouch can also sync your data into a LaunchDarkly rule clause.
Syncing synced segments
Hightouch can directly sync a segment or set of contexts to LaunchDarkly.
Record matching
To match rows from your model to a synced segment in LaunchDarkly, you need to select the model column that contains values that match the id field. Refer to the record matching docs for more information. Users removed from the model get removed from the segment.
Tips and troubleshooting
Common errors
To date, our customers haven't experienced any errors while using this destination. If you run into any issues, please don't hesitate to . We're here to help.
Live debugger
Hightouch provides complete visibility into the API calls made during each of your sync runs. We recommend reading our article on debugging tips and tricks to learn more.
Sync alerts
Hightouch can alert you of sync issues via Slack, PagerDuty, SMS, or email. For details, please visit our article on alerting.