Hightouch enables you to sync data about your product into your CRM tools like Hubspot and Salesforce without needing to maintain complex, brittle integrations. Syncing data is as easy as writing some SQL and picking a few fields from a dropdown.
Sales teams are realizing more and more the importance of having relevant, personalized information during conversations with leads and customers. Too often, they're forced to leave their CRM to use separate tools and apps to get the information they need. The alternative has largely been custom-built integrations that are brittle and time-consuming. With Hightouch, there's an easier way: a few simple SQL queries and you'll be able to integrate data directly into your favorite CRM.
In this example, we'll walk through adding product metrics to Hubspot, but this idea can be applied to everything from referral data gathered during the sign-up process, to trial/plan information for billing purposes, and more.
Step 1: Identify Product Metrics
The first step is to identify what information you would like to sync from your database to Hubspot. In this example, we'll use real-world Hightouch data to get information on what sources and destinations our customers are using and make that available to Hubspot.
1. Source type added by Workspace
2. Destination type added by Workspace
Step 2: Create Properties in Hubspot
Once we've identified our metrics, we can create properties in Hubspot. A property in Hubspot is a custom object where we can write data with our Hightouch Sync.
For detailed steps, refer to the Hubspot documentation, but we've summarized the key steps below:In your HubSpot account, click the settings icon settings in the main navigation bar.
- In the left sidebar menu, navigate to Properties.
- In the upper right, click Create property.
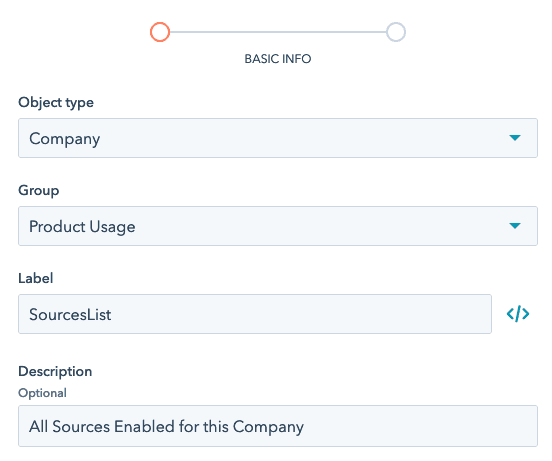
- Pick your Object type, we will use Company for this example since our attributes are at the company-level
- Choose the Group where this property should be organized under. We've picked Product Usage.
- Pick a Label. This will be the name of the property. We've picked SourcesList and DestinationsList
- Add an optional description.
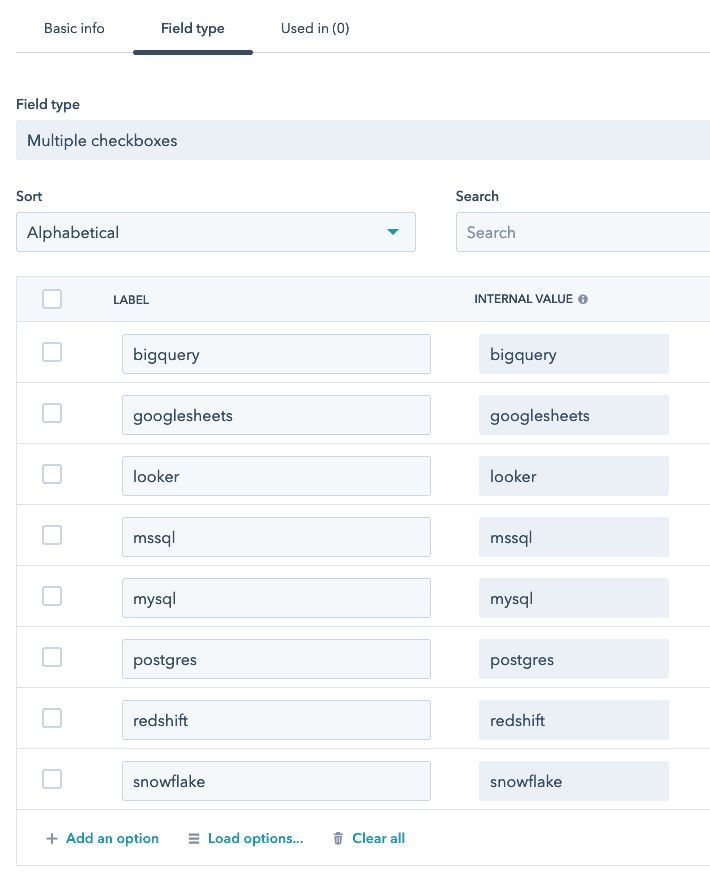
- Select an appropriate Field Type for this particular metric. Since we can have multiple Sources, we've gone with Multiple Checkboxes but other common types include Single-line text and number.
- Repeat these steps for every metric in Step 1.
If you've gone with a simple text field, then you're done! If you're using the Multiple Checkboxes option, like we are, you'll want to add all the possible options like we have.
Step 3: Create a Hightouch Model With Your Product Metrics
The next step is to create a Hightouch Model that queries your database for your metrics. This step will vary depending on how your data is organized. Some organizations might have a very clean table with all relevant tables, others may need to do some SQL joins to get the right data.
The output should be one row per customer, and one column per metric.
If you're using multi-checkboxes, you'll need to combine all values into one row, separated by a semi-colon. In this example, we use [string_agg in Postgres](https://www.postgresql.org/docs/12/functions-aggregate.html). Snowflake has LISTAGG which works similarly.
In the example below, we join our sources and destinations to our workspaces, combining all sources and destinations into one row, separated by a ;
with sources as (
	select
     workspace_id,
     string_agg(source_type, ';') as sources
  from sources
  group by 1
),

destinations as (
  select
    workspace_id,
    string_agg(destination_type, ';') as destinations
  from destinations
  group by 1
),

select
    workspaces.id as workspace_id,
    workspaces.name as workspace_name,
    destinations,
    sources,
from workspaces
left join sources on sources.workspace_id = workspaces.id
left join destinations on destinations.workspace_id = workspaces.id
where workspaces.type != 'demo'
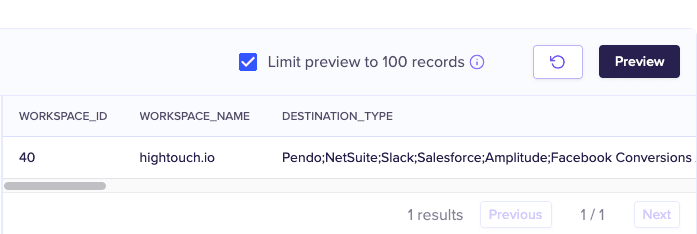
Use your handy preview to feature to confirm your SQL is outputting correctly.
Step 4: Create a Hightouch Sync
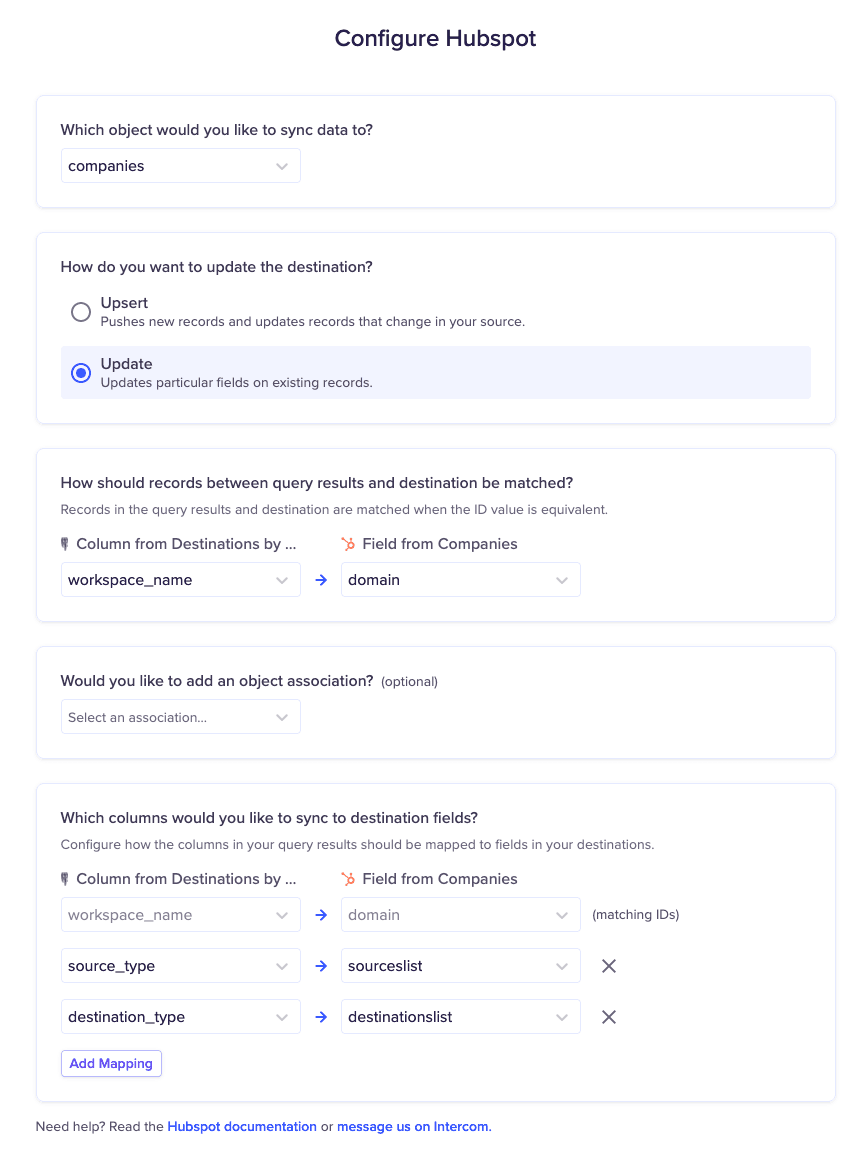
Next up, we create a Sync which connects the model we built with our Hubspot integration. Pick your model and Hubspot destination, and you'll be presented with the Configuration Page.
- Select the object to sync to. We're picking companies. This should match the property you created in Step 2.
- Choose if you want to upset or update. In our case, we only want to update existing records, so we picked update.
- Select how you will match records between your model and Hubspot. We're matching on Workspace_name to Hubspot's company domain.
- Select the additional properties to map your metrics to. We've picked the Sources and Destinations.
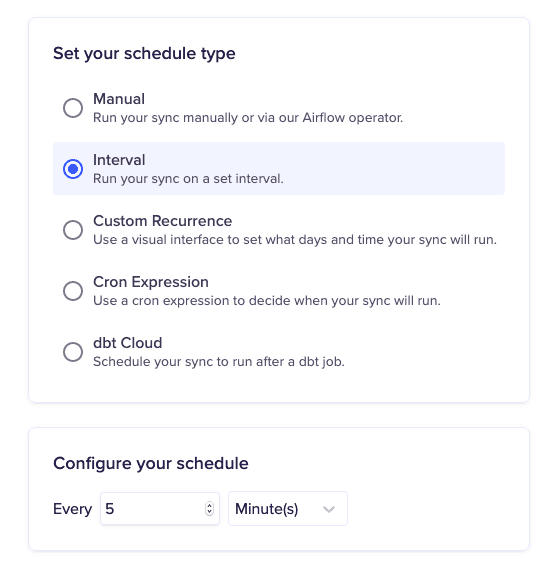
- Next up, pick your Interval. We've opted to Sync every 5 minutes. Our first Sync will update all records, but each subsequent run will only update anything that's changed since the previous run, ensuring we don't run into any API Usage issues.
Step 5: Sit Back and Enjoy the Show
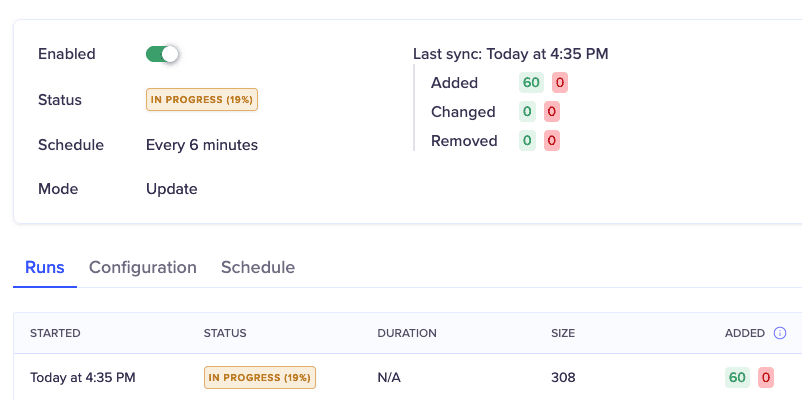
From here we'll take care of the rest. We'll fetch the data for the first run, update Hubspot, and then keep things in sync every five minutes for you. You can monitor the progress from our Sync page.
Once the Sync is complete, you can visit HubSpot and look for the newly-updated properties. You might have to scroll down to "View All Properties" to see all properties, and then click Add to Your View to have them visible. You can also use these properties in reports and views as well.

Wrapping Up
As you can see, getting product information into HubSpot can be really powerful with Hightouch. With just a few lines of SQL and a few clicks, we were able to get product information into the hands of our sales teams. From here, we can even take it a step further and start powering email automation that is personalized and unique to your customers. With minimal engineering effort required and low maintenance, anyone can update these models as your needs evolve.